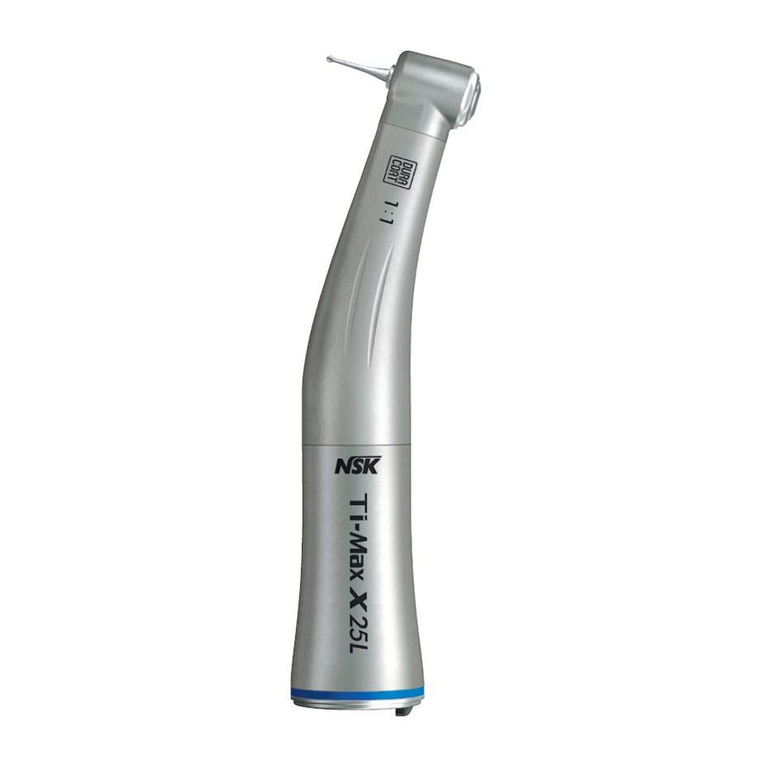
NSK Ti-Max X450L User manual

Air Turbine
X450L/X450
X450KL/X450SL
X450BLED/X450WLED
X450WHL/X450MWL/X450STL
X450M4/X450 5H
OM-T0387E
002

1
ENGLISH
1. User and Indications for Use
User: Licensed Physicians (Dentist)
Indications for Use: The Ti-Max X450 is an air-powered dental handpiece with intended use of being a surgical tool for impacted third molar removal
and periodontal procedures for which a conventional handpiece would be used.
2. Directions for handling and operation
• Please read these Directions carefully and use only as directed.
• Failure to follow safety instructions could result in injury to the user or patient and damage to the device. Safety instructions are classified according
the the severity of risk as follows:
Classification
WARNING
CAUTION
NOTICE
Severity
A potential hazard that could result in serious injury or damage to the device if the safety instructions are not followed.
A potential hazard that could result in light or moderate injury or damage to the device if the safety instructions are not
followed.
General product information highlighted to prevent product malfunction and reduction in performance.

2
CAUTION
· Read this Operation Manual completely before use to fully understand the product functions.
· When operating the handpiece always consider the safety of the patient.
· Users are responsible for the proper operation and maintenance of this product.
· Do not attempt to disassemble or tamper with the handpiece unless authorized by NSK in this Operation Manual.
· Do not drop, strike or permit any impact to the handpiece.
· Proper protective equipment (i.e. eyewear and masks) must be worn when operating this handpiece.
· Should the handpiece malfunction, cease operation immediately and contact your Authorised NSK Dealer.
· Do not use highly acidic water or sterilizing solutions to wipe, immerse or clean the handpiece.
· This product is delivered in a non-sterile condition and must be autoclaved prior to use.
· Perform routine function and maintenance checks.
· If the product is not used for an extended period perform a function check before use on a patient.
· To avoid clinical downtime it is recommended that a spare be kept on hand in case of a breakdown during use.
· Avoid eye contact with the LED light. (X450WLED)
· This product is classified as a Class 1 LED Product. (X450WLED)
· Use a power source which meets the following requirements. (X450WLED)
1. The power supply should be below 15W under both normal and single-fault condition.
2. The power supply must use a SELV circuit.
3. The output voltage of the power source is within the range recommended by the manufacturer of this product.
· U.S. Federal law restricts this device to sale by or on the order of a licensed physician.
· Under normal operating conditions air exhausts from the back of the head of the handpiece. Directing air into an open wound or beneath the
mucosa or dermis may result in injury from air emphysema or embolism.
· When using this handpiece do not direct the back of the head towards a tissue flap.
WARNING
· Depressing the Push Button while the handpiece is in rotation may lead to overheating, causing burn injuries or product failure.
Avoid the push button to contact with any oral tissue.

3
FREN
· Read this Operation Manual completely before use to fully understand the product functions.
· When operating the handpiece always consider the safety of the patient.
· Users are responsible for the proper operation and maintenance of this product.
· Do not attempt to disassemble or tamper with the handpiece unless authorized by NSK in this Operation Manual.
· Do not drop, strike or permit any impact to the handpiece.
· Proper protective equipment (i.e. eyewear and masks) must be worn when operating this handpiece.
· Should the handpiece malfunction, cease operation immediately and contact your Authorised NSK Dealer.
· Do not use highly acidic water or sterilizing solutions to wipe, immerse or clean the handpiece.
· This product is delivered in a non-sterile condition and must be autoclaved prior to use.
· Perform routine function and maintenance checks.
· If the product is not used for an extended period perform a function check before use on a patient.
· To avoid clinical downtime it is recommended that a spare be kept on hand in case of a breakdown during use.
· Avoid eye contact with the LED light. (X450WLED)
· This product is classified as a Class 1 LED Product. (X450WLED)
· Use a power source which meets the following requirements. (X450WLED)
1. The power supply should be below 15W under both normal and single-fault condition.
2. The power supply must use a SELV circuit.
3. The output voltage of the power source is within the range recommended by the manufacturer of this product.
· U.S. Federal law restricts this device to sale by or on the order of a licensed physician.
· Under normal operating conditions air exhausts from the back of the head of the handpiece. Directing air into an open wound or beneath the
mucosa or dermis may result in injury from air emphysema or embolism.
· When using this handpiece do not direct the back of the head towards a tissue flap.

4
Fig. 1
Chip Air Pressure
Water Pressure
Handpiece
Drive Air
Pressure
Exhaust
Air Pressure
3. Setting of Air & Water Supply Pressure
Supply pressure is measured at the handpiece / hose connection point and set to the value listed on the
specification table. (Fig. 1)
For Multi Gauge information refer to Option Parts List.
4. Connecting and Disconnecting the Handpiece
Refer to Operation Manuals of coupling and hose before connecting the handpiece.
WARNING
Do not exceed the maximum pressure specified on the specification table.
CAUTION
Do not use air contaminated by dust, moisture or oil.

Retention Lock Ring
Coupling
Tighten
Handpiece
Hose NutHandpiece
Fig. 3
5
FREN
Fig. 2
X450L / X450 (1) Connecting
1) Insert the handpiece into the Coupling.(Fig. 2)
2) Make sure the handpiece is fully seated in the coupling.
(2) Disconnecting
Pull back the Retention Lock Ring and remove the handpiece from the Coupling.(Fig. 2)
CAUTION
Do not operate the Retention Lock Ring while pressurized. This may cause the handpiece to shoot off
of the coupling unexpectedly.
X450M4 / X450 5H (1) Connecting
1) Insert the handpiece correctly into the hose connector and tighten the hose
nut.(Fig. 3)
2) Make sure the handpiece is securely connected to the hose.
(2) Disconnecting
Loosen the Hose Nut and remove from the Hose.

6
Fig. 4
NOTICE
Gripping the handpiece while placing your thumb tip on the Push button will make it easier to press the button.
5. Insertion & Removal of the Bur
5-1 To Insert the Bur
1) Insert the bur until it is fully seated. (Fig. 4)
2) Depress the Push Button and insert the bur into the chuck until it is secure then release the button.
3) Ensure that the bur is secure by gently pulling and pushing the bur WITHOUT depressing the Push
Button.
5-2 To Remove the Bur
Depress the Push Button firmly and remove the bur.

7
FREN
CAUTION
· Ensure the bur is fully seated in the chuck before use.
· Do not attempt to remove the bur until it has come to a complete stop.
· Do not use dirty, worn or used single use burs.
· Debris from the bur shank that is introduced into the chuck could cause the bur to slip and prevent the handpiece from fully gripping the bur.
· Do not exceed the bur speed recommended by the bur manufacturer.
· Do not exceed maximum bur length recommended by NSK.
· Do not apply excessive lateral pressure to the bur as it may break, bend or become difficult to remove.
· Damaged burs may break at high rotation speeds or slip from the chuck. Always inspect the bur before use and do not use any bur with
damage that includes but not limited to:
· Bent, deformed, worn, rusted, broken bur.
· Cracked.
· Non-ISO standard or tampered bur

8
Fig. 5
Fig. 6
Clean Head Hole
6. Pre Check
Check that the Head Cap is securely tightened. Check for handpiece vibration, noise and overheating. If
anything appears to be malfunctioning do not use the handpiece and contact your authorised NSK Dealer.
7. Maintenance
Perform the following maintenance after every patient.
7-1 Cleaning handpieces with the NSK Clean-Head System
After the treatment of each patient, clean the Clean Head.
1) Remove any debris from the Clean Head Holes with the provided cleaning wire and brush. (Fig. 5)
2) Fill a cup with clean water.
3) While rotating the handpiece immerse the front half of the handpiece head in the water. (Fig. 6)
4) Rotate the handpiece 3 times for 2 to 3 seconds each time.
5) Wipe the handpiece dry.

9
FREN
CAUTION
· After washing with Thermo-Disinfector and prior to lubrication ensure that the handpiece is free of any internal moisture. Moisture inside the
handpiece could reduce the effect of lubrication and cause corrosion.
· Never use and solvent such as benzine or thinner to clean the handpiece.
7-2 Cleaning (Handpiece)
1) Remove debris from the handpiece. Do not use a wire brush.
2) Wipe clean with an alcohol saturated cotton swab or cloth.
This icon indicates that the handpiece can be washed in a Thermo Disinfector.
Refer to the Thermo-Disinfector manual for proper automatic washing procedures.

Spray Port
Cleaning Wire
10
Fig. 7
Cotton Swab
Glass Rod
Fig. 8
7-3 Cleaning (Optic)
Clean the Glass Rod tip with an alcohol-saturated cotton swab. Remove all debris and oil. (Fig. 7)
7-4 Cleaning (Spray Port)
If the spray ports become clogged or cooling spray is uneven they can be cleaned using the following
procedure: (Fig. 8)
CAUTION
Do not use a sharp tool to clean the Glass Rod. It could damage the glass and affect light
transmission.
CAUTION
· Do not forcibly insert the wire into the port. Resulting damage could cause the spray to be directed
away from the bur and reduce the cooling effect of the spray.
· Do not blow air into the Clean Head Hole.

PANA SPRAY Plus
Handpiece
Cotton Swab
Handpiece
11
FREN
Fig. 10
Spray Nozzle
7-5 Cleaning (Rear of the handpiece) (X450STL)
Wipe all internal surfaces at rear of the handpiece with an alcohol-saturated cotton swab.
7-6 Lubrication
NSK PANA SPRAY Plus
X450L / X450 / X450KL / X450WLED / X450WHL / X450MWL / X450STL
Apply NSK PANA SPRAY Plus every time after each use and / or before autoclaving.
1) Remove the bur from the handpiece.
2) Insert the Spray Nozzle onto the Pana Spray can.
3) Insert the Spray Nozzle in the rear of the handpiece. Hold the handpiece and spray for approximately
2-3 seconds. Continue until it runs clear from the handpiece head for at least 2 seconds. (Fig. 10)
Fig. 9

Midwest 4-hole
PANA SPRAY Plus
Handpiece
Drive Air Port
5-hole Joint
Drive Air Port
12
Fig. 11
Fig. 12
Arrow-head Spray Nozzle
X450M4 / X450 5H
1) Remove the handpiece from the hose.
2) Insert the arrow-head spray nozzle tip into the spray can. (Fig. 11)
3) Place the Spray Nozzle into the Drive Air Port of the handpiece and spray for approximately 2-3
seconds. Continue spraying until it runs clear from the handpiece head for at least 2 seconds. (Fig. 12)
CAUTION
· When applying spray be sure to hold the handpiece firmly to prevent the handpiece from slipping out
of the hand due to the spray pressure.
· Hold the spray can upright.

13
FREN
Fig. 13
Hole for bur attachment
CAUTION
If the chuck is not regularly cleaned the chuck grip may weaken and the bur may slip during use.
NSK automatic handpiece cleaning and lubrication system
When using NSK automatic handpiece cleaning and lubrication system, refer to the system instructions.
Lubrication Oil (X450M4 / X450 5H)
1) Remove the handpiece from the hose.
2) Apply 1-2 drops of lubrication oil into the Drive Air Port shown in the Fig. 12.
3) Connect the handpiece to the hose. Operate the handpiece for about 10 seconds.
Chuck cleaning
Clean Push Button chuck once a week.
1) Insert the arrow-head spray nozzle tip into the spray can nozzle.
2) Lubricate the chuck with NSK PANA SPRAY Plus for 1 to 2 seconds directly through the bur insertion
hole. (Fig. 13)
3) Lubricate handpiece by using NSK PANA SPRAY Plus or Care3 Plus.

14
CAUTION
· Do not autoclave the handpiece with other instruments even in a pouch. This is to prevent possible discoloration and damage to the handpiece
from chemical residue on other instruments.
· Keep the handpiece in normal atmospheric pressure, temperature, humidity, ventilation, and sunlight. The air should be free from dust, salt and
sulphur.
· Immediately after use the handpiece should be cleaned, lubricated and sterilized. If blood remains on any external or internal surfaces it can
harden and cause rust.
· Do not heat or cool the handpiece too quickly. Rapid change in temperature could cause damage to the handpiece.
· Do not use the dry cycle if the sterilizer chamber temperature may exceed 135˚C.
· Autoclave sterilization is recommended for this product. The validity of other sterilization methods is unknown.
· Do not touch the handpiece immediately after autoclaving as it will be very hot.
7-7 Sterilization
The only recommended sterilization method is by steam autoclaving. Remove the bur after each patient and sterilize as follows.
1) Place the handpiece into an autoclave pouch and seal.
2) Autoclave according to the following time requirements.
Autoclave for more than 20 min. at 121˚C, 15 min. at 132˚C.
3) The handpiece should remain sealed in the autoclave pouch until required for use.

Taper Ring
15
FREN
Fig. 14
· Do not autoclave the handpiece with other instruments even in a pouch. This is to prevent possible discoloration and damage to the handpiece
from chemical residue on other instruments.
· Keep the handpiece in normal atmospheric pressure, temperature, humidity, ventilation, and sunlight. The air should be free from dust, salt and
sulphur.
· Immediately after use the handpiece should be cleaned, lubricated and sterilized. If blood remains on any external or internal surfaces it can
harden and cause rust.
· Do not heat or cool the handpiece too quickly. Rapid change in temperature could cause damage to the handpiece.
· Do not use the dry cycle if the sterilizer chamber temperature may exceed 135˚C.
· Autoclave sterilization is recommended for this product. The validity of other sterilization methods is unknown.
· Do not touch the handpiece immediately after autoclaving as it will be very hot.
NOTICE
NSK recommends Class B sterilizers as stated in EN13060.
8. Replacing the O-rings (X450L / X450)
Replace the O-rings if water is present in the exhaust air line. ALWAYS change the complete set of O-rings.
1) Loosen and Remove the taper ring at the rear of the handpiece. (Fig. 14)

O-ring
16
Fig. 15
2) Gently remove each O-ring by hand. (Fig. 15)
3) Insert the complete set of new O-rings in the correct grooves.
4) Replace and firmly tighten the taper ring.
*Refer to Spare Parts List to identify the correct parts.
CAUTION
· Do not force the new replacement O-ring with excessive pressure.
· When inserting new O-rings, make sure they are inserted in the correct grooves.
· Make certain that the taper ring is firmly tightened. If the taper ring is loose water and air leakage
could occur.
9. Replacing the Non-Retraction Valve
A water Non-Retraction Valve is integrated in the Coupling Joint (the product below), which shuts off the water retraction directly at the handpiece head
to prevent fluids infiltrating the water line. If water is beginning to leak from the handpiece, replace the non-retraction valve.

Fig. 16
Gasket Non-Retraction Valve
17
FREN
NSK Coupling
1) Remove the Coupling Joint from the hose.
2) Remove the back end Gasket.
3) Pull and remove the water tube, and replace the Non-Retraction Valve.
4) Insert the new Non-Retraction Valve securely and remount the back-end Gasket.
*Refer to Spare Parts List to identify the correct parts.

18
10. Routine Maintenance Checks
Perform routine maintenance checks every three months. If any abnormalities are found, contact your authorized NSK Dealer.
Points to check
Head cap is loose
Rotation
Details
Check that the Head Cap is firmly tightened.
Rotate the handpiece and check for abnormalities such as abnormal rotation, vibration, noise, and overheating.

19
FREN
*This handpiece is a water jet type. The coolant water is not sprayed.
11. Specifications
-
X450L X450 X450KL X450WLED
X450WHL / X450MWL
X450STL X450M4
ISO9168 Type 3
X450 5H
Glass Rod -
-
-
-
Glass Rod Glass Rod -
-
-
-
Glass RodWhite LED
AC / DC 3.3 ±0.05V
2.8 - 4.0V
0.38A Typical(3.3V)
380,000 - 450,000min-1
ISO 1797 - 1 ø1.59 - 1.60mm Surgical Long Shank Bur (25mm)
10.7mm
25mm
ø2mm
Temperature: 10 - 40˚C Humidity: 30 - 75% Atmospheric Pressure: 700 - 1,060hPa
Temperature: -10 - 50˚C Humidity: 10 - 85% Atmospheric Pressure: 500 - 1,060hPa
0.1 - 0.2MPa (1.0 - 2.0kgf / cm2) (14.5 - 29.0psi)
0.25 - 0.3MPa (2.5 - 3.0kgf / cm2) (36.2 - 43.5psi)
45±5NL / min (1.41±0.18cfm) (0.25MPa)
0.18 - 0.22MPa (1.8 - 2.2kgf / cm2) (26.1 - 31.9psi)
35±5NL / min (1.23±0.18cfm) (0.22MPa)
41±5NL / min
(0.27MPa)
Model
Hose Connection Type
Max. Rotation Speed
Bur Type
Chucking Length
Bur Length
Max. Working Part Diameter
Drive Air Pressure
Max. Air Consumption
Water Pressure
Optic
Voltage
Active Voltage
Current
Use Environment
Transportation and storage Environment
Other manuals for Ti-Max X450L
1
This manual suits for next models
10
Table of contents
Languages:
Other NSK Dental Equipment manuals