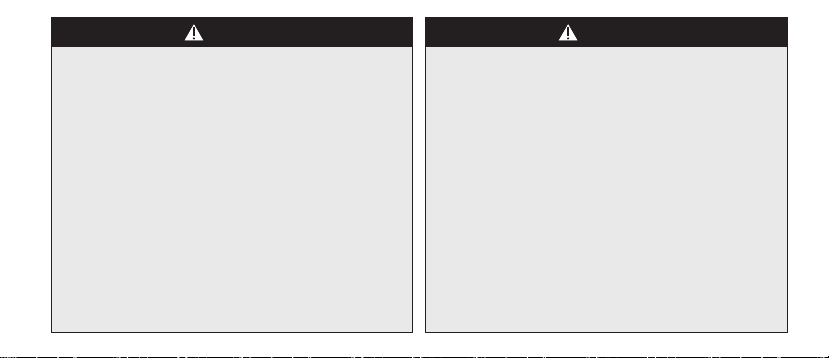
NSK PTL-CL-LED User manual

OM-DT0920EN 000


1
EN FR
1 User and Indications for Use
User: Qualified professionals (dentist, dental hygienist)
Indications for Use:
The Coupling is intended for the following applications:
A connection device to transfer energy (air, water, light)
required for handpieces.
* See the “8–2 Symbol” section on page 26 for
reference.
2 Precautions for Handling
and Operation
■Please read these precautions carefully and use only as
intended or instructed.
■Safety instructions are intended to avoid potential
hazards that could result in personal injury or damage to
the device. Safety instructions are classified as follows in
accordance with the seriousness of the risk.
Class Degree of Risk
WARNING Hazard that could result in serious injury
or damage to the device if the safety
instructions are not correctly followed.
CAUTION Hazard that could result in light or
moderate injury or damage to the device if
the safety instructions are not correctly
followed.

2
CAUTION
• The product is designed only for clinical dental use
by qualified personnel.
• Users are responsible for the operational control,
maintenance and continual inspection of this
product.
• Do not disassemble or alter the coupling except as
recommended by NSK in this Operation Manual.
• Do not allow any impact on to the product. Do not
drop the product. Deformation may cause the
coupling to fail during use.
• Should the product function abnormally, cease
operation immediately and return the product to an
authorised dealer for repair.
• Read the operation manual of the hose and
handpiece to be connected before use.
NOTICE General product specification information
highlighted to avoid product malfunction
and performance reduction.
WARNING
• The Coupling is delivered in a non-sterile condition
and must be cleaned and sterilized prior to its first
use and after each patient use.
CAUTION
• Read this operation manual before use to fully
understand the product functions and file for future
reference.
• When operating the product always consider the
safety of the patient.

3
EN FR
CAUTION
• Do not use the following fluids to wipe, immerse or
clean the product; strong/super acid water, strong
acid/alkaline chemicals, solutions containing
chlorine, solvents such as benzine or thinner.
• Perform regular function and maintenance checks.
(Refer to "6–3 Periodical Maintenance Checks")
• To avoid clinical downtime it is recommended that a
spare be kept on hand in case of a breakdown during
treatment.
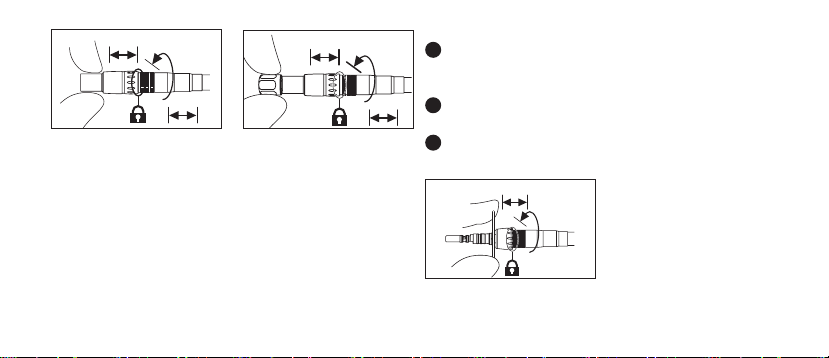
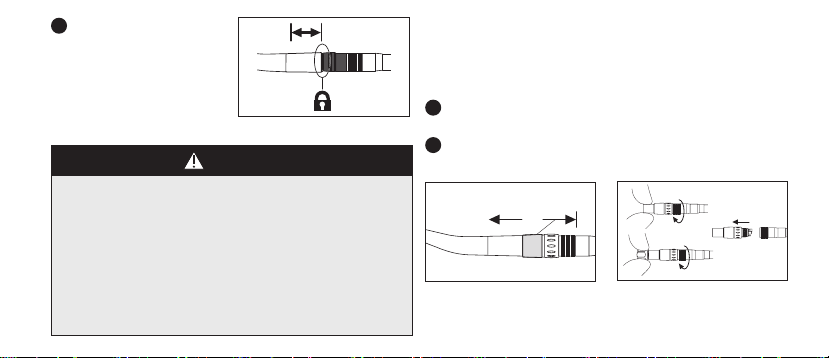
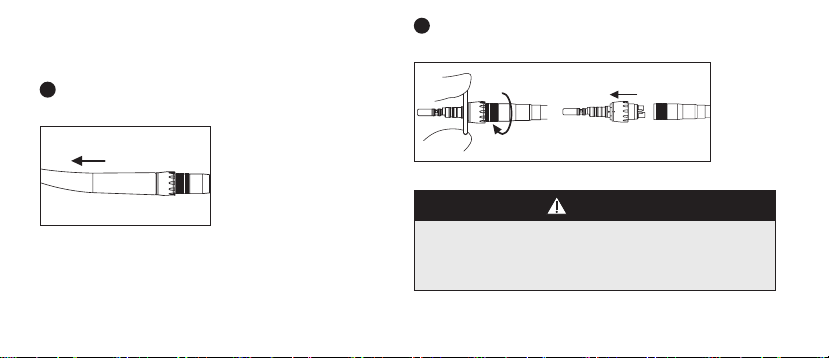
• Do not connect or disconnect the hose or handpiece
until the drive air has completely stopped.
• Do not use a washer-disinfector for the coupling.
Failure to do so may result in malfunction or electric
shock.
• Do not use air contaminated by dust, moisture or oil.
CAUTION
• Avoid continual eye contact with the LED light.
(PTL-CL-LED, PTL-CL-LED III, KCL-LED )
• This product is classified as Class 1 LED Product.
• Use a power source which meets the following
requirements.
1. The electricity supply of the power source is below
15W both under normal and single-failure
conditions.
2. The power source uses a SELV circuit for
electricity supply.
3. The output voltage of the power source is within
the range recommended by the manufacturer of
this product.
• U.S. Federal law restricts this device to sale by or on
the order of a licensed physician.

4
Part Name Quantity Remarks
1KCL Coupling Wrench 1 KCL-LED
2 KCL O-ring Set 1 KCL-LED
3 Package Contents 4 Preparation for Use
4–1 Connecting / Disconnecting
4–1–1 Connecting the Hose
PTL-CL-LED, PTL-CL-LED III, PTL-CL-FV-T,
FM-CL-M4, FM-CL-M4-T, QD-J B2/B3, QD-J
M4
1 To connect, align the pipes of the coupling with the pipe
holes of the hose, then insert them carefully and firmly,
and tighten the hose nut securely (1) (Fig. 1).
2 Hold the non-rotating part and connect to the hose
securely and make sure there is no looseness in the
hose connection (2) (Fig. 2). (When checking, do not
hold the ring as it will rotate.)

5
EN FR
KCL-LED
1 To connect, align the pipes of the coupling with the pipe
holes of the hose, then insert them carefully and firmly,
and tighten the hose nut securely (1) (Fig. 3).
2 Tighten the coupling with the coupling wrench provided
with the product and tighten the hose nut.
3 After connecting to the hose, make sure there is no
looseness in the hose connection (2).
Fig. 3
1
2
Fig. 1
1
2
Fig. 2
1
2
Use an optional coupling wrench if you are concerned about
tightening. For information on how to use the coupling
wrench, see “4–2 How to use a PTL Coupling Wrench
(Option)”.

6
QD-J B2/B3, QD-J M4
1 While pulling back the
Retention Lock Ring (1)
of the coupling, insert the
handpiece (2) to the
coupling (Fig. 7).
Fig. 7
1
2
4–1–2 Connecting the handpiece
PTL-CL-LED, PTL-CL-LED III, PTL-CL-FV-T,
FM-CL-M4, FM-CL-M4-T, KCL-LED
1 Insert the handpiece into the coupling straight until it
click (Fig. 4, Fig. 5).
Fig. 4 Fig. 5
2 Ensure the handpiece is attached tightly to the coupling
(Fig. 6).
Fig. 6

7
EN FR
4–1–3 Disconnecting
PTL-CL-LED, PTL-CL-LED III, PTL-CL-FV-T,
FM-CL-M4, FM-CL-M4-T, QD-J B2/B3, QD-J
M4
1 To disconnect, pull back the Retention Lock Ring (1) and
gently pull out the handpiece (2) (Fig. 9).
2 Loosen the hose nut and pull the coupling straight out
(Fig. 10).
12
Fig. 9 Fig. 10
CAUTION
• If the connection to the hose is loose, the handpiece
may pop out during treatment, causing injury to the
patient’s mouth, face, etc., and injury to the operator.
• Connect each coupling to the hose specified in the
specifications. Connecting a coupling with a light
function to a hose without a light function may
deform the light terminal of the coupling and cause a
failure.
2 Ensure the handpiece is
attached tightly to the
coupling (Fig. 8).
Fig. 8

8
For information on how to use the coupling wrench, see
“4–2 How to use a PTL Coupling Wrench (Option)”.
KCL-LED
1 Hold the coupling and the rear of the handpiece firmly
and pull them straight out (Fig. 11).
Fig. 11
2 Secure the coupling with the supplied coupling wrench,
loosen the hose nut, and pull it straight out (Fig. 12).
Fig. 12
CAUTION
• Do not operate the retention lock ring while
pressurized. This may cause the handpiece to shoot
off of the coupling unexpectedly.

9
EN FR
4–2 How to use a PTL Coupling
Wrench (Option)
4–2–1 Connecting
PTL-CL-LED, PTL-CL-LED III, FM-CL-M4,
FM-CL-M4-T
To connect, align and insert the pin of the coupling wrench
carefully and firmly into the pin holes of the coupling, and
turn the wrench until you hear the noise “Click”
(Fig. 13, Fig. 14).
Fig. 13 Fig. 14
4–2–2 Approach in the use of coupling
wrench
Use it as a slip stopper of the coupling side when loosening
or tightening the hose nut to connect/disconnect the
coupling to/from the hose (Fig. 15).
Tighten
Loosen
Fig. 15

10
KCL-LED
Water Adjustment Ring can rotate back side to decrease the
water supply (Fig. 17).
Fig. 17
4–3 Controlling Water Supply
(PTL-CL-LED III, KCL-LED)
Water supply is controlled by turning the Water Adjustment
Ring.
PTL-CL-LED III
Water Adjustment Ring can rotate to both sides. Water flow
level decreases as the mark on the Water Adjustment ring
gets farther from the mark on the coupling.
When the Water Adjustment Ring is turned 180 degree,
water supply stop (Fig. 16).
Fig. 16

11
EN FR
4–4 Checking the Coupling
Before Each Use
Perform the pre-use inspection referring to the operation
manuals for each handpiece connected to the coupling.
5 Post-Use Maintenance
After each patient maintain the product as follows.
WARNING
• To ensure cleaning and sterilization efficacy, use only
the following procedures for reprocessing.
• Follow any additional local directives, standards, and
guidelines for cleaning and sterilization.
• The Coupling is delivered in a non-sterile condition
and must be cleaned and sterilized prior to its first
use and after each patient use.
• Clean the coupling immediately (within 1 hour) after
each treatment to remove residue. Failure to properly
maintain the coupling may cause infection or product
failure.

12
5–1 Preparation
CAUTION
• Do not use the following liquids to wipe, immerse, or
clean the product: strong/super acid water, strong
acid/alkaline chemicals, solutions containing
chlorine, solvents such as benzine or thinner.
• Do not immerse NSK instruments in disinfectant
solution or clean in ultrasonic devices.
1 Always wear protective gloves, a mask, and protective
goggles for safety purposes and to minimize the risk of
infection (Fig. 18).
2 Wipe down the entire surface of the handpiece and
coupling with a dry cloth * before removing the
handpiece and hose (Fig. 19).
* Lint free cloth is recommended.
Fig. 18 Fig. 19
3 Operate the handpiece at the chair-side for at least 20
seconds to purge fluids in the handpiece. After the
handpiece rotation has completely stopped, touch the
handpiece head to confirm the head is NOT heating
abnormally.
4 Remove the handpiece from the coupling. For
reprocessing of the handpiece, refer to the operation
manual of the handpiece.
5 Remove the coupling from the hose.

13
EN FR
5–2 Cleaning
Clean the coupling and wrench under running water as
follows.
Coupling
1 Using a soft-bristled toothbrush, clean the entire
external surface of the coupling wrench under running
water for at least 15 seconds (Fig. 20).
(Water condition: ≤38 °C, ≥3.5 L/min; water should be
of the same quality as drinking water)
Fig. 20
2 Rinse from the hose connection side with running water
for at least 5 seconds (Fig. 21).
Fig. 21
3 Under appropriate lighting (natural office lighting, 500 lx
or higher), inspect the coupling for blood or other debris.
If any visible debris remains, repeat the process until the
coupling is visually clean.

14
Optional
Wipe the surface with a cloth moistened with disinfectant or
ethanol with a concentration of 60-90 %.
When using disinfectant, follow the instructions given by the
manufacturer of the disinfectant.
Use a state-sanctioned disinfectant with proven
bactericidal, fungicidal, and virucidal properties.
4 Shake the coupling body to drain water and wipe off
moisture on the surface with a dry cloth (Fig. 22).
Fig. 22
The following disinfectants can be used in the United States
and Canada:
CaviCide®, CaviWipes®(manufactured by Metrex)
NOTICE
• Wiping is not an alternative method of cleaning.
Please do not skip the required cleaning steps which
are previously displayed.
After cleaning, if moisture is present, wipe it off with a dry
cloth or blow it off with compressed air (≤0.35 MPa) until
there is no moisture in the interior and exterior of the
product.
When blowing off with compressed air, cover the product
with a cloth to prevent the scattering of water.

15
EN FR
Coupling wrench(PTL Type ZA01040100,
KCL-LED Type 20000953 )
1 Using a soft-bristled toothbrush, clean the entire
external surface of the coupling wrench under running
water for at least 15 seconds (Fig. 23).
(Water condition: ≤38 °C, ≥3.5 L/min; water should be of
the same quality as drinking water)
Fig. 23
2 Rinse with running water.
3 Under appropriate lighting (natural office lighting, 500 lx
or higher), inspect the coupling wrench for blood or
other debris. If any visible debris remains, repeat the
process until the handpiece is visually clean.
4 Wipe off moisture on the surface with a dry cloth.
5 Wipe the surface with a cloth moistened with
disinfectant or ethanol with a concentration of 60-90 %.
When using disinfectant, follow the instructions given by
the manufacturer of the disinfectant.
Use a state-sanctioned disinfectant with proven
bactericidal, fungicidal, and virucidal properties.
The following disinfectants can be used in the United
States and Canada:
CaviCide®, CaviWipes®(manufactured by Metrex)

16
5–3 Packing, Sterilizing, and
Drying
1 Use an FDA-approved sterilization pouch that conforms
to ISO 11607-1, and seal the pouch. Maximum
temperature for NSK instruments is 135 °C (275 °F)
(Fig. 24).
ISO 11607-1
Fig. 24
2 Perform steam sterilization with the following conditions.
NOTICE
• Wiping is not an alternative method of cleaning.
Please do not skip the required cleaning steps which
are previously displayed.
After cleaning, if moisture is present, wipe it off with a dry
cloth or blow it off with compressed air (≤0.35 MPa) until
there is no moisture in the interior and exterior of the
product.
When blowing off with compressed air, cover the product
with a cloth to prevent the scattering of water.

17
EN FR
Type Gravity
Displacement
Pre-Vacuum (Dynamic
Air Removal)
Temperature 132 °C (270 °F) 132 °C (270 °F)
Full Cycle Time 15 min 4 min
Drying Time 30 min 30 min
CAUTION
• Use an FDA-approved steam sterilizer to perform
sterilization.
• Follow local rules, regulations, and guidelines
regarding the reprocessing of devices.
• Do not touch the product immediately after steam
sterilization as it will be very hot and must remain in
a sterile condition.
• Do not heat or cool the product too quickly. Rapid
change in temperature could cause damage to the
product.
CAUTION
• Place each product in an individual sterilization
pouch for steam sterilization. This is to prevent
possible discoloration and damage to the product
due to chemical residue from other instruments.
• Clean the coupling prior to sterilization.
• Be sure to use sterilizers that can perform
sterilization up to 135 °C. In some sterilizers, the
chamber temperature may exceed 135 °C. Do not
use these sterilizers as failure of the coupling could
occur. Contact the sterilizer manufacturer for detailed
information about cycle temperatures.
• Steam sterilization is recommended for the product.
The validity of other sterilization methods (such as
plasma sterilization or EOG sterilization) is not
confirmed.

18
5–4 Storage
Store the product in a dry, clean location. The product
should remain in the sterilization pouch until required for
use (Fig. 25).
Fig. 25
CAUTION
• After the sterilization and drying cycles are complete,
remove the coupling immediately from the sterilizer
to store it.
• Store the product in a well ventilated place out of direct
sunlight and within the range of temperature, humidity
and pressure specified in “8–1 Specifications”.
• Sterilization is not guaranteed after the sterilization
retention period specified by the manufacturer and
seller of the sterilization pouch has elapsed. If the
sterilization retention period has elapsed, perform
sterilization again with a new sterilization pouch.
Other manuals for PTL-CL-LED
1
This manual suits for next models
8
Table of contents
Languages:
Other NSK Dental Equipment manuals
Popular Dental Equipment manuals by other brands

KaVo
KaVo SONICflex tips paro Instructions for use

Dabi Atlante
Dabi Atlante Syncrus G3 owner's manual

KaVo
KaVo MASTERmatic LUX M07 L - 1.009.3610 Instructions for use

Durr Dental
Durr Dental XR 24 Nova Series manual

Belmont
Belmont BEL-20+ operating instructions

RAM PRODUCTS
RAM PRODUCTS iCUBE owner's manual