manuals.online logo
Brands
  1. Home
  2. •
  3. Brands
  4. •
  5. Octane Fitness
  6. •
  7. Elliptical Trainer
  8. •
  9. Octane Fitness Q35 User manual

Octane Fitness Q35 User manual

23
23
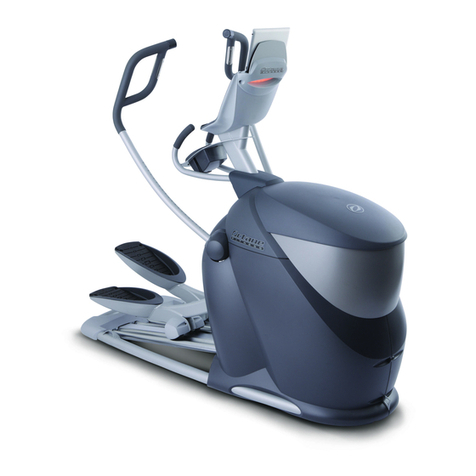
Q35/Q35e/Pro35 OPERATIONS MANUAL
Thank you for choosing an Octane Fitness™ elliptical cross trainer and congratulations on fueling your exercise
program. The team at Octane Fitness™ is totally focused on creating the best elliptical products in the world so
that you will have a tremendous workout experience. We wish you great success in achieving your workout goals
and using your new cross trainer to Fuel Your Life™!
Your new Octane Fitness™ elliptical has a wide variety of features that will help you to stay motivated and
reach your fitness goals. Please read this manual thoroughly to become acquainted with your product, including
information on assembly, operation and maintenance.
Octane Fitness™distributes products only through authorized specialty fitness dealers. These dealers are
experts in all aspects of the fitness experience and are trained to assist you with any questions you may
have about your Octane Fitness™ product. However, if you have any questions that you would like to speak
directly to Octane Fitness™ about please do not hesitate to call us at 763.757.2662 x23 or visit our web site at
www.octanefitness.com.
Octane Fitness
2705 Bunker Lake Boulevard NW
Suite 201
Andover, MN 55304
Phone: 763.757.2662
Fax: 763.323.2064
www.octanefitness.com
Fueled,
Dennis Lee
President
45
IMPORTANT SAFETY INSTRUCTIONS
Please Read and Save These
Instructions
WARNING! Before beginning this or any exercise program, consult your physician. This is especially important
for persons over 35 or persons with pre-existing health problems. If at any time during exercise you experience
chest pains, nausea, dizziness or shortness of breath, stop exercising immediately and consult your physician
before starting again.
Read this Operations Manual before operating this elliptical cross trainer.
WARNING! If placed in a commercial setting, (apartment complex, condominium, corporate workout facility,
etc...) before using the Pro35 we urge you to familiarize yourself and your staff with the entire Operations Manual.
Make the Operations Manual accessible to all exercisers.
WARNING! When using an electrical product, basic precautions should always be followed.
To reduce the risk of burns, fire, electrical shock or injury to persons:
• Use this exercise product for its intended use as described in this Operations Manual. Do not modify the
product in any way.
• Do not remove the plastic shrouds from the machine. Service should be performed only by an authorized
Octane Fitness™ service representative.
• Never operate this elliptical cross trainer if it has a damaged cord or plug. Contact your local dealer or
Octane Fitness™ for repair if your machine is not working properly, has been damaged, or has been
immersed in water.
• Keep the cord away from heated surfaces.
• Do not use outdoors.
• Only use the power cord provided with your Octane Fitness™ elliptical cross trainer.
• Never place the power cord under carpeting or place any object on top of the power cord which may pinch
and/or damage it.
• Unplug your Octane Fitness™ elliptical cross trainer before moving it.
45
OTHER IMPORTANT SAFETY
PRECAUTIONS
• Place the elliptical cross trainer on a level surface with at least two feet of clearance behind the pedal at
its furthest back position.
• To protect the floor or carpet from damage, place a mat under your elliptical cross trainer.
• Keep children off the elliptical cross trainer at all times.
• When the elliptical cross trainer is in use, children and pets should be kept clear of the area.
• Wear appropriate exercise clothing and shoes for your workout—no loose clothing.
• Use care when getting on or off the Q35/Q35e/Pro35. Never step on or off the unit while the foot pedals
are still moving.
• Always face forward. Never attempt to turn around on the Q35/Q35e/Pro35.
• Do not sit, stand or climb on the front plastic shroud, electronic console or stationary handles.
• Inspect and tighten all parts of the elliptical cross trainer regularly.
• Keep your hands and feet clear of any opening or moving parts.
• Never insert or drop any object into any opening.
• Do not overexert yourself or work to exhaustion.
• If during your workout you feel any chest pain, nausea, dizziness or abnormal symptoms, stop your
workout immediately and consult your physician.
• Monitor and check your Q35/Q35e/Pro35 on a regular basis. See page 37 for cleaning and maintenance
of your Octane elliptical.
67
67
HEART RATE OPTION
Safety Guidelines
Before using the Octane Fitness™ Q35e/Pro35 with heart rate, read and follow the instructions:
• Please take care in handling the equipment as it is extremely sensitive.
• Do not place the chest strap near devices that generate large magnetic fields. Television sets, electric
motors, radios, and high voltage power lines can affect the transmitter’s performance. These items can
interfere with the heart rate signal that is being transmitted to the receiver, possibly affecting the heart rate
readings that appear on the electronic console.
• Handle the Octane Fitness™ heart rate transmitter with care. Dropping the transmitter might cause
damage and this could void the manufacturer’s limited warranty.
• Do not use the chest strap if you have a cardiac pacemaker or you are taking any medication.
Medication or electrical impulses from the cardiac pacemaker can cause inaccurate heart rate readings.
• If the receiver tries to process several signals simultaneously, an incorrect heart rate reading could result.
Only use one chest strap at a time in the range of the receiver. Other transmitters should be at least
five feet away from the receiver on your unit.
• Do not immerse the transmitter in water. However, some moisture is necessary for the transmitter to func-
tion properly. Perspiration is usually sufficient, but you may need to moisten the electrodes with a small
amount of water. The electrodes are the ribbed portion on the back side (that sits against your skin) of the
transmitter.
• There are some individuals who cannot use the heart rate feature because they do not have the proper body
chemistry.
• Do not bend the strips inside the chest strap as it can cause the strap to lose its conductivity.
• The chest strap has a battery which may need to be replaced from time to time. A faulty battery or a
worn strap may cause inaccurate readings.
• In a commercial setting, space the products at least 24” apart. This will prevent cross talk, where the chest
strap signal from a user on one machine can be received and displayed on the other machine.
89
89
TABLE OF CONTENTS
• ASSEMBLING THE PRODUCT .............. 10
• ELECTRONICS............................... 15
-Q35 ......................................... 15
-Q35E........................................ 20
-PRO35 ...................................... 29
• USING THE PRODUCT...................... 37
• SMART EXERCISE TIPS.................... 38
• CLEANING & MAINTENANCE .............. 40
• TROUBLESHOOTING & FAQ’S ............. 40
• WARRANTY INFO ........................... 42
10 11
ASSEMBLING THE
PRODUCT
The Q35/Q35e/Pro35 base box contains the following: Tools required:
1) 1 - Q35/Q35e/Pro35 base • Phillips or standard screwdriver
2) 1 - Upright tube and boot • 17mm wrench or adjustable wrench
3) 1 - Top housing/accessory tray • 17mm socket and ratchet
4) 1 - Detached pedal lever • 6mm, 8mm hex key wrench
5) 1 - Right moving handlebar
6) 1 - Left moving handlebar
7) 2 - Outside moving handlebar covers
8) 2 - Inside moving handlebar covers
9) 1 - Hardware pack
Box Contents
Hardware Pack:
1) 4 - 8mm hex key bolt
(for moving handlebar)
2) 4 - 6mm hex key bolt
(for console upright mounting)
3) 6 - Phillips screws with washers
(for mounting top shroud)
4) 4 - Long Phillips screws
(for moving handlebar covers)
5) 4 - Phillips screws
(for console mounting)
6) 4 - Short Phillips screws
(for bottom of moving handlebar cover)
7) 3 - Zip ties
(for securing excess cable) Note: Hardware shown actual size.
13
7
4
56
8
2
1 3 52 4
9
6
10 11
The Q35 console box should contain the following:
1) 1 - Standard console
2) 1 - Power supply
3) 1 - Information packet
The Q35e console box should contain the following:
1) 1 - Interactive console
2) 1 - Power supply
3) 1 - Q35e decal
4) 1 - Octane Fitness™ wireless heart rate transmitter
and elastic strap
5) 1 - Information packet
1
3
45
2 3
12
12 13
Moving the Product
It is safest to move the product to its installation location in its shipping carton. It may be easier to move the
product into your home after you remove it from the packaging, but be careful not to hit any walls or doors.
The Q35/Q35e/Pro35 contains transport wheels on the front of the unit. Be careful when moving from one surface
to another, such as hardwood floor to carpet.
Note: If you need to pick up your elliptical there are hand placement slots under the front shroud. Please take
caution when lifting. The elliptical weighs 270 lbs. when fully assembled.
Tip: It is easier to pull the unit rather than push it when using the front transport wheels.
The Pro35 console box should contain the following:
1) 1 - Interactive console
2) 1 - Power supply
3) 1 - Pro35 decal
4) 1 - Information packet
3
4
1
2
12 13
1. Attach pedal lever
a. Remove shoulder bolt/nut from 3 pivot link.
b. Place pedal lever through leg slot in rear shroud and attach it
to the 3 pivot link.
c. Fasten the bolt and nut until it is snug using 17mm socket and
wrench.
2. Place top cover
a. Place top cover on top of main housing—don’t attach the
side screws; it is easier to lift the cover when installing
the console upright tube.
3. Install console upright
a. Attach all four 6mm hex head screws, engaging about 1/2 of
the threads to the upright mounting plate on the base.
b. Insert the console upright though the hole in the top shroud,
placing the upright plate over the bolts and sliding it forward
(away from the pedals).
c. Rotate top shroud 90° to access bolts.
d. Tighten the four 6mm hex key bolts attaching console upright
to frame.
e. Connect three wires on base frame to three wires at base of
console upright—listen for a click to make sure it is a
positive connection.
f. Use the three supplied zip ties to secure the cable. Push
the excess cable into the console upright tube.
4. Mount console to console upright tube
a. Attach plug from the top of the console upright tube to the
connection on the back of the console—make sure it is a
positive connection.
b. Make sure excess cable is pushed into upright tube and not
pinched when console is attached.
c. Insert all 4 screws partially into the console back. Then tighten
all 4 screws.
14 15
5. Attach arms—Arms are labeled left and right, be sure to
install accordingly.
a. Attach the back handlebar cover to the bottom of the moving
handlebar using the two short Phillips screws.
b. Install moving handlebar with two 8mm bolts on each side—
make sure these bolts are very tight.
c. Install front handlebar covers using two long Phillips head
screws.
d. Repeat for the other side.
6. Secure top cover
a. Place front lip under right and left shrouds.
b. Install all six Phillips head screws around perimeter of shroud.
7. Adjust levelers
a. Adjust all five levelers to make sure the product sits flat on the
floor. For a lower step up height, screw the rear levelers into
the rear stabilizer tube. Then level the machine using the front
three levelers.
b. Tighten the leveler nut to the top of each leveler.
Note: If you move your Q35/Q35e/Pro35 you may need to adjust
the levelers to make sure your product is level with the floor.
Caution: If the unit is not level, it may not function properly.
8. Q35e/Pro35 Sticker (Q35e/Pro35 only)
a. Place the Q35e/Pro35 sticker directly over the Q35 sticker—do
not remove the Q35 sticker.
9. Plug in product
a. First, insert the plug into the product, located just below the right roller track. Next, route the cable
toward the wall outlet. You can run it under the product to avoid seeing it or tripping on the cable. Ensure
that the cord will not be pinched and become damaged. Plug the product into the wall.
Note: There is no need to turn off your product—your Q35/Q35e/Pro35 was designed with an intelligent
sleep mode—a virtual off button. This eliminates the need for an on/off switch. When your product is
in sleep mode it uses very little power. Unplugging your elliptical will not harm or erase My QuickStart
profiles.
14 15
ELECTRONICS
Welcome to some of the easiest to use, yet most sophisticated, electronics available in the fitness industry.
In purchasing your Octane elliptical you had 3 choices: the Q35 with standard electronics, the Q35e with deluxe
electronics, and the Pro35 for commercial use. Instructions for all three are included in this manual. If you pur-
chased the Q35e go to page 20 and if you purchased the Pro35 go to page 29.
Q35 WITH STANDARD CONSOLE
Programming the console
DedicatedLogic™ DedicatedLogic™ was created to give you the ultimate in ease of use and total
Programming flexibility for programming your console. You can even start your workout, then
program the electronics! This ease of use starts by giving each key only one func-
tion. This makes it easy to understand how each key works.
Quick Start The easiest way for you to start your workout is to simply push the quick start
button and you are in a manual program at resistance level 1. Your calories will
be based on a 150 lb. (68 kg) user. Once you have selected quick start, you can
then program any item in any order.
Up and Down Keys
Program (+ and –) Toggles through programs. Program changes can be made at any point during
your workout.
Time (+ and –) Increases or decreases time. The maximum time 99:59. You can change your time
twice during a workout.
Level (+ and –) Increases or decreases the resistance level of the machine. There are 20 levels
of resistance.
Weight (+ and –) Increases or decreases the user’s weight. This value is used to give a more accu-
rate calorie burn readout. Weight is displayed in pounds (English) or kilograms
(metric). To switch from English to metric or metric to English, hold down the
weight (+/–) keys for three seconds. The console will beep and a “-” will appear
in the time window when it has switched from English to metric. When switching
from metric to English an “E” will appear in the time window.
Enter Selects any of the changed values or items for the above keys.
Note: T here is no need to turn off your product—your Q35 was designed with an intelligent sleep
mode—a virtual off button. This eliminates the need for an on/off switch. When your product is
in sleep mode it uses very little power. The X-Mode will continue to spin around while in sleep
mode.
16 17
Note :Throughout your workout you will hear a series of “beeps” from your console. This is perfectly normal.
These beeps signify various changes taking place in the unit’s programming. For instance, you will hear
one beep every time you press a key on the keypad, and one beep to engage higher function keys such
as X-Mode, and two beeps when they have selected a program for you. If you’ve decided to end your
workout and hit the Cool Down button you will hear three. Stepping away or stopping completely will
engage the Pause mode which will signal with three beeps that you’ve stopped your workout before it
was finished and will begin a ten minute countdown before exiting the program you were using. You
will also hear beeps as you move from the warm-up into each program.
Quick Start
Program (+/–)
Time (+/–) Level (+/–)
Weight (+/–)
Enter
Cool Down
X-Mode
Pause/Clear
16 17
Programs
P1 - Manual Manual simulates walking or jogging on a flat surface. The resistance stays
constant for the entire workout, unless changed by the user by pressing
level (+/–). The oval racetrack signifies 1/4 mile.
P4 - Hill The Hill program simulates walking or jogging up a big hill. The resistance
continues to get more difficult the closer you get to the top. Changing the resis-
tance level changes the level for the entire hill program. The warm-up lasts for
one minute. Each hill lasts for two minutes. Once you have reached all three
plateaus the hill will be repeated.
P2 - Random Random has virtually an infinite number of different combinations. The computer
randomly generates a new course each time you select the random program, giv-
ing you different levels of resistance. Each column lasts for 30 seconds.
P3 - Interval The Interval program gives you two different levels of resistance. Each level
is independently adjustable, so you can customize the amount of change
between the two intervals. The workout has preset resistance levels. The
warm-up has been set at level 1. Interval 1 (higher interval) has been set at
level six. Interval 2 (lower interval) has been set at level 3. Warm-up and all
intervals have a one minute duration. The resistance level can be changed for
the warm-up and all intervals by pressing the level (+/–) buttons. When changing
an interval level, it changes the interval (high or low) for the entire workout.
Level
Manual
Cool-down
Cool-down
Cool-down
18 19
LED Readout
Windows
Time Counts up from 0:00 and can be increased or decreased during your workout. The
maximum time is 99:59, then the window rolls over to 0:00. The program time
may be changed twice during a workout.
Distance Distance is an estimate of how far you have traveled. Distance can be shown in
either miles (English) or kilometers (metric). To switch from English to metric or
metric to English, hold down the weight (+/–) keys for three seconds. The console
will beep and a “-” will appear in the time window when it has switched from
English to metric. When switching from metric to English an “E” will appear in the
time window. Pedaling roughly 50rpm’s it will take eight minutes to reach one mile.
Speed Speed is how fast you are going. Speed is displayed in revolutions per minute (rpm).
Level Displays the resistance level from 1 - 20.
Calories Displays the total calories burned during your workout. The maximum shown is
999. If you burn 1000 it is shown as 000 while blinking. If you were to
burn 1200 calories in a single workout it would read 200 calories while
blinking. Calories are based on your weight. If you use Quick Start, calories
are based on a 150 lb. (68 kg) user.
Calories/Hour Displays the number of calories that would be burned in one hour at the current
resistance level and speed. Similar to calories, the maximum value that can be
displayed is 999. If you are at a rate of 1200 calories/hour it will be displayed as
200 calories/hour while blinking.
TIP: Do you wish the number LEDs didn’t toggle between the higher and lower LEDs? Do you just care
about seeing time, or maybe you don’t want to see time? Just press the enter key and it will freeze
in that position. Press the enter key again to have the LEDs revert back to continuous loop.
P5 - Run-Sim Run-Sim simulates jogging or running outdoors. It is a great training device to
get ready for a competition. The changes in terrain replicate the challenges you
encounter running outside. You can feel going uphill and downhill with gradual
resistance changes.
Warm-up Cool-down
Run-Sim
18 19
X-Mode™
X-Mode™ is like having a personal trainer coaching you. It is a great way to take advantage of the variety your
elliptical cross trainer offers. X-Mode™ works in any program; simply push the button to activate. There are
four different options:
Push/Arms Focus on pushing with your arms to
work your chest and triceps.
Pull/Arms Focus on pulling with your arms to work
your biceps and lats.
Reverse Pedal backwards to change the muscle
focus on your entire lower body.
Squat Bend slightly at the knees. You’ll feel
this one in your quadriceps and glutes
in no time!
One, two or three LEDs will light up instructing you what to do. The light sequence is randomly generated so you
never know what is coming next.
To activate X-Mode™ simply push the X-Mode™ button while in any program. To turn it off push the button again.
Each X-Mode™ session lasts for one minute. Once you complete that instruction for one minute, you have a two
minute rest period where you do your normal elliptical routine (pedaling forward and total body). After your two
minute ‘rest’ period you get your next X-Mode™ routine. Good luck!
Pause/Clear
Press once to pause your workout. The maximum pause time is 10 minutes. To restart a paused workout push any
key or simply begin pedaling. Press the pause/clear button twice within two seconds and your machine is reset
and ready for another workout. If you stop pedaling during a workout, the unit will automatically go into a 10
minute pause. Simply start pedaling to resume your workout.
Cool-Down
It is always a good idea to perform a cool-down at the end of your routine. This will help to transition your body
from an aggressive workout to its normal routine. Performing a cool-down can also reduce any discomfort to
muscles and joints which can be experienced after a rigorous workout. The time and intensity of the cool-down is
automatically customized to your workout duration and resistance level. The time window will change to a count-
down timer to tell you how long the cool-down will last.
If you have set a time for your workout the cool-down will automatically start when time has expired. If you decide
to end your workout early or have not set a time goal simply push the Cool Down button to activate the custom
cool-down.
20 21
Q35e WITH INTERACTIVE CONSOLE
Programming the console
DedicatedLogic™ DedicatedLogic™ was created to give you the ultimate in ease of use and total
Programming flexibility for programming your console. This allows you to modify your workout
once you’ve started. You can even start your workout, then program the electron-
ics. This ease of use starts by giving each key only one function. This makes it
easy to understand how each key works.
Quick Start The easiest way for you to start your workout is to simply push the Quick Start
button and you are in a manual program at resistance level one. Your calories
will be based on a 150 lb. (68 kg) user. Once you have selected Quick Start you
can program any item in any order.
My QuickStart 1 & 2 The My QuickStart buttons take the traditional Quick Start to the next level by
memorizing your profile. My QuickStart remembers your favorite program, time,
level, age and weight. With the simple push of a button, your favorite workout
and profile are entered and you are ready to go.
• To set your profile, simply enter your information as you normally do using the
+ and – keys. Then, just like most car stereos, hold down the My QuickStart
button for three seconds. The console will beep twice telling you the informa-
tion is saved. To update your information (like increasing your workout time
from 20 to 30 minutes) change the value during your workout and hold the My
QuickStart key down just like before.
• Tip: If only one person uses the product save your two favorite workouts.
• Tip: If you feel like doing a different program simply change it after pressing
the My QuickStart button.
• Note: Your profile will be saved even when you unplug the machine.
Up and Down Keys
Program (+ and –) Toggles through programs. Program changes can be made any time during your
workout.
Time (+ and –) Increases or decreases time. The maximum time 99:59. You can change your time
twice during a workout.
Level (+ and –) Increases or decreases the resistance level of the machine. There are 20 levels
of resistance for programs P1 - P5. During a heart rate program (P6 - P10) the
level button increases or decreases your target heart rate (for more information
on heart rate programs go to page 23). To enter a change in target heart rate, you
must hit Enter after selecting the proper number.
Weight (+ and –) Increases or decreases the user’s weight. This value is used to give a more accu-
rate calorie burn readout. Weight is displayed in pounds (English) or kilograms
(metric). To switch from English to metric or metric to English, hold down the
weight (+/–) keys for three seconds. The console will scroll the selected unit of
measure.

Other manuals for Q35

5

This manual suits for next models

2

Other Octane Fitness Elliptical Trainer manuals
Octane Fitness zr8000 Troubleshooting guide

Octane Fitness

Octane Fitness zr8000 Troubleshooting guide

Octane Fitness Q35 User manual

Octane Fitness

Octane Fitness Q35 User manual

Octane Fitness q47c User manual

Octane Fitness

Octane Fitness q47c User manual

Octane Fitness ZERO RUNNER ZR7000 User manual

Octane Fitness

Octane Fitness ZERO RUNNER ZR7000 User manual

Octane Fitness Q35c User manual

Octane Fitness

Octane Fitness Q35c User manual

Octane Fitness xRide xR4 User manual

Octane Fitness

Octane Fitness xRide xR4 User manual

Octane Fitness Q47 User manual

Octane Fitness

Octane Fitness Q47 User manual

Octane Fitness PRO3700 User manual

Octane Fitness

Octane Fitness PRO3700 User manual

Octane Fitness Pro 370 User manual

Octane Fitness

Octane Fitness Pro 370 User manual

Octane Fitness Q47e User manual

Octane Fitness

Octane Fitness Q47e User manual

Octane Fitness PRO4700 User manual

Octane Fitness

Octane Fitness PRO4700 User manual

Octane Fitness Q47e User manual

Octane Fitness

Octane Fitness Q47e User manual

Octane Fitness PRO 310 User manual

Octane Fitness

Octane Fitness PRO 310 User manual

Octane Fitness Q45 User manual

Octane Fitness

Octane Fitness Q45 User manual

Octane Fitness Q35 User manual

Octane Fitness

Octane Fitness Q35 User manual

Octane Fitness Q35 User manual

Octane Fitness

Octane Fitness Q35 User manual

Octane Fitness PRO3700 Original instructions

Octane Fitness

Octane Fitness PRO3700 Original instructions

Octane Fitness xR6000 User manual

Octane Fitness

Octane Fitness xR6000 User manual
Octane Fitness PRO4700 User manual

Octane Fitness

Octane Fitness PRO4700 User manual

Octane Fitness PRO350 Installation and operating instructions

Octane Fitness

Octane Fitness PRO350 Installation and operating instructions

Octane Fitness Pro 370 User manual

Octane Fitness

Octane Fitness Pro 370 User manual

Octane Fitness PRO 310 User manual

Octane Fitness

Octane Fitness PRO 310 User manual

Octane Fitness PRO3700C User manual

Octane Fitness

Octane Fitness PRO3700C User manual
Octane Fitness ZR8 User manual

Octane Fitness

Octane Fitness ZR8 User manual

Popular Elliptical Trainer manuals by other brands
Insportline IN 3651 Atlanta Black user manual

Insportline

Insportline IN 3651 Atlanta Black user manual

Diadora DX4 manual

Diadora

Diadora DX4 manual

Domyos VE 230 Original instructions

Domyos

Domyos VE 230 Original instructions

STI CLIMBER PR-8623 owner's manual

STI

STI CLIMBER PR-8623 owner's manual

Schwinn 418P user manual

Schwinn

Schwinn 418P user manual

Salter PT-323 owner's manual

Salter

Salter PT-323 owner's manual

Sunny Health & Fitness SF-E3890 user manual

Sunny Health & Fitness

Sunny Health & Fitness SF-E3890 user manual

Cubii MOVE F5A1 owner's manual

Cubii

Cubii MOVE F5A1 owner's manual

Weslo WLEL71807.0 user manual

Weslo

Weslo WLEL71807.0 user manual

Marcy E7000D manual

Marcy

Marcy E7000D manual

inbody 770 user manual

inbody

inbody 770 user manual

Omega CO-E130 Instruction book

Omega

Omega CO-E130 Instruction book

Stamina AVARI Magnetic Elliptical owner's manual

Stamina

Stamina AVARI Magnetic Elliptical owner's manual

NordicTrack E11.0 Elliptical Gebruikershandleiding

NordicTrack

NordicTrack E11.0 Elliptical Gebruikershandleiding

noble pro Elite E8.0 user manual

noble pro

noble pro Elite E8.0 user manual

NordicTrack E 11.5 Elliptical Manual do utilizador

NordicTrack

NordicTrack E 11.5 Elliptical Manual do utilizador

Kettler OMNIUM 500 manual

Kettler

Kettler OMNIUM 500 manual

Weslo Momentum 605 Elliptical Bedienungsanleitung

Weslo

Weslo Momentum 605 Elliptical Bedienungsanleitung

manuals.online logo
manuals.online logoBrands
  • About & Mission
  • Contact us
  • Privacy Policy
  • Terms and Conditions

Copyright 2025 Manuals.Online. All Rights Reserved.