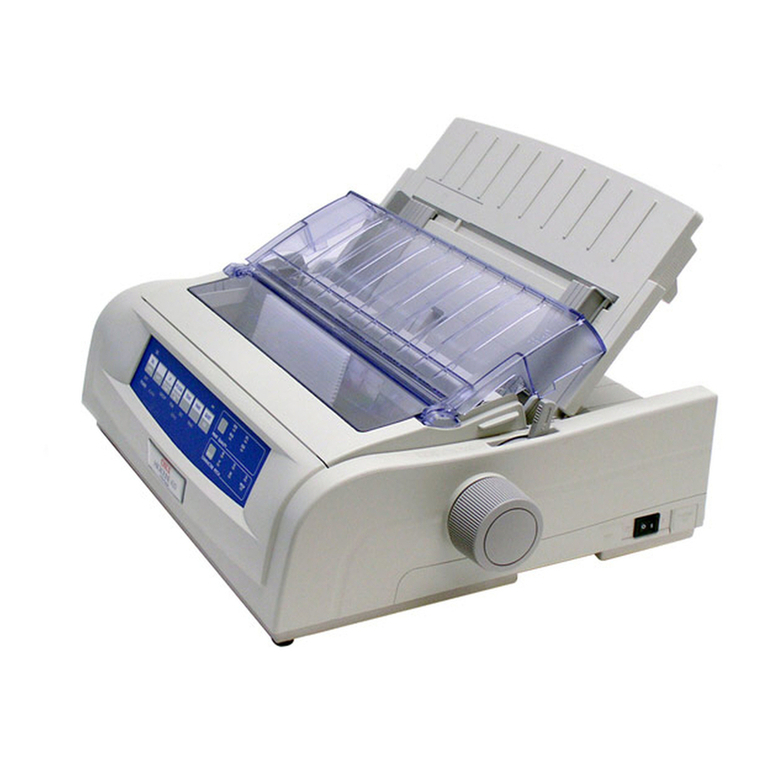
Oki 80 Series User manual

i
IMPORTANT
You have just bought the best printer, so be sure to use only the ribbons
recommended for it. Original OKI ribbons are the only ones that the
manufacturers recommend. Ask for them by name.
Please remember that if you buy any other ribbon your arranty may be
invalidated.
Purchasing inferior ribbons really does not make sense. They do not last
as long. What is more, they are prone to shredding, hich can cause
damage to your printhead. Any short term savings on cheap ribbons are
quickly lost.
So do not aste your time and money . . . insist on OKI consumables for
your OKI printer.
You can order them from your printer supplier.

ii
CONTENTS
Chapter 1: Setting Up Your Printer . . . . . . . . . . . . . . . . . . . . 1-1
Connecting To Your Computer . . . . . . . . . . . . . . . . . . . . . . 1-9
Setting the Internal S itches . . . . . . . . . . . . . . . . . . . . . . . . . 1-12
Optional Accessories . . . . . . . . . . . . . . . . . . . . . . . . . . . . . . . 1-15
Chapter 2: Operating Your Printer . . . . . . . . . . . . . . . . . . . . . 2-1
Buttons, Levers and Indicators . . . . . . . . . . . . . . . . . . . . . . . 2-1
Paper Loading . . . . . . . . . . . . . . . . . . . . . . . . . . . . . . . . . . . . . 2-6
Rear Feed Paper Loading . . . . . . . . . . . . . . . . . . . . . . . . . 2-6
Bottom Feed Paper Loading . . . . . . . . . . . . . . . . . . . . . . 2-7
Loading Single Sheets . . . . . . . . . . . . . . . . . . . . . . . . . . . . 2-9
Chapter 3: Programming . . . . . . . . . . . . . . . . . . . . . . . . . . . . . . 3-1
Basic Programming . . . . . . . . . . . . . . . . . . . . . . . . . . . . . . . . 3-3
If you have a Soft are Package . . . . . . . . . . . . . . . . . . . . . . 3-7
Programming the ML280 . . . . . . . . . . . . . . . . . . . . . . . . . . . 3-9
Programming Bit-Image Graphics . . . . . . . . . . . . . . . . . . . . 3-22
Appendix A: Programming Commands . . . . . . . . . . . . . . . . . A-1
Appendix B: Character Code Pages . . . . . . . . . . . . . . . . . . . . . B-1
Appendix C: Specifications . . . . . . . . . . . . . . . . . . . . . . . . . . .C-1

iii
SPECIAL NOTE
This manual ill help you install and use your ne OKI printer. It
contains everything you need to kno to print ith your MICROLINE’s
special features. If you still need assistance after reading this book,
please contact your dealer for fast personal service. If your dealer cannot
ans er your questions, please ask us.
Every effort has been made to ensure that the information in this
document is complete, accurate, and up-to-date. OKI assumes no
responsibility for the results of errors beyond its control. OKI also cannot
guarantee that changes in soft are and equipment made by other
manufacturers, and referred to in this book, ill not affect the applicability
of the information in this book.
© Copyright 1993 by OKI.
All rights reserved, including the right to reproduce this book or
portions thereof in any form.
IBM, IBM PC XT , PC AT, and Graphics Printer are registered trademarks of International Business
Machines Corp.
MS-DOS is the trademark of Microsoft Corporation.
WordStar is the trademark of WordStar International Limited.
Lotus, Lotus 1-2-3, are registered trademarks of Lotus Development Corporation.
iv
MPORTANT
The ires in this mains lead are coloured in accordance ith the
follo ing code:
GREEN AND YELLOW EARTH
BLUE NEUTRAL
BROWN LIVE
As the colours of the ires in the mains lead of this apparatus may not
correspond ith the coloured markings identifying the terminals in
your plug — PROCEED AS FOLLOWS:
The ire coloured GREEN AND YELLOW must be connected to the
terminal in the plug marked ith the letter E or by the safety earth
symbol or coloured GREEN or GREEN AND YELLOW. The ire
coloured BROWN must be connected to the terminal marked ith the
letter L or coloured RED. The ire coloured BLUE must be connected to
the terminal marked ith the letter N or coloured BLACK.
WARN NG: TH S APPARATUS MUST BE EARTHED
Ensure that your equipment is connected correctly. If you are in any
doubt consult a qualified electrician.

Setting Up 1 – 1
LINE
FEEDFORM
FEEDTOF
SET.SELECTALARMPOWERPITCH
17
12
10
HSD
UTILITY
NLQ
OKI MICROLINE 280
9 PIN PRINTER
Your new OKI printer is packed in a protective container along with this
manual and some extra items you will need. These items include:
1. Do not plug in your printer until the ollowing steps have been
completed.
2. Remove the access cover by inserting your hand in the top cover slot
(see igure below) and li ting.
Chapter 1
Setting Up Your Printer
Paper separator
AC cable
Platen knob
( itted)
Ribbon cartridge
LINE
FEEDFORM
FEEDTOF
SET.SELECTALARMPOWERPITCH
17
12
10
HSD
UTILITY
NLQ
OKI MICROLINE280
9PIN PRINTER
Slot Access cover

1 – 2 Setting Up
3. Remove the carriage shipping restraint that keeps the print head in
place.
Column
indicator
bar
Print head
Carriage shipping
restraint
4. Gently slide the print head to the middle o the printer or to the le t-
hand side so that it is away rom the rollers on the column indicator
bar.
➡

Setting Up 1 – 3
5. Place the black ribbon cartridge on the ribbon cartridge holder. The
easiest method is to tilt the back o the cartridge so that it slides into
the area o the plate that is nearest the ront o the printer, then lower
the top o the cartridge (where the plastic ribbon shield is located)
over the print head. The tabs on both sides o the cartridge should
align per ectly with the inserts on the print head plate.
Important: Only use genuine OKI ribbon cartridges in your printer. Do not remove the
ribbon shield.
Ribbon cartridge holder
Ribbon shield
Ribbon cartridge
Holding position
Print head
Column indicator
Ribbon shield

1 – 4 Setting Up
6. Press gently on the cartridge until you eel it snap into place. To
remove the ribbon cartridge, make sure the print head is moved
away rom the edge o the platen, then grasp the cartridge on both
sides o the print head and li t up.
7. The three-position blue lever located to the le t o the ribbon cartridge
is used to adjust the print head gap or single or multi-part paper.
When single part paper or two part paper is in the printer, slide the
blue lever orwards towards the print head. To print on three or our
part paper, slide the lever away rom the print head.
Paper release lever
Column indicator
bar
Print head gap
lever

Setting Up 1 – 5
8. The platen knob should already be itted to the right hand side o the
printer. However, i this is not the case, or i it has been removed or
any reason, align its slot with the spigot on the platen sha t.
9. Try running a sel test to make sure your new printer is working
correctly. Insert a piece o computer paper (with sprocket holes) or
a single sheet o typing paper into the printer as you would insert it
in a typewriter. I you are un amiliar with typewriters, here is the
method:
a. Open the paper release lever by sliding it towards you.
b. Insert the paper as ar as you can into the slots provided by the
black paper guides.
Paper guides

1 – 6 Setting Up
c. Close the paper release lever.
d. Turn the platen knob clockwise away rom you to pull the paper
around the platen and behind the column indicator bar.
e. Move the column indicator bar back on to the platen so that the
rollers rest on the paper you have just inserted.
10. Advance the paper, using the platen knob, until 1 inch o paper
appears above the column indicator bar.
11. Replace the access cover:
a. Insert the three tabs in the edge o the access cover into the holes
on the top ront edge o the printer.
b. Lower the access cover on to the printer.
12. Grasp the paper and pull it through the opening in the access cover.
Use the platen knob i you need more paper.
13. Insert the connector end o the power cord into the socket at the rear
o the printer.
14. Make absolutely certain that the ON/OFF power switch on the side
o the printer is OFF. (A sudden power surge can damage the
printer.)
15. Plug the power cord into an earthed (three-pronged) electrical
socket.
Important: The printer must be earthed at all times.

Setting Up 1 – 7
16. To print the sel test, hold down the LINE FEED button and turn the
power switch ON. When the printer is powered on (indicator
lights), release the LINE FEED button.
17. The ollowing test pattern will be printed, beginning with a printer
revision number that is ollowed by a rolling character pattern .
LINE
FEED FORM
FEED TOF
SET.SELECT ALARM POWER PITCH
17
12
10
HSD
UTILITY
NLQ
OKI MICROLIN
E
9 PIN
PR
Note: During sel test printing the SELECT indicator is not lit.
SELECT indicator
Line eed SELECT button
4YR4100–7200

1 – 8 Setting Up
18. To stop the test, press the SELECT button or turn the power switch
OFF.
A ter the printer has shown that it is unctioning correctly, it is ready to
be connected to your computer using an inter ace cable. I you do not
have one, see your computer dealer or, i you have the equipment and
the technical expertise, make your own cable using the instructions in
Appendix C.

Setting Up 1 – 9
Connecting to your computer
You will need either a parallel or serial inter ace cable to connect your
computer to your printer. Be ore you connect the cable, make sure both
printer and computer power is OFF.
Connecting a Parallel Interface
1. Insert the 36-pin plug into the appropriate socket on the rear o the
printer.
Locking tab
Parallel inter ace cable

1 – 10 Setting Up
2. Snap the two wire locking tabs on to the plug.
3. Insert the other end o the cable into your computer. You may also
connect it to another peripheral device, such as a disk drive, i your
equipment is designed or daisy chain connection.
4. Turn on the equipment and try the one line BASIC program shown
below, using the proper print statement or your computer (the
example uses LPRINT). Make sure you have paper and ribbon in the
printer.
5. Type: LPRINT “EVERYTHING’S OKAY” and then run the program.
6. Your printer should print this at 10 characters per inch.
Note: I the printer did not print, make sure you entered the program correctly. Some
computers require that you assign a number to the printer and speci y that number in
your print statement; or example OPEN # 3 means the printer is on line # 3 to the
computer.
7. Now try this BASIC program (change it, i necessary, to suit your
computer’s requirements):
10 LPRINT “THIS IS LINE ONE”
20 LPRINT “AND THIS IS LINE TWO”
8. The printout should look like this:
THIS IS LINE ONE
AND THIS IS LINE TWO
EVERYTHING’S OKAY

Setting Up 1 – 11
I it is overprinted, make a small adjustment to the printer switch
settings so that a line eed is automatically inserted at the end o a line.
(See Page 1-12 or details.)

1 – 12 Setting Up
Setting the internal DIP switches
Be ore altering the settings o the eight DIP switches, please read the
instructions on Page 1-14. These DIP switches are under the small cover
on the top o the printer. They allow the selection o a speci ic language
and to make the printer meet the requirements o your computer. This
section describes the switches and their actory settings.
Function switch
access hole
Circuit board control
switches
Switch cover
Note: I you have the optional inter ace board installed, this switch is located on the
lower board.

Setting Up 1 – 13
Switches 1 to 5 work in combination to select a oreign language (or
computer character set). The ollowing table shows the correct switch
settings or all available languages.
USA OFF OFF OFF OFF OFF 12
French ON OFF OFF OFF OFF 12
German OFF ON OFF OFF OFF 12
British ON ON OFF OFF OFF 12
Danish 1 OFF OFF ON OFF OFF 12
Swedish 1 ON OFF ON OFF OFF 12
Italian OFF ON ON OFF OFF 12
Spanish ON ON ON OFF OFF 12
Japanese OFF OFF OFF ON OFF 12
Norwegian ON OFF OFF ON OFF 12
Danish 2 OFF ON OFF ON OFF 12
Dutch ON ON OFF ON OFF 12
Swedish 2 OFF OFF ON ON OFF 12
Swedish 3 ON OFF ON ON OFF 12
Swedish 4 OFF ON ON ON OFF 12
Turkish ON ON ON ON OFF 12
Swiss 1 OFF OFF OFF OFF ON 12
Swiss 2 ON OFF OFF OFF ON 12
USA OFF ON OFF OFF ON 11
French ON ON OFF OFF ON 11
German OFF OFF ON OFF ON 11
British ON OFF ON OFF ON 11
Danish 1 OFF ON ON OFF ON 11
Swedish 1 ON ON ON OFF ON 11
Italian OFF OFF OFF ON ON 11
Spanish ON OFF OFF ON ON 11
Japanese OFF ON OFF ON ON 11
Norwegian ON ON OFF ON ON 11
Danish 2 OFF OFF ON ON ON 11
Dutch ON OFF ON ON ON 11
Swedish 2 OFF ON ON ON ON 11
Swedish 3 ON ON ON ON ON 11
Language Switch Number Page
Length
1 2 3 4 5 (inche )

1 – 14 Setting Up
It is recommended that you set the printer or the language or character
set you use most. You can use a program command (see Page 3–9) to
change to another language within a document, so it is not necessary to
change these switch settings i you use more than one language.
Switch 6 is the automatic line eed selection. Be ore shipment, it is set to
OFF. I you discover that your text is being overprinted, it may be
because your computer does not send a line eed at the end o a line. In
that event, set this switch to ON and the printer will insert an automatic
line eed at the end o each line. I your computer automatically sends a
line eed at the end o every line you can use this eature to double space
a document by setting it to the ON position.
Switch 7 selects the slashed or unslashed zero ont. The slashed zero ont
should be chosen when it is important to distinguish between a zero and
a capital O. The switch is set to OFF to select the unslashed zero and to
ON to select the slashed zero.
Switch 8 selects the roll paper stand (RPS) or the cut-sheet eeder (CSF)
To select the cut-sheet eeder move this switch to the ON position.
Changing the DIP- witch etting
All the switches are set to OFF when the printer leaves the actory.
To reset the switches, proceed as ollows:
1 . Make sure the printer is OFF and the power cable is unplugged.
2. Using a Phillips-head screwdriver, remove the screw on the switch
cover at the back o the printer and remove the cover.
3. Use a sharp tipped instrument, such as a ballpoint pen or toothpick,
to slide the appropriate switch(es) to the required new setting.
4. Replace the switch cover and tighten the screw.

Setting Up 1 – 15
Optional Accessories
Roll paper stand
Tractor eed unit
Access cover
Acoustic cover
Tractor eed option kit

1 – 16 Setting Up
Front sheet support
Cut-sheet eeder unit
Front sheet guide
Paper test lever
Le t paper guide
Rear sheet support
Cut Sheet Feeder
RS-232C serial board
Inter ace Equipment
This manual suits for next models
2
Table of contents
Other Oki Printer manuals