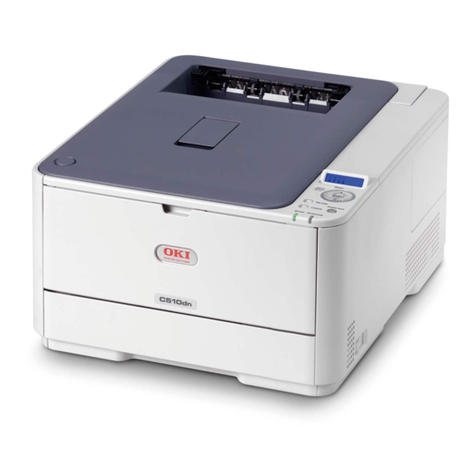
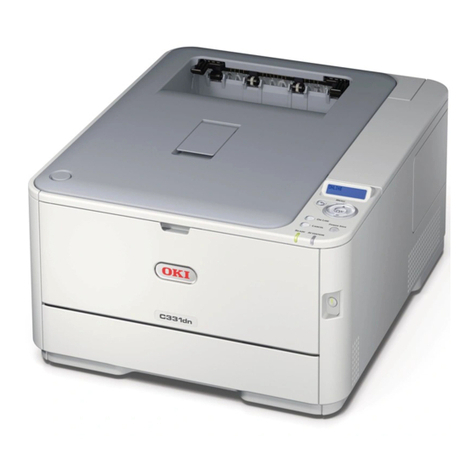
Oki C910n User manual

C910n
C910dn
User’s Guide
TM

Preface > 2
P
REFACE
Every effort has been made to ensure that the information in this document is complete,
accurate, and up-to-date. The manufacturer assumes no responsibility for the results of
errors beyond its control. The manufacturer also cannot guarantee that changes in software
and equipment made by other manufacturers and referred to in this guide will not affect
the applicability of the information in it. Mention of software products manufactured by
other companies does not necessarily constitute endorsement by the manufacturer.
While all reasonable efforts have been made to make this document as accurate and helpful
as possible, we make no warranty of any kind, expressed or implied, as to the accuracy or
completeness of the information contained herein.
The most up-to-date drivers and manuals are available from the Oki web site:
http://www.okiprintingsolutions.com
07103801 Iss. 2; Copyright © 2011 Oki Europe Ltd. All rights reserved.
Oki is a registered trademark of Oki Electric Industry Company, Ltd.
Oki Printing Solutions is a trademark of Oki Data Corporation.
Microsoft, MS-DOS and Windows are registered trademarks of Microsoft Corporation.
Apple, Macintosh, Mac and Mac OS are registered trademarks of Apple Inc.
Other product names and brand names are registered trademarks or trademarks of their
proprietors.
This product complies with the requirements of the Council Directives 2004/
108/EC (EMC), 2006/95/EC (LVD), 1999/5/EC (R&TTE) and 2009/125/EC
(ErP), as amended where applicable, on the approximation of the laws of the
member states relating to Electromagnetic Compatibility, Low Voltage, Radio
& Telecommunications Terminal Equipment and Energy Related Products.
The following cables were used to evaluate this product to achieve EMC directive
2004/108/EC compliance and configurations other than this may affect that compliance.
CAUTION!
This product complies with EN55022 Class B. However, when fitted with
the optional finisher, compliance to EN55022 is Class A. In a domestic
environment this configuration may cause radio interference, in which
case the user may be required to take adequate measures.
CABLE TYPE LENGTH
(METRE)
CORE SHIELD
Power 1.8 ✘✘
USB 5.0 ✘✔
Parallel 2.0 ✘✔
LAN 15.0 ✔✘

Emergency first aid > 3
E
MERGENCY
FIRST
AID
Take care with toner powder:
If swallowed, give small amounts of cold water and seek medical
attention. DO NOT attempt to induce vomiting.
If inhaled, move the person to an open area for fresh air. Seek medical
attention.
If it gets into the eyes, flush with large amounts of water for at least
15 minutes keeping eyelids open. Seek medical attention.
Spillages should be treated with cold water and soap to help reduce
risk of staining skin or clothing.
M
ANUFACTURER
Oki Data Corporation,
4-11-22 Shibaura, Minato-ku,
Tokyo 108-8551,
Japan
I
MPORTER
TO
THE
EU/
AUTHORISED
REPRESENTATIVE
Oki Europe Limited (trading as Oki Printing Solutions)
Blays House
Wick Road
Egham
Surrey, TW20 0HJ
United Kingdom
For all sales, support and general enquiries contact your local distributor.
E
NVIRONMENTAL
INFORMATION

Contents > 4
C
ONTENTS
Preface . . . . . . . . . . . . . . . . . . . . . . . . . . . . . . . . . . . . . . . . . . . . . . . . . . .2
Emergency first aid . . . . . . . . . . . . . . . . . . . . . . . . . . . . . . . . . . . . . . . . . .3
Manufacturer. . . . . . . . . . . . . . . . . . . . . . . . . . . . . . . . . . . . . . . . . . . . . . .3
Importer to the EU/authorised representative. . . . . . . . . . . . . . . . . . . . .3
Environmental information . . . . . . . . . . . . . . . . . . . . . . . . . . . . . . . . . . . .3
Contents . . . . . . . . . . . . . . . . . . . . . . . . . . . . . . . . . . . . . . . . . . . . . . . . . .4
Notes, cautions and warnings. . . . . . . . . . . . . . . . . . . . . . . . . . . . . . . . . .6
Introduction . . . . . . . . . . . . . . . . . . . . . . . . . . . . . . . . . . . . . . . . . . . . . . .7
Features. . . . . . . . . . . . . . . . . . . . . . . . . . . . . . . . . . . . . . . . . . . . . . . . 7
About this guide . . . . . . . . . . . . . . . . . . . . . . . . . . . . . . . . . . . . . . . . . . 8
Online usage. . . . . . . . . . . . . . . . . . . . . . . . . . . . . . . . . . . . . . . . . . . 9
Printing pages. . . . . . . . . . . . . . . . . . . . . . . . . . . . . . . . . . . . . . . . . . 9
Printer and paper overview. . . . . . . . . . . . . . . . . . . . . . . . . . . . . . . . . . .10
Opening and closing the top cover. . . . . . . . . . . . . . . . . . . . . . . . . . . . . .10
Identifying major components . . . . . . . . . . . . . . . . . . . . . . . . . . . . . . . .11
Software supplied . . . . . . . . . . . . . . . . . . . . . . . . . . . . . . . . . . . . . . . . .13
Paper recommendations. . . . . . . . . . . . . . . . . . . . . . . . . . . . . . . . . . . . .13
Paper input and output information . . . . . . . . . . . . . . . . . . . . . . . . . . . . .15
Trays and stackers . . . . . . . . . . . . . . . . . . . . . . . . . . . . . . . . . . . . . . . .16
Trays 1 to 5 . . . . . . . . . . . . . . . . . . . . . . . . . . . . . . . . . . . . . . . . . . .16
MP tray . . . . . . . . . . . . . . . . . . . . . . . . . . . . . . . . . . . . . . . . . . . . . .16
Face-down stacker . . . . . . . . . . . . . . . . . . . . . . . . . . . . . . . . . . . . . .16
Face-up stacker . . . . . . . . . . . . . . . . . . . . . . . . . . . . . . . . . . . . . . . .16
Duplex unit (if installed). . . . . . . . . . . . . . . . . . . . . . . . . . . . . . . . . . .17
Tray and stacker examples. . . . . . . . . . . . . . . . . . . . . . . . . . . . . . . . . . .18
Loading trays 1 to 5. . . . . . . . . . . . . . . . . . . . . . . . . . . . . . . . . . . . . .18
Using the MP tray . . . . . . . . . . . . . . . . . . . . . . . . . . . . . . . . . . . . . . .19
Using the stackers. . . . . . . . . . . . . . . . . . . . . . . . . . . . . . . . . . . . . . .21
Control panel. . . . . . . . . . . . . . . . . . . . . . . . . . . . . . . . . . . . . . . . . . . . . .23
Controls and indicators . . . . . . . . . . . . . . . . . . . . . . . . . . . . . . . . . . . . .23
LCD panel modes . . . . . . . . . . . . . . . . . . . . . . . . . . . . . . . . . . . . . . . . .24
Status information. . . . . . . . . . . . . . . . . . . . . . . . . . . . . . . . . . . . . . .24
Menu (functions) information . . . . . . . . . . . . . . . . . . . . . . . . . . . . . . .24
Configuration information. . . . . . . . . . . . . . . . . . . . . . . . . . . . . . . . . .25
Help mode . . . . . . . . . . . . . . . . . . . . . . . . . . . . . . . . . . . . . . . . . . . .25
LCD panel messages . . . . . . . . . . . . . . . . . . . . . . . . . . . . . . . . . . . . . . .25
Using the menus . . . . . . . . . . . . . . . . . . . . . . . . . . . . . . . . . . . . . . . . . .25
Getting started . . . . . . . . . . . . . . . . . . . . . . . . . . . . . . . . . . . . . . . . . . . .27
Printer location . . . . . . . . . . . . . . . . . . . . . . . . . . . . . . . . . . . . . . . . . . .27
Turning off/on. . . . . . . . . . . . . . . . . . . . . . . . . . . . . . . . . . . . . . . . . . . .28
Turning off . . . . . . . . . . . . . . . . . . . . . . . . . . . . . . . . . . . . . . . . . . . .28
Turning on . . . . . . . . . . . . . . . . . . . . . . . . . . . . . . . . . . . . . . . . . . . .29
Changing the display language . . . . . . . . . . . . . . . . . . . . . . . . . . . . . . . .29
Checking current settings. . . . . . . . . . . . . . . . . . . . . . . . . . . . . . . . . . . .29
Interfaces and connection . . . . . . . . . . . . . . . . . . . . . . . . . . . . . . . . . . .30
Connecting the parallel interface . . . . . . . . . . . . . . . . . . . . . . . . . . . . .30
Connecting the USB interface . . . . . . . . . . . . . . . . . . . . . . . . . . . . . . .30
Connecting the network interface . . . . . . . . . . . . . . . . . . . . . . . . . . . .31
Using the drivers DVD . . . . . . . . . . . . . . . . . . . . . . . . . . . . . . . . . . . . . .31
Operation . . . . . . . . . . . . . . . . . . . . . . . . . . . . . . . . . . . . . . . . . . . . . . . .32

Contents > 5
Consumables and maintenance. . . . . . . . . . . . . . . . . . . . . . . . . . . . . . . .33
Checking consumable/maintenance item usage . . . . . . . . . . . . . . . . . . . .33
Replacement indications. . . . . . . . . . . . . . . . . . . . . . . . . . . . . . . . . . . . .33
Replacing consumables/maintenance items . . . . . . . . . . . . . . . . . . . . . . .33
Cleaning the LED heads . . . . . . . . . . . . . . . . . . . . . . . . . . . . . . . . . . . . .33
Cleaning the paper feed rollers . . . . . . . . . . . . . . . . . . . . . . . . . . . . . . . .35
Cleaning the printer casing. . . . . . . . . . . . . . . . . . . . . . . . . . . . . . . . . . .37
Emptying the punch chip box (punch unit optional accessory) . . . . . . . . . .38
Optional accessories . . . . . . . . . . . . . . . . . . . . . . . . . . . . . . . . . . . . . . . .40
Installing accessories. . . . . . . . . . . . . . . . . . . . . . . . . . . . . . . . . . . . . . .40
Troubleshooting . . . . . . . . . . . . . . . . . . . . . . . . . . . . . . . . . . . . . . . . . . .41
General . . . . . . . . . . . . . . . . . . . . . . . . . . . . . . . . . . . . . . . . . . . . . . . .41
Paper jams . . . . . . . . . . . . . . . . . . . . . . . . . . . . . . . . . . . . . . . . . . . . . .41
Paper jams – printer . . . . . . . . . . . . . . . . . . . . . . . . . . . . . . . . . . . . . . .41
Open cover, paper jam, tray # side cover . . . . . . . . . . . . . . . . . . . . . .41
Open cover, paper jam, side cover . . . . . . . . . . . . . . . . . . . . . . . . . . .42
Open cover, paper jam, top cover . . . . . . . . . . . . . . . . . . . . . . . . . . . .44
Paper jams – duplex unit (if installed) . . . . . . . . . . . . . . . . . . . . . . . . . . .48
Check duplex unit, paper jam . . . . . . . . . . . . . . . . . . . . . . . . . . . . . . .48
Paper jams – finisher (optional accessory) . . . . . . . . . . . . . . . . . . . . . . . .51
Check finisher, paper jam/paper remains . . . . . . . . . . . . . . . . . . . . . . .51
591, 592, 593, 599/ 643, 645 (paper jam around finisher). . . . . . . . . . .51
594, 597, 598/ 644, 646 (paper jam in finisher) . . . . . . . . . . . . . . . . . .53
590 (paper jam in finisher/punch unit). . . . . . . . . . . . . . . . . . . . . . . . .56
Check inverter, paper jam . . . . . . . . . . . . . . . . . . . . . . . . . . . . . . . . .57
Avoiding paper jams . . . . . . . . . . . . . . . . . . . . . . . . . . . . . . . . . . . . . . .61
Dealing with unsatisfactory printing. . . . . . . . . . . . . . . . . . . . . . . . . . . . .61
Staple jams – finisher (optional accessory). . . . . . . . . . . . . . . . . . . . . . . .63
Check finisher, staple jam . . . . . . . . . . . . . . . . . . . . . . . . . . . . . . . . .63
Specifications . . . . . . . . . . . . . . . . . . . . . . . . . . . . . . . . . . . . . . . . . . . . .66
Appendix A – LCD messages . . . . . . . . . . . . . . . . . . . . . . . . . . . . . . . . . .67
Appendix B – menu system . . . . . . . . . . . . . . . . . . . . . . . . . . . . . . . . . . .68
Configuration . . . . . . . . . . . . . . . . . . . . . . . . . . . . . . . . . . . . . . . . . . . .69
Print page count . . . . . . . . . . . . . . . . . . . . . . . . . . . . . . . . . . . . . . . .69
Finisher count . . . . . . . . . . . . . . . . . . . . . . . . . . . . . . . . . . . . . . . . . .69
Supplies life . . . . . . . . . . . . . . . . . . . . . . . . . . . . . . . . . . . . . . . . . . .69
Network . . . . . . . . . . . . . . . . . . . . . . . . . . . . . . . . . . . . . . . . . . . . . .70
Paper size in tray . . . . . . . . . . . . . . . . . . . . . . . . . . . . . . . . . . . . . . .70
System . . . . . . . . . . . . . . . . . . . . . . . . . . . . . . . . . . . . . . . . . . . . . .71
Configuration example – monochrome pages printed. . . . . . . . . . . . . . .71
Print information . . . . . . . . . . . . . . . . . . . . . . . . . . . . . . . . . . . . . . . . . .72
Print information example – demonstration page . . . . . . . . . . . . . . . . .72
Print secure job. . . . . . . . . . . . . . . . . . . . . . . . . . . . . . . . . . . . . . . . . . .73
Menus . . . . . . . . . . . . . . . . . . . . . . . . . . . . . . . . . . . . . . . . . . . . . . . . .74
Tray configuration . . . . . . . . . . . . . . . . . . . . . . . . . . . . . . . . . . . . . . .74
System adjust. . . . . . . . . . . . . . . . . . . . . . . . . . . . . . . . . . . . . . . . . .77
Menus example 1 – tray 1 transparencies . . . . . . . . . . . . . . . . . . . . . .81
Menus example 2 – MP tray paper size . . . . . . . . . . . . . . . . . . . . . . . .81
Index . . . . . . . . . . . . . . . . . . . . . . . . . . . . . . . . . . . . . . . . . . . . . . . . . . . .82
Oki contact details. . . . . . . . . . . . . . . . . . . . . . . . . . . . . . . . . . . . . . . . . .83

Notes, cautions and warnings > 6
N
OTES
,
CAUTIONS
AND
WARNINGS
For the protection of your product, and in order to ensure that you benefit from its full
functionality, this model has been designed to operate only with genuine original toner
cartridges. Any other toner cartridge may not operate at all, even if it is described as
“compatible”, and if it does work, your product's performance and print quality may be
degraded.
Use of non-genuine products may invalidate your warranty.
Specifications subject to change without notice. All trademarks acknowledged.
NOTE
A note provides additional information to supplement the main text.
CAUTION!
A caution provides additional information which, if ignored, may
result in equipment malfunction or damage.
WARNING!
A warning provides additional information which, if ignored, may
result in a risk of personal injury.

Introduction > 7
I
NTRODUCTION
Congratulations on buying an Oki colour printer. Your new printer is designed with
advanced features to give you clear, vibrant colour prints and crisp black and white pages
at high speed on a range of print media for the office.
There are two different models available: C910n and C910dn, where n denotes networking
capability and d denotes duplex unit installed.
F
EATURES
The following features are standard on all models:
>1200 x 600 dpi (dots per inch) print resolution for high quality image production
showing the finest detail
>ProQ2400 multi level technology produces subtler tones and smoother gradations of
colour to lend photographic quality to your documents
>Single Pass Colour Digital LED technology for high speed processing of your printed
pages
>Hard disk drive enables spooled and verified printing
>10Base-T, 100Base-TX and 1000Base-T network connection lets you share this
valuable resource among users on your office network
>USB 2.0 and parallel (IEEE-1284) interfaces
>PCL, PS, IBM PPR, Epson FX emulations
>“Ask Oki” – a user-friendly function that gives a direct link from your printer driver
screen (but not illustrated in this guide) to a dedicated web site specific to the exact
model you are using. This is where you will find all the advice, assistance and
support you could need to help you get the best possible results from your Oki
printer.
Additionally, the following optional features are available:
>Automatic two-sided (duplex) printing for economical use of paper and compact
printing of larger documents
>Additional paper trays for loading a further 530 sheets at a time to reduce operator
intervention, or different paper stocks for letterhead stationery, alternative paper
sizes or other print media:
>Standard 2nd/3rd Tray (530 sheets each)
>High Capacity Feeder (HCF) (1590 sheets)
>Additional memory
>Finisher (for stapling printer output)
>Punch unit (to extend Finisher functionality)
>Printer cabinet
NOTE
This optional feature is only applicable to the C910n.
NOTE
1. Tray configurations are: Tray 1 only, Tray 1 + 2nd Tray, Tray 1 + 2nd Tray + 3rd
Tray, Tray 1 + HCF, Tray1 + 2nd Tray + HCF

Introduction > 8
A
BOUT
THIS
GUIDE
This manual is your user’s guide (check the web site, www.okiprintingsolutions.com,
for the most up-to-date version) for your printer and forms part of the overall user support
listed below:
>Installation Safety Booklet: as with all electrical equipment, there are a few basic
precautions that should be taken to avoid injury or damage. Please be careful to
read and understand the safety warnings in the Safety Booklet before operating the
product.
This is a paper document that is packaged with the printer.
>Set-up guide: to describe how to unpack, connect and turn on your printer
This is a paper document that is packaged with the printer.
>This User’s Guide: to help you to become familiar with your printer and make the
best use of its many features. Also included are guidelines for troubleshooting and
maintenance to ensure that it performs at its best. Additionally, information is
provided for adding optional accessories as your printing needs evolve.
This is an electronic document.
>Printing Guide for Windows users and Mac users: to help you operate your printer
effectively and efficiently
This is an electronic document.
>Configuration Guide: to provide machine configuration and network configuration
information
This is an electronic document.
>Installation Guides: accompany consumable items and optional accessories to
describe how to install them
These are paper documents that are packaged with the consumables and optional
accessories.
>Online Help: online information accessible from the printer driver and utility
software
NOTE
Images used in this manual may include optional features that your printer does not
have installed.

Introduction > 9
O
NLINE
USAGE
This guide is intended to be read on screen using an Adobe Reader. Use the navigation and
viewing tools provided in Acrobat.
You can access specific information in two ways:
>In the list of bookmarks down the left hand side of your screen, click on the topic of
interest to jump to the required topic. (If the bookmarks are not available, use the
“Contents” on page 4.)
>In the list of bookmarks, click on Index to jump to the Index. (If the bookmarks are
not available, use the “Contents” on page 4.) Find the term of interest in the
alphabetically arranged index and click on the associated page number to jump to
the page containing the term.
P
RINTING
PAGES
The whole manual, individual pages, or sections may be printed. The procedure is:
1. From the toolbar, select File, then Print (or press the Ctrl + P keys).
2. Choose which pages you wish to print:
(a) All pages, (1), for the entire manual.
(b) Current page, (2), for the page at which you are looking.
(c) Pages from and to, (3), for the range of pages you specify by entering their
page numbers.
3. Click OK.
1
2
3

Printer and paper overview > 10
P
RINTER
AND
PAPER
OVERVIEW
O
PENING
AND
CLOSING
THE
TOP
COVER
To open the top cover, squeeze the top cover handle (1) to release the catch and raise the
cover.
To close the top cover,
push gently (1) until the cover stops midway and then push harder
(2) to close the cover completely. Ensure that the cover is securely closed.
CAUTION!
To gain access to the inside of the printer, ensure that the top
cover is fully opened.
1
1
2

Printer and paper overview > 11
I
DENTIFYING
MAJOR
COMPONENTS
The major components of your printer are identified in the representations below.
1. Paper holding arm 5. Paper size label
2. Top cover (face-down
stacker)
6. Paper volume
indicator
3. MP Tray (multi-
purpose tray)
7. Tray 1 (paper tray)
4. Tray 1 side cover 8. Control panel
9. Top cover handle
10. Face-down stacker 12. Face-up stacker
11. Power (on/off) switch
13. Interface unit 16. USB interface
connector
14. Network
interface
connector
17. Power connector
15. Parallel interface
connector
18. Ventilation holes
1
2
3
4
5
6
7
8
9
12
11
10
13
17
18
14
15
16

Printer and paper overview > 12
19. Image drum
cartridge and
toner cartridge
(Cyan)
23. Toner cartridge
20. Image drum
cartridge and
toner cartridge
(Magenta)
24. Image drum
cartridge
21. Image drum
cartridge and
toner cartridge
(Yellow)
25. Fuser unit
22. Image drum
cartridge and
toner cartridge
(Black)
26. LED heads
27. Belt unit 30. Duplex unit
28. Drum basket
handle
31. High Capacity
Feeder (HCF),
three trays
29. Drum basket
25
19
20
21
22
23
24
26
27
28
29
30
31

Printer and paper overview > 13
S
OFTWARE
SUPPLIED
>Drivers and Utilities
Contains driver and application software for use by a general user.
>Network and Administrator Utilities
Contains software for use by system administrators.
>User’s Guides
Contains documentation in electronic form (for example, the User’s Guide and
Printing Guide) to describe how to use the printer for day-to-day printing tasks.
>Template Manager
Contains software to help you create business cards, CD packaging, banners and
much more.
P
APER
RECOMMENDATIONS
Your printer will handle a variety of print media, including a range of paper weights and
sizes, transparencies and envelopes. This section provides general advice on choice of
media, and explains how to use each type.
The best performance will be obtained when using standard weight 75 – 90g/m² paper
designed for use in copiers and laser printers. Suitable types are:
>M-Real Data Copy 80g/m²
>Color Copy by Mondi
Use of heavily embossed or very rough textured paper is not recommended.
Pre-printed stationery
Glossy paper
CAUTION!
Pre-printed stationery can be used, but the ink must not offset
when exposed to the high fuser temperatures used in the printing
process.Continued use of pre-printed stationery may cause the
paper feed performance to degrade over time and paper jams may
occur. Clean the paper feed rollers as described on page 35.
CAUTION!
Glossy paper must be of the type designed for use in
electrophotographic printers and must not melt, change in quality,
or warp during the printer’s thermal fusing process.

Printer and paper overview > 14
Envelopes
Transparencies
Recommended type is:
CG3720 by 3M (A4 or Letter size)
Labels
Recommended type is:
Avery White Laser Label types 7162, 7664, 7666 (A4), or 5161 (Letter)
NOTE
Always print a sample to check the output results are satisfactory.
Printing on glossy paper may have unexpected results:
>Compared with plain paper, glossy paper may often be printed with a thin
toner film over it, or the images may be printed lighter.
>In a high temperature and high humidity environment, a thin toner film is
likely to occur. Glossy paper is best used in an environment below 25°C
temperature and 60% humidity.
>Image offsetting may occur particularly if you are printing high density
images or printing several copies.
>Due to its coating, glossy paper may “slip” when being fed into the
printer.
CAUTION!
Envelopes should be free from twist, curl or other deformations.
They should also be of the rectangular flap type, with glue that
remains intact when subjected to hot roll pressure fusing used in
this type of printer. Window envelopes are not suitable.
CAUTION!
Transparencies should be of the type designed for use in copiers
and laser printers. In particular, avoid office transparencies
designed for use by hand with marker pens. These will melt in the
fuser and cause damage.
CAUTION!
Labels should also be of the type recommended for use in copiers
and laser printers, in which the base carrier page is entirely
covered by labels. Other types of label stock may damage the
printer due to the labels peeling off during the printing process.

Printer and paper overview > 15
P
APER
INPUT
AND
OUTPUT
INFORMATION
The following table relates paper parameters to input trays (Tray 1 to Tray 5 (numbering
from the top) and MP Tray) and to output areas (Face-down stacker and Face-up stacker).
TYPE SIZE WEIGHT INPUT/OUTPUT
Plain paper A3, A3 Nobi, A3 Wide,
A4, A5, A6, B4, B5,
Letter, Legal 13,
Legal 13.5, Legal 14,
Executive, Tabloid,
Tabloid Extra
64 – 216g/m² Any Tray
Any Stacker
217 –
300g/m²
MP Tray
Face-up Stacker
Custom:
W: 100 – 328mm
L: 148 – 457.2mm
64 – 216g/m² Any Tray
Face-up Stacker
Custom:
W: 79.2 – 328mm
L: 90 – 457.2mm
64 – 300g/m² MP Tray
Face-up Stacker
Banner:
W: A4 width
L: 457.2 –1200mm
128g/m²
recommended
MP Tray
Face-up Stacker
Postcard – – Tray 1 or MP Tray
Face-up Stacker
Envelopea
a. See important comments in “Paper recommendations” on page 13
120 x 235mm
90 x 205mm
235 x 120mm
235 x 105mm
240 x 332mm
216 x 277mm
119 x 197mm
210 x 297mm
85g/m² MP Tray
Face-up Stacker
324 x 229mm
229 x 162mm
220 x 110mm
225.4 x 98.4mm
241.3 x 104.8mm
190.5 x 98.4mm
Based on 90g/m²
paper
LabelsaA4, Letter, B5 0.1 – 0.2mm MP Tray
Face-up Stacker
TransparenciesaA4, Letter 0.1 – 0.11mm Tray 1 or MP Tray
Face-up Stacker
Glossy paperaA4, A3, A3 outsize 0.13 – 0.16mm Tray 1 or MP Tray
Face-up Stacker

Printer and paper overview > 16
T
RAYS
AND
STACKERS
T
RAYS
1
TO
5
Tray 1 is the standard blank paper input tray and can hold up to 530 sheets of paper.
Additional trays, to give a total of five, can be added as an option to give a total tray
capacity of 2650 sheets of paper.
If you have identical paper stock loaded in another tray (for example Tray 2 or the MP
Tray), you can have the printer automatically switch to that other tray when the current
tray runs out of paper. This function can be enabled by driver settings when printing from
a Windows application or by a menu setting when printing from other applications.
MP
TRAY
The multi-purpose tray is used for media sizes additional to those of the standard trays,
heavier media weights and special media.
The multi-purpose tray can handle the same sizes as the standard trays but in weights up
to 300g/m². For very heavy paper stock use the face-up paper stacker. This ensures that
the paper path through the printer is almost straight.
The multi-purpose tray can feed paper widths as small as 76.2mm and lengths up to
1200mm. For banner printing, recommended sizes are A4 wide, 900mm and 1200mm long
and weight 128g/m². Since paper of width less than 100mm does not auto feed, you have
to press the ONLINE button to cause it to feed.
Use the multi purpose tray for printing on envelopes and transparencies. Up to 100 sheets
of transparencies or 25 envelopes can be loaded at one time, subject to a maximum
stacking depth of 25mm.
Paper or transparencies should be loaded print side up and top edge into the printer. Do
not use the duplex (two-sided printing) function for transparencies.
F
ACE
-
DOWN
STACKER
The face-down stacker on the top of the printer can hold up to 500 sheets of 80g/m²
standard paper, and can handle paper stocks from 64 – 216g/m². Pages printed in reading
order (page 1 first) will be sorted in reading order (last page on top, facing down).
F
ACE
-
UP
STACKER
The face-up stacker should be opened and the tray extension pulled out when required for
use. (With the face-up stacker either open or closed, the driver setting of Face Down will
successfully direct prints to the Face-Down stacker.)
The face-up stacker can hold up to 200 sheets of 80g/m² standard paper and can handle
stocks up to 300g/m².
Always use this stacker and the multi-purpose feeder for paper stocks heavier than
216g/m².

Printer and paper overview > 17
D
UPLEX
UNIT
(
IF
INSTALLED
)
This unit provides automatic two-sided printing on plain paper fed from Trays 1 – 5 or the
MP Tray.
WEIGHT SIZE TRAY
64 – 120g/m² A6,
A5,
B5,
B5LEF,
Executive,
A4,
A4LEF,
Letter,
LetterLEF,
Legal 13 in,
Legal 13.5 in,
Legal 14 in, B4,
Tabloid,
Tabloid Extra,
A3,
A3 Wide,
A3 Nobi,
Custom size (100 –
328mm wide, 148 –
457.2mm long)
Trays 1 - 5
MP Tray
120 – 188g/m² A4, A4LEF, Letter,
Letter LEF, Tabloid, A3
MP Tray

Printer and paper overview > 18
T
RAY
AND
STACKER
EXAMPLES
L
OADING
TRAYS
1
TO
5
Tray 1 is used in the following example.
1. Pull out the tray.
2. Press the paper rear stopper tab (1) and adjust the tab to the required paper size.
3. Fan the paper to be loaded then tap the edges of the stack on a flat surface to make
it flush.
4. Load the paper (face down and top edge towards the right for headed paper), press
the tab (2) on the paper guide and adjust the guides (3) for a snug fit to the paper.
To avoid paper jams:
>Do not leave space between the paper and the guides and rear stopper.
>Do not overfill the paper tray. Capacity depends on the paper type.
>Do not load damaged paper.
1

Printer and paper overview > 19
>Do not load paper of different sizes or types at the same time.
5. Gently push the tray back into the printer.
U
SING
THE
MP
TRAY
1. Squeeze the handle (1) and open the multi-purpose tray.
2
3
1

Printer and paper overview > 20
2. Fold out the paper support section and swivel out the extension supports (2).
3. Adjust the paper guides (3) to the size of the paper being used.
4. Fan the paper to be loaded then tap the edges of the stack on a flat surface to make
it flush.
5. Load the paper.
>For single-sided printing on headed paper, load the paper into the multi-purpose
tray with pre-printed side up and top edge into the printer.
>For two-sided (duplex) printing on headed paper, load the paper with pre-printed
side down and top edge away from the printer. (The duplex unit must be installed
for this function.)
>Envelopes should be loaded face-up with long edge into the printer. Do not select
duplex printing on envelopes.
>Do not leave space between the paper and the guides.
2
3
This manual suits for next models
1
Table of contents
Other Oki Printer manuals

Oki
Oki ML421 Series User manual

Oki
Oki PT340 User manual

Oki
Oki B6500 Series Quick start guide

Oki
Oki B8300n Use and maintenance manual

Oki
Oki ML420 Series User manual

Oki
Oki IP-6620 User manual

Oki
Oki C7000 User manual

Oki
Oki OKIPAGE14e Training manual

Oki
Oki MPS930b Operating and maintenance instructions

Oki
Oki OKIPAGE 12i Series Programming manual