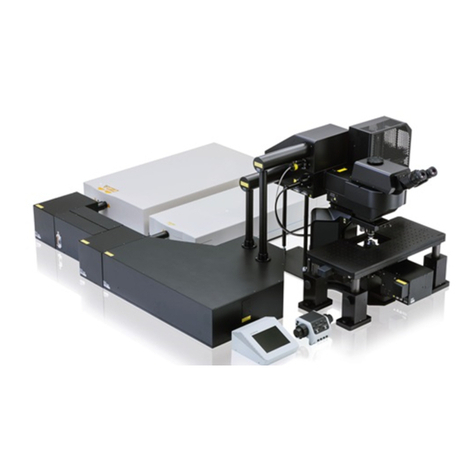
Olympus VS120 User manual

User’s Manual
[Simple Operation]
VS120
Virtual Slide System
Notice
This manual describes simple operating procedures so as the person who uses it for the
first time can use with use.
For detail information, refer to [Hardware] of the attached Instructions and [Online Manual]
of software
After reading this manual carefully, keep it in a safe place.
A X 8 0 3 6

CAUTION
Reproduction, copying or duplication of a part or all of this software and manual is prohibited.
Registered Trademarks
Microsoft, Microsoft Windows are registered trademarks of Microsoft Corporation.
Adobe, Adobe Flash Player are registered trademarks of Adobe Systems Incorporated.
Other brand names and product names are trademarks or registered trademarks of their
respective owners.

Contents
Contents
Contents i
1 Acquiring Images 1
1-1 VS120-L100·························································································· 1
1-2 VS120-S5 ··························································································· 11
1-3 VS120-S1 ··························································································· 19
1-4 Setting Focus Logic ········································································· 29
1-5 Changing the Save Location for Acquired Images ······················· 30
2 Databases 31
2-1 Opening Database ············································································ 31
2-2 Registering Images··········································································· 32
2-2-1 2-2-1 Registering Image Files on a Hard Disk Drive ······································ 32
2-2-2 Registering Image Files after Viewing ···························································· 33
2-3 Setting Permission for Images························································ 34
2-4 Viewing Images················································································· 35
3 Using Scan Projects 36
3-1 Saving Scan Projects ······································································· 36
3-2 Roading Scan Projects····································································· 36


Acquiring Images / VS120-L100
1
Page
1 Acquiring Images
1-1 VS120-L100
This section describes how to acquire images of several slide glasses by using the automatic transport function.
For this purpose, the following modes are available:
Quick Batch: It is to acquire images automatically without making precise settings.
When this mode is selected, follow procedures in the sections whitch carry (Quick Batch) marks
on top of the sections.
Expert Batch:It is to acquire images by setting the scanning area (XY) and focus.
When this mode is selected, follow procedures in the sections whitch carry (Expert Batch)
marks on top of the sections.
1 Starting Up the System (Quick Batch) (Expert Batch)
First, turn on the monitor , followed by the
microscope control box , slide loader , and
controller to start up the system.
After the system has started up, double click the
[VS-ASW] icon on the desktop to start up the
software and begin adjustment of the stage.

Acquiring Images / VS120-L100
2 Page
2 Placing a Slide Glass (Quick Batch) (Expert Batch)
Place slide glasses in the cassette.
Before placing slide glasses in the cassette,
wipe the glasses free of dust, etc.
Open the cassette cover of the slide loader.
Place the cassette in the designated part of the
loader.
Close the cassette cover of the slide loader.
1
25
26
50

Acquiring Images / VS120-L100
3
Page
3 Selecting Scan Mode (Quick Batch) (Expert Batch)
Select on the upper right of the screen.
Click or .
After clicking the button, do not open or close
the cassette cover.
The locations where the slide glasses have been
placed are detected.

Acquiring Images / VS120-L100
4 Page
4 Setting Slide Glass Information (Quick Batch) (Expert Batch)
Set information for each slide glass if necessary. It is possible to acquire the image
without setting any information.
Click the slide.
If you do not need to set slide glass information for
the slide, go to step .
Enter slide glass information.
Click to select the next slide.
Repeat steps and for all the slides for
which you need to set slide glass information.
Click .

Acquiring Images / VS120-L100
5
Page
5 Selecting the Objective Lens (Quick Batch) (Expert Batch)
Click the Objective Lens button that you want to
use.
(The check mark appears on the selected
objective lens button.)
To change the optional settings, go to step below.
If you do not need to change the optional settings, go to
step .
To capture the image in Z mode, click (Scan one
Z plane) button and then click [Virtual Z].
For more information, refer to the online help.
If you are using a database, you can set the location for
saving captured images to the hard disk drive (default)
or database.
To save captured images to the database, refer to
Section “1-5 Changing the Save Location for Acquired
Images” (page 30).
Click .
The [More Options] window appears.
Change the necessary settings in the [More
Options] window and click .
Click (Apply settings to all slides of all
cassettes).
The slides to which the settings have been
assigned turns yellow.

Acquiring Images / VS120-L100
6 Page
6 Acquiring an Overview Image (Expert Batch)
When setting is complete, click
.
(The 2x objective lens is used for scanning.)
Avoid movement or vibration of the system
during scanning of overview images.

Acquiring Images / VS120-L100
7
Page
7 Confirming Settings (Expert Batch)
+
Lines for the number of the slides to be scanned
are shown.
Click the lines you want to work on.
Change the objective lens as needed.
Click to edit the scan area.
Use the mark in the Edit screen to edit the scan
area, and then press the [Enter] key on the keyboard.
Click to edit the focus map.
Confirm the (focus map) in the Edit screen.
Delete the focus map by right clicking on it and selecting
[Delete] from the menu.
After editing the focus map, press the [Enter] key on the
keyboard.
The method for adjusting the focus can be set using
[Focus Logic]. If [Semi-automatic focusing] is selected,
focus can be adjusted manually after the focus is
automatically set.
For more information on Focus Logic, refer to Section
“1-4 Setting Focus Logic” (page 29) or the online help.
Click to select the next slide.
Repeat steps from to for all the slides for
which you need to set slide glass information.

Acquiring Images / VS120-L100
8 Page
8 Starting Scanning (Quick Batch) (Expert Batch)
Click .
Scanning starts.
Avoid movement or vibration of the system
during scanning.
9 Finishing Scanning (Quick Batch) (Expert Batch)
When the scan is complete, a screen similar to the
one shown on the left is displayed.
Click to complete the scan.

Acquiring Images / VS120-L100
9
Page
10 Turning Off the System (Quick Batch) (Expert Batch)
Open the cassette cover of the slide loader.
Pull out the cassette.
Close the cassette cover of the slide loader.
Take out the slide glasses from the cassette.

Acquiring Images / VS120-L100
10 Page
Click on the upper right corner of the
VS-ASW screen.
First, shut down the Windows, and turn off the the
microscope control box, slide loader, and monitor.

Acquiring Images / VS120-S5
11
Page
1-2 VS120-S5
This section describes how to acquire images of several slide glasses by using the automatic transport function.
For this purpose, the following modes are available:
Quick Batch: It is to acquire images automatically without making precise settings.
When this mode is selected, follow procedures in the sections whitch carry (Quick Batch) marks
on top of the sections.
Expert Batch:It is to acquire images by setting the scanning area (XY) and focus.
When this mode is selected, follow procedures in the sections whitch carry (Expert Batch)
marks on top of the sections.
1 Starting Up the System (Quick Batch) (Expert Batch)
First, turn on the monitor , followed by the
microscope control box , and controller to
start up the system.
After the system has started up, double click the
[VS-ASW] icon on the desktop to start up the
software and begin adjustment of the stage.
2 Placing a Slide Glass (Quick Batch) (Expert Batch)
Tilt the lever of the joystick to move the stage
toward you.
Place the slide glass on the stage.
Make sure that the specimen is placed
vertically and the label is on the front of the
slide glass.

Acquiring Images / VS120-S5
12 Page
3 Selecting Scan Mode (Quick Batch) (Expert Batch)
Select on the upper right of the screen.
Click or .
The locations where the slide glasses have been
placed are detected.

Acquiring Images / VS120-S5
13
Page
4 Setting Slide Glass Information (Quick Batch) (Expert Batch)
Set information for each slide glass if necessary. It is possible to acquire the image
without setting any information.
Click the slide.
If you do not need to set slide glass information for
the slide, go to step .
Enter slide glass information.
Click to select the next slide.
Repeat steps and for all the slides for
which you need to set slide glass information.
Click .

Acquiring Images / VS120-S5
14 Page
5 Selecting the Objective Lens (Quick Batch) (Expert Batch)
Click the Objective Lens button that you want to
use.
(The check mark appears on the selected
objective lens button.)
To change the optional settings, go to step below.
If you do not need to change the optional settings, go to
step .
To capture the image in Z mode, click (Scan one
Z plane) button and then click [Virtual Z].
For more information, refer to the online help.
If you are using a database, you can set the location for
saving captured images to the hard disk drive (default)
or database.
To save captured images to the database, refer to
Section “1-5 Changing the Save Location for Acquired
Images” (page 30).
Click .
The [More Options] window appears.
Change the necessary settings in the [More
Options] window and click .
Click (Apply settings to all slides of all
cassettes).
The slides to which the settings have been
assigned turns yellow.

Acquiring Images / VS120-S5
15
Page
6 Scanning an Overview Image (Expert Batch)
Click .
(The 2x objective lens is used for scanning.)
Avoid movement or vibration of the system
during scanning of overview images.

Acquiring Images / VS120-S5
16 Page
7 Confirming Settings (Expert Batch)
Lines for the number of the slides to be scanned
are shown.
Click the lines you want to work on.
Change the objective lens as needed.
Click to edit the scan area.
Use the mark in the Edit screen to edit the scan
area, and then press the [Enter] key on the keyboard.
Click to edit the focus map.
Confirm the (focus map) in the Edit screen.
Delete the focus map by right clicking on it and selecting
[Delete] from the menu.
After editing the focus map, press the [Enter] key on the
keyboard.
The method for adjusting the focus can be set using
[Focus Logic]. If [Semi-automatic focusing] is selected,
focus can be adjusted manually after the focus is
automatically set.
For more information on Focus Logic, refer to Section
“1-4 Setting Focus Logic” (page 29) or the online help.
Click to select the next slide.
Repeat steps from to for all the slides for
which you need to set slide glass information.
Other manuals for VS120
1
Table of contents
Other Olympus Microscope manuals

Olympus
Olympus SZX7 User manual

Olympus
Olympus DP74 User manual

Olympus
Olympus BX53M User manual

Olympus
Olympus fsx100 User manual

Olympus
Olympus U-LGPS User manual

Olympus
Olympus VS110 Fluorescence User manual

Olympus
Olympus BH2 Series User manual

Olympus
Olympus CKX41 User manual

Olympus
Olympus BX53 User manual

Olympus
Olympus U-D7RES User manual

Olympus
Olympus SZX16 User manual

Olympus
Olympus ORBEYE Manual

Olympus
Olympus SZX10 User manual

Olympus
Olympus BX3-URA User manual

Olympus
Olympus U-UVF248A User manual

Olympus
Olympus DP22 User manual

Olympus
Olympus IMT-2 User manual

Olympus
Olympus X-Tr Operating instructions

Olympus
Olympus BH2-6RE User manual

Olympus
Olympus U-CBS User manual