manuals.online logo
Brands
  1. Home
  2. •
  3. Brands
  4. •
  5. Ops-Core
  6. •
  7. Motorcycle Accessories
  8. •
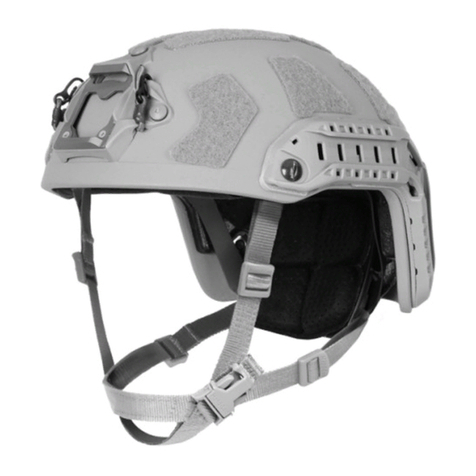
  9. Ops-Core SKULL User manual

Ops-Core SKULL User manual

Rear Exterior
Velcro &
Mounting
Plate for
Counterweights
Front Plate
OPERATOR’S MANUAL
© OPS-CORE 2017 06-01-400 REV. B
KIT INCLUDES:
(1) Skull Mounting System equipped with (1) ½” Front Pad , (1) ¼” Top Pad, (1) ¼” Rear Pad, (1) ¼” Let Side Pad,
(1) ¼” Right Side Pad; and additional (1) ½” Rear, (1) ½” Left Side, and (1) ½” Right Side Pads
ACCESSORIES
ATTACHMENT
The Front Plate and Rear Exterior Velcro®
provide convenient and secure ways to
attach and
detach various accessories
to different positions, allowing for
personalized customization.
The Skull Mounting System does not provide any type of protection for the head and does not offer any protection against neck, spinal, or brain injuries including those caused by rotational forces. Inspect the Skull Mounting System
before each use. Make sure the adjustment dials, plastic hardware, stitching, chinstrap, and t system components are not damaged, cracked, deformed, loose or showing signs of excessive wear. If they do, replace them or the Skull
Mounting System.
TheSkullMountingSystemiswarrantedfor(1)yearfromdateofpurchaseagainstmaterialdefectsand/orfaultyworkmanship.Thiswarrantyisinlieuofallotherwarranties,expressed,implied,orstatutory,andisstrictlylimitedtothetermshereof:
Ops-Core specically disclaims any warranty of merchantability or of usefulness for a particular purpose. The defective product must be returned to Ops-Core with proof of purchase and information describing
the nature of the problem. It is expressly agreed that the Purchaser’s sole and exclusive remedy for breach of the above warranty, for any tortious conduct of Ops-Core, or for any other cause of action, shall be the repair,
replacement, or credit, at Ops-Core’s discretion, of any components or parts thereof, that after examination by Ops-Core are proven to be defective. If it is determined by Ops-Core that the products failure was due
to accident, abuse, misuse, neglect, improper maintenance, or normal wear and tear, the product is not covered in this warranty. Ops-Core shall be released from all obligations under this warranty in the event
repairs or modications are made to any of the parts by persons other than its own service personnel. No agent, employee or representative of Ops-Core may bind Ops-Core to any afrmation, representation or
modication of the warranty concerning the goods sold under this contract. Exclusion of Consequential Damages – Purchaser specically understands and agrees that under no circumstances will Ops-Core be
liable to Purchaser for economic, special, incidental, or consequential damages or losses of any kind whatsoever, including but not limited to, loss of anticipated prots and any other loss caused by reason of the
non-operation of the goods.This exclusion is applicable to claims for breach of warranty, tortious conduct or any other cause of action against Ops-Core.
WARRANTY
VIDEO CAMERAS
The Skull Mounting System provides mounting options for various types of video
cameras. A Counterweight can be attached to the rear of the Skull Mounting System
to counterbalance the weight of accessories attached to the Front Plate.
ILLUMINATION / IFF
Skull Mounting System allows for streamlined mounting of devices such as IR
illuminators, lights, and IFF devices. The Rear Exterior Velcro provides a quick way to
attach and detach accessories.

SKULL MOUNTING SYSTEM SETUP
•Turn Adjustment Dials counter-clockwise (left) to make the Skull Mounting System is fully open.
•Place open Skull Mounting System on your head so that the Front Plate is centered over the
bridge of your nose. Begin adjustment by firmly pressing down on the top of the Front Plate while
tightening the Rear Adjustment Dial (turn clockwise to tighten).
•The distance from the top of the eyebrow to the bottom of the Skull Mounting System should be
approximately 0.5” - 1” as shown. The bottom of the Rear Pad should rest above nape of the neck.
FIT DIAL
OPERATION
•Proceed to tighten the front and rear Top
Adjustment Dials until the Skull Mounting
System fits securely on head. Readjust
dials as desired to achieve comfortable fit
and positioning.
•Once the front and rear Top Adjustment
Dials are set, the Rear Adjustment Dial
may need to be tightened again.
Right Side
Side Pads
0.5”-1”
Chinstrap
Buckle
Front
Head-Loc
Slider
Rear
Adjustment
Dial
TIGHTEN
(Skull Mounting System Fully Closed)
TURN DIALS CLOCKWISE TO TIGHTEN
LOOSEN
(Skull Mounting System Fully Open)
TURN DIALS COUNTER-CLOCKWISE TO LOOSEN
Side Rail
Adjustment Dial
Rear
Comfort Pad
Chinstrap Buckle
(LED Version Available)
Head-Loc®
Adjustment Sliders
Front
Plate
Large Counterweight
(with 1¼” Screws)
Small Counterweight
(with 5/8” Screws)
(Back of Skull Mounting System)
Attached
Counterweight
CHINSTRAP OPERATION
•Fasten the Chinstrap Buckle. With both hands, pull the two Rear Head-Loc Sliders on
the lower webbing straps toward your chin until snug.
•With both hands, pull the two Front Head-Loc Sliders on the webbing straps that come
from the front temples of the Skull Mounting System toward your chin until snug.
Rear Pad
Rear
Left Side
Front Plate
Top
Adjustment
Dials
Rear
Head-Loc
Slider
ABOUT YOUR SKULL MOUNTING SYSTEM
This manual covers the basic operating and tting instructions for the Ops-Core Skull Mounting System. The
Skull Mounting System is a multi-purpose headgear integration device that is compatible with a variety of
attachments. The Three Dial Adjustment system accommodates a full range of head shapes and sizes.
INTRODUCTION
COMFORT PAD SETUP
The Skull Mounting System is designed to t the majority of head
sizes. However, some users with smaller head sizes may nd the
thin pads to result in a loose t. If this occurs, replace the back and
side pads with the thicker comfort pads shown in dark grey.
COUNTERWEIGHT KIT
(OPTIONAL)
If you purchased a Counterweight Kit with your Skull Mounting
System kit includes (1) Small and (1) Large Counterweight with
corresponding hardware.
COUNTERWEIGHT
ATTACHMENT
NOTE: ONLY ATTACH A COUNTERWEIGHT IF YOU
NEED TO COUNTERBALANCE AN ATTACHMENT
AT THE FRONT OF THE Skull Mounting System.
Align Counterweight holes to the holes on the back of the Skull
Mounting System. Hold Counterweight in place and use your
fingers to loosely attach a screw through the Counterweight and
Skull Mounting System. Repeat for the remaining 2 holes.
Finish by using a screwdriver to tighten all 3 screws from the
outside of the Counterweight, making sure the Counterweight
is securely fastened to the Skull Mounting System.
FIT & ADJUSTMENT

Other Ops-Core Motorcycle Accessories manuals

Ops-Core FAST LOW PROFILE BALLISTIC APPLIQUÉ User manual

Ops-Core

Ops-Core FAST LOW PROFILE BALLISTIC APPLIQUÉ User manual

Ops-Core Fast Bump User manual

Ops-Core

Ops-Core Fast Bump User manual

Ops-Core MOTO MANDIBLE User manual

Ops-Core

Ops-Core MOTO MANDIBLE User manual

Ops-Core MBS User manual

Ops-Core

Ops-Core MBS User manual

Ops-Core ACH User manual

Ops-Core

Ops-Core ACH User manual

Ops-Core MOTO VISOR User manual

Ops-Core

Ops-Core MOTO VISOR User manual

Ops-Core Mesh Helmet Cover User manual

Ops-Core

Ops-Core Mesh Helmet Cover User manual

Ops-Core Mesh Helmet Cover User manual

Ops-Core

Ops-Core Mesh Helmet Cover User manual

Ops-Core FAST User manual

Ops-Core

Ops-Core FAST User manual

Ops-Core FORCE-ON-FORCE MANDIBLE User manual

Ops-Core

Ops-Core FORCE-ON-FORCE MANDIBLE User manual

Ops-Core FAST SF User manual

Ops-Core

Ops-Core FAST SF User manual

Ops-Core ACH-ARC User manual

Ops-Core

Ops-Core ACH-ARC User manual

Ops-Core UNIVERSAL EXTERIOR LOOP KIT User manual

Ops-Core

Ops-Core UNIVERSAL EXTERIOR LOOP KIT User manual

Popular Motorcycle Accessories manuals by other brands

HJC DS-X1 user manual

HJC

HJC DS-X1 user manual

Prospec EASY CLUTCH PRO installation instructions

Prospec

Prospec EASY CLUTCH PRO installation instructions

SRC H-X-ADV-14-01-SL quick start guide

SRC

SRC H-X-ADV-14-01-SL quick start guide

Thunderbike Old style manual

Thunderbike

Thunderbike Old style manual

AGV GP TECH Owner's instructions

AGV

AGV GP TECH Owner's instructions

Shad SH26 owner's manual

Shad

Shad SH26 owner's manual

Tecmen iMux Series owner's manual

Tecmen

Tecmen iMux Series owner's manual

gilles.tooling VCR38GT owner's manual

gilles.tooling

gilles.tooling VCR38GT owner's manual

CF MOTO 6AQV-801300-1000 Setup instructions

CF MOTO

CF MOTO 6AQV-801300-1000 Setup instructions

Gude 4/9-13 Original operating instructions

Gude

Gude 4/9-13 Original operating instructions

Dynojet Power Vision installation guide

Dynojet

Dynojet Power Vision installation guide

Sena Latitude SR user guide

Sena

Sena Latitude SR user guide

Sena M1 user guide

Sena

Sena M1 user guide

Cobra POWRPRO Fi2000 instruction manual

Cobra

Cobra POWRPRO Fi2000 instruction manual

MRA 4025066169757 Mounting instructions

MRA

MRA 4025066169757 Mounting instructions

Sigma MC 1812 installation guide

Sigma

Sigma MC 1812 installation guide

Memphis Shades 2321-0054 Mounting instructions

Memphis Shades

Memphis Shades 2321-0054 Mounting instructions

DYNATEK D3K1-4 installation instructions

DYNATEK

DYNATEK D3K1-4 installation instructions

manuals.online logo
manuals.online logoBrands
  • About & Mission
  • Contact us
  • Privacy Policy
  • Terms and Conditions

Copyright 2025 Manuals.Online. All Rights Reserved.