Ops-Core UNIVERSAL EXTERIOR LOOP KIT User manual

COLOR
For FAST®, Sentry, ACH and TBH Helmet Systems
This product is covered by one or more patents.
For more information visit www.gentexcorp.com/patents
© OPS-CORE 2017 UM-1039 REV. A
UNIVERSAL
EXTERIOR LOOP KIT
OPERATOR’S MANUAL
TAN FOLIAGE GREEN BLACK URBAN GRAY
LOOP PLACEMENT GUIDE
FAST HIGH CUT
FAST SUPER HIGH CUT
SENTRY
ACH / TBH
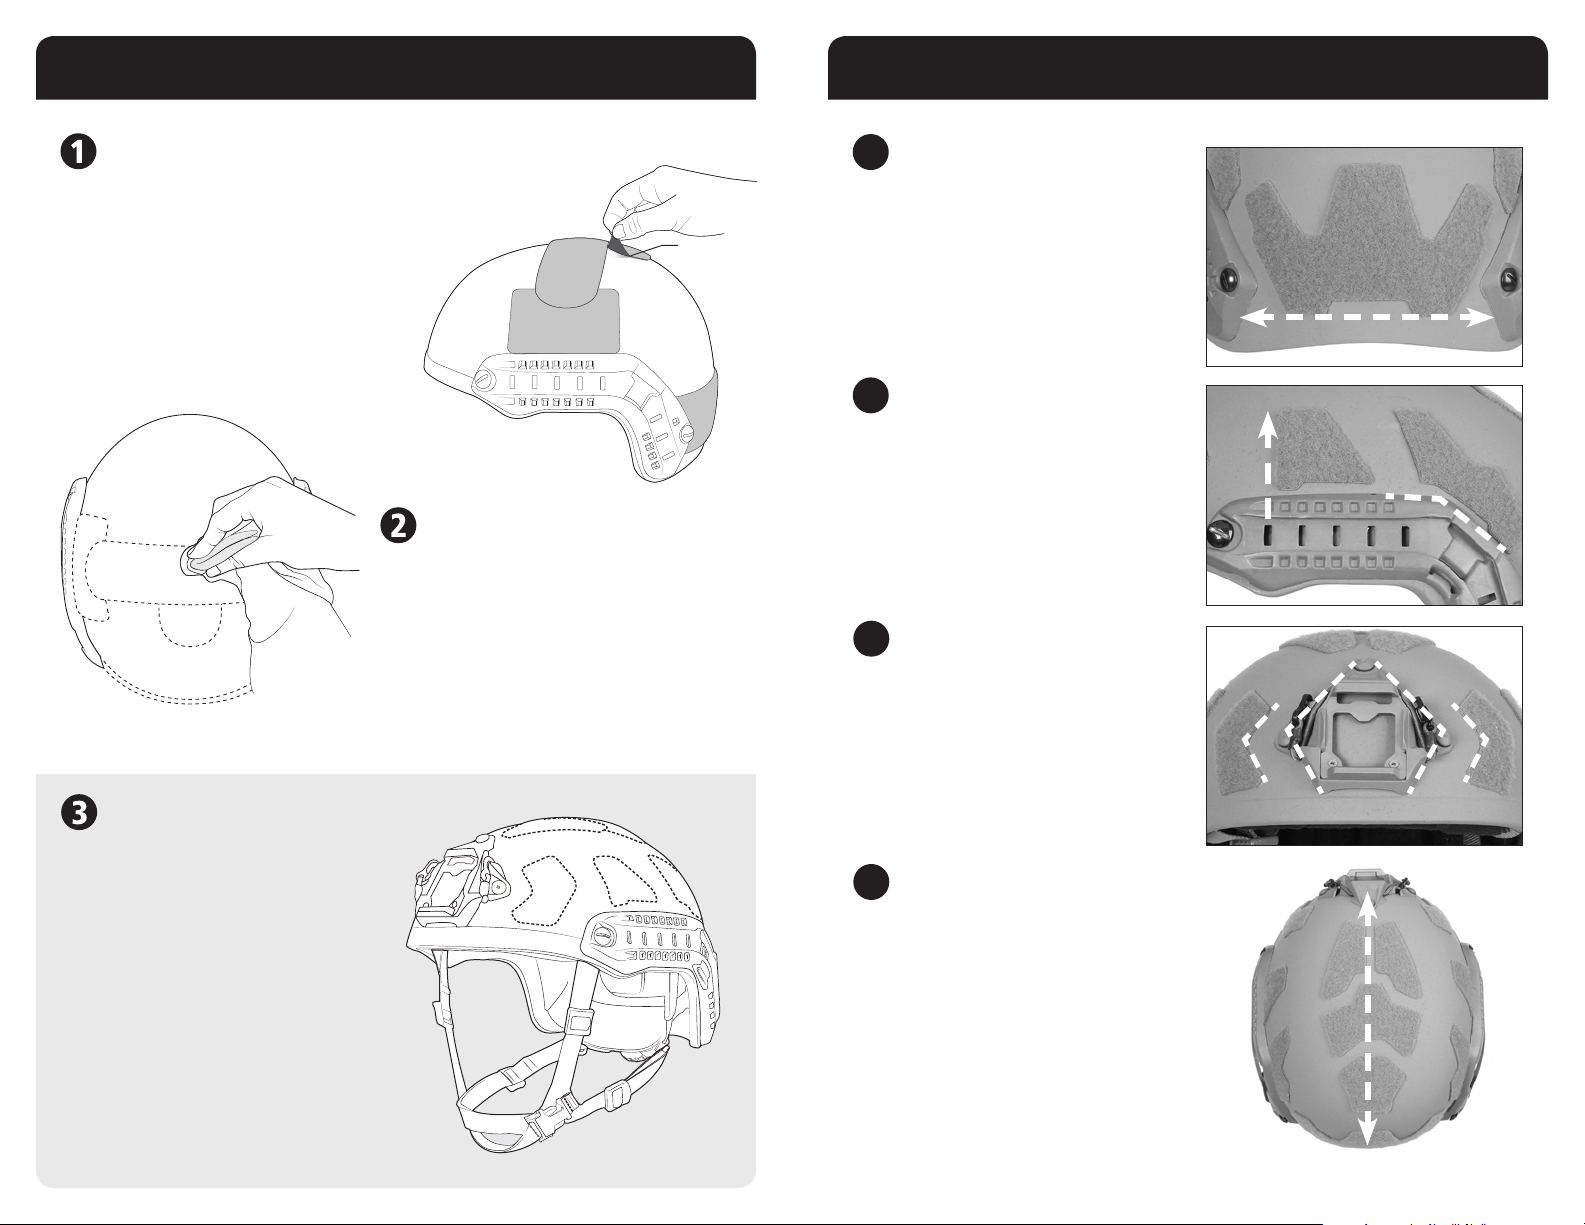
CAREFULLY REMOVE OLD LOOP
WARNING: DO NOT FORCEFULLY RIP THE LOOP OFF. THIS WILL CAUSE
SEVERE DAMAGE TO THE PAINT ON THE HELMET SHELL.
Using your fingers, carefully peel the Loop away from the
helmet shell. DO NOT FORCEFULLY RIP THE LOOP OFF!
Continue this process by slowly pulling it back until all
Loop is removed.
PLACEMENT PREPARATION
Using the “Loop Placement Guide” on the back
page and the “New Loop Installation” steps to
the right, carefully align all Universal Exterior Loop
pieces to their proper positions. Test fit all pieces
before removing the backing. The adhesive on the
Loop is pressure sensitive. Once in place it needs to
be pressed down firmly. Allow up to 24 hours for
adhesive to reach maximum bonding strength.
Slowly
Peel Back
*ALL DIAGRAMS AND INSTALLATION PHOTOS
ARE SHOWING THE FAST BALLISTIC HIGH CUT
HELMET. YOUR HELMET SHELL AND LOOP
PLACEMENT MAY VARY.
CLEAN THE HELMET SHELL
To remove excess adhesive from old Loop and to ensure
optimal adhesion of new Loop, gently rub affected areas
with a clean towel and Isopropyl Rubbing Alcohol. Do not
use harsh chemicals. If traces of adhesive remain, you can
use Goo Gone®to remove stubborn residue.Wipe the area
with alcohol again after use. Allow the helmet to dry before
attempting to place new Loop onto the shell’s surface.
HELMET SHELL PREPARATION NEW LOOP INSTALLATION
INSTALL TOP LOOP
Using the top corner and rear loop patch as reference,
nd the center of the helmet. Align and apply the
top loop patches as shown on the loop placement
guide. The gaps between these loop patches may vary
depending on the size and type of the helmet.
7
INSTALL REAR LOOP
Using the rear section of the ARCs as a reference,
center and apply the rear loop patch on the back of
the helmet. The lower edge of the rear loop patch
should be level.
4
INSTALL SIDE RAIL LOOP
Using the rst notch on the front of the ARCs as a
reference, align and apply the front rail loop patch.
Using the corner section of the rail as a reference,
align and apply the rear rail loop patch. Mirror this
process on the other side of the helmet.
5
INSTALL FRONT LOOP
Using the shroud and the ARCs as a reference, center
and apply the front loop patches. The notched section
of the front loop patch should be evenly offset from the
rounded corner of the shroud.
6
Other Ops-Core Motorcycle Accessories manuals

Ops-Core
Ops-Core FAST SF User manual

Ops-Core
Ops-Core Mesh Helmet Cover User manual

Ops-Core
Ops-Core MBS User manual

Ops-Core
Ops-Core Fast Bump User manual

Ops-Core
Ops-Core FAST LOW PROFILE BALLISTIC APPLIQUÉ User manual

Ops-Core
Ops-Core ACH-ARC User manual

Ops-Core
Ops-Core FORCE-ON-FORCE MANDIBLE User manual

Ops-Core
Ops-Core ACH User manual

Ops-Core
Ops-Core SKULL User manual

Ops-Core
Ops-Core FAST User manual


