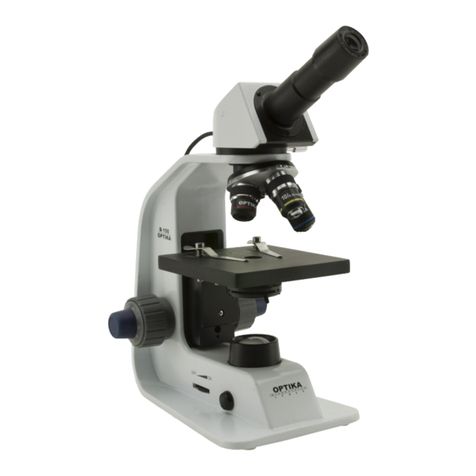
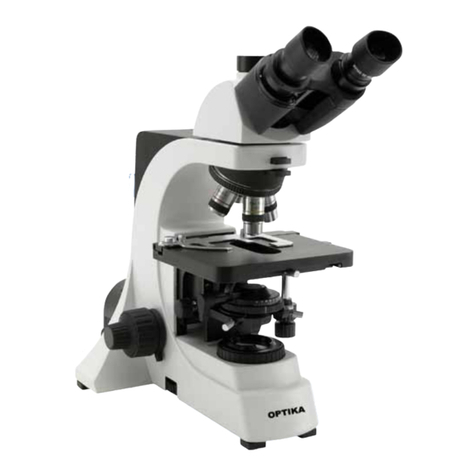
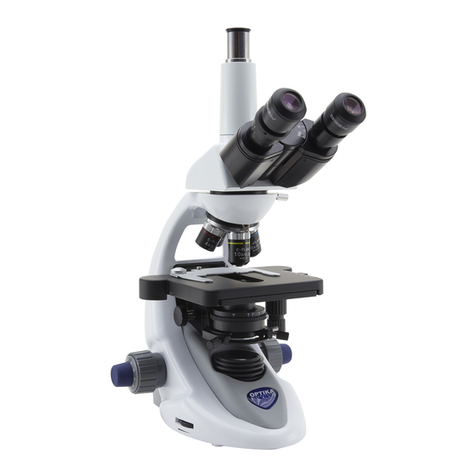
Optika B-350 User manual

OPERATION MANUAL
GUIDA UTENTE
MANUEL D’INSTRUCTIONS
B-350
MANUAL DE INSTRUCCIONES
BEDIENUNGSANLEITUNG

Page 2
INDEX
1.0 DESCRIPTION pag. 3
2.0 INTRODUCTION pag. 6
3.0 UNPACKING AND ASSEMBLY pag. 7
4.0 USING THE MICROSCOPE pag. 9
4.1 Observation head
4.2 Place the specimen on the stage
4.3 Illumination system settings
4.4 Interpupillary distance
4.5 Focus tension adjustment
4.6 Diopter adjustment
4.7 Condenser
4.8 Numerical aperture setting
4.9 Phase rings centering (models B-352Ph and B353Ph)
4.10Additionallters
5.0 MAINTENANCE
pag. 12
5.1 Microscopy environment
5.2 Before and after using the microscope
5.3 Precautions for a safe use
5.4 Cleaning the optics
6.0 TECHNICAL SPECIFICATIONS pag 13
7.0 RECOVERY AND RECYCLING pag 14

Page 3
1.0 DESCRIPTION
BINOCULAR OBSERVATION
HEAD
HEAD LOCKING
SCREW (1)
REVOLVING NOSEPIECE
STAGE
TRANSLATION KNOBS
MAIN BODY
BRIGHTNESS
ADJUSTMENT
CONDENSER CENTERING
SCREWS (2)
LED
ILLUMINATOR
IRIS DIAPHRAGM
(3)
EYEPIECE
FLIP OUT FILTER
HOLDER
LIGHT PATH
SELECTOR LEVER
PHOTO PORT
CONDENSER
TRINOCULAR OBSERVATION HEAD
FOCUS STOP KNOB
LAMP COVER
OBJECTIVE
INTERPUPILLARY
DISTANCE SCALE

Page 4
SLIDE CLAMP
FINE FOCUSING KNOB
MAINS CABLE
ATTACHMENT
FUSE
DIOPTRIC
ADJUSTMENT RING
ON-OFF SWITCH
CONDENSER HEIGHT
ADJUSTMENT (4)
TENSION
ADJUSTMENT KNOB (5)
COARSE FOCUSING KNOB
1.0 DESCRIPTION

Page 5
CONDENSER
TURRET (6) PHASE RINGS
CENTERING LEVERS (7)
1.0 DESCRIPTION

Page 6
Thismicroscopeisascienticprecisioninstrumentdesignedtolastformanyyearswithaminimumofmain-
tenance.Itisbuilttohighopticalandmechanicalstandardsandtowithstanddailyuse.
Optika reminds you that this manual contains important information on safety and maintenance, and that it
must therefore be made accessible to the instrument users.
Optikadeclinesanyresponsibilityderivingfrominstrumentusesthatdonotcomplywiththisma-nual.
2.1 Safety guidelines
Thismanualcontainsimportantinformationandwarningsregardingsafetyaboutinstallation,useand
maintenance of the microscope B-350. Please read this manual carefully before using the equipment.
Toensuresafeuse,theusermustreadandfollowallinstructionsinthismanual.OPTIKAproducts
are designed for safe use in normal operating conditions. The equipment and accessories described
in the manual are manufactured and tested according to industry standards for safety instrumentation
laboratory. Misuse can cause personal injury or damage to the instrument. Keep this manual at hand
close to the instrument, for an easy consultation.
2.2 Electrical safety
Beforeconnectingthepowercordtowalloutlet,ensurethatyourmainsvoltageforyourregioncorre-
spondstothevoltagesupplyoftheinstrument,andthattheilluminator’sswitchisinpositionOFF.The
usermustobservethesafetyregulationsinforceinhisregion.TheinstrumentisequippedwithCEsa-
fety marking, in any case the user has full responsibility concerning the safe use of that instrument.
2.3 Warning/Caution symbols used in this manual
Theusershouldbeawareofsafetyaspectswhenusingtheinstrument.Warningorhazardsymbols
areshownbelow.Thesesymbolsareusedinthismanual.
The instructions on this symbol to avoid possible severe personal injuries.
Warning of use; the incorrect operation on the instrument can cause damages
to the person or instrument.
Possibility of electric shock.
Attention: high temperature surfaces. Avoid direct contact.
Technical notes or usage tips.
2.0 INTRODUCTION

Page 7
3.0 UNPACKING AND ASSEMBLY
The microscope is located in a styrofoam moulded packaging. After removing the adhesive tape from
all packaging, lift the top half of the packaging. Pay attention not to drop or damage the optical com-
ponents(objectivesandeyepieces).Extractthemicroscopefromitspackagingwithbothhands(one
aroundthetoparmandonearoundthebase)andplaceitonastablesurface.Keepitawayfrom
solvents, chemical vapors and excessive moisture. Avoid high temperature environments, the direct
sunshineandexcessivevibrations,whichcouldaffecttheperformanceoftheinstrument.
3.1 Operating environment
Temperature: : 10 - 36°C (50 – 96.8°F)
Relative humidity: 0 – 85% up to 30°C (86°F)
3.2 Unpacking microscope
Control the packaging to ensure that all material is present. We recommend that you take note of all
the accessories to facilitate any future orders of spare parts and technical support calls. Make sure
that in the packaging no small accessories or small parts remain. Please keep the original packaging
in a safe place for future transport needs of microscope or accessories.
Nevertouchtheglasssurfacessuchaslensesorlters.Tracesofgreaseorotherresiduescanredu-
cethevisionqualityofthenalimageandcorrodethesurfaceoflensesinashorttime.
3.3 Installing the microscope
Settheopticalheadonthetoparmthroughthelockingscrew.Inserttheeyepiecesintothetubesand
lockthemwiththesmallscrewswhicharelocatedtothesideofthetubes.Removetheprotectivelm
from the stage of the microscope.
3.4 Connect the mains plug into the socket at the base

Page 8
Make sure, before you turn the illumination on, that the voltage selector is set to the mains voltage for
your region.
Thepowercordshouldbeusedonlyonnetworksocketsequippedwithadequategrounding.
Contact a technician to check the state of your electrical system.
Ifthereisnoneedtoinstalladditionalaccessories,theinstrumentisnowreadyforuse.
3.0 UNPACKING AND ASSEMBLY

Page 9
Oncepositionedandinstalledwiththenecessarycomponents,themicroscopeisreadytobeused.
Yourmicroscopeisalaboratoryinstrumentdesigned to last. Handle italwayscarefullyandavoid
abrupt vibrations or shocks.
Alwaysdisconnectthepowercablefromthemicroscopewhennotinuseforlongtime,whileyou
cleanitorwhenyouperformanymaintenance.
AVOID DISASSEMBLING THE INSTRUMENT
Donotdisassembletheinstrument.Thisentailsthecancellationofthewarrantyandmaycausemal-
function.
4.1 Observation head
Loosenthelock-screw(1),turntheobservationheadtoacomfortablepositionforobservation,and
thenlockthelock-screw.
4.2 Place the specimen on the stage
Lock the specimen slide on the mechanical stage using the slide clamp. Ensure that the spe¬cimen is
centred over the stage opening by adjusting the coaxial knobs of the stage.
4.3 Illumination system settings
ThemicroscopeisttedwithawhiteLEDilluminator.Beforeturningontheilluminationsystem,read
thesection5.3aboutelectricalsafetyprecautions.Inserttheplugofthecableintothepowersocket
andturnontheswitchonthebackofthemainbody.Turnthebrightnessadjustmentknobtoabright-
ness suitable for observation.
4.4 Adjust interpupillary distance
Holdtherightandleftpartsoftheobservationheadwithbothhandsandadjusttheinterpupil¬lary
distancebyturningthetwopartsuntilonecircleoflightcanbeseen.
Thewhitedot(°)placedontherighteyepieceshowsthesetinterpupillarydistance.Justremember
this value to help on later settings.
4.5 Focus tension adjustment
The tension of the coarse focusing knob is preset by factory. To change the tension according to your
preference,justrotatetheknob(5)clockwiseinordertoincreaseit.
Excessive tension could damage the mechanism of focus. A too loosed tension causes the descent
of the stage by gravity or a sudden loss of focus. In this case, rotate the knob (5) to increase the ten-
sion.
4.0 USING THE MICROSCOPE
Page 10
4.6 Diopter adjustment
Turnthedioptricadjustmentringontherighteyepiecedioptricuptoalignthebottomwiththegradua-
tedring.Turnthecoarsefocusknobinordertofocustheslidewithanobjectivewithlowmagnica-
tion.Adjustthenefocusknobuntilyouobtainaclearanddenedpictureobservingwiththeright
eye,andthenrepeattheoperationwiththeleftdioptriccompensationringandthelefteye.Whenthe
imageappearsinfocus,choosethenecessaryobjectivewiththerevolvingnosepiece.
4.7 Condenser
Raiseorlowerthecondenserthroughtheknob(4)toobtainaclearanduniformilluminationofthe
sample.
Tocenterthecondenser:completelyclosetheirisdiaphragm(3).Usingthecondensercenteringscrews
(2),movethediaphragminthecenteroftheeldofview.Thengraduallyexpandthediaphragmuntil
itistangenttotheedgesoftheeldofview.Ifnecessary,youcanperformanadditionaladjustment.
Thecondenseriscenteredwhentheedgesofirisdiaphragmaretangenttotheeldofview.
4.8 Numerical aperture setting
The value of the numerical aperture (N.A.) of the diaphragm is an indication of the contrast of the illu-
minationsystem.Matchingthevalueofilluminationsystem’sN.A.withthatoftheobjectiveensures
the best results in terms of contrast and image quality. To set the numerical aperture of the Illuminator,
adjusttheopeningoftheirisdiaphragm(3).Inthiswayyoucontrolcontrastandimageresolution.For
sampleswithlowcontrastsettheiristoabout75%ofthevalueoftheobjective’snumericalapertu-
re.
4.9 Phase rings centering (models B-352Ph and B353Ph)
Formodelsequippedwithphasecontrastset,youhavetoperformthecenteringofthephaserings.
Remove an eyepiece from the head and insert the centering telescope in the empty tube.
4.0 USING THE MICROSCOPE
Page 11
Insert the 10x objective rotating the nosepiece.
Rotate the turret of the condenser (6) until you reach the inscription “10”.
Looseningthelockscrewofthecenteringtelescope,focusonthelightringthatyouobserve.
Loosenthelockingscrewsofthephaseringscenteringlevers(7)andslidethemforwardorbackward
untilthebrightlightringisperfectlyalignedwiththedarkring.
Repeatfortheotherobjectives(onlyasavericationofthecorrectcentering).
Oncecenteredwith100xobjective,thecondenserwillbeautomaticallycenteredalsowiththeother
objectives.
Phaseringswillbecenteredwhenyouseeanimagelikethis:
4.10 Additional lters
Theblue,yellowandfrostedglasslterscanbeinsertedintheip-outlterholderunderneaththe
condenser.
4.0 USING THE MICROSCOPE

Page 12
5.1 Microscopy environment
Thismicroscopeisrecommendedtobeusedinaclean,dryandshockfreeenvironmentwithatem-
peratureof0-40°Candamaximumrelativehumidityof85%(noncondensing).Useadehumidierif
needed.
5.2 Before and after using the microscope
- Themicroscopeshouldalwaysbekeptverticallywhenmovingitandbecarefulsothatnomoving
parts, such as the eyepieces, fall out.
- Never mishandle or impose unnecessary force on the microscope.
- Never attempt to service the microscope yourself.
- Afteruse,turnoffthelightimmediately,coverthemicroscopewiththeincludeddust-cover,andkeep
it in a dry and clean place.
5.3 Precautions for a safe use
- Beforeplugginginthepowercordwiththesupply,makesurethatthesupplyingvoltageofyourregion
matcheswiththeoperationvoltageoftheequipmentandthatthelampswitchisinoff-position.
- Donotturnthepoweronandoff,offandonimmediatelyasthiswillshortenthelifespanofthebulb
and may cause damage to the electrical system.
- Users should observe all safety regulations of the region. The equipment has acquired the CE safety
label.However,usersdohavefullresponsibilitytousethisequipmentsafely.
5.4 Cleaning the optics
- Iftheopticalpartsneedtobecleanedtryrstto:usecompressedair.
- Ifthatisnotsufcient:useasoftlint-freepieceofclothwithwaterandamilddetergent.
- Andasanaloption:usethepieceofclothmoistenedwitha3:7mixtureofethanolandether.
Note: ethanol and ether are highly ammable liquids. Do not use them near a heat source, near
sparksornearelectricequipment.Usethesechemicalsinawellventilatedroom.
- Remembertoneverwipethesurfaceofanyopticalitemswithyourhands.Fingerprintscandamage
the optics.
- Do not disassemble objectives or eyepieces in attempt to clean them.
If you need to send the microscope to Optika for maintenance, please use the original packaging.
5.0 MAINTENANCE
Description: Teaching and routine laboratory microscope.
Die-castmetalstand,withgreatstabilityandergonomics,intendedfortransmittedlight
observation.
Illumination: Lightsource:X-LEDtypewithwhiteLED;brightnessadjustmentthroughapotentiome-
ter placed in the bottom right side of the stand.
LEDpower3W,comparableto30-35Whalogenlamp.
Average LED lifetime about 50.000 hours.
Thecollectinglensoftheilluminatorcanaccommodateadditionallters(blue,yellow,
frosted).
Inputvoltage:110/230Vac,50/60Hz,0,4/0,8A;Fuse:F2A250V
Maximumpower:7W
Observation
modes:
Brighteld,darkeld,phasecontrast,uorescence
Focus: Coaxialcoarseandne(graduated,0.002mm)focusingsystem,withfocusingstop
mechanism (to prevent the objective from hitting the slide).
Focus knobs tension is adjustable.
Stage: Doublelayerwithmechanicalslidingstage,dimensions160x142mm,mo¬vingran-
ge76x52mm.Withsampleholderfortwoslides.
Vernierscalewith0.1mmprecisiononbothtranslationaxis.
Nosepiece: Revolvingnosepiecewith4or5positions,withball-bearingmovement.
Head: Binocular or trinocular, 30° inclined and 360° rotating.
Diopter adjustment on both eyepieces.
Interpupillary adjustment range: 55-75 mm.
Eyepieces: Wideeldeyepieceswith20mmeldnumber.
Objectives: Achromatic set (160mm tube length):
-) 4X/0.10, 10X/0.25, 40X/0.65, 100X/1.25 (oil immersion)
PlanAchromatic set (160mm tube length):
-) 4X/0.10, 10X/0.25, 40X/0.65, 100X/1.25 (oil immersion)
E-PlanAchromaticIOSset(innity-corrected,45mmparfocaldistance):
-) 4X/0.10, 10X/0.25, 40X/0.65, 100X/1.25 (oil immersion)
PlanAchromatic Phase Contrast set (160mm tube length):
-) 4X/0.10, 10X/0.25Ph, 40X/0.65Ph, 100X/1.25Ph (oil immersion)
E-PlanAchromaticIOSPhaseContrastset(innity-corrected,45mmparfocaldistance):
-) 10X/0.25Ph, 20X,0.40Ph, 40X/0.65, 100X/1.25Ph (oil immersion)
PlanAchromaticDarkeldset(160mmtubelength):
-)4X/0.10,10X/0.25,40X/0.65,100X/1.25withiris(oilimmersion)
Allopticstreatedwithanti-fungussystem.
Condenser: Abbecondenser,N.A.1,25withcenteringsystem.
Phasecontrastcondenser(for10X,40X,100Xobjectives),brighteldanddarkeld.
Phasecontrastcondenser(for10X,20X,40X,100Xobjectives)andbrighteld.
Darkeldcondenserforoilimmersion,N.A.1,36withbuilt-inX-LED.
Dimensions: HEIGHT:445mm(withoutattachment)/520mm(withattachment).
WIDTH: 205 mm
DEPTH: 375 mm
WEIGHT: 4 Kg
Accessories: User manual and dust cover included.

Page 13
6.0 TECHNICAL SPECIFICATIONS
Description: Teaching and routine laboratory microscope.
Die-castmetalstand,withgreatstabilityandergonomics,intendedfortransmittedlight
observation.
Illumination: Lightsource:X-LEDtypewithwhiteLED;brightnessadjustmentthroughapotentiome-
ter placed in the bottom right side of the stand.
LEDpower3W,comparableto30-35Whalogenlamp.
Average LED lifetime about 50.000 hours.
Thecollectinglensoftheilluminatorcanaccommodateadditionallters(blue,yellow,
frosted).
Inputvoltage:110/230Vac,50/60Hz,0,4/0,8A;Fuse:F2A250V
Maximumpower:7W
Observation
modes:
Brighteld,darkeld,phasecontrast,uorescence
Focus: Coaxialcoarseandne(graduated,0.002mm)focusingsystem,withfocusingstop
mechanism (to prevent the objective from hitting the slide).
Focus knobs tension is adjustable.
Stage: Doublelayerwithmechanicalslidingstage,dimensions160x142mm,mo¬vingran-
ge76x52mm.Withsampleholderfortwoslides.
Vernierscalewith0.1mmprecisiononbothtranslationaxis.
Nosepiece: Revolvingnosepiecewith4or5positions,withball-bearingmovement.
Head: Binocular or trinocular, 30° inclined and 360° rotating.
Diopter adjustment on both eyepieces.
Interpupillary adjustment range: 55-75 mm.
Eyepieces: Wideeldeyepieceswith20mmeldnumber.
Objectives: Achromatic set (160mm tube length):
-) 4X/0.10, 10X/0.25, 40X/0.65, 100X/1.25 (oil immersion)
PlanAchromatic set (160mm tube length):
-) 4X/0.10, 10X/0.25, 40X/0.65, 100X/1.25 (oil immersion)
E-PlanAchromaticIOSset(innity-corrected,45mmparfocaldistance):
-) 4X/0.10, 10X/0.25, 40X/0.65, 100X/1.25 (oil immersion)
PlanAchromatic Phase Contrast set (160mm tube length):
-) 4X/0.10, 10X/0.25Ph, 40X/0.65Ph, 100X/1.25Ph (oil immersion)
E-PlanAchromaticIOSPhaseContrastset(innity-corrected,45mmparfocaldistance):
-) 10X/0.25Ph, 20X,0.40Ph, 40X/0.65, 100X/1.25Ph (oil immersion)
PlanAchromaticDarkeldset(160mmtubelength):
-)4X/0.10,10X/0.25,40X/0.65,100X/1.25withiris(oilimmersion)
Allopticstreatedwithanti-fungussystem.
Condenser: Abbecondenser,N.A.1,25withcenteringsystem.
Phasecontrastcondenser(for10X,40X,100Xobjectives),brighteldanddarkeld.
Phasecontrastcondenser(for10X,20X,40X,100Xobjectives)andbrighteld.
Darkeldcondenserforoilimmersion,N.A.1,36withbuilt-inX-LED.
Dimensions: HEIGHT:445mm(withoutattachment)/520mm(withattachment).
WIDTH: 205 mm
DEPTH: 375 mm
WEIGHT: 4 Kg
Accessories: User manual and dust cover included.

Page 14
7.0 RECOVERY AND RECYCLING
Art.13 Dlsg 25 july 2005 N°151. “According to directives 2002/95/EC, 2002/96/EC and 2003/108/EC
relatingtothereductionintheuseofhazardoussubstancesinelectricalandelectronicequipment
andwastedisposal.”
The basket symbol on equipment or on its box indicates that the product at the end of its useful life
should be collected separately from other waste.
The separate collection of this equipment at the end of its lifetime is organized and managed by
the producer. The user will have to contact the manufacturer and follow the rules that he adopted
for end-of-life equipment collection. The collection of the equipment for recycling, treatment and en-
vironmentally compatible disposal, helps to prevent possible adverse effects on the environment
and health and promotes reuse and/or recycling of materials of the equipment. Improper disposal
of the product involves the application of administrative penalties as provided by the laws in force.

Table of contents
Other Optika Microscope manuals

Optika
Optika B-500DK User manual

Optika
Optika B-380 Series User manual

Optika
Optika XDS-3FL User manual

Optika
Optika B-500 MET User manual

Optika
Optika IM Series User manual

Optika
Optika B-150 ALC Series User manual

Optika
Optika B-510 Series User manual

Optika
Optika B-600 MET User manual

Optika
Optika ST-50Led User manual

Optika
Optika B-500TiFL User manual

Optika
Optika LAB-1 User manual

Optika
Optika B-500 User manual

Optika
Optika OPTIStar OS-SZ1 User manual

Optika
Optika B-1000 POL User manual

Optika
Optika B-380 Series User manual

Optika
Optika DM-5UP User manual

Optika
Optika B-1000 MET User manual

Optika
Optika B-150POL User manual

Optika
Optika OPTIGEM User manual

Optika
Optika LAB User manual