manuals.online logo
Brands
  1. Home
  2. •
  3. Brands
  4. •
  5. ORiNG
  6. •
  7. Switch
  8. •
  9. ORiNG IGS-9084GP-LA User manual

ORiNG IGS-9084GP-LA User manual

Quick Installation Guide
Version 1.0
Quick Installation Guide
Introduction
PRINTED ON RECYCLED PAPER
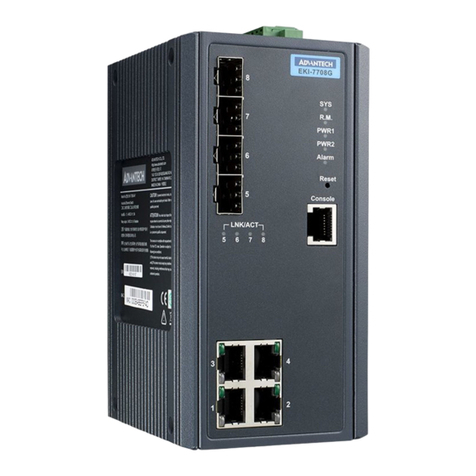
ar e l ay e r2 m a na g ed Et h er n et s w it c he s w it hIG S -9 0 84 G P- L A
8x10/100/1000Base-T(X) ports and 4x100/1000Base-X SFP ports. The
switches support Ethernet Redundancy protocol, O-Ring (recovery time <
30ms over 250 units of connection) and MSTP (RSTP/STP compatible) can
protect your mission-critical applications from network interruptions or
temporary malfunctions with its fast recovery technology. And support wide
operating temperature from -40 C to 75 C. can also be
o o IGS-9084GP-LA
managed centralized and convenient by Open-Vision, Except the Web-
based interface, Telnet and console (CLI) configuration. Therefore, the
switch is one of the most reliable choice for highly-managed and Fiber
Ethernet application.
Preparation
Before you begin installing the switch, make sure you have all of the package
contents available and a PC with Microsoft Internet Explorer 6.0 or later, for
using web-based system management tools.
Elevated Operating Ambient: If installed in a closed or multi-unit rack
assembly, the operating ambient temperature of the rack environment may be
greater than room ambient. Therefore, consideration should be given to
installing the equipment in an environment compatible with the maximum
ambient temperature (Tma) specified by the manufacturer.
Reduced Air Flow: Installation of the equipment in a rack should be such
that the amount of air flow required for safe operation of the equipment is
not compromised.
Safety & Warnings
Dimension
Panel Layouts
1. PWR indicators
2. Faulty relay indicator
3. R.M. status LED
4. Ring status LED
5. Reset button
6. Link/Act LED for Gigabit LAN
ports
7. Gigabit LAN ports
8. Speed LED for Gigabit LAN ports
9. Console port
10. SFP Ports
Package Contents
Contents
DIN-rail Kit
CD
IGS-9084GP-LA
Pictures Number
X 1
X 1
X 1
Front View
Top Panel
The device is shipped with the following items. If any of these items is
missing or damaged, please contact your customer service representative for
assistance.
QIG
Console Cable
X 1
X 1
X 1
Wall-mount Kit
Rear View
12
1
1. Wall-mount screw holes
2. Din-rail screw holes
1. Terminal blocks: PWR1, PWR2
, Relay
2. Ground wire.
1
Installation
Step 1: Slant the switch and screw the Din-rail kit onto the back of the switch, right in
the middle of the back panel.
Step 2: Slide the switch onto a DIN-rail from the Din-rail kit and make sure the switch
clicks into the rail firmly.
DIN-rail Installation
Step 1: Screw the wall-mount kit onto the rear panel of the switch. A total of six
screws are required, as shown below.
Step 2: Use the switch, with wall mount plates attached, as a guide to mark the
correct locations of the four screws.
Step 3: Insert a screw head through the large parts of the keyhole-shaped apertures,
and then slide the switch downwards. Tighten the screws for added stability.
Wall-mounting
IGS-9084GP-LA
Q I G IGS-9084GP-LA 1907-2-29-IGS9084GPLA-1.0
Mechanical Loading: Mounting of the equipment in the rack should be such that a
hazardous condition is not achieved due to uneven mechanical loading.
Circuit Overloading: Consideration should be given to the connection of the equipment
to the supply circuit and the effect that overloading of the circuits might have on overcurrent
protection and supply wiring. Appropriate consideration of equipment nameplate ratings
should be used when addressing this concern.
Network Connection
The switch provides standard Ethernet ports. According to the link type, the switch uses
CAT 3,4,5,5e UTP cables to connect to any other network devices (PCs, servers,
switches, routers, or hubs). Please refer to the following table for cable
specifications.
Cable Types and Specifications:
Cable Type Max. Length Connector
10BASE-T Cat. 3, 4, 5 100-ohm UTP 100 m (328 ft) RJ-45
100BASE-TX Cat. 5 100-ohm UTP UTP 100 m (328 ft) RJ-45
1000BASE-T Cat. 5 / Cat. 5e 100-ohm UTP UTP 100 m (328 ft) RJ-45
G I G A B I T
I N D U S T R I A L
S W I T C H
Industrial Managed Gigabit Switch
IGS-9084GP-LA
G11
100/10 00X
PWR
10/100 /1000T
G9
PWR1
PWR2 Fau lt
G6
G8
G2
G4
LNK/AC K
Speed
G5
G7
G1
G3
G12
G10
Conso le
Ring R.M
Reset
IGS-9084GP-LA
G11
100/1000X
PWR
10/100/1000T
G9
PWR1
PWR2 F ault
G6
G8
G2
G4
LNK/ACK
Spee d
G5
G7
G1
G3
G12
G10
Con sole
Ring R .M
Res et
7
2
3
4
5
6
1
8
9
10
2
IGS-9084GP-LA
G11
100/1000X
PWR
10/100/1000T
G9
PWR1
PWR2 Fa ult
G6
G8
G2
G4
LNK/ACK
Speed
G5
G7
G1
G3
G12
G10
Cons ole
Ring R. M
Rese t
Unit =mm (Tolerance ±0.5mm)
Q I G Quick Installation Guide
PRINTED ON RECYCLED PAPER
Version 1.0
Quick Installation Guide
Po we r
Redunda nt I nput powe r
Power con su mption( Typ. )
Ov erload cu rrent pro te ction Pr esent
Ph ys ic al C haracteristic
En closure I P- 30
Di mension ( W x D x H) 54 .3 (W) x 108. 3 (D ) x 145.1 (H) m m (2.13 x 4.2 6 x 5.71 inch es)
RS -232 Seri al C onsole Port
Sw itch Prop erties
Sw itching l atency: 7 u s
Sw itching b andwidt h: 2 4Gbps
Th roughpu t (p acket p er s econd) : 17 .856Mpp s@64Byt es p acket
Ma x. Number o f Ava il able VLAN s: 4096
VL AN ID Ran ge : V ID 0 to 4095
IG MP multic as t groups: 2 56 for each V LAN
Port ra te l imiting : User Defi ne
Se curity Feature s
De vice Bind in g securit y feature
En able/di sa ble ports , MAC based p ort secur it y
Port base d ne twork acc ess contr ol (802.1 x)
VL AN (802.1 Q ) to s egregat e and secur e network t raffic
Radius ce nt raliz ed passwo rd manage me nt
SN MPv3 encr yp ted authe nticati on and acce ss s ecurity
Ht tps / SSH enh ance netw or k secur it y
So ftware Feature s
ST P/RSTP/ MS TP (IEEE 80 2.1D/w/ s)
Redunda nt R ing (O-Ri ng) with re covery ti me less tha n 20ms over 2 50 units
TOS/Dif fs erv suppo rted
Qu ality of Se rvice (80 2. 1p) for rea l-time tr affic
VL AN (802.1 Q) w ith VLAN ta gging
IG MP Snoopi ng
IP -based ba nd width man agement
Ap plicati on -based Qo S managem ent
DO S/DDOS au to p reven ti on
Port conf ig urati on, statu s, statis ti cs, monit oring, se cu rity
DH CP Server /Client /Rela y
SM TP Client
Mo dbus TC P
Et herNet/ IP TM
NT P server
Ne twork Red undancy O- Ring, Ope n- Ring, O-C hain, MRP , MS TP (RSTP/ ST P compati ble)*N ote
RS -232 in RJ4 5 co nnector w ith conso le cable. Ba ud rate s etting: 1 15200bp s, 8 , N, 1
Weigh t (g)
Ju mbo fra me Up t o 9.6K Byte s
Weigh t (g) 71 0 g 74 0 g72 2 g 73 5 g 73 5 g 74 0 g
En vi ro nm ental
-4 0 to 85 C (-40 to 18 5 F )
o o
St orage Te mp eratu re
-4 0 to 75 C (-40 to 16 7 F )
o o
Op erating Tempe rature
5% t o 95% Non-c on densingOp erating H umidity
Re gu la to ry Approvals
EN 5 5032, CIS PR 32, EN 6100 0-3-2, EN 6 1000-3- 3, F CC Pa rt 1 5 B class AEM I
EN 5 5024 (IEC /E N 61000-4 -2 (ESD: Co nt act 8KV, Ai r 10 KV), IEC/ EN 61000- 4-3 (RS), IE C/EN 6100 0-4-4 (EF T Power 4KV, Si ngle 4KV) ,
IE C/EN 6100 0- 4-5 (Surg e: Powe r 4KV, R J4 5 4KV), IEC /EN 61000 -4-6 (CS) , IE C/EN 6100 0-4-8(P FM F), IEC/E N 61000-4 -11 (DIP) )
EM S
IE C60068- 2- 27Sh ock
IE C60068- 2- 31
IE C60068- 2- 6Vi brati on
EN60950-1
Sa fety
Fr ee Fa ll
Wa rr an ty
5 ye ars
Fa ul t Co nt act
Relay Relay outp ut to carry c apacity o f 1A at 24VDC
Reverse Polari ty Protec tion
Pr esent
Q I G
G I G A B I T
I N D U S T R I A L
S W I T C H
P o E
To connect the console port to an external management device, you need an RJ-45 to DB-
9 cable, which is also supplied in the package. Below is the console port pin assignment
information.
Console Port Pin Definition
PC (male) pin assignment RS-232 with DB9 (female) pin
assignment (RJ45-DB9 cable) RJ45 pin assignment
PIN#2 RxD PIN#2 RxD PIN#2 RxD
PIN#3 TxD PIN#3 TxD PIN#3 TxD
PIN#5 GND PIN#5 GND PIN#5 GND
Wiring
The switch supports dual redundant power supplies, Power Supply1
(PWR1) and Power Supply 2 (PWR2). The connections for PWR1,
PWR2 and the RELAY are located on the terminal block.
STEP 1: Insert the negative/positive wires into the V-/V+ terminals,
respectively.
STEP 2: To keep the DC wires from pulling loose, use a small flat-
blade screwdriver to tighten the wire-clamp screws on the front of the
terminal block connector.
PWR-1PWR-2
1A@24V
V2- V2+ V1- V1+
Fault
Power inputs
The two sets of relay contacts of the 6-pin terminal block connector are used to detect
user-configured events. The two wires attached to the fault contacts form an close circuit
when a user-configured event is triggered. If a user-configured event does not occur, the
fault circuit remains opened.
Relay contact
Resetting
To reboot the switch, press the button for 2-3 seconds.Reset
To restore the switch configurations back to the factory defaults, press the button for 5 seconds.Reset
Grounding and wire routing help limit the effects of noise due to electromagnetic
interference (EMI). Run the ground connection from the ground screws to the grounding
surface prior to connecting devices.
Grounding
Configurations
After installing the switch, the green power LED should turn on. Please refer to the
following tablet for LED indication.
1. Launch the Internet Explorer and type in IP address of the switch. The default static IP address is
192.168.10.1
2. Log in with default user name and password
(both are ). After logging in, you shouldadmin
see the following screen. For more information
on configurations, please refer to the user
manual. For information on operating the switch
using ORing’s Open-Vision management utility,
please go to ORing website.
Follow the steps to set up the switch:
Specifications
OR in g Sw it ch Model
Ph ys ic al P orts
Te ch no lo gy
Et hernet St an dards
IE EE 802.3 fo r 10 Base-T
IE EE 802.3u f or 1 00Base-T X and 100Ba se-FX
IE EE 802.3a b fo r 1000Bas e-T
IE EE 802.3z f or 1 000Base -X
IE EE 802.3x f or F low contr ol
IE EE 802.3a d fo r LACP (Lin k Aggrega tion Cont ro l Protoco l )
IE EE 802.1p f or C OS (Class o f Service )
IE EE 802.1Q f or V LAN Tag ging
IE EE 802.1D f or S TP (Spann ing Tree P rotocol )
IE EE 802.1w f or R STP (Ra pid Spann in g Tree P ro tocol)
IE EE 802.1s f or M STP (Mult iple Span ning Tre e Protoco l)
IE EE 802.1x f or Authen ti cation
IE EE 802.1A B fo r LLDP (Lin k Layer D iscover y Protoco l)
MA C Tabl e 8K
Pr iority Qu eu es 8
Pr ocessin g St ore-a nd -Forward
10 0/1000B as e-X w ith SFP por t 2
LED
Color
Status
Description
PWR Green On DC power on
PWR1 Green On DC power module 1 activated
PWR2 Green On DC power module 2 activated
R.M Green On Ring Master
Ring Green
On Ring enabled
Blinking
Ring structure is broken (i.e. part of the ring is
disconnected)
Fault Amber On
Faulty relay (power failure or port
disconnected)
10/100/1000Base-T(X) Gigabit Ethernet ports
LNK/ACT Green
On Port link up
Blinking Data transmitted
Speed
Green On Port link at 1000Mbps
Amber On Port link at 100Mbps
Green/Amber Off Port link at 10Mbps
SFP ports
LNK/ACT Green
On Port link up
Blinking Data transmitted
*Note : This function is available by request only
MT BF ( hr s)
516416hrs
For pin assignments for different types of cables, please refer to the following
tables.
10/100 Base-T(X) MDI/MDI-X
Pin Number MDI port MDI-X port
1 TD+(transmit) RD+(receive)
2 TD-(transmit) RD-(receive)
3 RD+(receive) TD+(transmit)
4 Not used Not used
5 Not used Not used
6 RD-(receive) TD-(transmit)
7 Not used Not used
8 Not used Not used
Note: “+” and “-” signs represent the polarity of the wires that make up each wire pair.
1000Base-T MDI/MDI-X
Pin Number MDI port MDI-X port
1 BI_DA+ BI_DB+
2 BI_DA- BI_DB-
3 BI_DB+ BI_DA+
4 BI_DC+ BI_DD+
5 BI_DC- BI_DD-
6 BI_DB- BI_DA-
7 BI_DD+ BI_DC+
8 BI_DD- BI_DC-
1000Base-T RJ-45 Port
Pin Number Assignment
1 BI_DA+
2 BI_DA-
3 BI_DB+
4 BI_DC+
5 BI_DC-
6 BI_DB-
7 BI_DD+
8 BI_DD-
10/100 Base-T(X) RJ-45 Port
Pin Number Assignments
1 TD+
2 TD-
3 RD+
4 Not used
5 Not used
6 RD-
7 Not used
8 Not used
ORing Industrial Networking Corp.
Copyright© 2018 ORing
All rights reserved.
TEL: +886-2-2218-1066
FAX: +886-2-2218-1014
Website: www.oringnet.com
E-mail: support@oringnet.com
IG S- 90 84 GP-LA
10 /100/10 00 Base-T(X ) with
Ports in RJ 45 Auto MDI /M DIX 8
Sh are Data Bu ff er 4M bit
Re se t Fu nc tion
Reset Fun ct ion < 5 se c: System r eboot, > 5 sec: Factor y de fault
Du al DC input s. 1 2~48VDC o n 6-pin ter minal blo ck
13 Watt s
Hi -POT 1. 5K V AC
CE E MC (EN 5502 4, E N 55032), F CC Part 1 5 B
EM C
77 9g
IGS-9084GP-LA
IGS-9084GP-LA
Industrial Managed Gigabit Switch

Other ORiNG Switch manuals
ORiNG IGPS-1411GTPA User manual

ORiNG

ORiNG IGPS-1411GTPA User manual

ORiNG IES-3160 User manual

ORiNG

ORiNG IES-3160 User manual

ORiNG TRGPS-9084GT-M12X-BP2-MV User manual

ORiNG

ORiNG TRGPS-9084GT-M12X-BP2-MV User manual

ORiNG TPS-1080-M12 User manual

ORiNG

ORiNG TPS-1080-M12 User manual

ORiNG IGPS-1082GP Series User manual

ORiNG

ORiNG IGPS-1082GP Series User manual

ORiNG IES-1041FX-MM-SC User manual

ORiNG

ORiNG IES-1041FX-MM-SC User manual

ORiNG TPS-3882GT-M12-BP1 User manual

ORiNG

ORiNG TPS-3882GT-M12-BP1 User manual

ORiNG IES-3162GC Series User manual

ORiNG

ORiNG IES-3162GC Series User manual

ORiNG IDS-342GT User manual

ORiNG

ORiNG IDS-342GT User manual

ORiNG IGPS-1080A User manual

ORiNG

ORiNG IGPS-1080A User manual

ORiNG IGS-9122GPM User manual

ORiNG

ORiNG IGS-9122GPM User manual

ORiNG DGS-9168GP-SS-AIO_S User manual

ORiNG

ORiNG DGS-9168GP-SS-AIO_S User manual

ORiNG IES-2050A User manual

ORiNG

ORiNG IES-2050A User manual

ORiNG TGS-1080-M12 Series User manual

ORiNG

ORiNG TGS-1080-M12 Series User manual

ORiNG IPS-3082GC-AT User manual

ORiNG

ORiNG IPS-3082GC-AT User manual

ORiNG IPS-1080A User manual

ORiNG

ORiNG IPS-1080A User manual

ORiNG IBS-102FX Series User manual

ORiNG

ORiNG IBS-102FX Series User manual

ORiNG IGS-9080 User manual

ORiNG

ORiNG IGS-9080 User manual

ORiNG TGPS-9080-M12A-MV User manual

ORiNG

ORiNG TGPS-9080-M12A-MV User manual

ORiNG GS-9164GF Series User manual

ORiNG

ORiNG GS-9164GF Series User manual

ORiNG TGPS-9084GT-M12X-BP2-24V User manual

ORiNG

ORiNG TGPS-9084GT-M12X-BP2-24V User manual

ORiNG IES-1050A User manual

ORiNG

ORiNG IES-1050A User manual

ORiNG Thunder Series User manual

ORiNG

ORiNG Thunder Series User manual

ORiNG IGPS-9084GP User manual

ORiNG

ORiNG IGPS-9084GP User manual

Popular Switch manuals by other brands
Huawei Quidway S5300 Series quick start

Huawei

Huawei Quidway S5300 Series quick start

Juniper EX Series quick start guide

Juniper

Juniper EX Series quick start guide

Cisco Catalyst 3000 Regulatory compliance and safety information

Cisco

Cisco Catalyst 3000 Regulatory compliance and safety information

H3C S5500-EI series Configuration guide

H3C

H3C S5500-EI series Configuration guide

Ubiquiti ES-24-250W quick start guide

Ubiquiti

Ubiquiti ES-24-250W quick start guide

Huawei S5700-LI Series manual

Huawei

Huawei S5700-LI Series manual

TP-Link TL-SF1005D user guide

TP-Link

TP-Link TL-SF1005D user guide

Network Devices ND-70M-HDBT-HVD user manual

Network Devices

Network Devices ND-70M-HDBT-HVD user manual

Lindy 32879 Installation and use

Lindy

Lindy 32879 Installation and use

Ascale AS?6244C user manual

Ascale

Ascale AS?6244C user manual

TP-Link TL-SF1005D installation guide

TP-Link

TP-Link TL-SF1005D installation guide

IDEC HS1E Series manual

IDEC

IDEC HS1E Series manual

HP ProCurve 1600M installation guide

HP

HP ProCurve 1600M installation guide

Seojin Instech SMC-7 instruction manual
Seojin Instech
Seojin Instech SMC-7 instruction manual

CyberData 4-Port PoweredUSB 2.0 Hub 011006 Quick reference guide

CyberData

CyberData 4-Port PoweredUSB 2.0 Hub 011006 Quick reference guide

Smartwares SH4-99572 instruction manual

Smartwares

Smartwares SH4-99572 instruction manual

Dell OptiPlex Powered USB HUB Product information guide

Dell

Dell OptiPlex Powered USB HUB Product information guide

Jung 10911STRF Series operating instructions

Jung

Jung 10911STRF Series operating instructions

manuals.online logo
manuals.online logoBrands
  • About & Mission
  • Contact us
  • Privacy Policy
  • Terms and Conditions

Copyright 2025 Manuals.Online. All Rights Reserved.