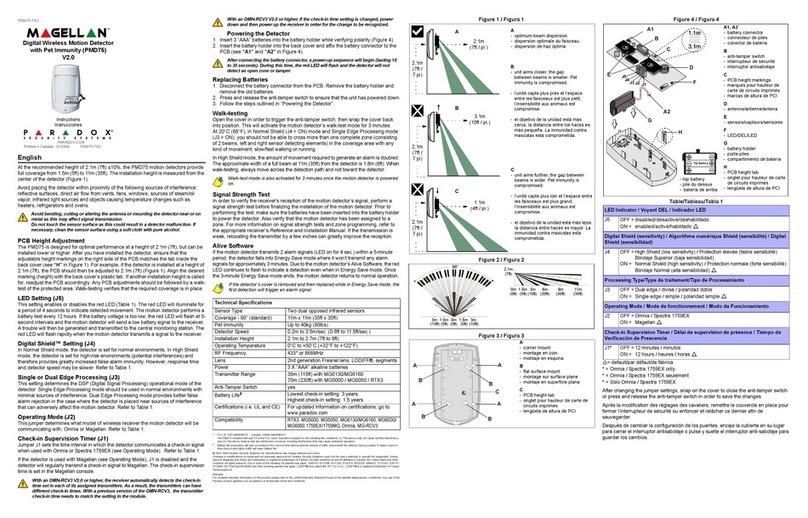
Paradox ESPRIT728 Operating instructions

SOFTWARE VERSION 1.0
BENCH TEST
Refer to Connection (Wiring) Diagram.
Note: [ ] indicates keypad key i.e. [2], [ENTER]. [CLEAR], [MEM].
Shaded addresses are not applicable. Any values must be
entered i.e. [2ND].
1. To set zones in non-alarm state (keypad zone lights off),
install green (1K OHM) resistors across zone terminals.
2. Connect keypad. Install green (1K OHM) resistor across keypad
zone.
3. Connect sounder or install green (1K OHM) resistor across "BELL"
terminal.
4. Connect AC, connect battery.
5. [TRBL]key illuminates, due to timer loss. Push [TRBL]to view
trouble conditions, (see Keypad Trouble Display).
6. All keypad lights should be off and keypad should respond to
Master code arming and disarming.
7. Master Code:
default 474747.
8. Keypad Programming
(default installer code 747474)
.
ACCESS TO UPLOAD/DOWNLOAD:
000: /__ Number of rings before answer
(default 8rings)
Enter "[2ND][2ND]" panel will not answer.
PANEL IDENTIFIER
(default code "empty")
001: __/__ 002: __/__
PC PASSWORD
(default code "empty")
003: __/__ 004: __/__
INSTALLER CODE:
(default code 747474)
Full access to programming,(all addresses except 008-058)
No access to arming/disarming and access code programming
(can be used to modify installer code)
Important: Use only numeric keys from [1] to [10] (key [10] = 0) to
enter installer code.
005: __/__ 006: __/__ 007: __/__
PG728-960603
- 1 -
Key "ON" =
[1] No battery/low voltage [7] Communicator report failure
[3] AC failure [8] Timer loss*
[4] Bell disconnect [9] Tamper or zone wiring failure
[5] Maximum bell current [10] Telephone line failure
[6] Max auxiliary current [11] Fire loop trouble
*To clear timer loss trouble, see
Key Access Programming
[MEM].
Press [CLEAR]to clear troubles.
(Used to program "Access to Upload/Download" and "Installer Code")
All digits from 0 to F are valid. (See Interpreting Hexa Values)
Programming values are programmed into memory locations from
address 000 to 007.
1) Press [
ENTER
]+ installer code (default 747474)
2) Key [
ENTER
]will flash (programming mode)
3) Enter 3 digit memory address
4) Enter 2 digit data (See Hexa Display
to read value
)
5) To erase, press [
CLEAR
]. To save press [
ENTER
]
6) Go to step 3 for next address
To exit programming mode press [
CLEAR
]
KEYPAD TROUBLE DISPLAY
skip, null, not programmed
KEY
[1] - [9]
[10]
[11]
[12]
[BYP]
[MEM]
[TRBL]
[2ND]
HEXA VALUE
1 - 9
A
B
C
D
E
F
DECIMAL VALUE
1 - 9
0
11
12
13
14
15
INTERPRETING HEXA VALUES
Value of
2ND digit = 10
( 8+ 2= 10)
Value of
1ST digit = 3
( 2+ 1= 3)
VALUE = "30"
HEXA DISPLAY
No display = SKIP (empty) No light = 0
10 = [0] = [A]
If key is lit =8 =4 =2 =1

TELEPHONE AND ACCOUNT NUMBERS:
(default empty)
[TRBL]must end the phone number if less than 16 digits are programmed.
Special instructions can be entered in the telephone numbers using the following keys:
[10] = the number "0"
[11] = *
[12] = #
[BYP]= switch from pulse to tone while dialing
[MEM]= pause 4 seconds
[TRBL]= end of number
Streamlined (section) programming = [ENTER] + installer + [2], [7]
COMPUTER TELEPHONE NUMBER: (View at addresses 060 to 067.)
00 __ / __ / __ / __ / __ / __ / __ / __ 01 __ / __ / __ / __ / __ / __ / __ / __
1 2 3 4 5 6 7 8 9 10 11 12 13 14 15 16
CENTRAL STATION TELEPHONE NUMBER 1: (View at addresses 068 to 075.)
02 __ / __ / __ / __ / __ / __ / __ / __ 03 __ / __ / __ / __ / __ / __ / __ / __
1 2 3 4 5 6 7 8 9 10 11 12 13 14 15 16
CENTRAL STATION TELEPHONE NUMBER 2: (View at addresses 076 to 083.)
04 __ / __ / __ / __ / __ / __ / __ / __ 05 __ / __ / __ / __ / __ / __ / __ / __
1 2 3 4 5 6 7 8 9 10 11 12 13 14 15 16
ACCOUNT "A" AND "B": (View at addresses 084 to 087.)
06 __ / __ / __ / __ __ / __ / __ / __
1 2 3 4 5 6 7 8
A B
If only one account number is required, the same number must be entered for both account "A" and "B".
- 2 -
(Used to program sections 00 to 34)
To begin programming
Press [
ENTER
]+ installer code + [2] [7]. ([
ENTER
]and [2
ND
]keys will flash)
Enter 2 digit section number for programming (00 - 34) ([
ENTER
]key is "steady" and [2
ND
] key is "off")
Enter 8 digit to program the section. Keypad will beep verifying completion of section programming. Data is saved and the next
section is advanced to automatically for programming.
To select a specific section press [
CLEAR
]or [
ENTER
]. ([
ENTER
]and [2
ND
]keys will flash).
Enter 2 digit section number (00-34) ([
ENTER
]key is "steady" and [2
ND
] key is "off").
To exit programming mode press [
CLEAR
].
PG728
Press [TRBL]to end the
phone number if less than
16 digits are programmed.
Press [TRBL]to end the
phone number if less than
16 digits are programmed.
Press [TRBL]to end the
phone number if less than
16 digits are programmed.
For 3 digit account number,
enter "skip" ([2ND]) as first
digit.
If only one central station phone number is used, the same number must be programmed
for telephone number 1 and 2.

2017 140
141
142
143
128
129
130
131
- 3 -
PG728
__/__
__/__
/
__/__
__ __
__/__
__/__
/
__/__
__ __
__/__
__/__
/
__/__
__ __
__/__
__/__
/
__/__
__ __
__/__
__/__
/
__/__
__ __
__/__
__/__
/
__/__
__ __
User code 1
User code 2
User code 3
User code 4
User code 9
User code 10
User code 11
User code 12
User code 5
User code 6
User code 7
User code 8
Zone 1
Zone 2
Zone 3
Zone 4
Zone 9
Zone 10
Zone 11
Zone 12
Zone 5
Zone 6
Zone 7
Zone 8
KYPD1
KYPD2
Zone 21
Zone 22
Zone 23
Zone 24
Zone 13
Zone 14
Zone 15
Zone 16
Zone 17
Zone 18
Zone 19
Zone 20
User code 13
User code 14
User code 15
User code 16
088
089
090
091
120
121
122
123
132
133
134
135
096
097
098
099
092
093
094
095
124
125
126
127
136
137
138
139
100
101
102
103
Streamline
section Data Description Address
Streamline
section Data Description Address Streamline
section Data Description Address
ARMING (closing) CODES:
ALARM CODES ZONE 1 TO 12: ALARM CODES ZONE 13 TO 24:
07
15 18
09
08
16 19
10
__/__
__/__
/
__/__
__ __
__/__
__/__
/
__/__
__ __
User code 1
User code 2
User code 3
User code 4
User code 9
User code 10
User code 11
User code 12
User code 5
User code 6
User code 7
User code 8
User code 13
User code 14
User code 15
User code 16
104
105
106
107
112
113
114
115
108
109
110
111
116
117
118
119
Streamline
section Data Description Address
DISARMING (opening) CODES:
11
13
12
14
In a partitioned system, zone 7 to 12 report with account "B" and are assigned to system "B".
For single digit reporting enter "skip" ( ) as first digit.[2 ]
ND
__/__
__/__
/
__/__
__ __
__/__
__/__
/
__/__
__ __
__/__
__/__
/
__/__
__ __
__/__
__/__
/
__/__
__ __
REPORTING CODES:
(default code
"empty"
)
All digits from - are valid. ( ) = digit is not reported.
Streamlined (section) programming: + installer code + , .
[1] [F] [2 ]
[] [2][7]
ND
ENTER
SKIP
___ / ___
___ / ___
/
___ / ___
___ ___
[]2ND []2ND
[]2ND []2ND
[]2ND []2ND
[]2ND []2ND
___ / ___
___ / ___
/
___ / ___
___ ___
[]2ND []2ND
[]2ND []2ND
[]2ND []2ND
[]2ND []2ND
___ / ___
___ / ___
/
___ / ___
___ ___
[]2ND []2ND
[]2ND []2ND
[]2ND []2ND
[]2ND []2ND
IMPORTANT: ONLY 194 [10]
088 193
If the reporting format selected at address is "contact I.D." (key - all codes),
there is no need to program any values for addresses - . (See Contact I.D. Format, page 5)

[]2ND []2ND
[]2ND []2ND
[]2ND []2ND
[]2ND []2ND
[]2ND []2ND
[]2ND []2ND
[]2ND []2ND
[]2ND []2ND
[]2ND []2ND
[]2ND []2ND
[]2ND []2ND
[]2ND []2ND
__/__
__/__
/
__/__
__ __
__/__
__/__
/
__/__
__ __
__/__
__/__
/
__/__
__ __
__/__
__/__
/
__/__
__ __
__/__
__/__
/
__/__
__ __
__/__
__/__
/
__/__
__ __
__/__
__/__
/
__/__
__ __
__/__
__/__
/
__/__
__ __
__/__
__/__
/
__/__
__ __
__/__
__/__
/
__/__
__ __
Maximum auxiliary current
Bell disconnect / max. bell current
Battery disconnected / low voltage
No AC / low AC
Maximum auxiliary current
Bell disconnect
Battery disconnected / low voltage
No AC / low AC
Tamper / wiring fault
Timer programmed
Fire loop trouble
TLM trouble restore
Program change
Timer loss
Fire loop trouble
Test report
Zone 21
Zone 22
Zone 23
Zone 24
Zone 13
Zone 14
Zone 15
Zone 16
Zone 17
Zone 18
Zone 19
Zone 20
144
145
146
147
152
153
154
155
148
149
150
151
Streamline
section Data Description Address
Streamline
section Data Description
176
177
178
179
180
181
182
183
168
169
170
171
172
173
174
175
Address
TROUBLE CODES:
ZONE 1 TO 12 RESTORE CODES: ZONE 13 TO 24 RESTORE CODES:
156
157
158
159
164
165
166
167
160
161
162
163
Streamline
section Data Description Address
Streamline
section Data Description Address
TROUBLE RESTORE CODES:
For single digit reporting enter "skip" ( ) as first digit.[2 ]ND
In a partitioned system, zones 7 to 12 report with account "B" and are assigned to system "B".
- 4 -
REPORTING CODES:
(default code )
"empty" .
All digits from - are valid.
( ) = digit is not reported.
Streamlined (section) programming: + installer code + , .
[1] [F]
[2 ]
[] [2][7]
ND
ENTER
SKIP
PG728
Zone 1
Zone 2
Zone 3
Zone 4
Zone 5
Zone 6
Zone 7
Zone 8
KYPD1
KYPD2
Zone 9
Zone 10
Zone 11
Zone 12
21
23
29
30
27
22
28
24
25
26

[]2ND
[]2ND
[]2ND[]2ND
[]2ND[]2ND
FUNCTION
Provides pulse before
communication attempt
Provides output when keys
and are pressed simultaneously.
Output removed when system
armed.
Provides latching output on
alarm, until disarmed.
3 sec.
[1]
[2]
DESCRIPTION
Provides output upon fail to
communicate for
Provides output after one failed
communication attempt.
Provides output after signal
received at monitoring station.
2 minutes.
3 sec.
Provides output every day
at 8PM.
+
3 sec.
[][11]
TRBL
HEXA PROG.TYPE
Ground start Pulse
(Timed N.O.)
Push key and
(Regular N.O.)
System armed
(Regular N.C.)
Strobe output
(Regular N.O.)
Fail to communicate
(Timed N.O.)
2 telephone line relay
(Regular N.O.)
Kiss off
[1] [2]
nd
Time output
(Timed N.O.)
Fire reset
(Timed N.C.)
(Timed N.O.)
5/2
5/8
2/B
2/C
2/6
7/A
7/D
2/3
5/3
5
1
9
1
5
5
6
[2 ]
[]
ND
BYP
[2]
[2]
[2]
[2]
[2]
[2]
[2]
[2]
ND
ND
ND
ND
ND
ND
ND
ND
/8
/6
/8
/2
/4
/E
/8
1/4
2/
TYPICAL PGM OUTPUTS
*
**
*
*
*
*
*Times must be programmed at address 254.
**Not permitted on UL listed systems
Provides to reset detectors
after alarm.
4 sec.
Addresses 196-199 (section 34)
Address
Address
__/__
__/__
/
__/__
__ __
__/__
__/__
/
__/__
__ __
__/__
__/__
/
__/__
__ __
__/__
__/__
/
__/__
__ __
Panic 1
Panic 2
Panic 3
Partial arming
Disarm with Espload
Disarm with master code
1st digit: telephone 1 format
2nd digit: telephone 2 format
1st digit: PGM 1
2nd digit: any value must be entered i.e.
TYPE [2 ]ND
184
185
186
187
192
193
194
195
188
189
190
191
Streamline
section Data Description Address
SPECIAL CODES - FORMATS - PGM:
REPORTING CODES:
(default code )
"empty" .
All digits from - are valid.
( ) = digit is not reported.
Streamlined (section) programming: + Installer code + , .
[1] [F]
[2 ]
[] [2][7]
ND
ENTER
SKIP
*No movement for specified time or panel not armed at specified
hour - see addresses , , .245 246 253
**1st digit of zone tamper is reported with 2nd digit of zone 1 - 3
alarm codes - see addresses .120 - 131
PG728
31
32
33
KEY
[2 ]
[1]
[2]
[3]
[4]
[5]
[6]
[7]
[8]
[9]
[10]
[]
ND
TRBL
= ADEMCO slow (1400Hz, 1900Hz, 10bps)
= (1400Hz, 1800Hz, 10bps)
= SILENT KNIGHT fast (1400Hz, 1900Hz, 20bps)
= SESCOA (2300Hz, 1800Hz, 20bps)
= RADIONICS (40bps with 1400Hz handshake)
= RADIONICS (40bps with 2300Hz handshake)
= RADIONICS with PARITY (1400Hz, 40bps)
= RADIONICS with PARITY (2300Hz, 40bps)
= ADEMCO express
= ADEMCO contact ID (selected codes)
= ADEMCO contact ID (all codes)
= DTMF - no handshake (personal dialing)
COMMUNICATOR FORMAT
Address 194 (section 33)
(For timed PGM see also address )254
KEY
[2 ]
[1]
[2]
[4]
[5]
[6]
ND KEY
[8]
[9]
[10]
[12]
[]
[]
BYP
MEM
: OR
: AND
: EQUAL
: OR
: AND
: EQUAL
: OR
: AND
: EQUAL
: OR
: AND
: EQUAL
Reg N.O. Reg N.C.
Timed N.O. Timed N.C.
PGM TYPE
Address 195 (section 33)
Auto / Espload arm
Arm with master code
No movement / late to close
Tamper on zones 1-3
2nd digit: any value must be entered i.e. [2 ]ND
***
PGM 1 (1st and 2nd digit)
PGM 2 (1st and 2nd digit)
PGM 1 (3rd and 4th digit)
PGM 2 (3rd and 4th digit)
196
197
198
199
34
CONTACT I.D. FORMAT
Address 194 (section 33, key [9], [10])
If is selected, (address ,
key ), all addresses from to programmed
or not, will report Contact I.D. event codes. (Refer to
"Contact I.D. event code" list, Installation Manual)
Programming is not required for these addresses
when this format is used.
If is chosen, (address
, key ), all addresses from to
programmed with ANY VALUE except will
report Contact I.D. event report codes. (Refer to
"Contact I.D. event code" list, Installation Manual)
CONTACT I.D. (ALL CODES)
CONTACT I.D. (SELECTED CODES
ND ND
194
[10] 088 193,
ONLY
)
194 [9] 088 193,
[2 ] [2 ],
(Potential application: to report in Contact I.D. format
to one central station number, and 4/2 format to the
second. Use 4/2 format to program addresses. At
address 194, select a 4/2 format for one telephone
number, and Contact I.D. format for the second. The
software will automatically convert the 4/2 codes to
Contact I.D. codes when transmitting them to the
second receiver.)
IMPORTANT:Dialer circuit is patent pending.
- 5 -
[5]
[2]
[4]
[2 ]ND
[1]
[3]
[6]
[11]
[8]
[10]
[7]
[9]
[12]
[]
BYP
[]
MEM
[]
TRBL
- 6 -
stay arm / System A
enabled
enabled
enabled
Answering machine override
Bell squawk on arm/disarm
Auto zone shut-down
See " " TableREPORTING
(1:1.5) PULSE USA(1:2) PULSE EUROPE
enabledenabled
enabled
Auto arm on time
Auto arm on no movement [5]
[2]
PS1/Keyswitch = regular arm / (A + B)
[4] enabledCall back
[2 ]ND
[1]
See " " TableTLM
[3] enabled
PS1/keyswitch arming
[6]
generates only a report
Silent zone/panic generates a silent alarm
[11]
[8]
[10]
[7]
Pulse dialing
Partitioning Tone dialing (DTMF)
enabled
[9]
[12]
206: KEY
[]
BYP
[]
MEM
[]
TRBL
OFF / ON
only after alarm
audible
enabled
audible
enabled
fire
on zone closure
4 digit
enabled
enabled
enabled
208: OFF / ON
enabled
enabled
KEY
no EOL
Report zone restore on bell cut-off
Panic 2
Panic 3
See "Tamper/Wire Fault Definition Table"
Panic 1
Call PC when event list is full
Always report disarm
Panic 2 silent
Panic 1 silent (PS1)
Panic 3 silent
6 digit access codes
Key regular arm / (A + B)[10]
Key stay or system Aarm[11]
Beep on exit delay
Zones with EOL (1K )green Ω
(keys & )[1] [3], PS1
(keys & )[4] [6]
(keys & )[7] [9]
5
24
13611 15
810 14
7913
12 16
5
24
13611 15
810 14
7913
12 16
5
24
13611 15
810 14
7913
12 16
[2]
[1] [6] [11]
[8] [10]
[7] [9]
[]
BYP
[]
MEM
[]
TRBL
[2 ]
ND
[12]
[5]
[4]
[3]
KEY SELECT:
CODE PRIORITY
202:
204:
SYSTEM "A" / STAY
SYSTEM "B" / AWAY
Codes with bypass access
200:
Note: Default = " " for addresses to
OFF
1) Press + installer code (default 747474). key will flash.
2) Enter 3 digit memory address ( to ).
3) Press corresponding key to select option.
4) To change selection press key again.
5) To save press .
6) Repeat steps 3 to 5 for addresses to
7) To exit programming mode press
Feature selection programming addresses to The " "/" " status of the lights (keys) determines features selected.
ON OFF
FEATURE SELECT (LIGHT ON/OFF) PROGRAMMING
PG728
TLM generates trouble only
TLM disabled
generates an alarm if armed
silent alarm becomes audible
(address , key has to be )206 [9] OFF
KEY
[2 ]
ND
[1]
OFF OFF
ONOFF
ON
ON OFF
ON
TLM TABLE (TLM = Telephone Line Monitor)
Address 206, Key [2 ] [1]ND
Exception: for 24 hour zones the tamper definition will follow the
audible/silent alarm definition of the 24 hour zone.
Silent zones will generate a silent alarm
Disabled
Alarm as per individual
zone definitions
KEY
No alarm, trouble code
reported
Audible alarm and trouble
codes reported
Silent alarm and trouble
codes reported
Always generate trouble
and alarm, audible or
silent as per individual
zone definitions
[11]
[10]
OFF OFF
OFF ON
ON OFF
ON ON
SYSTEM ARMED SYSTEM DISARMED
*
TAMPER / WIRE FAULT DEFINITION TABLE
Address 208, Key [10] [11]
*
**
**
OFF OFF
ONOFF
ON
ON
OFF
ON
REPORTING TABLE
Regular reporting 2,1,2,1,2,1,2,1, fail to comm.
Reporting disabled
Split reporting: Alarms
System report 1,1,1,1,1,1,1,1, fail to comm.
Double reporting 2,2,2,2,2,2,2,2, fail to comm.
2,2,2,2,2,2,2,2, fail to comm.,
1,1,1,1,1,1,1,1, fail to comm.
KEY
DIALING SEQUENCE
(tel. No.)
TYPE
[11]
[12]
On alarm, all reports are made to Tel. #1 until the system is disarmed.
(Once disarmed system reports are made to Tel. #2)
*
Address 206, Key [11] [12]
*

Only bypass code reported on bypass arming
Zone doubling (ATZ) [7]
[8]
(default = " ")
ZONE DEFINITION:
Instant =ON
Follow =ON
If , zone is ARMED
on stay or split arming
ON
Bypass enabled =ON
Silent =ON
Fast =ON
226224
230
228
242** Zone Swap
240 SYSTEM A SYSTEM B
238236
218216
214212 5
24
13611
810
7912
5
24
13611
810
7912
5
24
13611
810
7912
5
24
13611
810
7912
5
24
13611
810
7912
5
24
13611
810
7912
5
24
13611
810
7912
5
24
13611
810
7912
5
24
136
5
24
13611
810
7912
5
24
13611
810
7912
5
24
13611
810
7912
5
24
13611
810
7912
[2]
[1] [6] [11]
[8] [10]
[7] [9] [12]
[5]
[4]
[3]
KEY SELECT: [1] [2] [6] [11]
[8] [10]
[7] [9] [12]
[5]
[4]
[3]
Delay 2 =ON 234232 5
24
13611
810
7912
5
24
13611
810
7912
24 Hr./ Fire =ON
*When zone 3 is defined "24 Hour" it becomes a fire zone
222
220 5
24
13611
810
7912
5
24
13611
810
7912
NOTE: 220 234Zones not selected at addresses to are "Delay 1" zones.
- 7 -
210:
Exclude AC from trouble display
[2 ]
ND
OFF / ON
[3]
[1] disabled(in case of fire zone 3 only)
enabled
auto away
Arming regular [2] stay armAuto arm = regular arm / (A+ B)
KEY
[6] tamper follows zone bypass definitionNo tamper bypass [5]
[4]
[9]
enabled
enabled
disabled
Audible trouble warning
enabled
*Only installer can clear tamper trouble.
enabled
Arm-inhibit on tamper*
Arm-inhibit on batt fail
Note: Default = " " for addresses to
OFF
1) Press + installer code (default 747474). key will flash.
2) Enter 3 digit memory address ( to ).
3) Press corresponding key to select option.
4) To change selection press key again.
5) To save press .
6) Repeat steps 3 to 5 for addresses to
7) To exit programming mode press
Feature selection programming addresses to The " "/" " status of the lights (keys) determines features selected.
ON OFF
FEATURE SELECT (LIGHT ON/OFF) PROGRAMMING
PG728
Zone 6
Zones 13 to 24 are not available.
N/A
**See installation manual "Partitioning"
[1]
[2]
[3]
[4]
[5]
[6]
1 7
2 8
3 9
4 10
5 11
6 12
Zone Swap
Recommended for use with partitioned systems only.

(values entered at addresses "244 - 255" contain 3 digits between "000" and "255") ([10] = 0)
244: __/__/__ (days) Auto test report every ? days (between "001" and "255")
(000=disabled)
245: __/__/__ (hours) Auto test report / Auto arm time (between "000" and "023")
246: __/__/__ (minutes) Auto test report / Auto arm time (between "000" and "059")
247: __/__/__ (seconds) Exit delay
(default 60 seconds)
248: __/__/__ (seconds) Entry delay 1
(default 45 seconds)
249: __/__/__ (seconds) Entry delay 2
(default 45 seconds)
250: __/__/__ (minutes) Bell cut-off time (
default 5minutes)
251: __/__/__ ( x 15 mSec.) Slow zone speed
(default 600 mSec.)
252: __/__/__ (minutes) AC report delay
(default 30 minutes) (000=disabled)
253: __/__/__ ( x 15 minutes) Time for "No Movement" Report
(000=disabled) (default 8hours)
254: __/__/__ PGM timer setting: 001 to 127 for seconds and 129 to 255 for minutes
(default 5 seconds)
.
Add 128 to desired value in minutes (i.e.for 5 minutes:enter 5 + 128 = 133)
255: __/__/__ Installer lock (147 = locked, 000 = unlocked)
(default unlocked)
- 8 -
Decimal value programming addresses 244 to 255. Values entered must contain 3 digits.
1) Press [
ENTER
]+ installer code (default 747474) ([
ENTER
]key will flash)
2) Enter 3 digit address (244 to 255)
3) Enter 3 digit DECIMAL value (See Decimal Value Display
to read value
)
4) To erase, press [
CLEAR
]. To save press [
ENTER
]
5) Go to step 2 for next address. To exit programming mode press [
CLEAR
]
PG728
Total value (57)
(8+ 1+ 32 + 16 = 57)
DECIMAL VALUE DISPLAY
No light = 0
If key is lit =8 =4 =2 =1
If key is lit = 128 = 64 =32 =16

key
[9] "Auto arming" time program
(accessible to master and user 1 only)
Enter two digits (00 to 23) for hours + 2 digits (00 to 59) for minutes + [ENTER].
[MEM]"Panel time" and clear "trouble 8"
(all 3 codes)
Enter two digits (00 to 23) for hours + 2 digits (00 to 59) for minutes + [ENTER]
[BYP]Test report
(all 3 codes)
Reporting is enabled at address 206 keys [11], [12]. A value must be entered at address 175, and both
telephone and account numbers must be programmed.
[TRBL]Call Espload via telephone
(all 3 codes)
Panel and PC ID numbers (addresses 001-004) and PC download phone number (addresses 060-067) must
be programmed.
[AWAY]Answer Espload
(all 3 codes)
This feature is available when using the ADP-1 adapter. In Espload, "blind dial" must be activated in "modem
setup" section, and panel phone number programmed (works also without ADP-1).
[STAY]Cancel communication attempts
(master code and user 1 can only stop calls from/to Espload)
Until next reportable event
(installer code - all communications)
[STAY]Reset to default panel settings
(installer code only)
Connect reset jumper. Press [ENTER]+ installer code + [STAY], remove reset jumper.
[2],[6]Installer test mode
(installer code only)
In installer test mode, a confirmation beep (intermittent) indicates test is "on", a "rejection" beep (long)
indicates test is "off". The bell will squawk during walk testing to indicate opened, functional zones.
[2],[7]Streamlined value entry
(installer code only)
Note: When communicating with Espload, it is impossible to enter programming mode.
- 9 -
Several panel features can be programmed quickly, without entering addresses or programming section
numbers. Select "one-key access" programming mode by pressing [
ENTER
], followed by the installer, mas-
ter or user 1 code (depending on the feature you wish to activate, only certain codes will be functional).
Then press the single key (listed below) corresponding to the feature you wish to enable.
(default master 474747)
[
ENTER
] + master code + code number (2 digits) + new code (4 or 6 digits, 0 to 9) +[
ENTER
].
Use [2
ND
]to erase a code.
Master code = 00 ([10][10]) Full access to all system functions.
User codes = 01-16 (01 - can modify access codes. All user code priorities can be
programmed at addresses 200, 202, 204 with the installer code.)
Note: [2
ND
]key flashes if location is empty.
To erase a code: [
ENTER
] + master + code number + [2
ND
]+ [
ENTER
].
PG728

4
5
6
AT ONE IENTIFICATION TALE
Input
Terminal # Zone #'s
(without ATZ) ATZ zone #'s
(double zones)
brown
(.5K )Ω
green
(1K )Ω
1
2
3
*
1
2
3
1/4
2/5
3/6 *
*Fire zone when programmed "24 hour"
PG728
- 10 -
RESISTOR GUIE
BROWN
Double Zone
500Ω(.5KΩ)
GREEN
Normal Zone
1000Ω(1KΩ)
If unavailable, a 510 is acceptableΩ
*
*
RESISTOR GUIE (ALTERNATE)
If unavailable, a 510 is acceptableΩ
*
1000Ω(1KΩ)
BROWN GOLD
BLACK RED
Normal Zone
GREEN GOLD
BLACK BROWN
Double Zone
500Ω(.5KΩ)
*

The system hardware will recognize the following conditions for each zone:
ADVANCED TECHNOLOGY ZONE connection, 1 zone resistor (without EOL), tamper
recognition (N.C. contacts)
address 208, key [MEM] = "on"
key [10] =
key [11] =
address 210, key [8] = "on"
Tamper fault transmits separate code
Each zone transmits separate alarm code, see "TYPICAL"
4 Alarm zones
2 Tamper signals
SINGLE ZONE connection without EOL resistor (N.C. contacts)
address 208, key [MEM] = "on"
key [10] = "off" (default)
key [11] = "off" (default)
address 210, key [8] = "off"
N.C. contacts see Figure 1
Note: Keypad zones always use green (1K OHM) EOL
SINGLE ZONE connection with 1 EOL resistor
(N.C. and N.O. contacts)
address 208, key [MEM] = "off" (default)
key [10] = "off" (default)
key [11] = "off" (default)
address 210, key [8] = "off"
N.C. and/or N.O. contacts, see Figure 2
See "Tamper/wire Fault Definitions
and Options"
ESPRIT 728 CONNECTION DIAGRAMS
- 11 -
BROWN GREEN BROWN GREEN
(UL/ULC configuration)
GREENGREEN

SINGLE ZONE connection with 1 EOL resistor, tamper recognition (N.C. contacts)
address 208, key [MEM] = "off"
key [10] =
key [11] =
address 210, key [8] = "off"
Tamper fault transmits separate code, see Figure 3
ADVANCED TECHNOLOGY ZONE connection, 2 zones with zone resistors, 1 EOL resistor
green (
1KOHM)
tamper (open) recognition, wire fault (short circuit) recognition (N.C. contacts)
address 208, key [MEM] = "off"
key [10] =
key [11] =
address 210, key [8] = "on"
Each zone transmits a separate alarm code.
Tamper/wire fault transmits a separate alarm code,
indicated by fast flashing zone light on keypad
and is annunciated in
Espload
, see figure 4.
See "Tamper/wire Fault Definitions
and Options"
See "Tamper/wire Fault Definitions
and Options"
ESPRIT 728 CONNECTION DIAGRAMS (continued)
- 12 -
(UL/ULC configuration)
GREEN
GREEN GREEN
GREEN

ESPRIT 728 CONNECTION DIAGRAMS (continued)
- 13 -

ESPRIT 728 WIRING DIAGRAM
GREEN
1K
EOL
RES
Ω
GREEN
1K
EOL
Ω
KEYPAD
MAX 5 per system*
ZONE 7 or 8
TAMPER
Smoke and heat detectors
BLK
GRN
YEL
RED
( is considered as keypad)PS1
GRN
YEL
RED
BLK
ZONE
COM
N.C.
N.O.
N.C.
N.O. GREEN
1K
EOL
Ω
P R DOXP R DOX
RMED RE DY
To cabinet and grounding rod
-+
T - 1
R-1 TIP
RING
BATT
5AMP
DIALER
+AUX -
+BELL -
AC PGM +COM1/4 2/5 3/6
GRN YEL
+
+
++
BLACK
RED
BELL
SIREN
-+
TRANSFO
16.5VAC 40VA
N.O. contacts
8 ZONE CONTROLLER/COMMUNICATOR
ESPRIT
728
-
+
BRN
GRY
GRN
RED
SECURITY SYSTEMS
Charging and battery test LED
(every 60 seconds)
SERIAL
OUTPUT
RESET
JUMPER
"TLM" LED
Short flash = OK
Long flash = Fault
OFF = Disabled
Constant = On Line
RJ31X
CA 38A
BATT
RECHARGEABLE
BATTERY
UL/ULC 12VDC
7AH required.
UL: K12 model T16 V40
ULC: Frost model FTC 1637
Caution: Disconnect battery
before replacing fuse.
A.C.
POWER
BELL OUTPUT
UL/ULC 650mA max.
will shut down
if current
exceeds 3A.
AUX POWER
400mA max.
UL/ULC 250mA max. for
24 hr. standby. Aux Power
will shut down if
current exceeds 1A. ZONE
7 OR 8
*Zone 3 = Fire zone
If definition is
selected
24 hour zone.
For zone connections
see diagrams below
PS1
ESPRIT arming / panic module
PGM OUTPUT RELAY
BLK RED
YELBRN
COM N.C. N.O.
+AUX
PGM
MR3-UL
For smoke detector reset PGM1
Address
196
198
Data
[5] [3]
[2] [2 ]
ND
WHT
Keyswitch can be used in parallel with keypad (or PS1),
(not on UL systems).
Warning: Improper connection may
result in damage to the system.
Warning:
Disconnect
telephone line
before servicing.
Not on
UL systems
GROUND START CIRCUIT
RNG
WHT
BLK RED
YEL
MR3-UL
+AUX
PGM
Not permitted on UL listed sytems.
UL/ULC: Wheelock 46T-12
TYPICAL (UL/ULC)
ZONE CONNECTIONS
Zone input COM
TAMPER TAMPER N.C.
N.C.
BROWN
.5KΩBROWN
.5KΩ
BROWN
.5KΩ
GREEN
1KΩ
EOL EOL
Advanced Technology Zoning with EOL resistor
To reset smoke detectors, press [TRBL] + [11]
COM
PGM*
*PGM maximum 50mA
Z3
AUX
+
GREEN
1K
EOL
Ω
+
+
-
-
Smoke detector
power supervision
relay, 12VDC
Smoke detector must be 4 wire latching -
UL Falcon model 5454, ULC BRK 2412
Power supervision relay model MR3-UL.
FIRE ALARM ZONE
CONNECTIONS
Smoke
detector
Smoke
detector
PN2011 00200-PRT
KEYSWITCH
KEYSWITCH CONNECTION
KYPD GRN
KYPD BLK
220Ω
*
*
SECURITY SYSTEMS
780 Industrial Blvd., St-Eustache, Montreal, Quebec, Canada J7R 5V3 Fax: (514) 491-2313 http://www.paradox.ca Paradox Security Systems Graphic Dept
PRINTED IN CANADA 960603
ESPRIT 728
Calculation of the auxiliary supply current must
include reduction to available current due to total
keypad consumption.
*
Table of contents
Other Paradox Security Sensor manuals

Paradox
Paradox NV75M User manual

Paradox
Paradox PMD85 User manual

Paradox
Paradox NVR35M User manual

Paradox
Paradox PMD2P User manual

Paradox
Paradox SR230 User manual

Paradox
Paradox NV37MX User manual

Paradox
Paradox ENVY NVX80 User manual

Paradox
Paradox DG85W User manual

Paradox
Paradox Digigard DG85 User manual

Paradox
Paradox TM50 Touch User manual

Paradox
Paradox NV75MR User manual

Paradox
Paradox NV35MR User manual

Paradox
Paradox PMD2P User manual

Paradox
Paradox PMD75N User manual

Paradox
Paradox NV35MX User manual

Paradox
Paradox Omnia OMN-PMD1 User manual

Paradox
Paradox NV37MR User manual

Paradox
Paradox NV35MX User manual

Paradox
Paradox SR250 User manual

Paradox
Paradox ENVY NVX80 User manual