manuals.online logo
Brands
  1. Home
  2. •
  3. Brands
  4. •
  5. Polycom
  6. •
  7. Telephone
  8. •
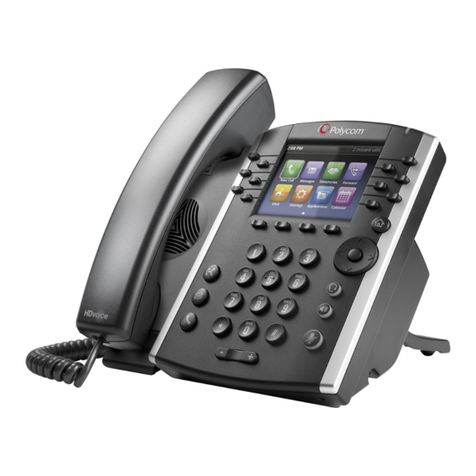
  9. Polycom VVX410 User manual

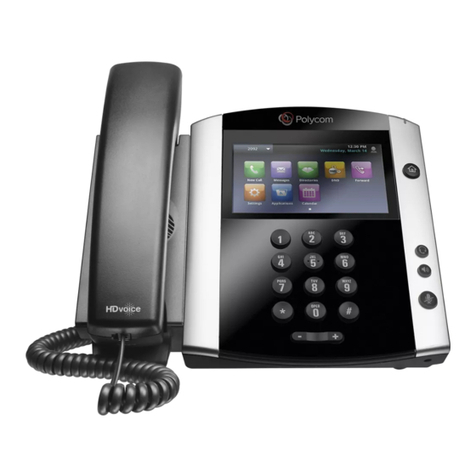
Polycom VVX410 User manual

Contact Directory
To select a contact from the Contact Directory, press the
Navigation keys/Select key.
• To view your Directory—Select Directories from
Home view. Press Contact Directory on the
Directory screen.
• To add a contact—Navigate to your Contact
Directory and press Add. Enter the contact’s
information, and press Save. To make a contact a
Favorite, enter a Favorite Index number.
• To update contact information— Navigate to
your Contact Directory and select the contact.
Press Info, press Edit, update the contact’s
information, and press Save.
• To delete a contact— Navigate to your Contact
Directory and select the contact. Press Info, press
Delete, and press Yes to conrm.
• To search for a contact—Navigate to your Contact
Directory and press Search. Enter search criteria
and press Search.
• To dial a contact from your Directory—Navigate
to your Contact Directory and select the contact.
From the contact’s information screen, select the
contact’s phone number.
Tip: What Does the Star Mean?
A indicates a Favorite.
Favorites
Favorites are contacts you call most often. Your Favorites
list displays all your Favorites. A smaller number of
Favorites displays in Lines view.
• To view your Favorites list—From Home view, press
and select Directories> Favorites.
• To make a contact a Favorite—Navigate to your
Contact Directory and select the contact.
Press Info, press More, and select Add.
Press Yes to conrm.
• To dial a Favorite—Press the Favorite from Home
or Lines view, or from your Favorites list.
Viewing Recent Calls
From Lines view, do one of the following:
• Press , select Directories, and select
Recent Calls to view your Recent Calls list.
• Press the right arrow key to view the recent Placed
Calls.
(Continued in next column)
Viewing Recent Calls (continued)
• Press the left arrow key to view the recent Received
Calls.
• Press the down arrow key to view the recent Missed
Calls.
• Press the up arrow key to view Favorites.
From the Recent Calls list, press Sort to sort and order
calls, press Type to display only certain calls, or select a
call record to call the person.
Muting the Microphone
During a call, press so other parties can’t hear you.
To disable Mute, press again.
This applies to calls using the handset, headset, and
speakerphone.
Using Do Not Disturb (DND)
The Do Not Disturb (DND) feature allows you to forward
all your calls directly to voicemail (the caller will hear
your Busy greeting when DND is activated). Please note,
when DND is enabled, calls cannot be received until
you disable the feature. To enable or disable ringing,
press DND from Home or Lines view. When Do Not
Disturb is enabled, the DND icon displays in the status
bar and beside the appropriate Line key.
Adjusting Volume
To change call volume, press the appropriate side of
during a call. To change the ringer volume,
press when the phone is idle or ringing.
Updating Ringtones
To change the incoming call ringtone, select Settings
from Home view, and press Basic > Ring Type. Select
the ringtone you want.
To set a ringtone for a contact, navigate to your Contact
Directory and select the contact. Press Edit, update the
contact’s ring type, and press Save.
For more information about your Polycom phone, visit
the website at
its.virginia.edu/telephone © 2013, Polycom, Inc. All rights reserved. POLYCOM®, the Polycom logo and the names and marks associated with Polycom’s products are trademarks
and/or service marks of Polycom, Inc. and are registered and/or common law marks in the United States and various other countries. All other trade-
marks are property of their respective owners. No portion hereof may be reproduced or transmitted in any form or by any means, for any purpose
other than the recipient’s personal use, without the express written permission of Polycom.
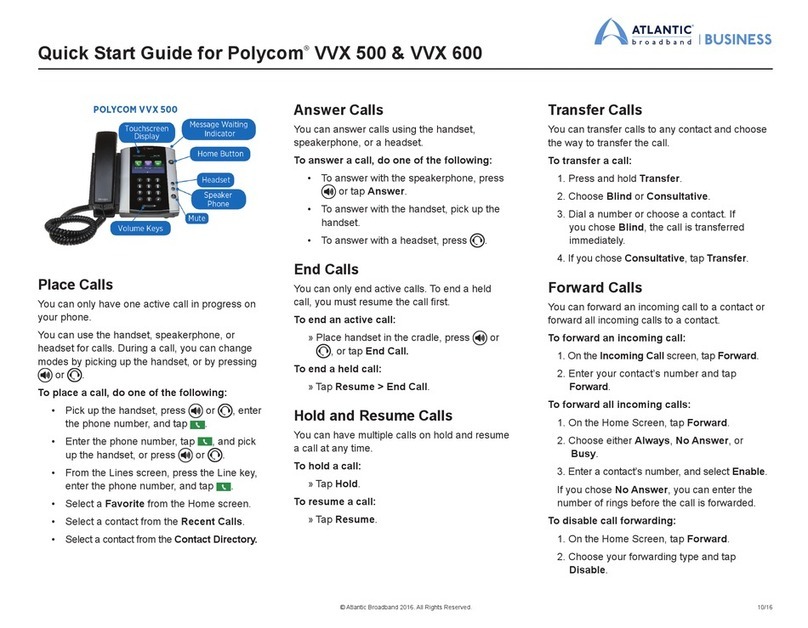
Polycom VVX 410 Phone Quick Reference Guide
v5 080614
About Calls (continued)
Tip: Switching Between Lines and Calls View
When in Calls view, switch to Lines view by
pressing More > Lines.
Switch back to Calls view by pressing More >
Calls.
Placing Calls
Pick up the handset, press or . Enter the phone
number.
Or enter the phone number rst, then press Dial. You
may pick up the handset or press for privacy. From
Lines view: Press the phone Line key, enter the phone
number.
From Home view: Select New Call using the left and right
arrow keys. Enter the phone number.
If you are dialing a phone within the University, enter
the 5-digit number. For a local call, enter 9 + 7-digit
phone number. If you are dialing a long-distance call,
enter 9 + 1 + 10-digit phone number. Note: if a long-
distance Forced Authoriztion Code (FAC) is required, you
will be prompted to enter it.
Timesaver: Placing Calls Quickly
Select a recent call or Favorite, or select a contact’s
phone number in the Contact Directory.
Creating Speed Dial Contacts
You may add a speed dial key to any blank line
key.
• Press and hold the blank line key you would like
to use
• Enter the contact’s rst and last name (as you
would like to see it appear on your display)
• Enter the contact’s phone number in the
“Contact” eld
• Press Save. The line key will now be a speed dial
for that contact
Answering Calls
To answer with the speakerphone, press or Answer.
To answer with the handset, pick up the handset.
To answer with a headset, press .
To answer a new call while on an active call, press
Answer. The current call will be held.
Phone Views
Your phone has three main Views: Home, Calls, and Lines
view (the default). You can access Home and Lines view
at any time. If your phone has one or more calls, you can
also access Calls view.
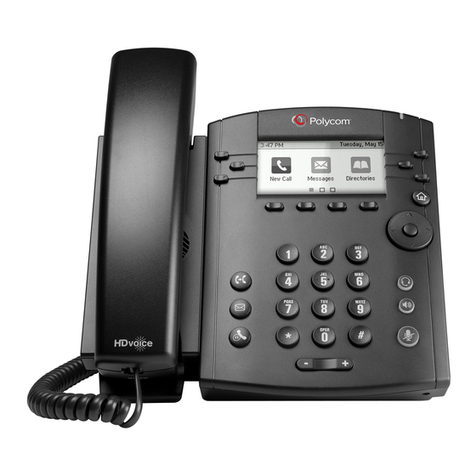
For Home view from any menu, press .
Press to alternate between Home and Lines view.
Home View
Home view displays icons you can select to access phone
functions.
To get to dierent icons, you can use the right, left, up,
and down arrow keys on the Navigation key (shown
above right). To choose an icon, press the Select button in
the center of the Navigation key .
Lines View
Lines view displays phone Lines, Favorites and soft keys.
If your phone is idle, you can press the Line key to access
the Dialer.
Tip: Referring to Soft Keys
In this guide, soft keys are referred to by their
name only. For example, to end an active call,
press End Call.
Calls View
If your phone has one or more calls, you can access Calls
view.
Call color indicates status:
• Dark green—Active call
• Bright blue—Incoming call
• Dark blue—Held call
Use the up and down arrow keys to select a call (highlight
it). The soft keys control the highlighted call.
Entering Data
Use the dialpad keys to enter information. To backspace
or delete, press Backspace.
To type with the dialpad keys, press a key repeatedly to
view the character options and stop to select.
To type other characters, press Encoding or Mode.
When using the dialpad keys, use the 1, *, 0, and #keys.
About Calls
Only one call can be active at one time.
You can use the handset, speakerphone, or headset for
calls. During a call, you can change modes by picking up
the handset, or by pressing or .
If you navigate away from your call(s), press to see
Active Call or Calls view again.
Ending Calls
To end an active call, replace the handset, press , or
press . Or, press End Call.
Holding Calls
From Calls view, press Hold or press . Remember to
highlight the call rst.
To resume a held call, press again. Remember to
highlight the call rst.
Transferring Calls
Blind (Unannounced)
From Calls view, press Transfer or . Press Blind and
dial the party you wish to transfer to.
Announced
From Calls view, press Transfer or . Dial the party
you wish to transfer to. After you speak to the desired
party, press Transfer to complete the call.
Forwarding Calls
To enable call forwarding, press Forward from Home or
Lines view. Select the forwarding type to enable, enter a
forwarding number, and press Enable.
To disable call forwarding, press Forward from Home
or Lines view, select the forwarding type to disable, and
press Disable.
To enable per-call forwarding: As your phone rings,
press Forward, enter the forwarding number, and press
Forward.
Placing Conference Calls (Up to 6 parties)
Call the rst party, and after the call connects, press
More, and select Confrnc. (Note: ”More” and “Confrnc”
will appear after you start the call.) Then, dial and
connect with the second party and press Confrnc again.
From Lines or Calls view, you can:
• Press Hold to hold all participants, press Resume to
retrieve conference from hold.
• Press End Call to end the conference call.
Timesaver: Placing Conference Calls
If you already have an active and held call, press
Join to bring these calls together in conference.
New Call Redial DND Callers
<<
Navigation key
Select button
Other manuals for VVX410

32

Other Polycom Telephone manuals

Polycom Polycom SoundPoint IP 430 Instruction manual

Polycom

Polycom Polycom SoundPoint IP 430 Instruction manual

Polycom VVX 250 User manual

Polycom

Polycom VVX 250 User manual

Polycom VVX410 User manual

Polycom

Polycom VVX410 User manual

Polycom VVX-250 Series Instruction manual

Polycom

Polycom VVX-250 Series Instruction manual

Polycom VVX 411 Instruction manual

Polycom

Polycom VVX 411 Instruction manual

Polycom Integra VVX 500 User manual

Polycom

Polycom Integra VVX 500 User manual

Polycom VVX 300 Instruction manual

Polycom

Polycom VVX 300 Instruction manual

Polycom VVX410 User manual

Polycom

Polycom VVX410 User manual

Polycom CX300 R2 User manual

Polycom

Polycom CX300 R2 User manual

Polycom VVX 310 User manual

Polycom

Polycom VVX 310 User manual

Polycom VVX 300 User manual

Polycom

Polycom VVX 300 User manual

Polycom 1725-32504-001 User manual

Polycom

Polycom 1725-32504-001 User manual

Polycom VVX 150 User manual

Polycom

Polycom VVX 150 User manual

Polycom VVX 500 series User manual

Polycom

Polycom VVX 500 series User manual

Polycom VVX 500 series User manual

Polycom

Polycom VVX 500 series User manual

Polycom VVX 601 User manual

Polycom

Polycom VVX 601 User manual

Polycom CCX310 User manual

Polycom

Polycom CCX310 User manual

Polycom VVX 500 User manual

Polycom

Polycom VVX 500 User manual

Polycom Polycom VVX 600 User manual

Polycom

Polycom Polycom VVX 600 User manual

Polycom VVX 300 User manual

Polycom

Polycom VVX 300 User manual

Polycom VVX 600 series User manual

Polycom

Polycom VVX 600 series User manual

Polycom 300 series User manual

Polycom

Polycom 300 series User manual

Polycom VVX 400 Instruction manual

Polycom

Polycom VVX 400 Instruction manual

Polycom VVX 501 Instruction manual

Polycom

Polycom VVX 501 Instruction manual

Popular Telephone manuals by other brands

Panasonic KX-TDA50 Feature manual

Panasonic

Panasonic KX-TDA50 Feature manual

BT On-Air 1800 user guide

BT

BT On-Air 1800 user guide

SSS Siedle HTA 711-01 installation instructions

SSS Siedle

SSS Siedle HTA 711-01 installation instructions

Aastra 9116LP Technical specifications

Aastra

Aastra 9116LP Technical specifications

Firstcom 07D200N manual

Firstcom

Firstcom 07D200N manual

Mitel 8660 user guide

Mitel

Mitel 8660 user guide

ClearSound CL1200 Instruction guide

ClearSound

ClearSound CL1200 Instruction guide

Nortel Centrex IP Client Manager 2.4 Series Installation guide and user's manual

Nortel

Nortel Centrex IP Client Manager 2.4 Series Installation guide and user's manual

NEC G355 user guide

NEC

NEC G355 user guide

Grandstream Networks GXP2100 Quick reference guide

Grandstream Networks

Grandstream Networks GXP2100 Quick reference guide

Scitec 60010S user guide

Scitec

Scitec 60010S user guide

Siemens OpenStage 15 Administration manual

Siemens

Siemens OpenStage 15 Administration manual

ImageTech iMage A2 user manual

ImageTech

ImageTech iMage A2 user manual

Aastra Aastra 610d Quick user guide

Aastra

Aastra Aastra 610d Quick user guide

SpectraLink NetLink PTB810 Technical bulletin

SpectraLink

SpectraLink NetLink PTB810 Technical bulletin

Broadview OfficeSuite Administrator user guide

Broadview

Broadview OfficeSuite Administrator user guide

Jabra CRUISER2 HSF002 Declaration of conformity

Jabra

Jabra CRUISER2 HSF002 Declaration of conformity

Planet Networking & Communication VIP-254NT manual

Planet Networking & Communication

Planet Networking & Communication VIP-254NT manual

manuals.online logo
manuals.online logoBrands
  • About & Mission
  • Contact us
  • Privacy Policy
  • Terms and Conditions

Copyright 2025 Manuals.Online. All Rights Reserved.