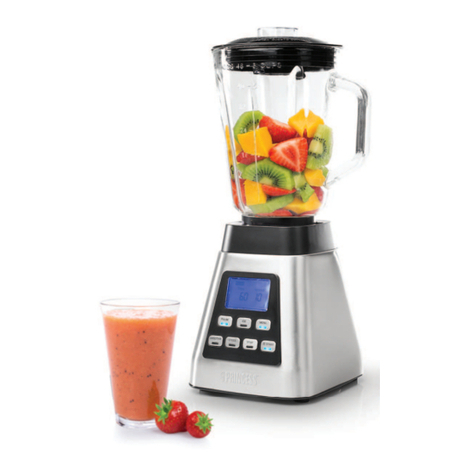
Princess 219600 User manual

EN Instruction manual
NL Gebruiksaanwijzing
FR Mode d’emploi
DE Bedienungsanleitung
ES Manual de usuario
PT Manual de utilizador
IT Manuale utente
SV Bruksanvisning
CS Návod na použití
PL Instrukcja obsługi
SK Návod na použitie
Vacuum blender
01.219600.01.001
RU Руководство по эксплуатации

3
4
9
10
6
1
2
7
8
5
PARTS DESCRIPTION / ONDERDELENBESCHRIJVING / DESCRIPTION DES PIÈCES
/ TEILEBESCHREIBUNG / DESCRIPCIÓN DE LAS PIEZAS / DESCRIÇÃO DOS
COMPONENTES / DESCRIZIONE DELLE PARTI / BESKRIVNING AV DELAR /
OPIS CZĘŚCI / POPIS SOUČÁSTÍ / POPIS SÚČASTÍ / ОПИСАНИЕ ЗАПЧАСТИ

Instruction manual
3
SAFETY
• By ignoring the safety instructions the
manufacturer cannot be held responsible for
the damage.
• If the supply cord is damaged, it must be
replaced by the manufacturer, its service
agent or similarly qualified persons in order
to avoid a hazard.
• Never move the appliance by pulling the
cord and make sure the cord cannot
become entangled.
• The appliance must be placed on a stable,
level surface.
• The user must not leave the device
unattended while it is connected to the
supply.
• This appliance is only to be used for
household purposes and only for the
purpose it is made for.
• This appliance shall not be used by children.
This appliance can be used by people with
reduced physical, sensory or mental
capabilities or lack of experience and
knowledge if they have been given
supervision or instruction concerning use of
the appliance in a safe way and understand
the hazards involved. Children shall not play
with the appliance. Keep the appliance and
its cord out of reach of children aged less
than 8 years. Cleaning and user
maintenance shall not be made by children.
• To protect yourself against an electric shock,
do not immerse the cord, plug or appliance
in the water or any other liquid.
• Do not allow children to use the device
without supervision.
• Switch off the appliance and disconnect
from supply before changing accessories or
approaching parts that move in use.
• Always disconnect the device from the
supply if it is left unattended and before
assembling, disassembling or cleaning.
• It is absolutely necessary to keep this
appliance clean at all times, because it
comes into direct contact with food.
• Never let the appliance work without liquid
inside the jar.
• NOTE: The chopping blades are very sharp,
avoid physical contact during emptying and
cleaning the device, you can seriously
injure.
• This appliance is intended to be used in
household and similar applications such as:
EN

Instruction manual
4
• Staff kitchen areas in shops, offices and other
working environments.
• By clients in hotels, motels and other residential
type environments.
• Bed and breakfast type environments.
• Farm houses.
• Be careful if hot liquid is poured into the food
processor or blender as it can be ejected out of
the appliance due to a sudden steaming.
Cleaning and maintenance
• Always remove the plug from the socket when
the device will be cleaned.
• Clean the appliance with a damp cloth. Never
use harsh and abrasive cleaners, scouring pad
or steel wool, which damages the device.
• Never immerse the electrical appliance in water
or any other liquid.
• Clean the jar immediately after each use for
easy cleaning. Pour some water with detergent
into the jar, push and hold the pulse button and
let it run for a few seconds, then pour out the
soapy water and rinse the jar with clean water.
• Components that have come into contact with
food can be cleaned in soapy water.
Blade assembly
• Turn the blade unit anti-clockwise to loosen and
take out the blades. For reassembly place back
the blade unit and turn clockwise to fasten.
• For reassembly place the rubber gasket back
on the blade unit and turn it anti-clockwise back
in position.
PARTS DESCRIPTION
1. Release handle
2. Release switch
3. Vacuum lid
4. Plastic jar
5. Blade unit
6. Rotary knob with preset buttons
7. Base
8. Nonslip feet
9. Vacuum bottle lid
10. Vacuum bottle
BEFORE THE FIRST USE
• Take the appliance andaccessoriesoutthebox.Removethe
stickers,protective foilorplasticfrom thedevice.
• Place the device on a flat stable surface and ensure a minimum of 10
cm. free space around the device. This device is not suitable for
installation in a cabinet or for outside use.
• Before using your appliance for the first time, wipe off all removable
parts with a damp cloth. Never use abrasive products.

Instruction manual
5
• Putthepower cable intothe socket.(Note: Make surethe
voltagewhich is indicated on the devicematchesthe
localvoltage beforeconnecting the device.Voltage220V-240V
50/60Hz)
• Caution! Run the blender no longer than 2 minutes continuous,
after 2 operation cycles always cool the blender for 10 minutes.
USE
• Place the blender on a flat stable surface, not near a sink filled
with water or a similar setting. table, close the blender lid. Align
the triangle mark on the cup against the unlock mark on the body.
Twist the handle to the left to make the triangular mark of the cup
is aligned with the lock mark on the body.
• Put food (for instance fruits or vegetables) in the blender jar and
add a certain amount of water (normal proportion between food
and water is 2:3). Make sure to never exceed the MAX mark on
the jar.
• Push down the release handle when the suction nozzle is
directed at the air outlet of jar.
• Insert the power supply in the socket.
• Turn the knob to the on position, the light of the ON indicator and
the indicator of the function buttons pulse, ice, v blend and
vacuum light up. The machine is in standby modus.
The knob can be used for five optional functions;
•ICE function: The motor works at highest speed, it turns on for
2.5 seconds and stops 1.5 seconds in 15 cycles. The program
then ends and the blender enters into standby modus. This
function can be stopped when the button is pressed again or the
knob is turned to OFF during program execution, the program will
not stop or switch if any of the other function buttons are being
pressed during program execution. After the program ends, first
press the switch to open the release handle, then unlock the cup
from the body.
•V-blend function: After selecting this function, the machine will
start to vacuum and then blends for 1 minute. When the negative
pressure in the cup reaches the desired vacuum, the air pump
stops vacuuming. After 2 seconds, the motor runs at low speed
for 10 seconds and then at maximum speed for 50 seconds. The
program will then end and the blender will enter the standby
modus. If there is air leakage or the seal is not tight, the blender
will continue to pump for 70 seconds. If the negative pressure in
the cup has not reached the standard value, there will be a
flashing indicator light and a buzzer alarm, please check then the
seal before continuing. This function can be stopped when the
button is pressed again or the knob is turned to OFF during
program execution, the program will not stop or switch if any of
the other function buttons are being pressed during program
execution. After the program ends, first press the switch to open
the release handle, then unlock the cup from the body, press the
vent button on the vacuum lid until you don’t hear the airflow
sound anymore. The vacuum lid can now be removed from the
jar.
Note:
• Pay attention to place the lid correct on the jar before starting to
vacuum. The pouring nozzle of the vacuum lid should be
completely covered by the sealing ring, otherwise there may be
air leakage!
EN

Instruction manual
6
• After each cycle, the accumulated water and impurities in the filter
cover, the lower one way valve and the cup cover should be removed.
• Note that the water temperature must not exceed 40°C.
• Note that the blade unit (under the jar) must be tightened, otherwise
there may be air leakage.
•Vacuum function: After selecting this function, the machine will start
to vacuum. When the negative pressure in the cup reaches the
desired vacuum, the air pump stops vacuuming. The program will then
end and the blender will enter the standby modus. If there is air
leakage or the seal is not tight, the blender will continue to pump for 70
seconds. If the negative pressure in the cup has not reached the
standard value, there will be a flashing indicator light and a buzzer
alarm, please check then the seal before continuing. This function can
be stopped when the button is pressed again or the knob is turned to
OFF during program execution, the program will not stop or switch if
any of the other function buttons are being pressed during program
execution. After the program ends, first press the switch to open the
release handle, then unlock the cup from the body, press the vent
button on the vacuum lid until you don’t hear the airflow sound
anymore. The vacuum lid can now be removed from the jar.
Note:
• Pay attention to place the lid correct on the jar before starting to
vacuum. The pouring nozzle of the vacuum lid should be completely
covered by the sealing ring, otherwise there may be air leakage!
• Note that the blade unit (under the jar) must be tightened, otherwise
there may be air leakage.
•Pulse function: This function is a pulse program. The motor runs at
the highest speed. Press and hold down the pulse button in this
position, not longer than 2 minutes, due to possible overheating of the
engine. The indicator light will turn on until you release the button.
Allow the unit to cool down before further use. When finished, first
press the switch to open the release handle and then unlock the cup
from the body.
•Min~Max blending function: Turn the knob to the right to set the
desired speed, the min position is the lowest speed and the max
position is the highest speed. The speed indicator bar will light up
accordingly. After 2 minutes and 30 seconds the program ends and
the blender enter the standby modus. Press the switch to open the
release handle and then unlock the cup from the body.
After three minutes with no operations after entering the standby mode, all
the indicators will go out and the blender will enter sleep state. At this time,
press any button to go back to the standby mode.
When the machine is not in use, please turn the knob to the OFF position,
unplug the power plug and store it in a clean, dry indoor location.
ENVIRONMENT
This appliance should not be put into the domestic garbage at the
end of its durability, but must be offered at a central point for the recycling
of electric and electronic domestic appliances. This symbol on the
appliance, instruction manual and packaging puts your attention to this
important issue. The materials used in this appliance can be recycled. By
recycling of used domestic appliances you contribute an important push to
the protection of our environment. Ask your local authorities for information
regarding the point of recollection.
Support
Instruction manual
7
You can find all available information and spare parts at http://
www.service.princess.info/!
EN

Gebruiksaanwijzing
8
VEILIGHEID
• Als u de veiligheidsinstructies negeert, kan de
fabrikant niet verantwoordelijk worden
gehouden voor de mogelijke schade.
• Als het netsnoer beschadigd is, moet het
worden vervangen door de fabrikant, de
onderhoudsmonteur van de fabrikant of door
personen met een soortgelijke kwalificatie om
gevaar te voorkomen.
• Verplaats het apparaat nooit door aan het snoer
te trekken en zorg dat het snoer niet in de war
kan raken.
• Het apparaat moet op een stabiele, vlakke
ondergrond worden geplaatst.
• De gebruiker mag het apparaat niet onbeheerd
achterlaten wanneer de stekker zich in het
stopcontact bevindt.
• Dit apparaat is uitsluitend voor huishoudelijk
gebruik en voor het doel waar het voor bestemd
is.
• Dit apparaat mag niet door kinderen worden
gebruikt. Dit apparaat mag door personen met
verminderde lichamelijke, zintuiglijke of
verstandelijke capaciteiten of gebrek aan kennis
worden gebruikt, mits dit gebeurt onder toezicht
of zij de juiste instructies hebben gekregen over
het gebruik van het apparaat en de gevaren van
het gebruik begrijpen. Kinderen mogen niet
spelen met het apparaat. Houd het apparaat en
het snoer buiten het bereik van kinderen onder
de 8 jaar. Het apparaat mag niet worden
gereinigd of onderhouden door kinderen.
• Dompel het snoer, de stekker of het apparaat
niet onder in water of andere vloeistoffen om
elektrische schokken te voorkomen.
• Buiten het bereik van kinderen houden indien er
geen toezicht is.
• Schakel het apparaat uit en verwijder de stekker
uit het stopcontact, voordat u accessoires
verwisselt of bewegende onderdelen benadert.
• Koppel het apparaat te allen tijde los als er
geen toezicht is en alvorens het apparaat te
monteren, te demonteren of te reinigen.
• Het is noodzakelijk om dit toestel zuiver te
houden, aangezien het in direct contact komt
met eetwaren.
• Laat het apparaat nooit werken zonder een
vloeistof aan de kan te hebben toegevoegd.
• LET OP: De hakmessen zijn zeer scherp.
Vermijd fysiek contact tijdens het legen en
reinigen van het apparaat. U kunt ernstig letsel
oplopen.
• Dit apparaat is bedoeld voor huishoudelijk en
soortgelijk gebruik, zoals:

Gebruiksaanwijzing
9
• Personeelskeukens in winkels, kantoren en
andere werkomgevingen.
• Door gasten in hotels, motels en andere
residentiële omgevingen.
• Bed&Breakfast-type omgevingen.
• Boerderijen.
• Wees voorzichtig als u hete vloeistoffen in
de keukenmachine of blender giet,
aangezien deze uit het apparaat kunnen
worden geworpen door plotselinge
stoomvorming.
Reiniging en onderhoud
• Verwijder altijd de stekker uit het stopcontact
als het apparaat wordt gereinigd.
• Reinig het apparaat met een vochtige doek.
Gebruik nooit agressieve of schurende
reinigingsmiddelen, schuursponzen of
staalwol; dit beschadigt het apparaat.
• Dompel het elektrische apparaat nooit onder
in water of andere vloeistoffen.
• Maak de kan direct na elk gebruik schoon.
Giet wat water met afwasmiddel in de kan,
houd de pulsknop ingedrukt en laat het
apparaat enkele seconden werken. Giet het
sop er vervolgens uit en spoel de kan om
met schoon water.
• Onderdelen die in aanraking zijn gekomen
met voedsel kunnen worden gereinigd in
sopwater.
Mesvoorziening
• Draai de messen tegen de klok in om ze los
te maken en te verwijderen. Als u het
apparaat weer in elkaar wilt zetten, plaatst u
de messen terug en draait u ze met de klok
mee om ze vast te zetten.
• Plaats voor het opnieuw monteren de
rubberen afdichting terug op de
mesvoorziening en draai deze linksom terug
in positie.
ONDERDELENBESCHRIJVING
1. Vrijgavehendel
2. Vrijgaveschakelaar
3. Vacuümdeksel
4. Plastic kan
5. Messen
6. Draaiknop met snelkeuzeknoppen
7. Basis
8. Antislipvoeten
9. Deksel van vacuümfles
10. Vacuümfles
NL

Gebruiksaanwijzing
10
VOOR HET EERSTE GEBRUIK
• Haal het apparaat en de accessoires uit de doos.Verwijder de
stickers, de beschermfolie of het plastic van het apparaat.
• Plaats het apparaat op een vlakke, stabiele ondergrond. Zorg voor
minimaal 10 cm vrije ruimte rondom het apparaat. Dit apparaat is niet
geschikt voor inbouw of gebruik buitenshuis.
• Veeg voor het eerste gebruik van het apparaat alle afneembare
onderdelen af met een vochtige doek. Gebruik nooit schurende
producten.
• Sluit de voedingskabel aan op het stopcontact.(Let op: Zorg er voor
het aansluiten van het apparaat voor dat het op het apparaat
aangegeven voltage overeenkomt met de plaatselijke
netspanning.Voltage:220V-240V 50/60Hz)
• Let op: laat de blender niet langer dan 2 minuten ononderbroken
werken en laat de blender na deze 2 keer te hebben laten werken 10
minuten afkoelen.
GEBRUIK
• Plaats de blender op een vlakke, stabiele ondergrond, uit de buurt van
een gootsteen met water of een vergelijkbare opstelling. Sluit het
deksel van de blender. Lijn de driehoekmarkering op de kan uit met de
ontgrendelingsmarkering op het hoofdgedeelte. Draai de hendel naar
links om de driehoekmarkering van de kan uit te lijnen met de
vergrendelingsmarkering op het hoofdgedeelte.
• Voeg ingrediënten (bijvoorbeeld fruit of groenten) en een bepaalde
hoeveelheid water toe aan de blenderkan. Een normale verhouding
tussen voedsel en water is 2:3. Zorg ervoor dat u de MAX-markering
op de kan niet overschrijdt.
• Duw de vrijgavehendel omlaag wanneer de zuigmond op de
luchtuitlaat van de kan is gericht.
• Doe de stekker in het stopcontact.
• Draai de knop in de ON-stand (AAN). Het lampje van de ON-indicator
(AAN) en de indicator van de knoppen voor de puls-, ijs-, v-blend- en
vacuümfunctie gaat branden. Het apparaat staat nu in de stand-
bymodus.
De knop kan voor 5 optionele functies worden gebruikt.
•IJsfunctie: De motor werkt op de hoogste snelheid, wordt
2,5seconde ingeschakeld en 1,5seconde uitgeschakeld gedurende
15cycli. Het programma wordt dan beëindigd en de blender wordt in
de stand-bymodus gezet. U kunt deze functie stoppen door de knop
opnieuw in te drukken of de draaiknop naar OFF (UIT) te draaien
wanneer het programma actief is. Het programma wordt niet gestopt
en er wordt niet geschakeld naar een ander programma als u een van
de andere functieknoppen indrukt terwijl het programma actief is.
Nadat het programma is beëindigd, moet u eerst op de schakelaar
drukken om de vrijgavehendel te openen. Maak vervolgens de kan los
van het hoofdgedeelte.
•V-blendfunctie: Als u deze functie selecteert, wordt er een vacuüm
gecreëerd in het apparaat en wordt de blenderfunctie 1minuut
geactiveerd. Als de negatieve druk voor het gewenste vacuüm heeft
gezorgd, stopt de luchtpomp met zuigen. Na 2seconden werkt de
motor gedurende 10seconden op lage snelheid, en vervolgens
50seconden op maximale snelheid. Het programma wordt daarna
beëindigd en de blender wordt in de stand-bymodus gezet. Als er lucht
ontsnapt of als de afsluiting niet voldoende is, blijft de blender
70seconden lang pompen. Als de negatieve druk in de kan niet de
standaardwaarde heeft bereikt, knippert er een indicatorlampje en

Gebruiksaanwijzing
11
klinkt er een zoemer. Controleer de afdichting voordat u
doorgaat. U kunt deze functie stoppen door de knop opnieuw in
te drukken of de draaiknop naar OFF (UIT) te draaien wanneer
het programma actief is. Het programma wordt niet gestopt en er
wordt niet geschakeld naar een ander programma als u een van
de andere functieknoppen indrukt terwijl het programma actief is.
Nadat het programma is beëindigd, moet u eerst op de
schakelaar drukken om de vrijgavehendel te openen. Maak
vervolgens de kan los van het hoofdgedeelte en druk op de
ontluchtingsknop tot u geen luchtstroom meer hoort. Het
vacuümdeksel kan nu van de kan worden verwijderd.
Opmerking:
• Zorg ervoor dat u het deksel correct op de kan plaatst voordat u
de vacuümfunctie gebruikt. De schenktuit van het vacuümdeksel
moet volledig worden afgedekt door de afsluitring. Als dat niet zo
is, kan er lucht ontsnappen.
• Na elke cyclus moeten het water en de onzuiverheden in de
filterafdekking, het onderste eenrichtingsventiel en de
kanafdekking worden verwijderd.
• De watertemperatuur mag niet hoger zijn dan 40°C.
• De messen (onder de kan) moeten worden vastgezet. Als dat
niet gebeurt, kan er lucht ontsnappen.
•Vacuümfunctie: Als u deze functie selecteert, wordt er een
vacuüm gecreëerd in het apparaat. Als de negatieve druk voor
het gewenste vacuüm heeft gezorgd, stopt de luchtpomp met
zuigen. Het programma wordt daarna beëindigd en de blender
wordt in de stand-bymodus gezet. Als er lucht ontsnapt of als de
afsluiting niet voldoende is, blijft de blender 70seconden lang
pompen. Als de negatieve druk in de kan niet de
standaardwaarde heeft bereikt, knippert er een indicatorlampje
en klinkt er een zoemer. Controleer de afdichting voordat u
doorgaat. U kunt deze functie stoppen door de knop opnieuw in
te drukken of de draaiknop naar OFF (UIT) te draaien wanneer
het programma actief is. Het programma wordt niet gestopt en er
wordt niet geschakeld naar een ander programma als u een van
de andere functieknoppen indrukt terwijl het programma actief is.
Nadat het programma is beëindigd, moet u eerst op de
schakelaar drukken om de vrijgavehendel te openen. Maak
vervolgens de kan los van het hoofdgedeelte en druk op de
ontluchtingsknop tot u geen luchtstroom meer hoort. Het
vacuümdeksel kan nu van de kan worden verwijderd.
Opmerking:
• Zorg ervoor dat u het deksel correct op de kan plaatst voordat u
de vacuümfunctie gebruikt. De schenktuit van het vacuümdeksel
moet volledig worden afgedekt door de afsluitring. Als dat niet zo
is, kan er lucht ontsnappen.
• De messen (onder de kan) moeten worden vastgezet. Als dat
niet gebeurt, kan er lucht ontsnappen.
•Pulsfunctie: Met deze functie start u een pulsprogramma. De
motor werkt op de hoogste snelheid. Houd de pulsknop in deze
stand. Doe dit niet langer dan 2 minuten om oververhitting van
het apparaat te voorkomen. Het indicatorlampje brandt totdat u
de knop loslaat. Laat het apparaat afkoelen voordat u het weer
gebruikt. Als u klaar bent, moet u eerst op de schakelaar drukken
om de vrijgavehendel te openen. Maak vervolgens de kan los
van het hoofdgedeelte.
NL

Gebruiksaanwijzing
12
•Min/max-blenderfunctie: Draai de knop naar rechts om de gewenste
snelheid in te stellen. In de min-stand wordt de laagste snelheid
gebruikt, en in de max-stand de hoogste. De indicatiebalk voor de
snelheid brandt in overeenstemming met de gekozen snelheid. Het
programma wordt na 2minuten en 30seconden beëindigd en de
blender wordt in de stand-bymodus gezet. Druk op de schakelaar om
de vrijgavehendel te openen. Maak vervolgens de kan los van het
hoofdgedeelte.
Als u het apparaat 3minuten niet bedient nadat het in de stand-bymodus
is gezet, gaan alle indicatorlampjes uit en wordt de blender in de
slaapstand gezet. U kunt dan altijd op een willekeurige knop drukken om
terug te gaan naar de stand-bymodus.
Als u het apparaat niet gebruikt, moet u de knop in de OFF-stand (UIT)
draaien, de stekker uit het stopcontact halen en het apparaat binnen op
een droge plek bewaren.
MILIEU
Dit apparaat mag aan het einde van de levensduur niet bij het
normale huisafval worden gedeponeerd, maar moet bij een speciaal
inzamelpunt voor hergebruik van elektrische en elektronische apparaten
worden aangeboden. Het symbool op het apparaat, in de
gebruiksaanwijzing en op de verpakking attendeert u hierop. De in het
apparaat gebruikte materialen kunnen worden gerecycled. Met het
recyclen van gebruikte huishoudelijke apparaten levert u een belangrijke
bijdrage aan de bescherming van ons milieu. Informeer bij uw lokale
overheid naar het inzamelpunt.
Support
U kunt alle beschikbare informatie en reserveonderdelen vinden op http://
www.service.princess.info/!

Manuel d'instructions
13
SÉCURITÉ
• Si vous ignorez les consignes de sécurité, le
fabricant ne peut être tenu pour responsable
des dommages.
• Si le cordon d'alimentation est endommagé,
il doit être remplacé par le fabricant, son
réparateur ou des personnes qualifiées afin
d'éviter tout risque.
• Ne déplacez jamais l'appareil en tirant sur le
cordon et veillez à ce que celui-ci ne
s'enroule pas.
• L'appareil doit être posé sur une surface
stable et nivelée.
• Ne laissez jamais le dispositif sans
surveillance s'il est connecté à l'alimentation.
• Cet appareil est uniquement destiné à des
utilisations domestiques et seulement dans
le but pour lequel il est fabriqué.
• Cet appareil ne pas être utilisé par des
enfants. Cet appareil peut être utilisé par
des personnes ayant des capacités
physiques, sensorielles ou mentales
réduites ou un manque d'expérience et de
connaissances si elles bénéficient d'une
supervision ou d'instructions concernant
l'utilisation de l'appareil en toute sécurité et
comprennent les risques que cela suppose.
Les enfants ne doivent pas jouer avec
l'appareil. Tenez l'appareil et son cordon
hors de portée des enfants de moins de 8
ans. Le nettoyage et l'entretien ne peuvent
être assurés par des enfants.
• Afin de vous éviter un choc électrique,
n'immergez pas le cordon, la prise ou
l'appareil dans de l'eau ou autre liquide.
• Ne pas laisser les enfants jouer avec
l'appareil.
• Éteignez l’appareil et débranchez-le du
secteur avant de changer les accessoires ou
d’approcher de parties amovibles durant le
fonctionnement
• Débranchez toujours l'appareil du secteur si
vous quittez la pièce et avant de le monter,
le démonter ou le nettoyer.
• Il est impératif de conserver cet appareil
propre en permanence car il est en contact
direct avec des aliments.
• Ne laissez jamais l'appareil fonctionner sans
liquide à l'intérieur du récipient.
• NOTE: Les lames du hachoir sont très
tranchantes. Évitez tout contact physique
lors du vidage et du nettoyage de l’appareil.
Vous pourriez vous blesser gravement.
FR

Manuel d'instructions
14
• Cet appareil est destiné à une utilisation
domestique et aux applications similaires,
notamment:
• Coin cuisine des commerces, bureaux et autres
environnements de travail.
• Hôtels, motels et autres environnements de
type résidentiel.
• Environnements de type chambre d’hôtes.
• Fermes.
• Attention si du liquide chaud est versé dans le
robot ou le mixeur, car il peut être éjecté de
l'appareil suite à une soudaine vaporisation.
Nettoyage et maintenance
• Débranchez toujours la fiche de la prise lors du
nettoyage de l'appareil.
• Nettoyez l'appareil avec un chiffon humide.
N'utilisez pas de produits nettoyants agressifs
ou abrasifs, de tampons à récurer ou de laine
de verre, ceux-ci pourraient endommager
l'appareil.
• N’immergez jamais l'appareil dans l'eau ou
dans tout autre liquide.
• Nettoyez le récipient aussitôt après chaque
utilisation pour faciliter le nettoyage. Versez un
peu d'eau et de détergent dans le récipient,
appuyez sur le bouton de pulsion (pulse) et
maintenez-le enfoncé, laissez-le fonctionner
pendant quelques secondes, puis versez l'eau
savonneuse et rincez le récipient à l'eau propre.
• Les composants qui ont touché les aliments
peuvent être nettoyés à l’eau savonneuse.
Ensemble de lame
• Tournez l'unité de coupe dans le sens inverse
des aiguilles d'une montre pour desserrer et
retirer les lames. Pour le remontage, replacez
l'unité de coupe et tournez dans le sens des
aiguilles d'une montre pour la fixer.
• Pour le montage, remettez le joint en
caoutchouc sur l'unité de lame et tournez en
sens antihoraire pour repositionner.
DESCRIPTION DES PIÈCES
1. Poignée de déclenchement
2. Commutateur de déclenchement
3. Couvercle de vide
4. Récipient en plastique
5. Unité de coupe
6. Bouton rotatif avec boutons de préréglage
7. Base
8. Socle antidérapant
9. Couvercle de vide de la bouteille
10. Bouteille de vide

Manuel d'instructions
15
AVANT LA PREMIÈRE UTILISATION
• Sortez l'appareil et les accessoires hors de la boîte.Retirez les
autocollants, le film protecteur ou le plastique de l'appareil.
• Mettez l'appareil sur une surface stable plate et assurez un
dégagement tout autour de l'appareil d'au moins 10 cm. Cet
appareil ne convient pas à une installation dans une armoire ou à
un usage à l'extérieur.
• Avant la première utilisation de votre appareil, essuyez toutes les
pièces amovibles avec un chiffon humide. N’utilisez jamais de
produits abrasifs.
• Branchez le cordon d’alimentation à la prise.(Remarque: Veillez
à ce que la tension indiquée sur l’appareil corresponde à celle du
secteur local avant de connecter l'appareil.Tension220-240V
50/60Hz)
• Attention! Ne faites pas fonctionner le mixeur plus de 2 minutes
en continu, après 2 cycles, laissez-le toujours refroidir pendant
10 minutes.
UTILISATION
• Placez le mixeur sur une surface plane et stable, loin d'un évier
rempli d'eau ou d'un endroit similaire et fermez le couvercle du
mixeur. Alignez la marque du triangle sur la tasse avec la marque
de déverrouillage sur le corps. Tournez la poignée vers la gauche
pour que la marque triangulaire de la tasse soit alignée avec la
marque de verrouillage sur le corps.
• Mettez des ingrédients (par exemple des fruits ou des légumes)
dans le récipient du mixeur et ajoutez un peu d'eau (proportion
normale entre les ingrédients et l'eau: 2/3). Ne jamais dépasser
la marque MAX sur le récipient.
• Appuyez sur la poignée de déclenchement lorsque la buse
d'aspiration est dirigée vers la sortie d'air du récipient.
• Insérez l'alimentation électrique dans la prise.
• Tournez le bouton en position marche, le voyant de l'indicateur
ON et le voyant des boutons de fonction pulse, ice, v blend et
vacuum s'allument. La machine est en mode veille.
Le bouton peut être utilisé pour cinq fonctions optionnelles;
•Fonction ICE: Le moteur fonctionne à la vitesse maximale, il se
met en marche pendant 2,5 secondes et s'arrête 1,5 seconde en
15 cycles. Le programme prend alors fin et le mixeur se met en
mode veille. Cette fonction peut être arrêtée en appuyant à
nouveau sur le bouton ou en mettant le bouton sur OFF pendant
l'exécution du programme. Le programme ne s'arrêtera pas ou
ne se commutera pas si l'un des autres boutons de fonction est
enfoncé pendant l'exécution du programme. Une fois le
programme terminé, appuyez d'abord sur l'interrupteur pour
ouvrir la poignée de déclenchement, puis déverrouillez la tasse
du corps.
•Fonction de mixeur à vide (V-blend): Après avoir sélectionné
cette fonction, la machine commencera à faire le vide et mixera
ensuite pendant 1 minute. Lorsque la pression négative dans la
tasse atteint le vide souhaité, la pompe à air cesse de faire le
vide. Au bout de 2 secondes, le moteur tourne à basse vitesse
pendant 10 secondes, puis à vitesse maximale pendant 50
secondes. Le programme se terminera alors et le mixeur se
mettra en mode veille. S'il y a une fuite d'air ou si le joint n'est
pas étanche, le mixeur continuera à pomper pendant 70
secondes. Si la pression négative dans la tasse n'a pas atteint la
valeur standard, il y aura un témoin lumineux clignotant et une
FR

Manuel d'instructions
16
alarme sonore, veuillez alors vérifier le joint avant de continuer. Cette
fonction peut être arrêtée en appuyant à nouveau sur le bouton ou en
mettant le bouton sur OFF pendant l'exécution du programme. Le
programme ne s'arrêtera pas ou ne se commutera pas si l'un des
autres boutons de fonction est enfoncé pendant l'exécution du
programme. Une fois le programme terminé, appuyez d'abord sur
l'interrupteur pour ouvrir la poignée de déclenchement, puis
déverrouillez la tasse du corps. Le couvercle à vide peut maintenant
être retiré du récipient.
Remarque:
• Veillez à placer correctement le couvercle sur le récipient avant de
commencer à faire le vide. Le bec verseur du couvercle à vide doit
être complètement recouvert par la bague d'étanchéité, sinon il peut y
avoir des fuites d'air!
• Après chaque cycle, l'eau et les impuretés accumulées dans le
couvercle du filtre, la soupape unidirectionnelle inférieure et le
couvercle de la tasse doivent être retirés.
• Notez que la température de l'eau ne doit pas dépasser 40°C.
• Notez que l'unité de coupe (sous le récipient) doit être resserrée,
sinon il peut y avoir des fuites d'air.
•Fonction de vide: Après avoir sélectionné cette fonction, la machine
commencera à faire le vide. Lorsque la pression négative dans la
tasse atteint le vide souhaité, la pompe à air cesse de faire le vide. Le
programme se terminera alors et le mixeur se mettra en mode veille.
S'il y a une fuite d'air ou si le joint n'est pas étanche, le mixeur
continuera à pomper pendant 70 secondes. Si la pression négative
dans la tasse n'a pas atteint la valeur standard, il y aura un témoin
lumineux clignotant et une alarme sonore, veuillez alors vérifier le joint
avant de continuer. Cette fonction peut être arrêtée en appuyant à
nouveau sur le bouton ou en mettant le bouton sur OFF pendant
l'exécution du programme. Le programme ne s'arrêtera pas ou ne se
commutera pas si l'un des autres boutons de fonction est enfoncé
pendant l'exécution du programme. Une fois le programme terminé,
appuyez d'abord sur l'interrupteur pour ouvrir la poignée de
déclenchement, puis déverrouillez la tasse du corps. Le couvercle à
vide peut maintenant être retiré du récipient.
Remarque:
• Veillez à placer correctement le couvercle sur le récipient avant de
commencer à faire le vide. Le bec verseur du couvercle à vide doit
être complètement recouvert par la bague d'étanchéité, sinon il peut y
avoir des fuites d'air!
• Notez que l'unité de coupe (sous le récipient) doit être resserrée,
sinon il peut y avoir des fuites d'air.
•Fonction Pulse: Cette fonction est un programme à impulsions. Le
moteur tourne à la vitesse la plus élevée. Appuyez et maintenez le
bouton à impulsions dans cette position, pas plus de 2 minutes, en
raison d'une possible surchauffe du moteur. Le voyant lumineux
s'allume jusqu'à ce que vous relâchiez le bouton. Laissez l'appareil
refroidir complètement avant de l'utiliser de nouveau. Une fois le
programme terminé, appuyez d'abord sur l'interrupteur pour ouvrir la
poignée de déclenchement, puis déverrouillez la tasse du corps.
•Fonction de mixage Min~Max: Tournez le bouton vers la droite pour
régler la vitesse souhaitée, la position min est la vitesse la plus basse
et la position max est la vitesse la plus élevée. La barre de l'indicateur
de vitesse s'allume en conséquence. Le programme prend alors fin au
bout de 2 minutes et 30 secondes et le mixeur se met en mode veille.
Appuyez sur l'interrupteur pour ouvrir la poignée de déclenchement,
puis déverrouillez la tasse du corps.

Manuel d'instructions
17
Après trois minutes sans fonctionnement après être entré en mode
veille, tous les indicateurs s'éteignent et le mixeur se met en veille. À
ce moment, appuyez sur n'importe quel bouton pour revenir au mode
veille.
Lorsque l'appareil n'est pas utilisé, veuillez tourner le bouton en
position OFF, débrancher la prise de courant et le ranger dans un
endroit propre et sec à l'intérieur.
ENVIRONNEMENT
Cet appareil ne doit pas être jeté avec les déchets ménagers
à la fin de sa durée de vie, il doit être remis à un centre de recyclage
pour les appareils électriques et électroniques. Ce symbole sur
l'appareil, le manuel d'utilisation et l'emballage attire votre attention
sur un point important. Les matériaux utilisés dans cet appareil sont
recyclables. En recyclant vos appareils, vous contribuez de manière
significative à la protection de notre environnement. Renseignez-
vous auprès des autorités locales pour connaître les centres de
collecte des déchets.
Support
Vous pouvez trouver toutes les informations et pièces de rechange
sur http://www.service.princess.info/!
FR

Bedienungsanleitung
18
SICHERHEIT
• Beim Ignorieren der Sicherheitshinweise kann
der Hersteller nicht für Schäden haftbar
gemacht werden.
• Ist das Netzkabel beschädigt, muss es vom
Hersteller, dem Kundendienst oder ähnlich
qualifizierten Personen ersetzt werden, um
Gefahren zu vermeiden.
• Bewegen Sie das Gerät niemals durch Ziehen
am Kabel, und stellen Sie sicher, dass sich das
Kabel nicht verwickeln kann.
• Das Gerät muss auf einer ebenen, stabilen
Fläche platziert werden.
• Das Gerät darf nicht unbeaufsichtigt bleiben,
während es an einer Stromquelle
angeschlossen ist.
• Dieses Gerät darf nur für den
Haushaltsgebrauch und nur für den Zweck
benutzt werden, für den es hergestellt wurde.
• Dieses Gerät darf nicht von Kindern verwendet
werden. Dieses Gerät darf von Personen mit
eingeschränkten körperlichen, sensorischen
oder geistigen Fähigkeiten oder einem Mangel
an Erfahrung und Kenntnissen verwendet
werden, sofern diese Personen beaufsichtigt
oder über den sicheren Gebrauch des Geräts
unterrichtet wurden und die damit verbundenen
Gefahren verstanden haben. Kinder dürfen mit
dem Gerät nicht spielen. Halten Sie das Gerät
und sein Anschlusskabel außerhalb der
Reichweite von Kindern unter 8 Jahren.
Reinigungs- und Wartungsarbeiten dürfen nicht
von Kindern ausgeführt werden.
• Tauchen Sie das Kabel, den Stecker oder das
Gerät nicht in Wasser oder andere
Flüssigkeiten, um einen elektrischen Schlag zu
vermeiden.
• Kinder dürfen das Gerät nicht ohne
Beaufsichtigung benutzen.
• Schalten Sie das Gerät aus und trennen es von
der Stromversorgung, bevor Sie Zubehörteile
wechseln oder sich beweglichen Teilen nähern.
• Trennen Sie das Gerät immer von der
Stromversorgung, wenn es unbeaufsichtigt
zurückgelassen wird sowie vor dem
Zusammenbau, der Zerlegung oder Reinigung.
• Es ist absolut notwendig, das Gerät immer
sauber zu halten, weil es in direkten Kontakt mit
Nahrungsmitteln kommt.
• Setzen Sie das Gerät nie in Betrieb, wenn sich
keine Flüssigkeit im Gefäß befindet.

Bedienungsanleitung
19
• HINWEIS: Die Hackmesser sind sehr scharf;
vermeiden Sie beim Entleeren und bei der
Reinigung des Geräts einen Körperkontakt.
Sie können sich ernsthaft verletzen!
• Dieses Gerät ist dazu bestimmt, im Haushalt
und ähnlichen Anwendungen verwendet zu
werden, wie beispielsweise:
• In Küchen für Mitarbeiter in Läden, Büros
und anderen gewerblichen Bereichen.
• Von Kunden in Hotels, Motels und anderen
Wohneinrichtungen.
• In Frühstückspensionen.
• In Gutshäusern.
• Seien Sie vorsichtig, wenn Sie heiße
Flüssigkeiten in die Küchenmaschine oder
den Mixer gießen, weil sich plötzlich
bildender Dampf austreten kann.
Reinigung und Pflege
• Vor der Reinigung des Geräts immer den
Netzstecker ziehen.
• Reinigen Sie das Gerät mit einem feuchten
Tuch. Verwenden Sie niemals scharfe oder
scheuernde Reiniger, Topfreiniger oder
Stahlwolle. Dies würde das Gerät
beschädigen.
• Tauchen Sie das Gerät niemals in Wasser
oder andere Flüssigkeiten.
• Zweckmäßigerweise sollte der Behälter
direkt nach Gebrauch gereinigt werden.
Geben Sie etwas Wasser und Spülmittel in
den Behälter. Drücken Sie dann den
Impulsknopf und lassen Sie das Gerät
einige Sekunden lang laufen. Gießen Sie
das Seifenwasser danach aus und spülen
Sie den Behälter mit klarem Wasser aus.
• Komponenten, die mit Speisen in Berührung
gekommen sind, können in Seifenwasser
gereinigt werden.
Messer-Baugruppe
• Drehen Sie die Messereinheit im
Uhrzeigersinn, um sie zu lösen, und nehmen
Sie die Klingen heraus. Zur Remontage
setzen Sie die Messereinheit wieder ein und
drehen sie dann gegen den Uhrzeigersinn
fest.
• Für den Zusammenbau legen Sie die
Gummidichtung wieder auf die
Messereinheit und drehen Sie die
Messereinheit gegen den Uhrzeigersinn
wieder in ihre Ausgangsposition.
DE

Bedienungsanleitung
20
TEILEBESCHREIBUNG
1. Freigabegriff
2. Freigabetaster
3. Vakuumdeckel
4. Kunststoffbehälter
5. Messereinheit
6. Drehknopf mit Vorwahltasten
7. Sockel
8. Anti-Rutsch-Füße
9. Vakuumflaschendeckel
10. Vakuumflasche
VOR DER ERSTEN INBETRIEBNAHME
• Nehmen Sie das Gerät und das Zubehör aus der
Verpackung.Entfernen Sie die Aufkleber, die Schutzfolie oder das
Plastik vom Gerät.
• Stellen Sie das Gerät auf eine ebene und stabile Fläche und halten
Sie einen Abstand von mindestens 10 cm um das Gerät herum ein.
Dieses Gerät ist nicht für den Anschluss oder die Verwendung in
einem Schrank oder im Freien geeignet.
• Wischen Sie vor der ersten Inbetriebnahme des Geräts alle
abnehmbaren Teile mit einem feuchten Tuch ab. Verwenden Sie
niemals Scheuermittel.
• Verbinden Sie das Netzkabel mit der Steckdose.(Hinweis: Stellen Sie
vor dem Anschließen des Geräts sicher, dass die auf dem Gerät
angegebene Netzspannung mit der örtlichen Spannung
übereinstimmt.Spannung: 220V-240V50/60Hz, 500W)
• Vorsicht! Lassen Sie den Mixer nicht länger als 2 Minuten
ununterbrochen laufen. Nach 2 Betriebszyklen sollte man den Mixer
immer 10Minuten abkühlen lang lassen.
GEBRAUCH
• Stellen Sie den Mixer auf eine stabile, ebene Fläche, nicht neben ein
wassergefülltes Waschbecken oder dergleichen. Schließen Sie den
Mixerdeckel. Richten Sie die Dreiecksmarkierung am Behälter mit der
Freigabemarkierung am Gehäuse aus. Drehen Sie den Griff nach
links, so dass die Dreiecksmarkierung am Behälter mit der
Verriegelungsmarkierung lock am Gehäuse ausgerichtet ist.
• Geben Sie Lebensmittel (z.B. Früchte oder Gemüse) sowie etwas
Wasser (normales Lebensmittel-Wasser-Verhältnis 2:3) in den
Mixbehälter. Achten Sie darauf, die Markierung MAX am Behälter
nicht zu überschreiten.
• Drücken Sie den Freigabegriff nach unten, wenn die Ansaugdüse auf
den Luftauslass des Behälters zeigt.
• Schließen Sie den Netzstecker an einer Steckdose an.
• Drehen Sie den Knopf in die Stellung „Ein“; die LED der Anzeige „ON“
sowie die Funktionstasten „Impulse“, „Ice“, „V Blend“ und „Vacuum“
leuchten auf. Das Gerät befindet sich im Standby-Modus.
Der Knopf hat fünf optionale Funktionen:
•Funktion „ICE“: Der Motor läuft mit maximaler Geschwindigkeit; er
wird 15Zyklen lang für 2,5Sekunden eingeschaltet und dann für
1,5Sekunden stoppt. Anschließend wird das Programm beendet, und
der Mixer wechselt in den Standby-Modus. Diese Funktion lässt sich
stoppen, indem die Taste erneut gedrückt oder der Knopf während der
Programmausführung auf „OFF“ gestellt wird. Das Programm wird
nicht angehalten oder gewechselt, wenn eine andere Funktionstasten
Table of contents
Languages:
Other Princess Blender manuals

Princess
Princess 218000 User manual

Princess
Princess 212071 User manual

Princess
Princess 212023 User manual

Princess
Princess Piano User manual

Princess
Princess 212524 User manual

Princess
Princess 212070 User manual

Princess
Princess Healthy Turbo Blender User manual

Princess
Princess Pro 4 Series User manual

Princess
Princess 212008 User manual

Princess
Princess 212065 User manual
Popular Blender manuals by other brands

Ninja
Ninja PROFESSIONAL PLUS BLENDER DUO WITH AUTO-IQ quick start guide

MAGIMIX
MAGIMIX LE BLENDER Instruction

Team International
Team International TEAM BL 6 operating instructions

Bennett Read
Bennett Read BRBSS15001 user guide

Arzum
Arzum MIXTECH instruction manual

NUTRIBULLET
NUTRIBULLET Smart Touch Blender user guide