Proline TB10 User manual

MARQUE: PROLINE
REFERENCE: TB 10 TIRE BOUCHON
CODIC: 2495791
TIRE-BOUCHON LECTRIQUE
ELECTRIC WINE OPENER
ELEKTRISCH WIJN OPENER
É

Automatic Corkscrew
MANUAL
We recommend that you charge your corkscrew for at least eight hours
before using it for the first time. Please follow the instructions for recharging
below:
The corkscrew is operated by a one simple switch. The switch has two functions.
Press the lower part of the switch to remove a cork from a bottle.
Press the upper part of the switch to release a cork from the mechanism after you
have removed it from the bottle. (See Pic 1)
Recharging your corkscrew
Plug one end of the adaptor cord into the
base of the recharging unit and the other
end into a mains socket. Place the
corkscrew into recharging unit, ensuring
that it is firmly in position and is fully
engaged with the recharging connectors.
It will take approximately 6-8 hours to
recharge your corkscrew. When the
corkscrew is fully recharged it can be used
to open approximately 30 bottles.
WINE OPENERWINE OPENER
SWITCH
CHARGING STANDCHARGING STAND
LED LIGHTLED LIGHT
ADAPTORADAPTOR
Model: TB10
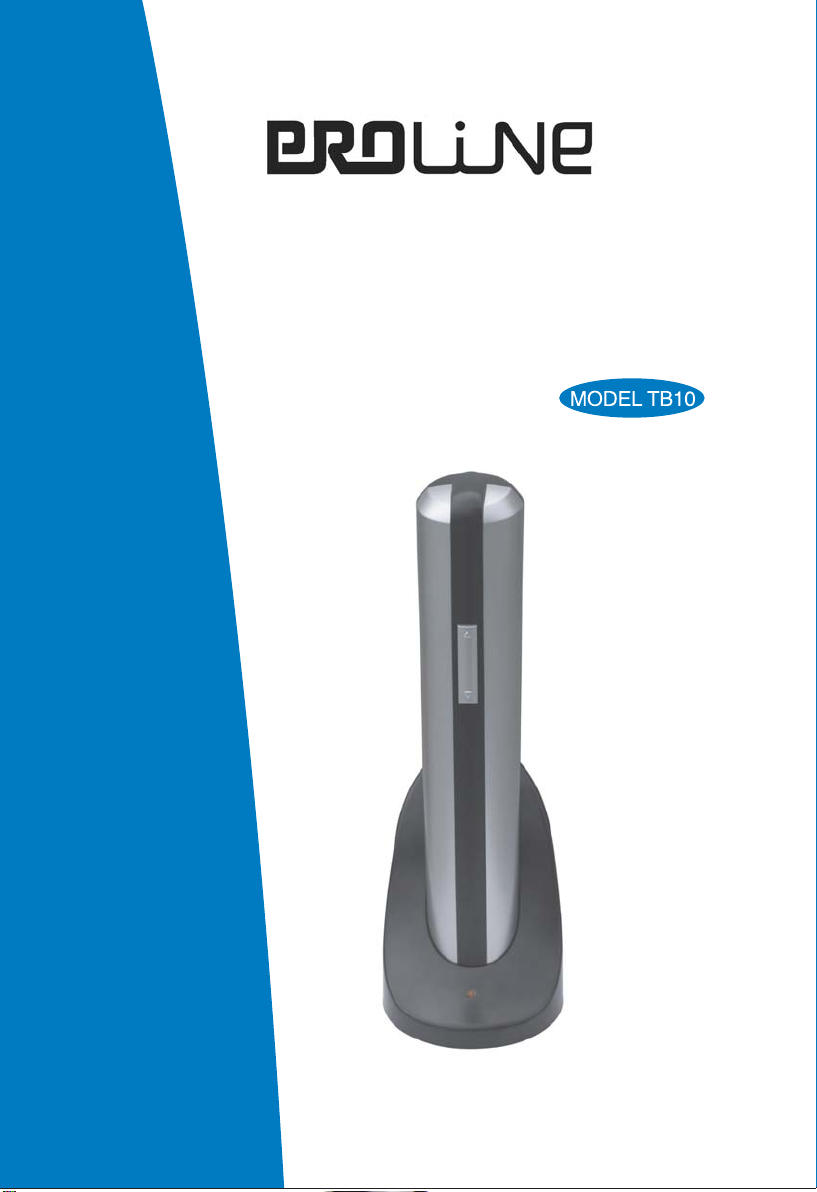
How to operate the corkscrew
Before using the corkscrew, you must remove
any foil from the top of the bottle using the
foil cutter provided.
1. Place the corkscrew on the top of the wine
bottle. Ensure that it remains as upright as
possible at all the times. If you hold the
corkscrew at an angle to the bottle, it will not
remove the cork properly. (See Pic 2).
(Pic.01)
up
down
2.Hold the corkscrew firmly and depress the lower
part of the switch. The corkscrew spiral will turn in a
clockwise direction and enter the cork, then
gradually remove it from the bottle. When the
corkscrew mechanism stops, the cork has been fully
removed from the bottle.
(Pic.02)
1
GB
GB
(Pic.03)
4.Always return the corkscrew to the
recharging unit when you have finished with it.
This will protect the mechanism while it is not
in use.
Note- It has been noted the automatic corkscrew
may experience problems with a small
percentage of plastic / synthetic corks and
undersized corks , if in this case the cork should
be removed manually.
PLEASE NOTE THESE IMPORTANT SAFETY POINTS
WARNING. When using this electrical appliance the following safety
precautions should be taken to reduce the risk of fire, electric shock and
personal injury.
&
&
&
&
&
&
&
&
&
&
&
&
&
Read all the instructions before use and save them for future reference.
When using or recharging the corkscrew keep your work surface clean and free
from potential hazards.
Never use the corkscrew in damp areas or near water, sinks or taps.
Never submerge the corkscrew or charger.
For indoor use only. Do not expose the corkscrew or charging unit to rain or
other extreme conditions.
Never force the corkscrew onto a bottle or attempt to speed up the mechanism.
The corkscrew will work best when it is operated at its intended speed.
Do not touch or adjust the corkscrew's mechanism or the corkscrew spiral. Only
hold the corkscrew by the plastic housing.
Do not attempt to open bottles if the switch is not working correctly.
Keep away from children. This is not a toy.
Do not attempt to open the corkscrew or the recharging unit. It has no
serviceable parts. Your corkscrew is guaranteed for one year. In event of
malfunction in this time please contact our customer services department
(details below).
Do not attempt to operate if the corkscrew, cord, plug or recharging unit is
damaged, dropped or malfunctions.
Only recharge the corkscrew using the recharging unit and power cord supplied.
Never remove the plug from the socket by pulling the power cord.
Mains supply
This equipment is designed to operate from a 230 Volt, 50Hz AC mains supply.
Other power sources may damage it.
Check that the rating label on the back of the equipment states 230V AC before
you plug it in for the first time.
Safety information
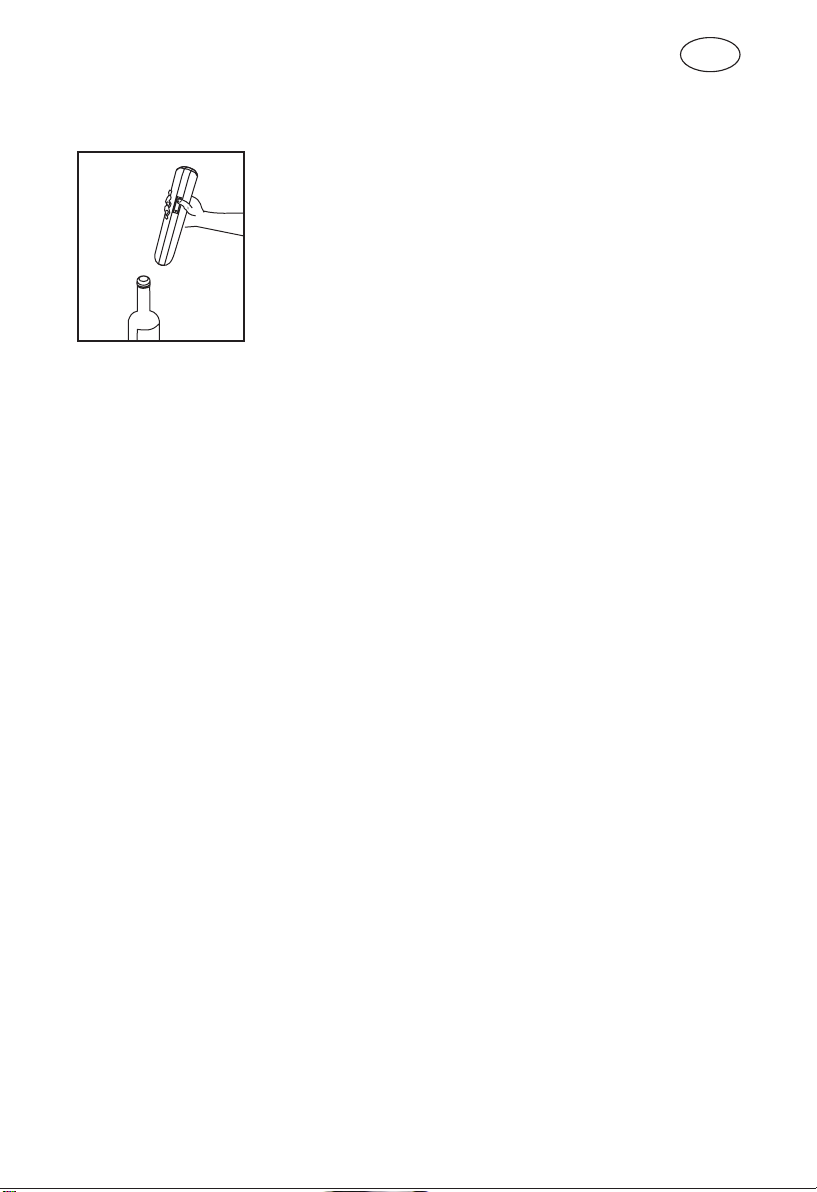
3.Lift the corkscrew away from the bottle. To remove the cork, simply depress
the upper part of the switch. The spiral will turn in an anti-clockwise direction
and release the cork. (See Pic 3).
2

UK standard (BS1363) plugs must havea3amp(BS1362 type) fuse fitted.
Replace the plug or have the power lead assembly replaced if The fuse cover is
lost.
Mains fuse
Symbols
This equipment is double insulated and an earth connection is not required.
Dangerous voltage constituting a risk of electric shock is present inside this
equipment.
This mark is applied to show the equipment conforms to European safety and
electro-magnetic compatibility standards.
There are important operating and maintenance instructions in the literature
accompanying this equipment.
Safe use and care of your equipment
We have designed and made this product to meet European safety standards, but
as with any electrical equipment you
must take care to get the longest working life from it and stay safe. Here are a
fewtipstohelpyoudothis.
Read
Protect the mains lead.
these instructions carefully before you try to use the equipment
You must ensure the mains lead cannot Be walked
on, crushed, chafed or cut.
Avoid harsh conditions such as wet or damp places, high humidity, strong vibration,
extremely high or low temperatures, strong sunlight and places which are very dusty.
Never
To save power,
Don't
Pull
push objects into holes and ventilation slots.
switch off mains power or pull out the mains power plug when you
are not using the equipment,unless the function of the equipment requires a
continuous power supply.
continue to use this equipment if you have spilt liquids in it, if it is damaged in
any way or if it does not work normally. Immediately unplug the equipment and get
expert advice.
the mains adapter out of the wall socket during thunderstorms.
This product is designed for domestic use only. Any other use may
invalidate the guarantee and might be dangerous.
If the mains adapter or its lead, gets damaged it must be replaced by a qualified
service agent with an approved adapter of the same type and rating to avoid an
electrical hazard.
Please destroy the old adapter, as it would be dangerous if inserted into a live
power outlet.
You must make sure the mains lead is firmly secured under the cord clamp.
This product is supplied with a mains to DC adapter suitable for your local supply.
Mains Adapter
3
GB

Cleaning
Disconnect the mains supply and use only a lightly dampened soft cloth.
Do not use chemical solvents or strong detergents as these may damage the
cosmetic finish.
Batteries
Remove batteries when the equipment is not to be used for a long time. Batteries
left in equipment may cause damage through deterioration and corrosive
leakage, invalidating the guarantee. To protect the environment please use local
recycling facilities for battery disposal.
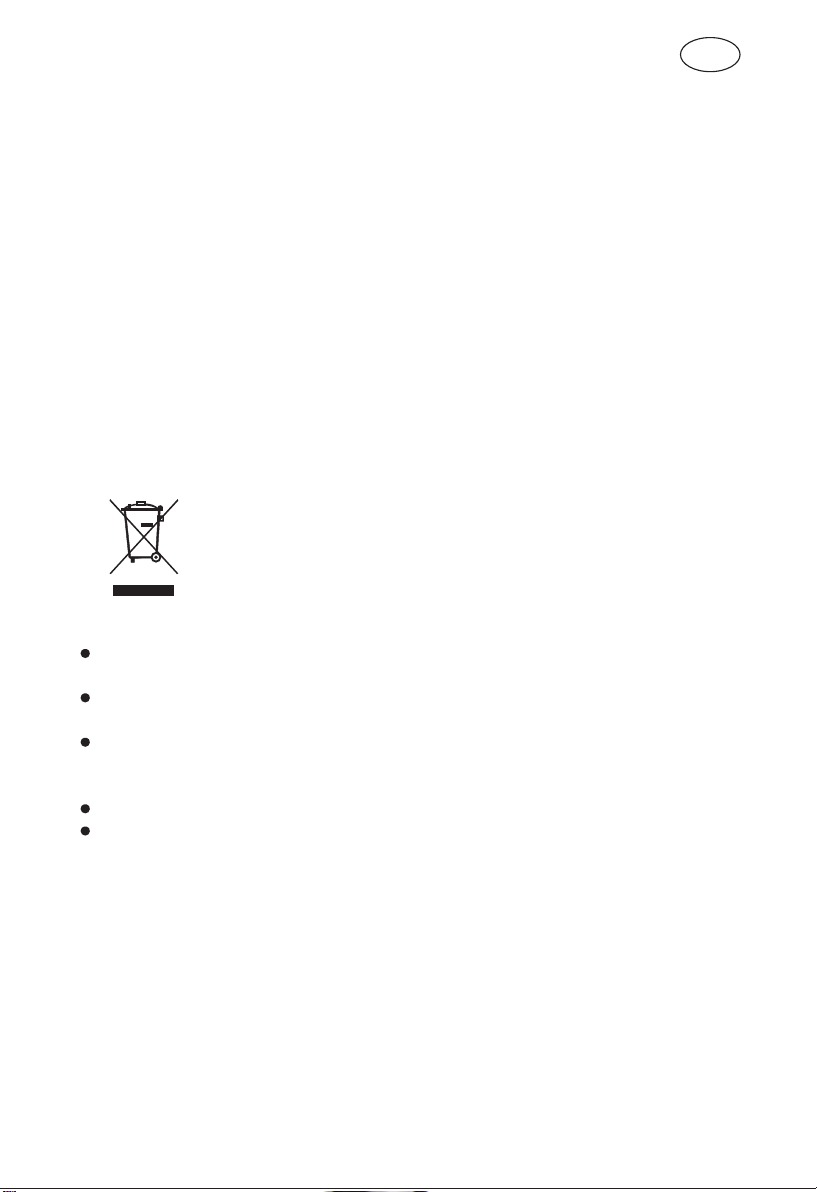
Disposal
Waste electrical and electronic products must not be disposed of
with household waste. Please refer to the retailer from whom you
purchased this item for disposal instructions.
Batteries and packaging materials can be recycled using your local
collection facilities.
Important Safety warnings
To prevent electric shock, do not remove any cover.
If anything goes wrong, don't try and fix it yourself, get a qualified service agent
to look at the product.
Do not expose this equipment to dripping or splashing or place any objects filled
with liquids, such as vases, on the equipment.
Never put a naked flame source on or near this equipment.
Small parts. Do not let young children play with the equipment
If something doesn't seem to work.
If there is something about your appliance which you do not understand and you
live in the UK, you can phone our help line during normal office hours on: 0113
2793520.
Calls are charged at standard rates.
We apologise for any inconvenience caused by minor inconsistencies in these
instructions, which may occur as a result of product improvement and
development. Kesa U.K HU1 3AU 30 / 07 / 2007
Specification
Charging time:10 hours
Bottles/full charged:30pcs
Charging Power:2W
Noise:<78db
Product weight(kg):0.8
Product size(cm):12.5*12*35
Place the equipment on a hard flat surface away from direct sunlight and heat
sources. If it is in a cabinet, allow at least a 10cm gap all around. Don't obstruct
the ventilation slots, including those underneath, with soft furnishings.
Overheating will shorten the life of the equipment and increase the risk of fire.
Ventilation
4
GB

FR
2.Maintenez le tire-bouchon fermement et appuyez sur
la partie inférieure de l'interrupteur. La partie en spirale
du tire-bouchon tournera dans le sens des aiguilles
d'une montre et entrera dans le bouchon. Enlevez le
bouchon progressivement de la bouteille. Lorsque le
mécanisme du tire-bouchon s'arrête, le bouchon sera
complètement retiré de la bouteille.
(Schéma 02)
Avant d'utiliser le tire-bouchon, vous devez
enlever la couverture en aluminium du bouchon
du haut de la bouteille en utilisant le cutter fourni.
1.Placez le tire-bouchon sur le haut de la
bouteille de vin. Assurez-vous de toujours le
maintenir droit. Si vous tenez le tire-bouchon de
travers, le bouchon ne s'enlèvera pas
Correctement (voir schéma 2).
(Schéma 01)
Haut
Bas
TIRE-BOUCHON
INTERRUPTEUR
SUPPORT DE RECHARGESUPPORT DE RECHARGE
LUMIERE LEDLUMIERE LED
ADAPTATEUR
Le tire-bouchon fonctionne grâce à un simple interrupteur. L'interrupteur a deux fonctions.
Appuyez sur la partie inférieure de l'interrupteur pour enlever le bouchon d'une bouteille.
Appuyez sur la partie supérieure de l'interrupteur pour relâcher le bouchon du mécanisme
une fois qu'il a été enlevé de la bouteille (voir schéma 1).
Comment utiliser le tire-bouchon
Recharger votre tire-bouchon
Branchez une extrémité du câble
d'alimentation à la base de l'unité de
recharge et l'autre extrémité à une prise
électrique. Placez le tire-bouchon dans
l'unité de recharge en vous assurant qu'il soit
positionné solidement et que les connecteurs
de recharge soient entièrement engagés. Il
faut environ 6 à 8 heures pour recharger
votre tire-bouchon. Lorsque le tire-bouchon
est complètement rechargé, il pourra
déboucher approximativement 30 bouteilles.
Nous vous recommandons de charger votre tire-bouchon durant au moins huit
heures avant de l'utiliser la première fois. Pour le recharger, veuillez suivre
les instructions suivantes :
Tire-bouchon automatique
MANUAL
Modèle:TB10
5

Alimentation électrique
Cet équipement est conçu pour fonctionner à une prise CA de 230 volts, 50Hz.
D'autres sources de courant pourraient l'endommager.
Vérifiez que votre alimentation domestique corresponde au courant CA de 230V
indiqué à l'arrière de l'appareil avant de brancher le tire-bouchon la première fois.
Informations de sécurité
&
&
&
&
&
&
&
&
&
&
&
&
&
Lisez toutes les instructions et conservez-les pour toute future référence.
Lorsque vous utilisez ou rechargez le tire-bouchon, gardez votre surface
de travail propre et éloignée de tout risque de danger.
N'immergez jamais le tire-bouchon ou le chargeur dans de l'eau
Utilisation uniquement en intérieur. N'exposez pas le tire-bouchon ou
l'unité de recharge à la pluie ou à d'autres intempéries.
Ne forcez jamais sur le tire-bouchon pour l'enfoncer dans une bouteille et ne
tentez pas d'accélérer le mécanisme. Le tire-bouchon fonctionnera mieux s'il
est utilisé à sa vitesse normale.
Ne touchez pas et n'ajustez pas le mécanisme ou la spirale du tire-bouchon.
Maintenez le tire-bouchon seulement par son boîtier en plastique.
N'essayez pas d'ouvrir des bouteilles si l'interrupteur ne fonctionne pas
correctement.
Gardez le tire-bouchon éloigné des enfants. Cela n'est pas un jouet.
Ne tentez pas d'utiliser le tire-bouchon si le câble, la prise ou l'unité de
recharge est endommagé(e ), est tombé ou dysfonctionne.
Rechargez uniquement le tire-bouchon en utilisant l'unité de recharge et le
câble d'alimentation fournis.
N'enlevez jamais la prise de la prise murale en tirant sur le câble.
N'utilisez jamais le tire-bouchon dans un lieu humide ou près de l'eau, d'un
évier ou d'un robinet.
Ne tentez pas d'ouvrir le tire-bouchon ou l'unité de recharge. Ils ne
contiennent aucune pièce interne pouvant être utilisée pour un autre usage.
Votre tire-bouchon est garanti durant une année. Dans le cas d'un
dysfonctionnement durant cette période, veuillez contacter notre service
d'assistance aux consommateurs (détails ci-dessous).
AVERTISSEMENT. Lors de l'utilisation de cet appareil électrique, les
précautions de sécurité suivantes doivent toujours être suivies afin deréduire le
risque d'incendie, de choc électrique et de blessure corporelle.
VEUILLEZ NOTER CES POINTS DE SECURITE IMPORTANTS
3.Eloignez le tire-bouchon de la bouteille. Pour enlever le bouchon, appuyez
simplement sur la partie supérieure de l'interrupteur. La spirale tournera dans le sens
contraire des aiguilles d'une montre et relâchera le bouchon (Voir schéma 3).
4.Remettez toujours le tire-bouchon sur l'unité de
recharge une fois que vous fini de l'utiliser. Cela
protégera le mécanisme lorsqu'il n'est pas utilisé.
Note : Le tire-bouchon automatique peut
dysfonctionner avec des bouchons synthétiques /
en plastique et avec des bouchons de taille plus
petite. Dans ce cas, vous devrez enlever le
bouchon manuellement.
(Schéma 03)
6
FR

Utilisation et entretien de votre équipement
Lisez
Protégez le câble d'alimentation
Evitez toute condition dangereuse
N'insérez jamais
Pour économiser de l'électricité,
Arrêtez
Tirez
Ce produit est conçu pour une utilisation domestique uniquement. Toute
autre utilisation pourrait annuler la garantie et pourrait être dangereuse.
Nous avons conçu et fabriqué ce produit selon les normes européennes de sécurité,
mais comme avec tout appareil électrique, vous devez prendre les précautions
nécessaires pour assurer une durée de vie maximale de votre appareil et assurer
votre sécurité. Voici quelques conseils pour vous aider.
attentivement ces instructions avant d'utiliser cet équipement.
. Vous devez vous assurer que le câble électrique
ne soit pas écrasé, frotté ou coupé.
, comme un lieu mouillé ou humide, de forte
humidité, sujet à de fortes vibrations, sujet à des températures élevées ou basses,
exposé à une forte lumière du soleil et un lieu extrêmement poussiéreux.
d'objets dans les trous et les fentes d'aération.
éteignez l'appareil ou débranchez la prise
lorsque vous n'utilisez pas cet appareil, sauf si la fonction de l'appareil nécessite
une alimentation continue.
d'utiliser cet appareil si un liquide s'est déversé à l'intérieur, s'il est
endommagé ou s'il dysfonctionne. Débranchez immédiatement l'appareil et
consultez un technicien.
sur la prise pour la débrancher de la prise murale durant un orage.
Des instructions importantes de fonctionnement et d'entretien sont inclues
dans le manuel accompagnant cet équipement.
Cet équipement est doublement isolé et il n'est pas nécessaire de le brancher
à une prise de terre.
Cette marque indique que cet équipement est conforme aux normes
de sécurité européennes et aux normes de compatibilité électrique.
Une tension dangereuse constituant un risque de choc électrique est présente
à l'intérieur de cet équipement.
Symboles
Les prises standard anglaises (BS1363) doivent contenir un fusible de 3 ampères
(de type BS1362).Remplacez la prise ou l'assemblage du câble si la couverture
du fusible est perdue.
Si l'adaptateur électrique ou le câble devient endommagé, il devra être
remplacé par un agent qualifié avec un adaptateur approuvé de même type
pour éviter tout risque de choc électrique.
Veuillez détruire l'adaptateur usé car il pourrait être dangereux s'il est inséré
dans une prise sous tension.
Vous devez vous assurer que le câble soit solidement maintenu avec l'attache
de câble.
Ce produit est fourni avec un adaptateur CC convenant à votre alimentation
domestique.
Adaptateur d'alimentation
Fusible
7
FR
Pour éviter tout choc électrique, n'enlevez aucun couvercle.
Si un problème survient, ne tentez pas de réparer vous-même, consultez un agent
qualifié pour vérifier le produit.
Ne placez jamais une flamme vive sur ou près de l'appareil.
Petites pièces. Ne laissez pas de jeunes enfants jouer avec cet appareil.
N'exposez pas cet appareil à des gouttes d'eau ou à des éclaboussures et ne placez aucun
objet rempli de liquide, comme un vase, sur l'appareil.
Spécifications
Durée decharge:10 heures
Bouteilles/ charge pleine :30 pièces
Puissance decharge:2W
Bruit :<78db
Poidsduproduit (kg) :0,8
Taille duproduit (cm) :12,5x12x35
Précautions importantes de sécurité
Déconnectez le câble électrique et utilisez seulement un chiffon doux légèrement
humidifié. N'utilisez pas de solvants chimiques ou de détergents puissants car ils
pourraient endommager le revêtement.
Piles
Enlevez les piles lorsque l'appareil n'est pas utilisé durant une longue période. Les
piles laissées dans l'appareil pourraient endommager l'appareil en le détériorant par
une fuite corrosive, ce qui annulerait la garantie. Pour protéger l'environnement,
veuillez jeter les piles selon les règles locales de recyclage.
Nettoyage
Placez l'appareil sur une surface plate et dure éloignée de la lumière directe du
soleil et de toute source de chaleur. S'il est placé dans un placard, laissez au moins
10cm autour de l'appareil. N'obstruez pas les fentes d'aération, incluant celles qui
sont situées en dessous qui pourraient être bouchées si vous placez le tire-bouchon
sur des matières molles. Une surchauffe réduirait la durée de vie de l'appareil et
pourrait créer un risque d'incendie.
Ventilation
Traitement des déchets
8
Les produits électriques et électroniques usagés ne doivent pas être
jetés avec les ordures ménagères. Renseignez-vous auprès du
revendeur où vous avez acheté ce produit pour obtenir la marche à
suivre en matière de recyclage.
Utilisez les installations de recyclage prévues pour vous
débarrasser de vos emballages.
FR
Nous nous excusons pour tout inconvénient causé par des incohérences mineures
dans ces instructions pouvant se produire dû à l'amélioration et le développement
du produit.
Kesa U.K HU1 3AU 30/07/2007

NL
GEBRUIKSAANWIJZING
Automatische kurkentrekker
2.Houd de kurkentrekker stevig vast en druk op de
onderkant van de schakelaar. De spiraal van de
kurkentrekker draait in de richting van de klok en gaat in
de kurk, waarna hij voorzichtig de kurk uit de fles
verwijdert. De fles is volledig ontkurkt wanneer het
mechanisme van de kurkentrekker is gestopt.
(Afb. 02)
Verwijder met behulp van de meegeleverde
foliesnijder alle folie bovenaan de wijnfles
voordat u deze kurkentrekker gebruikt.
1.Zet de kurkentrekker op de hals van de wijnfles.
Zorg ervoor dat de fles steeds zo recht mogelijk
blijft staan. Wanneer u de kurkentrekker schuin
ten opzichte van de fles houdt is het mogelijk dat
de kurk niet goed verwijderd wordt. (zie Afb. 2)
De werking van de kurkentrekker
De kurkentrekker wordt bediend via één eenvoudige schakelaar. Deze
schakelaar heeft twee functies:
Druk op de onderkant van de schakelaar om een fles te ontkurken.
Druk op de bovenkant van de schakelaar om de kurk uit het mechanisme los te
maken nadat u een fles heeft ontkurkt. (zie Afb. 1)
Stop de ene stekker van de adapterkabel in
de oplaadstand en de andere in een
stopcontact. Zet de kurkentrekker in de
oplaadstand, erop lettende dat hij stevig
vast zit en in contact is met de
oplaadcontacten. Een oplaadbeurt van uw
kurkentrekker neemt ongeveer 6-8 uur in
beslag. U kunt met een volledig opgeladen
kurkentrekker ongeveer 30 flessen
ontkurken.
KURKENTREKKER
SCHAKELAAR
ADAPTER
OPLAADSTAND
LED-LAMPJE
Het is aanbevolen de kurkentrekker minstens acht uur lang op te laden voordat
men hem voor het eerst in gebruik neemt. Gelieve de onderstaande instructies
voor het opladen te volgen: Model: TB10
Opladen van uw kurkentrekker
(Afb. 01)
bovenkant
onderkant
9
Veiligheidsinformatie
Netvoeding
Dit apparaat werd ontworpen voor werking op een netvoeding van 230 volt,
50 Hz. Andere stroombronnen kunnen dit apparaat beschadigen.
Kijk na of het informatieplaatje op de onderzijde van het apparaat 230 V
wisselstroom aangeeft voordat u de oplaadstand voor het eerst op een
stopcontact aansluit.
WAARSCHUWING: Tijdens het gebruik van dit elektrische apparaat
moeten de onderstaande veiligheidsvoorzorgen in acht worden genomen
om een risico van brand, elektrische schokken of verwonding te voorkomen.
Lees de volledige gebruiksaanwijzing voor ingebruikname en bewaar hem voor
toekomstig gebruik.
Tijdens het gebruik of opladen van de kurkentrekker dient men het werkvlak
schoon en vrij van mogelijke gevaren te houden.
De kurkentrekker mag nooit worden gebruikt in vochtige plaatsen of vlakbij water,
spoelbakken of kranen.
De kurkentrekker en oplaadstand mogen niet in vloeistof worden
ondergedompeld.
Uitsluitend bestemd voor binnenhuis gebruik. De kurkentrekker en oplaadstand
mogen niet aan regen of andere extreme omstandigheden worden blootgesteld.
Forceer de kurkentrekker nooit op een fles en probeer het mechanisme niet sneller
te laten werken. De kurkentrekker werkt het beste op de snelheid waarvoor hij
ontworpen werd.
Raak het mechanisme van de kurkentrekker noch de spiraal aan en probeer er niet
aan te sleutelen. Houd de kurkentrekker alleen vast bij de kunststof behuizing.
Probeer geen flessen te ontkurken wanneer de schakelaar niet naar behoren
functioneert.
Buiten het bereik van kinderen houden. Dit is geen speelgoed.
Probeer de kurkentrekker noch de oplaadstand te demonteren. Geen enkel
onderdeel ervan kan door de gebruiker zelf worden hersteld. Bij aankoop van uw
kurkentrekker krijgt u een garantie van één jaar. Wanneer hij binnen deze periode
defect is neemt u contact op met onze klantenservice (details onderaan).
Probeer de kurkentrekker niet te gebruiken wanneer het apparaat, het snoer, de
stekker of de oplaadstand beschadigd of gevallen is of niet naar behoren
functioneert.
Laad de kurkentrekker uitsluitend op met de meegeleverde oplaadstand en het
meegeleverde netsnoer.
Trek nooit aan het snoer om de stekker uit het stopcontact te verwijderen.
&
&
&
&
&
&
&
&
&
&
&
&
&
4. Zet de kurkentrekker na gebruik altijd terug
in de oplaadstand om het mechanisme te
beschermen terwijl het niet in gebruik is.
Opmerking wij hebben ondervonden dat de
automatische kurkentrekker problemen kan
hebben met een minimaal percentage van
kunststof / synthetische kurken en ondermaatse
kurken. In dergelijke gevallen moet de fles
handmatig worden ontkurkt.
(Afb. 03)
3.Neem de kurkentrekker van de fles af. Om de kurk te verwijderen drukt u
eenvoudig op de bovenkant van de schakelaar. De spiraal draait tegen de richting
van de klok om de kurk los te maken. (zie Afb. 3)
GELIEVE DE ONDERSTAANDE BELANGRIJKE
VEILIGHEIDSVOORZORGEN IN ACHT TE NEMEN
10
NL

Veilig gebruik en verzorging van uw apparaat
Lees
Bescherm het netsnoer.
Voorkom extreme omstandigheden
nooit
Om stroom te besparen
niet
Verwijder
Dit product is uitsluitendbestemdvoor huishoudelijk gebruik. Alle andere
vormen van gebruik kunnen de garantie teniet doen en gevaarlijk zijn.
Hoewel wij dit apparaat hebben ontworpen en vervaardigd in overeenstemming
met de Europese veiligheidsnormen moet men, zoals bij alle elektrische apparaten,
dit apparaat voorzichtig hanteren en verzorgen voor een zo lang mogelijke
gebruiksduur en omwille van de veiligheid.
Hier volgen enkele tips om u hierbij te helpen.
deze gebruiksaanwijzing aandachtig voordat u dit apparaat in gebruik neemt.
Zorg ervoor dat niemand op het netsnoer kan stappen en
dat het niet gekneld, geschonden of gesneden kan worden.
zoals natte of vochtige plaatsen, hoge
vochtigheidsgraad, sterke trillingen, extreem hoge of lage temperaturen, sterk
zonlicht en plaatsen die zeer stoffig zijn.
Duw voorwerpen in de openingen en ventilatiesleuven.
schakelt u de stroomvoeding naar het stopcontact uit of
verwijdert u de stekker uit het stopcontact wanneer het apparaat niet wordt
gebruikt, tenzij de toepassing van het apparaat een ononderbroken netvoeding
vereist.
Gebruik dit apparaat nadat er vloeistof op werd gemorst en wanneer het
beschadigd is of abnormaal functioneert. Verwijder in dat geval onmiddellijk de
stekker uit het stopcontact en vraag advies aan een expert.
bij onweer de stekker uit het stopcontact.
Bij dit apparaat hoort documentatie met belangrijke gebruiksaanwijzingen
en instructies voor het onderhoud.
Een gevaarlijk voltage dat een risico van elektrische schokken inhoudt is
aanwezig binnenin dit apparaat.
Deze markering wordt aangebracht om aan te geven dat het apparaat voldoet aan
de Europese normen voor de veiligheid en elektromagnetische congruentie.
Netadapter
Dit product is uitgerust met een netvoeding-naar-gelijkstroom adapter die
geschikt is voor uw plaatselijke netvoeding.
Een beschadigde netadapter of het snoer ervan dient bij een gekwalificeerde
reparatieservice te worden vervangen door een goedgekeurde adapter van
hetzelfde type en voltage om gevaren met elektriciteit te voorkomen.
Gelieve de oude adapter te vernietigen omdat het gevaarlijk zou zijn wanneer
hij in een stopcontact onder stroomspanning zou worden gestopt.
Let erop dat het netsnoer stevig onder de snoerklem vastzit.
Stekkers die voldoen aan de Britse richtlijn BS1363 moeten uitgerust zijn met
een zekering van 3 Amp (type BS1362). Laat de stekker of het assemblage van
het netsnoer vervangen wanneer de afdekking van de zekering zoek is.
Zekering in de stekker
Symbolen
Dit apparaat is dubbel geïsoleerd zodat aardeaansluiting niet nodig is.
11
NL
Elektronische afvalstoffen dienen niet weggegooid te worden met het
huisafval. Breng dit materiaal terug naar uw electro-speciaalzaak voor
een veilige verwerking, of indien dit niet mogelijk is, naar het inname
punt in uw gemeente.
Verpakkingsmateriaal dient gerecycleerd te worden bij uw
plaatselijke faciliteiten.
Verwijder geen enkel onderdeel van de behuizing om elektrische schokken
te voorkomen.
Probeer in geval van problemen het apparaat nooit zelf te repareren. Breng
het naar een gekwalificeerde reparatieservice voor een nazicht.
Stel dit apparaat niet bloot aan druppelende of spattende vloeistof en zet
geen voorwerpen die met vloeistof gevuld zijn, zoals vazen, bovenop dit
apparaat.
Zet geen voorwerpen met naakte vlammen op of vlakbij dit apparaat.
Kleine onderdelen. Sta niet toe dat jonge kinderen met dit apparaat spelen.
Belangrijke waarschuwingen betreffendede veiligheid
Wegwerpen
Schoonmaken
Batterijen
Ontkoppel de netvoeding en gebruik uitsluitend een lichtbevochtigde zachte doek.
Gebruik geen chemische schoonmaakproducten of sterke detergenten omdat deze
de afwerking van het apparaat kunnen beschadigen.
Verwijder de batterijen wanneer het apparaat lange tijd niet zal worden gebruikt. In
het apparaat achtergebleven batterijen kunnen door slijtage en corrosieve lekkage
schade veroorzaken, die niet door de garantie wordt gedekt. Wees milieubewust en
breng oude batterijen naar een plaatselijk inzamelsysteem voor recyclage.
Ventilatie
Zet dit apparaat neer op een stevige, vlakke ondergrond waar het niet aan
rechtstreeks zonlicht of warmtebronnen wordt blootgesteld. Wanneer dit in een
kast is, laat u een vrije ruimte van minstens 10 cm rondom het apparaat.
Blokkeer de ventilatiesleuven niet, ook niet deze in de onderzijde, door
bijvoorbeeld zacht meubilair. Door oververhitting wordt de gebruiksduur van
het apparaat korter en het risico van brand groter.
Technische gegevens
Laadduur: 10 uur
Flessen / volledig opgeladen: 30 stuks
Laadvermogen: 2 W
Geluidssterkte: <78 db
Gewicht van product (kg): 0,8
Afmetingen van product (cm) 12,5x12x35
12
NL
Wij verontschuldigen ons voor kleine onnauwkeurigheden die ondanks onze
nauwlettendheid in deze gebruiksaanwijzing kunnen voorkomen als gevolg van
voortdurende ontwikkeling en verbetering van onze producten.
Kesa U.K. HU1 3AU 30/07/2007
This manual suits for next models
1
Table of contents
Languages:
Other Proline Kitchen Appliance manuals

Proline
Proline SW4 User manual

Proline
Proline CHOCR User manual

Proline
Proline MIAM User manual

Proline
Proline TPKI2000 User manual

Proline
Proline SM22S User manual

Proline
Proline FS20 User manual

Proline
Proline JE45 User manual

Proline
Proline JE7W User manual

Proline
Proline MC95 User manual

Proline
Proline MC20 User manual


