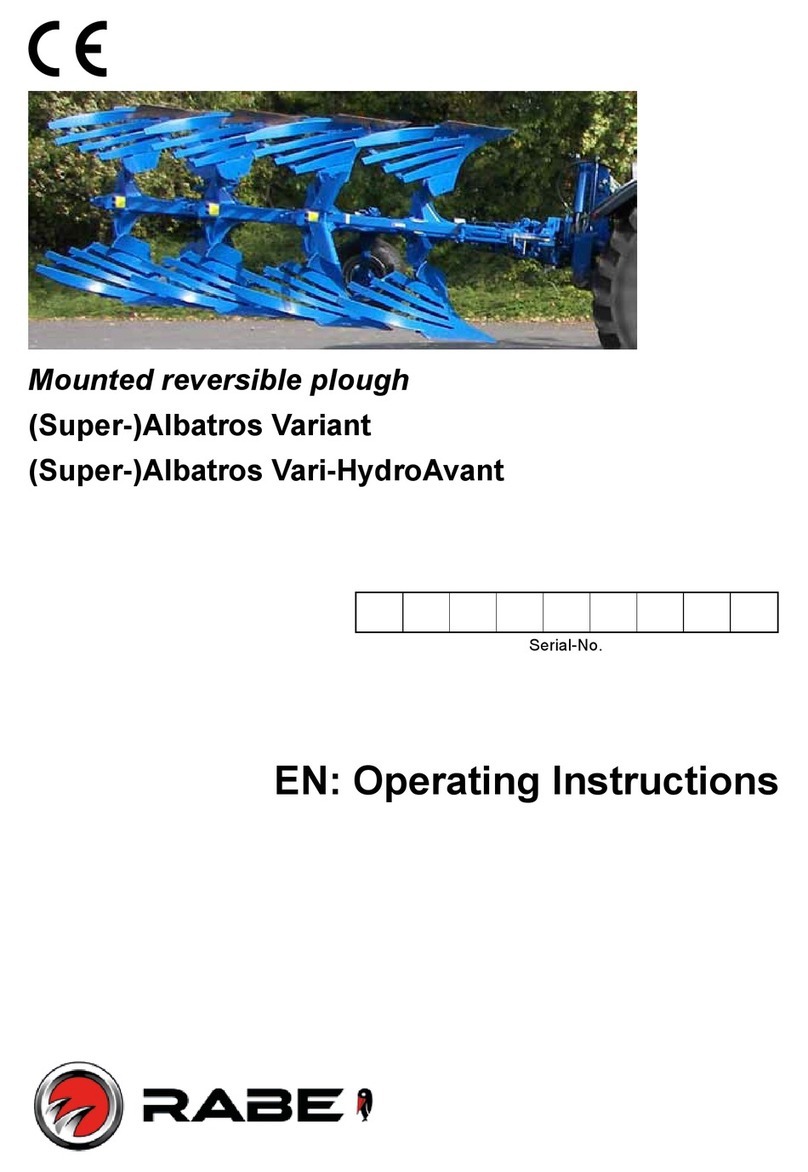
Rabe Raven Avant Series User manual

Operating Instruction
Reversible Ploughs
Raven(Shearbolt)
Raven (Hydro)Avant (Auto-reset)
Order-No. 9900.00.01GB01


1
For Your Own Safety
In this enclosure to the operating instructions you will find some general rules
of conduct explaining how to operate the implement correctly - and some
safety advice which we advise you to observe for your own safety!
The list is very extensive, and some of the advice does not specifically relate to
the implement supplied. However, the summary of advice is to remind you of
safety guidelines which are often unconsciously ignored when operating the
machines and implements on a daily basis.
1. Authorized Use
The implement has been specifically built to perform standard operations pertaining to
agricultural work (authorized use).
Any type of usage outside of these parameters is deemed to be improper usage. The
manufacturer accepts no responsibility for damage resulting from such usage, and the risks are to
be borne solely by the user.
Within the bounds of authorized usage it is also necessary to adhere to the manufacturer’s
prescribed operational, maintenance and service conditions.
The implement may only be used, maintained or serviced by people who are familiar with such
an implement and aware of the risks involved. Please also ensure that all safety instructions are
passed on to other users.
It is important that any and all relevant accident prevention regulations and any other generally
recognized safety, industrial hygiene and road traffic regulations be observed.
Modifications to the implement made by the user will void any liability on the part of the
manufacturer for any resulting damage.

2
2. General Safety Advice and Accident Prevention Regulations
•Before starting up your implement and tractor, please check that it is roadworthy and
operatively safe.
•Please observe all generally valid safety and accident prevention regulations.
•The warnings and signs found on the implement are there to provide essential data needed to
operate the unit safely. Please observe these for your own safety.
•When using public roads always follow the relevant traffic regulations.
•Before commencing work, ensure that you are familiar with all devices and operating controls
as well as with the functions these perform. It is too late to do so once the implement is in
operation!
•Operators should wear tight-fitting clothing. Try to avoid wearing loose clothing wherever
possible!
•The machine should be kept clean to prevent the risk of fire!
•Check the immediate surroundings before driving off and putting the machine into operation!
(Beware of children!) Ensure that you have sufficient visibility!
•Riding on the equipment during work or transportation is not allowed!
•Implements should be correctly coupled and only secured to the specified appliances.
•Special care is to be taken when coupling and uncoupling implements to or from the tractor.
•When coupling and uncoupling supports, always position them correctly. (Stability)
•Always ensure that weights are only added correctly to the specified mounting points.
•Observe all permissible axle loads, total weights and transportation dimensions.
•Check and mount transportation equipment such as lighting, warning devices, and guards, if
necessary.
•Ensure that the release ropes used for rapid coupling and uncoupling hang loose and do not
automatically release when in a low position.
•Never leave the operating platform when in transit.
3
•Road, steering and braking performance will be influenced by mounted or attached
implements and ballast. Therefore make sure that you have sufficient steering and brake
capability.
•Account for the width of the implement and its working load when taking corners.
•Only operate implements once all the safety devices/guards have been mounted and are in
protection mode.
•Keep clear of working areas at all times.
•Keep clear of rotating and swinging parts on the implement.
•Ensure the swinging parts are clear of bystanders before operating any hydraulic folding
frames.
•Power-steered parts (e.g. hydraulics) can cause crushing or amputation!
•On high-speed implements with ground-driven implements beware of after-running swinging
parts! Only approach once the implement is at a complete standstill!
•Before leaving the tractor, lower the implement to the ground, switch off the engine and
remove the ignition key!
•Do not allow anyone to stand between the tractor and the implement without first having
secured the vehicle against running away by putting on the handbrake and/or using wheel
chocks.
•Ensure that the folded-in frames and lifting equipment are securely in transportation position.
•Fold in and lock the packer catching arms before transporting on roads.
•Lock the marker arms to transportation position.
2.1 Coupled Implements
•Before coupling or uncoupling an implement to the three-point linkage, position the operating
device in such a way as to prevent unintentional lifting or lowering.
•When using the three-point linkage it is vital that the coupling configurations of the tractor
and implement correspond or are co-ordinated.
•There is a risk of injury through crushing or amputation near the three-point linkage.

4
•When using the external controls to operate the three-point linkage, keep clear of the area
between the tractor and the implement.
•When the implement is in transportation position, always ensure that the tractor’s three-point
linkage is sufficiently locked at the side.
•When transporting a raised implement on public roads ensure the control lever is locked in
place to prevent accidental lowering.
2.2 Mounted Implements
•Secure the implement to prevent it from running away.
•Observe the max. permissible bearing loads for the trailer coupling, swinging drawbar or
hitch.
•If a drawbar trailer is used, ensure that there is sufficient manoeuvrability at the towing point.
2.3 PTO Drive (applies only to PTO-driven implements)
•Only use the drive shafts specified by the manufacturer.
•A pipe shield and protective bell must be mounted on the drive shaft as well as a PTO guard –
also possible on the implement - and must be in perfect working order.
•Ensure the specified pipe covers are used on the drive shafts when in transportation and
working position.
•Only couple and uncouple the drive shaft once the PTO has been disengaged, the engine
switched off and the ignition key removed.
•Ensure that the drive shaft is mounted and secured correctly at all times.
•Secure the drive shaft guard by locking the chains in place to prevent them from turning.
•Before engaging the PTO make sure that the PTO speed chosen on the tractor complies with
the permissible speed of the implement.
•When using ground speed power take-off ensure that the speed is regulated by the travel
speed and that the direction of rotation changes when reversing.

5
•Before engaging the PTO make sure that the area of danger around the implement is free of
bystanders.
•Never engage the PTO when the engine is switched off.
•When working with the PTO, keep the area around the rotating PTO and drive shaft clear of
any bystanders.
•Always disengage the PTO where the bends are too big and it is not needed.
•Caution! Beware of after-running gyrating loads after disengaging the PTO! Do not stand too
close to the implement during this time. Only begin working on it once it has come to a
complete standstill. It is essential that you switch off the engine and remove the ignition key.
•Before cleaning, greasing or adjusting a PTO-driven implement or its drive shaft, always
disengage the PTO, switch off the engine and remove the ignition key.
•Place the uncoupled drive shaft on the specified support.
•Cover the stump of the PTO with a protective cover after dismounting the drive shaft.
•Any damage which may arise should be repaired immediately. Never work with a damaged
implement.
2.4 Hydraulic Equipment
•Hydraulic equipment is under very high pressure.
•When connecting hydraulic cylinders and motors ensure that the hydraulic hoses are
connected as specified.
•When connecting hydraulic hoses to the tractor’s hydraulics ensure that the hydraulics are
depressurized on the tractor and the implement.
•Where it is necessary to connect hydraulic functions between the tractor and the implement,
the coupling sockets and plugs should be marked to prevent faulty operation.
Mixing up the connections will reverse the functions (e.g. lift/lower) - Risk of injury!
•Check the hydraulic hose connections at regular intervals and replace if damaged or aged. The
replacement hydraulic hoses must comply with the technical requirements stipulated by the
implement manufacturer.
•When looking for leaks, use suitable aids and resources to prevent injury.

6
•Liquids that leak at high pressure (hydraulic oil) can penetrate the skin and cause serious
injury! In the event of injury, consult a doctor immediately. Risk of infection!
•Before working on hydraulic units, lower the implement, depressurize the system, switch off
the engine and remove the ignition key.
2.5 Brakes and Tyres
•Check that the brakes are functional before every journey.
•Thorough checks are to be performed on the brake systems at regular intervals.
•Adjustments or repairs to the brake system may only be performed by qualified staff or
recognized brake service centres. Only use the prescribed brake fluid and replace as specified.
•When working on the tyres please ensure that the implement has been securely parked and
cannot run away (wheel chocks).
•Fitting tyres requires having sufficient training and the correct fitting tools.
•Wheel and tyre repairs may only be performed by qualified staff using the correct fitting
tools.
•Check the air pressure at regular intervals observing the prescribed air pressures given.
2.6 Maintenance
•Service, maintenance and cleaning work as well as the elimination of malfunctions should
only be carried out once the drive unit has been switched off and the engine has come to a
standstill. Remove the ignition key.
•Check that the nuts and bolts are snug, and tighten as necessary.
•When carrying out maintenance work on a raised implement always secure using suitable
support elements.
•When replacing bladed working tools use the appropriate tools and gloves.
•Dispose of all oils, grease and filters in a due and proper manner.
•Always disconnect the power supply before working on electrical equipment.

7
•When performing electrical welding work on a tractor with a mounted implement disconnect
any cables connected to the generator and the battery.
•Gas tanks must only be filled using nitrogen to avoid risk of explosion.!
•Spare parts must at a minimum comply with the technical requirements given by the
manufacturer of the implement. We therefore recommend that for your own safety you use
original parts only!
2.7 Additional Hints and Tips: Mechanical Seed Drills
•Danger! Beware of rotating and oscillating machine parts when performing a calibration test.
•Only use the tread plates for filling purposes. Riding on the machine during operation is
prohibited.
•When transporting on public roads protect or remove the thrust collars on the pre-emergence
marking.
•When filling the seed hopper, observe the information provided by the implement
manufacturer.
•Lock row markers in transportation position.
•Do not place any foreign parts in the seed hopper – the agitating shaft also rotates during
manoeuvring.
•Observe the permissible filling quantities.


Ensure before operating the plough for the first time that you have thoroughly read and taken note of
this operating manual and the safety precautions (”For your own safety”).
All persons operating this unit must be properly trained and qualified with regard to use,
maintenance and safety requirements, and correctly informed of the hazards involved. Supply
complete copies of the safety precautions to all those employed to operate the unit.
Please observe all applicable accident prevention regulations, along with any other generally rele-
vant recognised safety, workplace health and road traffic legislation.
Always obey the warning notices.
Precautions identified in this manual with this symbol
and indicated by this warning notice
attached to the machine warn of danger.
(Please refer to the appendix entitled ”Pictogram symbols”
for an explanation of the warning notices.)
Voiding of guarantee
This plough is designed and built exclusively for normal agricultural use.
Use for any other purpose will be regarded as unauthorised operation, and no liability will be
accepted for any damage or injury that may occur as a result.
The term ”authorised use” also covers observation of the specified operating, maintenance and
servicing conditions: e.g. the kW/HP limits and the exclusive use of original spares.
Any use of accessories and/or parts from other suppliers (consumables or spares) that has not
been approved by RABEWERK will void all guarantee liabilities.
Unauthorised repairs and/or modifications of the unit cancel all liability that may result from injuries
or damage so caused.
Any claims resulting from delivery (transit damage, missing items) must be communicated in
writing immediately.
Warranty claims, along with guarantee conditions to be observed and/or liability limits, are as
established in our terms of delivery.
Operatinginstructions
Reversible Ploughs
Raven, Raven Avant / Hydro-Avant

Technical specifications
(Wereservetherighttomakealterations) Underbeam Interbody Furrow
Furrows 3 4 5 6 clearance clearance adj. width
Plough type ** Weight in standard form kg* ( Tractor max. kW / HP ) cm cm cm
Raven 1200
Raven Avant 1200 695
905 (78 /
105) 865
1145 (88 /
120) - - 75/80 90 32,36,41,
46
Raven 1200 M
Raven Avant 1200 M 700
910 (78 /
105) 870
1150 (88 /
120) - - 75/80 97 34,39,44,
49
Raven 1500
Raven Avant 1500
Raven HydroAvant 1500 S
840
1025
1040
(88 /
120)
1035
1280
1305
(103 /
140)
1245
1555
1585
(118 /
160) -75/80 93 33,37,42,
47
Raven 1500 M
Raven Avant 1500 M
Raven HydroAv. 1500 MS
845
1030
1050
(88 /
120)
1040
1290
1315
(103 /
140)
1255
1565
1595
(118 /
160) -75/80 100 35,40,45,
50
Raven 1800
Raven Avant 1800
Raven HydroAvant 1800 -1120
1405
1345
(118 /
160)
1355
1715
1635
(133 /
180) -80
75/80 93 33,37,42,
47
Raven 1800 M
Raven Avant 1800 M
Raven HydroAv. 1800 M
915
1130
1085
(103 /
140)
1130
1415
1355
(118 /
160)
1365
1725
1645
(133 /
180) -80
75/80 100 35,40,45,
50
Raven 2300
Raven Avant 2300
Raven HydroAvant 2300 --
1585
-
(140 /
190)
1505
1880
1805
(155 /
210)
1725
-
2080
(170 /
230)
80
75/80 93 33,37,42,
47
Raven 2300 M
Raven Avant 2300 M
Raven HydroAv. 2300 M -1275
1575
1515
(140 /
190)
1515
1890
1815
(155 /
210)
1735
-
2095
(170 /
230)
80
75/80 100 35,40,45,
50
* without optional equipment
** “Raven1200”Cat.II,“Raven1500-1800” Cat.II,IIIor IIInarrow,“Raven 2300”Cat.IIIorIIInarrow
(Height variable lower link pins).
"Raven" – with shear bolt leg protection
"RavenAvant" – with automatic mechanical stone protection
"Raven HydroAvant" – with automatic hydraulic stone protection
Sound level: < „70 dB (A)“
Weights of optional equipment:
Manure skimmer 26kg per pair, Maize skimmer 33 kg per pair, Trash boards 14 kg per pair ,
Disc coulters – plain or notched 45 kg per pair, spring loaded 52 kg per pair, Wing coulters 6 kg per pair,
Subsoiler 26 kg per pair, rear land wheel 85 kg, Combi wheel D2 140 kg,
Furrowpressarm for"Raven"60 kg, for"Raven-Avant/-HydroAvant”110kg
Explanation of pictures: (13/1) means Fig.13, Position 1.
2

Safety precautions
Prevent injuries.
Do not allow anyone to remain between the tractor and
the unit while it is being coupled or uncoupled.
Likewise, do not stand between the tractor and the
ploughwhenoperatingthehydraulicexternal controls.
Before coupling or uncoupling, set the tractor’s
hydraulic lifting system to ”Position Control”.
Ensure before starting up at the beginning of each shift
that the tractor and plough are both in safe operating
condition. The user is responsible for safety.
Ensure that there is sufficient space to manoeuvre, and
attach suitable and sufficient weights to the front of the
tractortopreservesteeringstabilityandpreventthe
tractorfrom rearing.
Thereisa danger of sufferingcrushinjuriesor
amputationinthearea of the three-point linkage/plough
head stock, and also when carrying out width
adjustmentsor turning.
Ensure each time the plough is used, and while it is
being towed, that no one is standing nearby.
Never allow anyone to climb onto or ride on the
plough,orremaininthe danger area (swing-out zone).
Do not carry out adjustment or maintenance tasks
beforefirstloweringtheunitontheground.
Use the correct tools and wear suitable protective
gloves when fitting parts with cutting edges.
When working along the contour line of a steep slope,
take into account the centre of gravity when the plough
is raised.
Lock the hydraulic controls fitted to the tractor when
transporting the unit. This is to prevent accidental
activation.
Never leavethe tractor unattended without first
loweringtheplough,cutting off the engine andremoving
the ignition key.
Before starting up for the first time - and after any
prolonged period without use - check all screws and
bolts for tightness, ensure all bearings are sufficiently
greased, check the hydraulic system for leaks and
ensure the tyres are inflated to the correct pressure.
Warning notices (pictograms)
Warning notices are used to indicate possible
hazards; their purpose is to help ensure the safety
ofallthose involved inoperatingtheplough.
Pleaserefer to the appendix entitled ”Pictogram
symbols” for an explanation of the warning notices.
See Fig.1 (e.g. 3 = numbered series in the
explanation)fordetailsof their locations.
Replace any missing warning notices. These items
can be ordered from RABE as spare parts.
1
1
2
3
5
3

Set-up
Ensure that couplings on the three-point linkages are
compatible(Cat.:Tractor/Plough).
Check tractor tyre pressures and measure the inner
clearance between the tyres. This distance should be
approximatelythesameforthefrontandrearwheels,
and the inner walls of the tyres should align (2/1).
Set the lower link arms to the same height.
Set the lower link pins (3/1) to a height where the
plough can be raised sufficiently, and/or the lower link
arms are in the correct position during operation. (See
tractoroperating manual).
Set the top link on the plough head stock so that it lifts
slightlyrelativetotheploughduringoperation.(Secure
the top link pin to prevent it turning (4/1); Fit on the
opposite side a washer and lynch pin.
Securethethree-pointlinkageinaccordancewith
safetyregulations.
Connect the hydraulic hoses according to protective
capcolour.
Turnover: Connect the two hoses with the double
acting control unit on the tractor (red);
Thehosemarked‘P’onthehydraulicturnovercylinder
shouldbe used for the ”UP” function.
Forsingle acting turnover use the hose from ”T” direct
into the oil reservoir of the tractor lift and the second
hose to the single acting spool valve.
In this case an additional single-action spool valve is
requiredforahydraulicallyoperatedpick-uparmfor
furrowpress operation.
Hydraulic front furrow adjustment: Connect the two
hoses with a double acting spool valve on the tractor
(blue).
HydroAvant models: Connect the one hose for the
hydraulic auto reset system with a single-action spool
valve(white).
2
1
3
1
4
1
2
Turnovertest
Raiseplough. Releaseparking prop.
Activatethehydrauliccontrolfrom”Neutral”into”UP”
position until the plough has rotated compl. and is flush
with the vertical adjuster screw (3/2),
or - in the case of a an hydraulic angling device – until
the re-angling sequence is also completed.
Then put the control back into ”Neutral”.
Afterabouteightseconds,a new turnover sequence or
immediately if the hydraulic control is operated briefly in
”Down”position.
If, when reversing, it emerges that the plough is not
sufficiently raised (despite the lower link pins being
fitted in the bottom position), the lifting rods of the
three-pointlinkagewillneedtobeshortened.
If this is also not sufficient, attach the top link at a
higherpointontheplough.
Beware of the raised plough colliding with other objects,
e.g. the open rear window of the tractor cab, including
whenturning.
4

E
D
6
1
E
7
8
E1
Preliminary adjustment
The”Pointofdraft” (6/Z)and the front furrowwidthcan
be already pre-adjusted before setting out to work. Fi-
nal adjustment is then carried out on-site during work.
In the RABE adjusting centre, both settings are clearly
configuredandseparately adjusted.
Draft: usingthe turnbuckle(8/1)oradj.sleeveon
angling cylinder (7/1) to align the landsides in a paral-
lel line to the central turnover shaft (axis of rotation).
Thefollowing table indicates the approx. length of the
turnbuckleor angling cylinder (6/D) dependingtothe
workingwidth(cm)oftheplough model:
2. Front furrow width: use screw (6/E) or
hydraulically to adjust dimension (C) which is the hori-
zontal distance from centre turnover shaft to the land
side of the first body. Supposition is that the plough is
in a correct vertical alignment.
Dimension (C) depends, along with other items, on the
innerclearancebetweenthe tyres (A)andfurrowwidth
perbody (B).If no model-specific furrow width is shown
in the table, dimension (C) should be regarded as an
intermediatevalue–seeexample ”b”.
Examples:
a) Working width per body 40 cm
Inner tyre clearance 130 cm
Dimension C18 cm
b) Working width per body 37 cm
Inner tyre clearance 130 cm
Dimension C21 cm
Do not carry out hydraulic front furrow width
adaptation under load or when the plough is lifted.
Working width,
beam 110 32~34 36~39 41~44 46~49
Working width,
beam 120 or 140 33~35 37~40 42~45 47~50
Raven / -Avant
/ -HydroAvant Length of turnbuckle or angling cyl. D (cm)
Raven 1200 47,5 46 45 43,5
Raven 1500
Raven 1800
66 64,5 62,5 61
Raven 2300 70,5 68,5 66 63,5
Inner tyre
Clearance Working width per body B
A35 40 45 50
110 13 83~
120 18 13 8 3
130 23 18 13 8
140 29 24 19 14
150 35 30 25 20
C
: from centre turnover shaft to land side of first body
5

90° 1
9
10 11
12
12
11
2
2
Use during operation
The lower link arms of the tractor must be able
tomovesidewaysduringoperation.Checkchainsor
stabilisers should be slack. However, they should be
laterally rigid when the unit is raised, insofar as this
is permitted by the design of the tractor.
Working depth: Select ”Draft” or ”Mixed Control” on
the hydraulic system and choose desired working
depth.
Adjust the top link so that the plough beam is paral-
lel to the ground surface.
With bottom link sensing on the tractor the top link
can be fitted to the slotted hole position on the
ploughheadstock for improved draftcontroland
relieve of strain on the hydraulic three-point system.
The top link pin should rest against the forward
shoulderallowingsomeplayduringwork.
Thisimprovesalsofasterpenetrationof the plough
at the start of a furrow.
Depth wheel: If the plough is fitted with a depth
wheelortransport/depthwheel(combi- wheel), this
is not brought into contact with the ground until the
ploughingdepthadjustmenthasbeencarried out –
Do not exert to much load on the wheel.
Depth setting using spindle (10/1 or 11/1):
Using the eccentric collar (10/2 or 11/2)differences
indepthbetweentheleftandrighthandploughing
side can be equalised.
Plough inclination / tilt: Each side of the plough is
adjustedseparately. Ground surfaceandplough
beamshould be at approximately right angles (90°)
to each other. (See Fig.12).
Spindle (9/1) for the right-hand bodies
Spindle (9/2) fortheleft-handbodies
The inclination control can also be used to carry out
adepth alignment of the front bodies. If the front
furrow of one side is too shallow, it should be
aligned by inclining it more steeply relative to the
ploughedside.
6

14
52
1
4
3
15
1
Draft alignment and front furrow width
Adjustments should be carried out in the following
order:Draftadjustment first and thenthefrontfurrow
width.
Futureadjustmentsto the front furrow width subject
tochangingworkingdepthsorploughingona
slope– do not greatly influence the draft setting.
Draft: (Position of the lower link arms):
Thetractorshouldrunalongthefurrowwithoutany
lateraldraft.
If the laterally mobile lower link arms are not
approximately centred relative to the tractor, causing
lateral draft, correction should be made at the
turnbuckle (15/1)oranglingcylinder (14/1).
Turn cylinder limit stop sleeve (14/2) with the
spannerprovided (14/3).
Secure with screw (14/4)in groove.
Shorten turnbuckle / cylinder – Three-point
linkagecreepstowardsploughedside
Extend turnbuckle / cylinder – Three-point linkage
creepstowardsunploughed side
Example: If the tractor is pulled at the front end
towardstheploughedside,shortentheturnbuckle
or the cylinder somewhat. After adjustments do not
forget to extend the cylinder fully against the limit
stop.
Front furrow width: This must be adapted to the
workingwidthofthe other bodies.
Using the spindle (14/5) – or the hydraulic system –
to shift the plough beam parallel:
Beamdisplacedtowardsploughed side
–frontfurrownarrower
Beamdisplacedtowardsunploughedside
–front furrowwider
Do not carry out hydraulic front furrow width
adaptation under load or when the plough is lifted.
7

3
2
1
17
18
20
19
2
1
3
1
Working width adjustment
Theworking width for each body is adjustable in four
steps. Use locating pin (17/1) for adjusting and fit
washerunderbothsides.
Slacken the pivot bolt (17/2) only slightly if the
consoleneeds to be swivelled.
All bodies must be set to the same working width.
Torque tension of locating pins and pivot
bolts (17/1 & 17/2)
110 & 120 mm beam -410 Nm
140mmbeam -710 Nm
For your owm safety: Use gloves and only suitable
toolsandspanners(25/3) as provided!
( RABE part no. 4798.00.99).
It is important to observe the torque tensions
stated in this manual ( see pages 8, 10 & 12)
Skimmers and disc coulters are adjusted at the
same time.
Whenchangingtheworkingwidth,thewheel
bracket must be shifted as well (17 & 18) at the
samepattern.
Every time the working width is changed
realignmentofthe draft and frontfurrowwidthis
absolutely necessary.
Referto”Preliminaryadjustment”page5 (6D & 6E).
Pick- up arm for furrow presses
Transport position: Fix the connecting rod (19/1) at
the main arm (19/2). OnAVANT – models swing the
outerendof thearm(20/1)forward.
Working position: Fix the connecting rod (19/1) so,
that the pick- up arm is in an rectangular position to
thetravellingdirection.
On the arm of the hydraulic disconnecting device
there is a set of holding pins (19/3)provided which
can be fitted on both ends of the hook, to pull the
furrowpressaroundobstacleswiththeploughin
liftedposition.
Tooperatethe disconnecting device whenthedevice
isconnectedtotheturnoverram(markedTon ram),
the hydraulic control must be activated in opposite
directionaswhenreversing the plough.
8
This manual suits for next models
23
Table of contents
Other Rabe Farm Equipment manuals

Rabe
Rabe Albatros Variant User manual

Rabe
Rabe KORMORAN PL V 180 User manual

Rabe
Rabe ADLER DS18 800 User manual

Rabe
Rabe Combi-Digger Series User manual

Rabe
Rabe KORMORAN SF 180 User manual

Rabe
Rabe Pavo V 140 User manual

Rabe
Rabe TURBOSEED PRO User manual

Rabe
Rabe Packer CR User manual

Rabe
Rabe Kormoran PF 180 User manual

Rabe
Rabe Super Albatros 140 RMW+ User manual