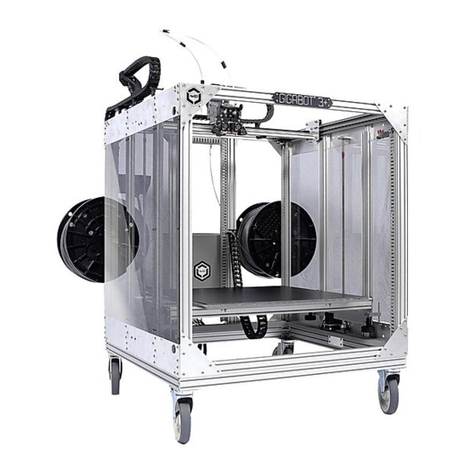
re:3D TERABOT User manual

TERABOT
Getting Started Guide
Revision 08 | August 25, 2022

Welcome
Congratulations on your Terabot® purchase. We can’t wait to see you print huge!
This guide will help get your Terabot® set up and ready to print. Should you have any
questions, please reach out to [email protected].
HELPFUL LINKS
Here are some additional links to help you along the way:
●KNOWLEDGE BASE | https://re3d.zendesk.com
●COMMUNITY FORUM | https://re3d.zendesk.com/hc/en-us/community/topics
●SHOP | http://shop.re3d.org/
●WEBSITE | https://re3d.org/
●THINGIVERSE | https://www.thingiverse.com/re3dprinting/designs
●CULTS3D | https://cults3d.com/en/users/re3D/creations
●YOUTUBE | https://www.youtube.com/re3Dprinting
FOLLOW US
Stay updated on re:3D activities! We regularly post content on the following accounts:
●FACEBOOK | https://www.facebook.com/re3Dprinting/
●TWITTER | https://twitter.com/re3Dprinting
●LINKEDIN | https://linkedin.com/company/re-3d
●INSTAGRAM | https://www.instagram.com/re3dprinting/
Sales, updates and events are announced in our monthly newsletter. Sign up at bottom of
our main page at https://re3d.org/
2

Safety Instructions
3
READ INSTRUCTIONS
All the safety and operating instructions must be read before the printer is operated.
RETAIN INSTRUCTIONS
The safety and operating instructions should be retained for future reference or accessed
on our Knowledge Base here: https://bit.ly/gigabotguides
HEED WARNINGS
All warnings on the product and in the operating instructions should be adhered to.
FOLLOW INSTRUCTIONS
All operating and use instructions should be followed.
CLEANING
Unplug this product from the wall outlet before cleaning. Compressed air and vacuums can
be used for dust or particle removal. Only water and isopropyl alcohol may be used to
damp a lint-free rag to wipe off dust and bed surface adhesives.
ATTACHMENTS
Do not use any attachments or enhancements not recommended by the product
manufacturer as they may cause hazards.
WATER AND MOISTURE
Do not use Gigabot® 3+ near water such as a sink or other water source. The relative
humidity of the environment should ideally be between 0%-50%. Feedstock should be
stored in dry boxes if the environment is too humid or if the material is moisture-sensitive.
PLACEMENT
Do not place this product on an unstable cart, stand, tripod, bracket, or table. The product
may fall, causing serious injury to a child or adult, and serious damage to the product. Place
the product only on stable surfaces recommended by the manufacturer, or sold with the
product.
VENTILATION
Slots and openings in the enclosure are provided for ventilation to ensure reliable
operation of the product. To protect it from overheating, these openings must not be
blocked or covered. This product should not be placed in a built-in installation unless
proper ventilation is provided or the manufacturer’s instructions have been adhered to.

Safety Instructions
POWER SOURCES
This product should be operated only from the type of power source indicated on the
marking label. If you are not sure of the type of power supply to your home consult your
appliance dealer or local power company. For products intended to operate from battery
power, or other sources, refer to the operating instructions.
GROUNDING
This product is equipped with a 3-wire grounding type plug. The 3-wire grounding type
plug will fit into a grounding type power outlet. If you are unable to insert the plug into the
outlet, contact your electrician to replace your obsolete outlet. The grounding pin is a both
a safety feature and critical component for proper function of the machine. Do not defeat
the purposes of the grounding type plug.
POWER-CORD PROTECTION
Power-supply cords should be routed so that they are not likely to be walked on or pinched
by items placed upon or against them, paying particular attention to cords at plugs,
convenience receptacles, and the point where they exit from the product.
LIGHTNING
For added protection for this product during a lightning storm, or when it is left unattended
and unused for long periods of time, unplug it from the wall outlet. This will prevent
damage to the product due to lightning and power-line surges. Plugging the machine into a
surge protector or an uninterrupted power supply (UPS) can prevent damage to the
machine as well. In the case of the UPS, it will allow the machine to keep running for a short
period of time to prevent loss of progress in out-of-power scenarios.
OVERLOADING
Do not overload wall outlets, extension cords, or integral convenience receptacles as this
can result in a risk of fire or electric shock. A product and cart combination should be
moved with care. Quick stops, excessive force, and uneven surfaces may cause the product
and cart combination to overturn.
OBJECT AND LIQUID ENTRY
Never push foreign objects of any kind into this product through openings as they may
touch dangerous voltage points or mechanical components that could result in a fire,
electric shock, or broken components. Never spill liquid of any kind on the product.
4
Terabot Dimensions
5

A | Receiving and Uncrating
Inside this crate is your Terabot®. We know you want to start printing, but your new 3D
printer needs a little attention before your power it on. It’s currently wearing extra pieces
that protect it during shipping, but wreak havoc if left on during the printing process.
Follow these receiving and uncrating instructions first, and we’ll get you printing soon!
To uncrate your fully assembled Terabot®, you will need a Phillips head screwdriver and a
pair of diagonal cutting pliers to cut zip ties. You will also need 3mm and 4mm Allen
wrenches which are provided with the printer.
Upon delivery of Terabot®, inspect all packages for damage prior to signing for the delivery.
If there is any damage, record it and report to our shipping manager within 24 hours at
Terabot® runs on 110V as a standard unless you specified when purchasing that it would be
preferable to use 220V. It will draw no more than 20A of power at 110V. The standard
110V version comes with a 6 foot 20A power cord with NEMA 6-20P plug to IEC C19 SJT.
7

IMAGE BOX:
Option A.
1. Place Image
2. Sent to Back
IMAGE BOX:
Option A.
1. Place Image
2. Sent to Back
IMAGE BOX:
Option A.
1. Place Image
2. Sent to Back
Before arrival, establish an appropriate space
for Terabot® to be located during operation.
Terabot® requires access to a dedicated 20A
circuit, and it should be plugged into an
uninterrupted power supply or a surge
protector. A climate-controlled environment
is recommended, but not necessary.
8
A1
Upon arrival, check the Tip n' Tell and
Shockwatch indicators for indication of
mishandling. Check the crate for damage. If
any damage is observed, or the indicators are
tripped, record and report to
[email protected] within 24 hours.
A2
Using a Phillips head screwdriver, remove the
wood lid and panels of the crate. Remove the
ratchet straps and plastic wrap covering
Terabot®.
A3

IMAGE BOX:
Option A.
1. Place Image
2. Sent to Back
IMAGE BOX:
Option A.
1. Place Image
2. Sent to Back
IMAGE BOX:
Option A.
1. Place Image
2. Sent to Back
Remove all zip ties, foam blocks, tape, bubble
wrap, etc. from Terabot®. The foam blocks can
be removed by using at least 3 people to
carefully lift one side of Terabot® and pull out
the foam blocks from beneath the printer.
Once the foam blocks are removed, Terabot®
will rest on its casters and can be rolled off the
plywood crate base.
9
A4
Use a 4mm allen wrench to remove all 8
triangle braces holding the bed in place. Note
that these are both above AND below the bed
frame.
A5
Similarly, use the 4mm allen wrench to
remove the 4 triangle braces that hold the Y
gantry in place. There are two on each side.
A6

IMAGE BOX:
Option A.
1. Place Image
2. Sent to Back
IMAGE BOX:
Option A.
1. Place Image
2. Sent to Back
IMAGE BOX:
Option A.
1. Place Image
2. Sent to Back
Locate your power cable. Attach the female
end in the socket underneath the electrical
box. Insert the male end of the power cable
into an outlet.
10
A7
The power switch is located at the back of
Terabot® on top of the electrical box. It is a
large red and yellow switch. Rotate it
clockwise to turn on the printer!
A8
Once again, use the 4mm allen wrench to
remove the 2 triangle braces that hold the
print head in place on the gantry. Store and
keep all of these braces in case the bot needs
to be shipped elsewhere in the future.
A9

B | Bed Leveling and Z-Home Position
A level bed is the foundation for all your 3D prints, and laying down a successful first print
layer is the difference between a beautiful new creation and a messy blob. Read on to
discover more steps on your path towards becoming a 3D printing ninja.
Before shipment, all Terabot® printers are calibrated to have a leveled bed and correctly
gapped nozzle Z heights (the distance between the nozzle and the bed). The following
instructions outline the steps to level the bed of your Terabot® and recalibrate the Z height
in case of movement during shipping.
Please follow the steps outlined in this guide to level the bed of your Terabot® and set the
proper gap between the bed and the nozzle (Z-Home Position).
These steps recommend and demonstrate the use of a 4 inch touch off gage, or tool setter
gage, to indicate the distance between the nozzle and the bed. You can find this touch-off
gauge here: https://www.edgetechnologyproducts.com/pro-touch-off-gage/
11

IMAGE BOX:
Option A.
1. Place Image
2. Sent to Back
IMAGE BOX:
Option A.
1. Place Image
2. Sent to Back
IMAGE BOX:
Option A.
1. Place Image
2. Sent to Back
12
B1
B2
With Terabot on,, refer to section D to learn
how to start a .gcode file from the micro SD
card. Use the provided micro SD card to run
the file titled “Terabot Bed Level.” This will
automatically home the print head and bed,
heat the hot ends, drop the bed to 101.6mm,
then move the print head over each of the
leveling points.
B3
Make sure that the bed is clean and clear of
debris to ensure an accurate measurement.
Place a 4” tool setter on the bed between the
bed and the left hot end nozzle. It is important
to note that you need to use the left hot end
for each measurement.
If the dial indicator is to the right of zero, it
means that the bed is too close. You will need
to LOWER that point. Use the 17mm wrench
to 1) loosen the upper hex nut, and 2) tighten
the lower hex nut such that it draws that point
down. Adjust the bed level such that the dial
indicator on the tool setter is reading zero
(0).

IMAGE BOX:
Option A.
1. Place Image
2. Sent to Back
IMAGE BOX:
Option A.
1. Place Image
2. Sent to Back
IMAGE BOX:
Option A.
1. Place Image
2. Sent to Back
13
B4
B5
If the dial indicator is to the left of zero, it
means that the bed is too close, and you will
need to RAISE that point. Use the 17mm
wrench to 1) loosen the lower hex nut, and 2)
tighten the upper hex nut such that it pushes
that point up. Adjust the bed level such that
the dial indicator on the tool setter is reading
zero (0).
B6
After setting each point to the proper height,
press the Viki button to advance to the next
position. Repeat steps A5-A6 on all 9 bed
leveling points.
Run the “Terabot Bed Level” .gcode file again.
Use the tool setter gauge to check all 9 points
again, adjusting them as needed. Repeat these
steps multiple times around the bed as
needed, with a deviation less than 0.01”

IMAGE BOX:
Option A.
1. Place Image
2. Sent to Back
IMAGE BOX:
Option A.
1. Place Image
2. Sent to Back
IMAGE BOX:
Option A.
1. Place Image
2. Sent to Back
14
B7
Once you’ve verified that the level is good
according to the tool setter, verify that all hex
nuts have been tightened again so the bed
does not move.

C | Loading and Changing Filament
Terabot® prints with 2.85mm diameter polymer filament. Thanks to the all-metal design of
the hot ends, Terabot® can print virtually any 3D printing filament available on the market!
Whether you are using Terabot® for utilitarian or artistic prints (or both!), your 3D printer
needs filament loaded and inserted into the extruder to properly execute your vision for a
3D printed paradise. The following section demonstrates how to load filament into
Terabot® prior to printing as well as how to change filament when needed.
For a video demonstration of loading filament similar to the following instructions, please
read our article “GB3+ Filament Loading” on our Knowledge Base here:
https://bit.ly/LoadingFilament
For a video demonstration of changing filament similar to the following instructions, please
read our article “Changing the Filament Spool” on our Knowledge Base here:
https://bit.ly/ChangingFilament
For updates on the full range of materials we have tested, see our website at:
https://re3d.org/materials/
With your Terabot®, we have provided PLA filament. We recommend using this material
for your first test print since it prints consistently, and we have developed optimized print
settings for it that will be discussed in a future section.
15

IMAGE BOX:
Option A.
1. Place Image
2. Sent to Back
IMAGE BOX:
Option A.
1. Place Image
2. Sent to Back
IMAGE BOX:
Option A.
1. Place Image
2. Sent to Back
16
Install the [10864] spool holders on the back
of Terabot® with 2x M5 magic t-nuts, 2x M5
flat washers, and 2x SHCS M5x16 each. The
spool holders should be on the far left and far
right vertical rails, approximately 36 inches off
the ground. The hardware to mount the spool
holders may already be attached to the frame.
Use a 4mm Allen wrench to fasten the
hardware.
C1
Place the filament spool onto the spool holder.
The filament should feed from below the spool
and into the Filament Detection (FD) unit
nearest to it.
C2
Prior to inserting the filament into the guide
tubes, use the dust cleaning cloth to clean it.
Insert each filament into its tube, wrap a
filament cleaning cloth around it just below
the FD unit, and then secure it using the
spiralite.
C3

IMAGE BOX:
Option A.
1. Place Image
2. Sent to Back
IMAGE BOX:
Option A.
1. Place Image
2. Sent to Back
IMAGE BOX:
Option A.
1. Place Image
2. Sent to Back
17
To manually load the filament, set the filament
temperature using the Viki controls (Prepare
> Preheat PLA/PC, or Control > Temperature
> set custom temperature). (1) Pull up on the
tensioner arm (2) Insert filament into the hole
between the idler bearing and the extruder
drive gear. Keep inserting until plastic comes
out the nozzle.
C4
To load the filament using the Viki, navigate to
Prepare > Change Filament. You will still need
to insert the filament into the hole of the
extruder manually, but the extruder will push
it through the nozzle.
C5
Use a l
C6
1
2
34

D | Printing on Terabot®
You are almost ready, 3D printing ninja! There are two ways to make Terabot® print gcode;
via USB or using a microSD card in the Viki LCD controller. Typically, we recommend
printing via the microSD card. It's the most reliable method because it eliminates the
possibility of a print stopping due to computer errors or power issues. The USB cable is
also more susceptible to electrical interference which can disturb the serial
communication to Terabot®. For your first print, you will print a “Moai” with a pre-loaded
file on the SD card using the Viki LCD controller. Later in Section F we will show you how to
generate your own gcode.
Prior to printing, prepare your Terabot® bed and enclosure according to the requirements
of the material you are using. Examples of common materials and their necessary
preparations are listed below:
PLA
●Enclosure open (remove at least 2 enclosure hood panels)
●Bed clean or thin layer of glue stick or Magigoo Original
●Can be main part material or support material with PETG in dual extrusion
●Filament removed from the filament tube when printing with a closed enclosure
PETG
●Glue stick on bed
●Can be main part material or support material with PLA in dual extrusion
●Enclosure optional
ABS
●Very clean bed surface. Clean bed with damp rag (water) then isopropyl alcohol
●For large parts: Very clean surface as above, then apply Magigoo Original
●Enclosure fully shut
●Uses itself as support material
The full “Material Printing Guide” is found on our Knowledge Base here:
https://bit.ly/MaterialPrintingGuide
Note that at the start of each print, Terabot® will heat the bed and nozzle(s), and then home
each axis. Be sure to share what you print in the "Show and Tell" section of our forum, at
https://bit.ly/re3Dshowandtell or tag us on social media using #Gigabot.
Should you have any questions, please reach out to [email protected].
18

IMAGE BOX:
Option A.
1. Place Image
2. Sent to Back
IMAGE BOX:
Option A.
1. Place Image
2. Sent to Back
IMAGE BOX:
Option A.
1. Place Image
2. Sent to Back
19
Insert the provided microSD card into the Viki
controller. Your Terabot® will come
pre-loaded with a gcode file. This file is
preconfigured for you to immediately print.
D1
Select "Init. SD card" or "Change SD card" and
then navigate to "Print from SD".
D2
Select the .gcode file and Terabot® will begin
heating the bed and nozzles. Once heated,
Terabot® will begin to print. You can load the
SD card with your own gcode files to print
with later.
D3

E | Software Setup
To achieve the best 3D prints, it will take a combination of your skills, a properly
maintained Terabot®, and a well sliced 3D model. Simplify3D is our preferred slicing and
printer hosting program. Not only does it lead the market in parameter customization and
features like customizable support generation, but Simplify3D best handles the large print
jobs that Terabot® users make on a daily basis. The factory file functionality also enables us
to better support and troubleshoot with customers. We recommend this for any user
looking for a robust and reliable software workflow.
Current installations of Simplify3D will not have the most updated printing profiles for
Terabot®, so the following steps discuss how to import a new profile. For a quick video
demonstration of these steps, feel free to watch our video on this process titled “Importing
Profiles to Simplify3D” on our YouTube channel linked here:
https://www.youtube.com/watch?v=VUiiRQfaPjc
20
Table of contents
Other re:3D 3D Printer manuals

re:3D
re:3D Gigabot User manual

re:3D
re:3D Gigabot User manual

re:3D
re:3D Gigabot User manual

re:3D
re:3D Gigabot X User manual

re:3D
re:3D Gigabot User manual

re:3D
re:3D Gigabot User manual

re:3D
re:3D gigabot User manual

re:3D
re:3D Gigabot User manual

re:3D
re:3D Gigabot User manual

re:3D
re:3D GIGABOT 3+ User manual
Popular 3D Printer manuals by other brands

zortrax
zortrax M200 Plus Troubleshooting: Camera Preview Is Blurred

Snapmaker
Snapmaker CAN Hub A150 quick start guide

pro3dure medical
pro3dure medical CD-2 Working instructions

Prusa
Prusa i3 Hephestos Assembling Guide

SINTERIT
SINTERIT Lisa X Translation of the original manual

Stratasys
Stratasys Dimension Elite user guide