manuals.online logo
Brands
  1. Home
  2. •
  3. Brands
  4. •
  5. Rebotec
  6. •
  7. Mobility Aid
  8. •
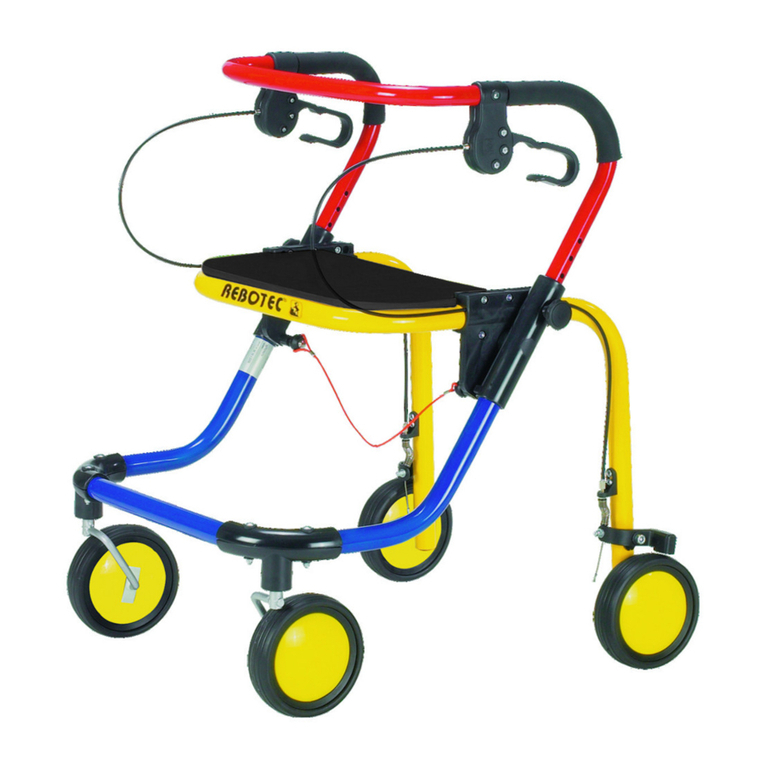
  9. Rebotec YANO Series User manual

Rebotec YANO Series User manual

rt. No.:
Model
130.xx.10
Standard handle
130.xx.20
Ellipse handle
130.xx.30
Spade handle
Art. No.:
Model - Long
130.xx.15
Standard handle
130.xx.25
Ellipse handle
130.xx.35
Spade handle
Art. No.:
Model - children
130.95.10
Standard handle
130.95.20
Ellipse handle
130.95.30
Spade handle
xx/00=light gray,10=black,50= gentian blue,95=coloured
BA No.: 02.01.119/2017-02
Arthritis Crutch - YANO
Max. Body Weight 150 kg
User Instructions
Important advisories!
Read the User Instructions before first-time use and always keep them available for the user.
Always abide by all the advisories and especially the safety instructions.
Always store the User Instructions for future use.
GB
Ellipse handle
Spade handle
Standard handle
REBOTEC®Rehabilitationsmittel GmbH
DE-49610 Quakenbrück, Artlandstr. 57-59
Telephone: (+49) 5431/9416-0
Telefax: (+49) 5431/9416-66
http://www.rebotec.de
E-mail: [email protected]
REBOTEC / BA No.: 02.01.119/2017-02 GB
- 2 -
1. General advisories
1.1 Introduction
In these User Instructions you will find information
and advisories on starting-up, using and
maintenance and care of the Arthritis crutch.
1.2 Intended use
The arthritis crutch is designed for persons with
impaired walking ability who have inflammatory
rheumatism of the joints. It serves to provide more
security when walking. This crutch can be used
inside and outside in street traffic areas. Always be
sure to observe all the safety advisories! No
contraindications are known.
1.3 Crutch design
The crutch has an upholstered lower arm support
cuff with fixation of the lower arm using Velcro
straps. The lower arm cuff and the handle position
are adjustable. A crutch end-cap with a large
support area provides added stability.
The crutch is designed for a max. body
weight of up to 150 kg.
You can see this User Instructions pamphlet
via our website at www.rebotec.de.
It is possible to print out the information and to
read it as necessary.
2. Symbols
Read the User Year of
Instructions! Manufacture
Product conforms to the Medical
Products Directive 93/42/EWG
Important advisory Language
or information!
Warning –observe safety advisory!
3. Guarantee
We provide a warranty period of 2 years for the
crutches. A prerequisite for this is that the crutch is
used only as instructed and regular maintenance is
carried out. Wear and damage resulting from
product misuse are excluded.
Non-compliance with the instructions and
advisories in this User Instruction, improper
maintenance and unauthorized alterations to the
product lead to the immediate annulment of the
guarantee and product liability rights.
The delivery date on the
REBOTEC delivery note is the start of the
guarantee period.
4. Re-Use, lifetime
Product liability applies only to the first use of the
product described in this User Instructions. If the
product is to be given further again after the first
use, then it must be checked over by an authorised
dealer or by the manufacturer. This inspection
should prevent an improper use through possible
or directly visible damages.
We defer to the conditions of the Medical Products
Act (MPG) and the (ProdHaftG §4) Product Liability
Act.
The lifetime of this product is limited to 2 years.
5. Care
To care for the crutch, use a mild commercially
available cleanser and disinfection agent. After
cleaning, wipe it with clean water and then wipe
dry with a cloth.
Do not use an abrasive scouring agent or cleaner
(read the product instructions!) that contain
aggressive solvents (acids, benzene, thinners,
alcohol). Do not use stiff cleaning brushes, as
these will damage the plastic surfaces or cause
deposits to build up on the plastic parts and other
materials.
When using a disinfectant, be sure to
abide by the manufacturer’s
instructions during use!
6. Maintenance
A worn or damaged crutch end-cap (wear-part)
must be replaced immediately.
Bent or damaged crutches may not be used
because they no longer provide the necessary
stability. Because of the risk of breakage, bent
crutches may not be repaired by straightening. In
the event the crutch is damaged, then have it
repaired by an authorized sales and service
dealer.
Be sure to have your crutches inspected by an
authorized company at least every year. Heavy
use and harsh conditions by the patient on the
crutch may necessitate more frequent
maintenance.
7. Disposal
Products that are no longer useable must be
properly disposed of according to national and
local regulations for environmental protection and
material recycling. They must be kept separated
from regular household refuse. Contact your local
disposal company or environmental authorities on
how to properly dispose of the product.
8. Ordering spare parts, complaints
For ordering spare parts or in the event of
complaints, we kindly ask you to provide the article
number and product model. You can find this
information on the crutch.
GB
REBOTEC / BA No.: 02.01.119/2017-02 GB
- 3 -
9. Safety advisories for use
Observe the following instructions
when using the crutch:
Read the User Instructions before first-time use
in order to avoid damages through improper use
or other hazards.
Be sure the maximum allowable weight for the
crutch is not exceeded!
Before each use, carefully check the crutch for
damage. If damage is detected, then do not use
the crutch. Contact your authorised dealer for a
complete inspection!
For your safety, have someone assist you in
overcoming obstacles.
When using the crutch, be sure that the Velcro
straps are securely fastened around the forearm.
Check the crutch end-tip on a regular basis for
wear or damage. Replace if damaged or worn.
Under no circumstances may the crutch be used
for foreign purposes. Use it only to assist your
walking and not for example as an aid for getting
up, as a lever for prying or for moving objects.
Do not use the crutch as an implement to
activate light switches or elevator buttons.
Do not hang any objects on the crutch
(handbags, shopping bags, etc.).
Do not expose crutches to direct sunlight for long
time periods (in front of windows, or next to
heaters, or under the rear window of a car). Heat
can lead to an alteration of the material
properties and shorten the crutches’lifetime.
If unused for an extended time period, have the
crutch inspected by a specialist before re-using.
Never clean the grip handle or the crutch end-
cap with an oily substance.
Be very careful when walking on moist tiles,
carpeting or parquet floors.
Do not hold the crutch too far out to the side
away from your body or too far in front of you in
the direction of travel.
Avoid using the crutch on snow or icy surfaces
without first attaching the ice claws.
Once the height is adjusted, the push-button
must be visible.
All screwed connections must be tight.
Be careful when walking on uneven surfaces and
if there are holes in the ground because the
crutch may slip or sink unexpectedly!
Be careful when using the crutch on loose gravel
surfaces, sand or leaves because there is far
less stability.
10. Product specifications
10.1 Delivery scope
The product was checked at the factory for
freedom of defects and completeness. After having
received it, carefully check over the product for
possible transport damages and for completeness.
1x arthritis crutch, 1x User Instructions
10.2 Technical specifications
We reserve the right to make technical
developments and improvements without notice
with respect to the design shown in this User
Instructions booklet.
Product specifications
Model
Normal
long
child
Adjustment type
Push-button
A. Arm cuff height from/to
(mm)
92
114
100
123
72
94
B. Arm cuff width
Max. 100 mm
C. Total length of arm cuff
approx. 260 mm
D. Adjustment/tube
10 positions
E. Handle type
standard, ellipse, spade
F. Crutch end cap Ø
19 mm
G. Arm cuff upholstery
yes
H. Velcro strap
yes
X. Arm cuff angle
65° to 160° adjustable
Materials used
aluminium tube, plastic
Max. body weight
150 kg
Product weight (kg)
0.860
0.900
0,790
11. Spare parts, accessories
Article No.
Name
200.00.00
End-cap 19 mm, light grey
231.xx.02
Handle standard, assembly
231.xx.04
Handle ellipse, assembly
231.xx.06
Handle spade, assembly
231.10.36
Upholstery for arm cuff, black
231.10.38
Velcro strap for arm cuff, black
01.01.119
User Instructions - YANO
168.10.17
BIG-Foot 18.5-20.5 mm, black
xx/00=light gray,10=black,50=gentian blue
A
D
E
F
B
G
C
H
X
REBOTEC / BA No.: 02.01.119/2017-02 GB
- 4 -
12. First-time use
The product is delivered fully assembled in
standard design. Before using the crutch, a
customised adjustment for assuring top
functionality must be undertaken by a specialist or
qualified care-person. Instruction on the correct
use must be given personally to the user.
1. Height adjustment
Using the height adjustment, the crutch can be
matched up to the patient’s body size.
Loosen screw fitting (A) by turning to the left.
Press the push-button (B) into the hole.
Push tube (C) to the desired position.
Click push-button (B) into the hole.
Tighten screw (A) by turning to the right. By
tightening, noise is reduced during use.
2. Adjustment of the forearm cuff / forearm
length
For adjusting the forearm length, there are three
adjustment possibilities (A= normal / B= short / C=
long)
Remove cap nut (1) with an open SW10 spanner
and completely remove screw (2).
Select desired adjustment, insert the screw and
put on the cap nut firmly.
3. Handle adjustment
The position of the handle can be variably
adjusted.
Firmly hold handle (A) with one hand.
With the other hand, loosen screw (1) with the
Allen key SW5 (2).
Push the handle forwards, rotate to the desired
position (left/right), align with the centre, and
then tighten firmly.
4. Adjusting the arm cuff / angle adjustment
Through variable adjustment of the angle of the
arm cuff, the position of the forearm can be
adjusted.
Loosen screw (1) of the clamping journal (2) of
the support clevis using an SW 4 Allen key (3).
With your hand (A), press the arm cuff downward
to the desired position. (max. angle adjustable
until the stop (B)
Tighten screw (1).
Attention!
Adjustment is also possible with the different
forearm lengths (see no. 2).
5. Adjusting the Velcro strap:
By using the Velcro strap (A), the forearm is fixed
and attached to the arm cuff (B).
Loosen one side of the Velcro strap.
Place the forearm in the cuff.
Close the Velcro strap once again.
The pressure of the Velcro strap on the forearm
must be light!
C
A
B
B
C
A
2
1
2
1
Before
After
Stop
A
B
B
A
1
A
2
3
Do not unlock this screw connection!

This manual suits for next models

6

Other Rebotec Mobility Aid manuals

Rebotec James 250 User manual

Rebotec

Rebotec James 250 User manual

Rebotec QUADRO User manual

Rebotec

Rebotec QUADRO User manual

Rebotec FIXI User manual

Rebotec

Rebotec FIXI User manual

Rebotec Polo-YANO User manual

Rebotec

Rebotec Polo-YANO User manual

Rebotec ECO 100 User manual

Rebotec

Rebotec ECO 100 User manual

Rebotec 340 Series User manual

Rebotec

Rebotec 340 Series User manual

Rebotec 188.99.00 User manual

Rebotec

Rebotec 188.99.00 User manual

Rebotec Travel User manual

Rebotec

Rebotec Travel User manual

Rebotec Arnold 150 User manual

Rebotec

Rebotec Arnold 150 User manual

Rebotec Walk-On XS User manual

Rebotec

Rebotec Walk-On XS User manual

Rebotec Monaco User manual

Rebotec

Rebotec Monaco User manual

Rebotec Polo-Yano S User manual

Rebotec

Rebotec Polo-Yano S User manual

Rebotec DUBAI User manual

Rebotec

Rebotec DUBAI User manual

Rebotec 188.00.00 User manual

Rebotec

Rebotec 188.00.00 User manual

Rebotec Arnold 125 User manual

Rebotec

Rebotec Arnold 125 User manual

Rebotec Augsburg User manual

Rebotec

Rebotec Augsburg User manual

Rebotec Fixi-YANO User manual

Rebotec

Rebotec Fixi-YANO User manual

Rebotec Big 250 User manual

Rebotec

Rebotec Big 250 User manual

Rebotec Hamburg User manual

Rebotec

Rebotec Hamburg User manual

Rebotec Arnold 150 User manual

Rebotec

Rebotec Arnold 150 User manual

Rebotec Polo Standard User manual

Rebotec

Rebotec Polo Standard User manual

Rebotec YANO-Walker User manual

Rebotec

Rebotec YANO-Walker User manual

Rebotec 174.10 User manual

Rebotec

Rebotec 174.10 User manual

Rebotec 133 Series User manual

Rebotec

Rebotec 133 Series User manual

Popular Mobility Aid manuals by other brands

CareCo MS05016 quick start guide

CareCo

CareCo MS05016 quick start guide

Medline Guardian Envoy 485B User instructions

Medline

Medline Guardian Envoy 485B User instructions

Decon wheel MED3170 Assembly instructions

Decon wheel

Decon wheel MED3170 Assembly instructions

Dietz TAIMA user manual

Dietz

Dietz TAIMA user manual

Gima 27780 quick start guide

Gima

Gima 27780 quick start guide

NRS M66739 User instructions

NRS

NRS M66739 User instructions

Drive Medical RTL10266CF user manual

Drive Medical

Drive Medical RTL10266CF user manual

Invacare Aquatec Marine user manual

Invacare

Invacare Aquatec Marine user manual

KMINA PRO K10059 user manual

KMINA

KMINA PRO K10059 user manual

Schuchmann MADITA MAXI Instructions for use

Schuchmann

Schuchmann MADITA MAXI Instructions for use

WY'EAST MEDICAL SUMMIT500 Instructions for use

WY'EAST MEDICAL

WY'EAST MEDICAL SUMMIT500 Instructions for use

human care Leia Maintenance manual

human care

human care Leia Maintenance manual

SeniorSam RC874 instructions

SeniorSam

SeniorSam RC874 instructions

Graham Field Lumex 574G Series Assembly and operating instructions

Graham Field

Graham Field Lumex 574G Series Assembly and operating instructions

Etac R82 Stingray user guide

Etac

Etac R82 Stingray user guide

medi M.4s PCL dynamic quick start guide

medi

medi M.4s PCL dynamic quick start guide

Invacare Lima H263 user manual

Invacare

Invacare Lima H263 user manual

Winncare Mangar Swift User instructions

Winncare

Winncare Mangar Swift User instructions

manuals.online logo
manuals.online logoBrands
  • About & Mission
  • Contact us
  • Privacy Policy
  • Terms and Conditions

Copyright 2025 Manuals.Online. All Rights Reserved.