manuals.online logo
Brands
  1. Home
  2. •
  3. Brands
  4. •
  5. REVELL
  6. •
  7. Motorized Toy Car
  8. •
  9. REVELL KIT 4285 User manual

REVELL KIT 4285 User manual

KIT 4285 85428510200
'67 CHEVELLE
™SS
™
396
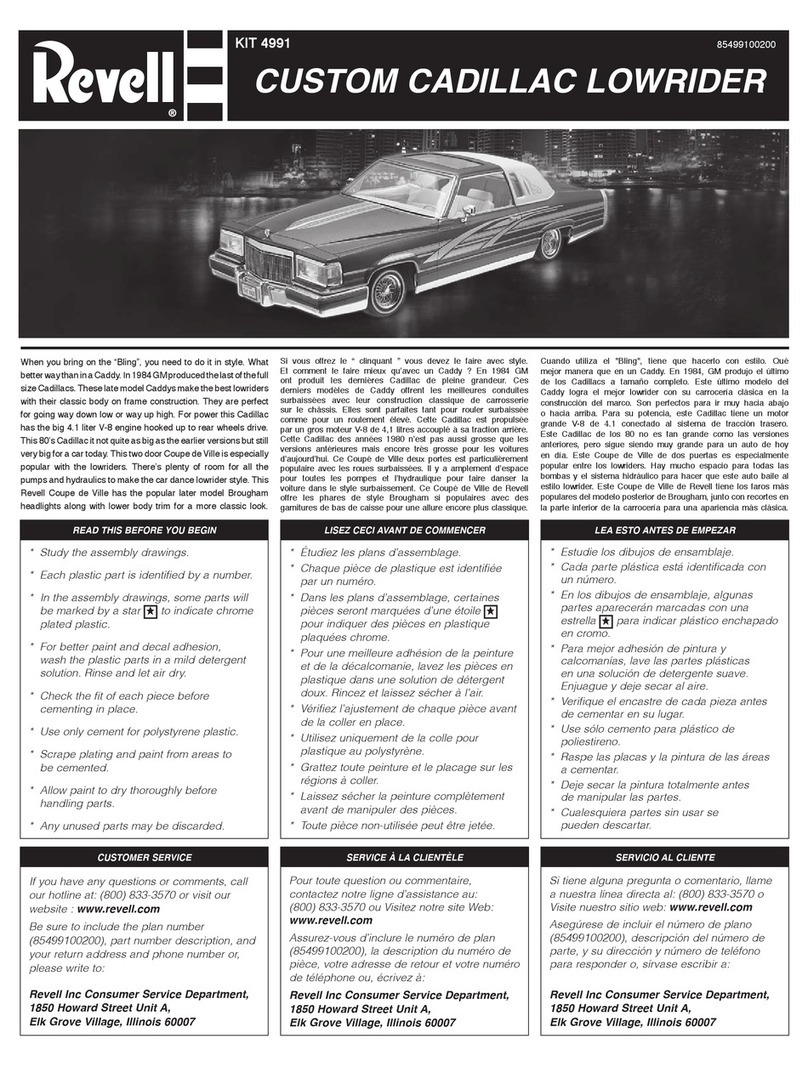
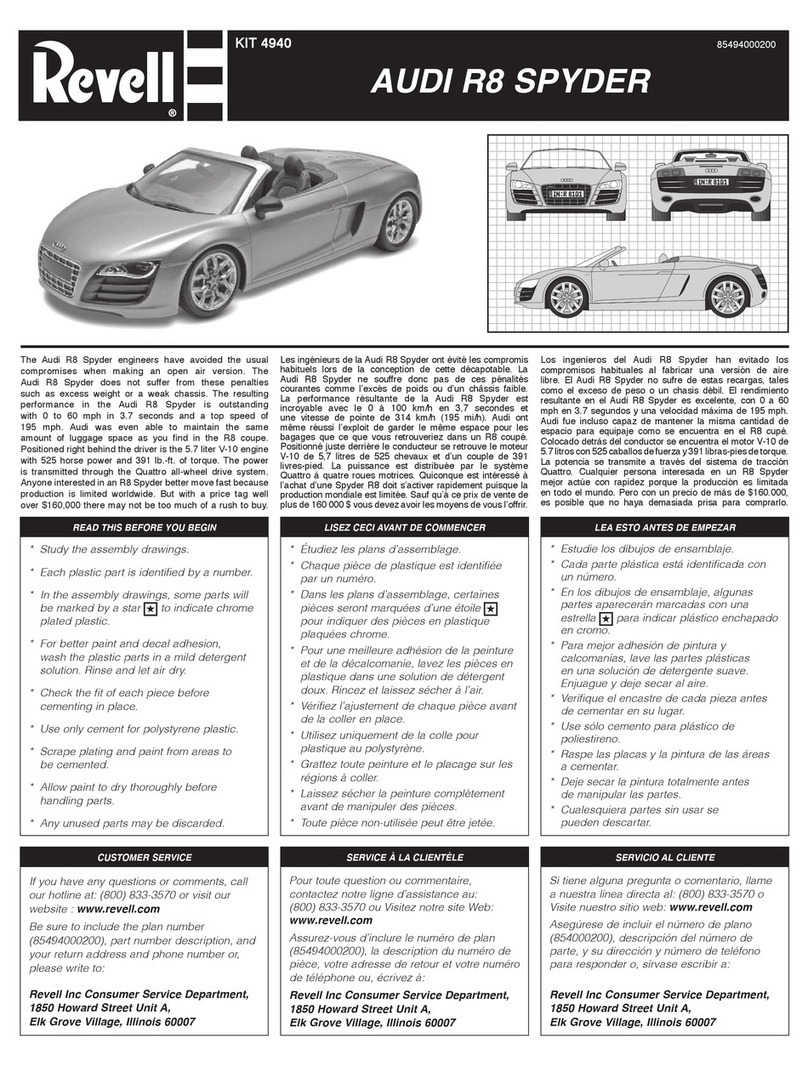
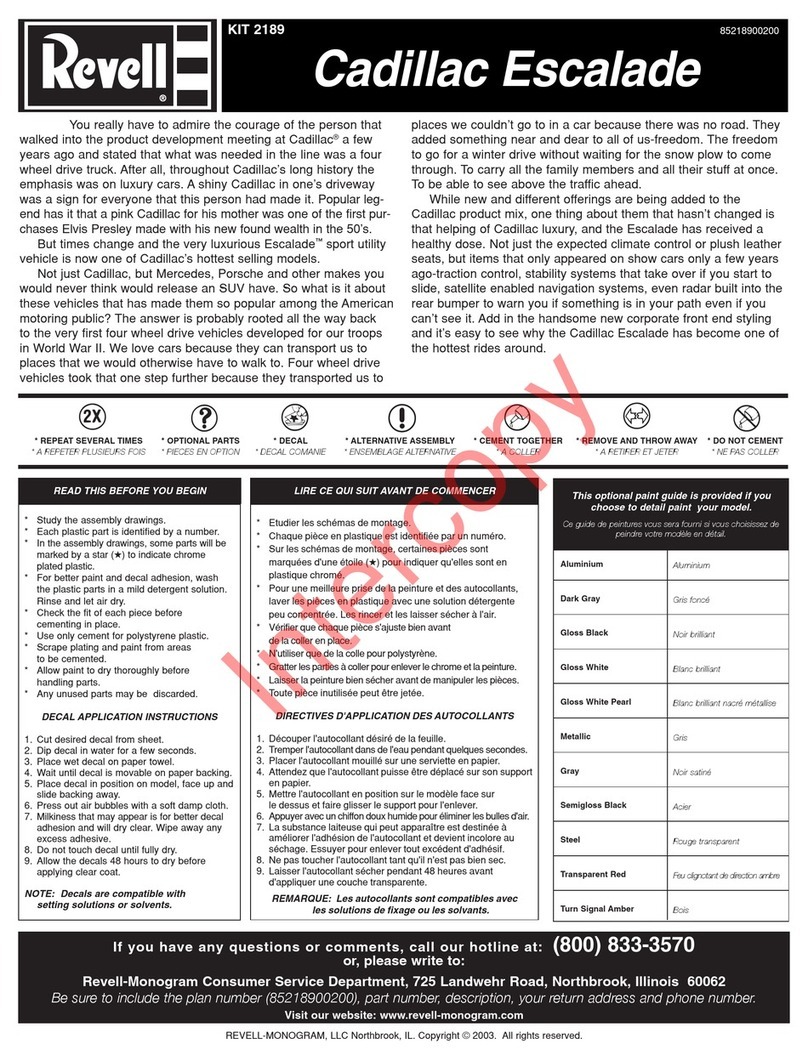
Since its introduction in 1964, the 1967
Chevrolet Chevelle™ has been one of the
most favorite American muscle cars. Designed
to fill a niche between the compact Chevy II
and the large full size Chevrolet Impala™, the
Chevelle offered most of the larger power train
options but in a handsome smaller, lighter body.
Your Revell model features an opening hood
with 396 cubic inch engine plus stock or
lowered front suspension, optional stock
rally wheels or larger diameter custom
wheels with disc brake details and decals
with factory stock and custom graphics.
Depuis son introduction en 1964, la Chevrolet Chevelle™
a été l’une des voitures américaines de haute performance
parmi les favorites de tous les temps. Conçue pour
occuper la niche entre la Chevy II compacte et la
grosse Chevrolet Impala™ de pleine grandeur, la Chevelle
offrait la plupart des options des voitures plus grosses
mais dans une magnifique carrosserie plus petite.
Votre modèle Revell offre un capot ouvrant avec son
moteur de 396 po3 en plus de sa suspension de série ou
surbaissée à l’avant, ses roues rallye ou ses roues larges
personnalisées en option avec le détail des freins à disque et
sadécalcomanieavecgraphiquesdesérieoupersonnalisés.
Desde su presentación en 1964, el Chevrolet Chevelle™
1967 fue uno de los automóviles norteamericanos de
alto rendimiento favoritos de todos los tiempos. Diseñado
para llenar la brecha entre el Chevy II compacto y
el Chevrolet Impala™ de gran tamaño, el Chevelle
ofrecía la mayor parte de las opciones de transmisión,
pero en una carrocería más pequeña y liviana.
Su modelo de Revell incluye un capó que se puede
abrir con un motor de 396 pulgadas cúbicas o un
rebaje delantero, ruedas de rally estándar opcionales
o rines personalizados de mayor diámetro con
detalles de los frenos de disco y calcomanías con
gráficos estándares de fábrica y personalizados.
READ THIS BEFORE YOU BEGIN
* Study the assembly drawings.
* Each plastic part is identified by a number.
* In the assembly drawings, some parts will
be marked by a star ★to indicate chrome
plated plastic.
* For better paint and decal adhesion,
wash the plastic parts in a mild detergent
solution. Rinse and let air dry.
* Check the fit of each piece before
cementing in place.
* Use only cement for polystyrene plastic.
* Scrape plating and paint from areas to
be cemented.
* Allow paint to dry thoroughly before
handling parts.
* Any unused parts may be discarded.
LISEZ CECI AVANT DE COMMENCER
* Étudiez les plans d’assemblage.
* Chaque pièce de plastique est identifiée
par un numéro.
* Dans les plans d’assemblage, certaines
pièces seront marquées d’une étoile ★
pour indiquer des pièces en plastique
plaquées chrome.
* Pour une meilleure adhésion de la peinture
et de la décalcomanie, lavez les pièces en
plastique dans une solution de détergent
doux. Rincez et laissez sécher à l’air.
* Vérifiez l’ajustement de chaque pièce avant
de la coller en place.
* Utilisez uniquement de la colle pour
plastique au polystyrène.
* Grattez toute peinture et le placage sur les
régions à coller.
* Laissez sécher la peinture complètement
avant de manipuler des pièces.
* Toute pièce non-utilisée peut être jetée.
LEA ESTO ANTES DE EMPEZAR
* Estudie los dibujos de ensamblaje.
* Cada parte plástica está identificada con
un número.
* En los dibujos de ensamblaje, algunas
partes aparecerán marcadas con una
estrella ★para indicar plástico enchapado
en cromo.
* Para mejor adhesión de pintura y
calcomanías, lave las partes plásticas
en una solución de detergente suave.
Enjuague y deje secar al aire.
* Verifique el encastre de cada pieza antes
de cementar en su lugar.
* Use sólo cemento para plástico de
poliestireno.
* Raspe las placas y la pintura de las áreas
a cementar.
* Deje secar la pintura totalmente antes
de manipular las partes.
* Cualesquiera partes sin usar se
pueden descartar.
CUSTOMER SERVICE
If you have any questions or comments, call
our hotline at: (800) 833-3570 or visit our
website : www.revell.com
Be sure to include the plan number
(85428510200), part number description, and
your return address and phone number or,
please write to:
Revell Inc Consumer Service Department,
1850 Howard Street Unit A,
Elk Grove Village, Illinois 60007
SERVICE À LA CLIENTÈLE
Pour toute question ou commentaire,
contactez notre ligne d’assistance au:
(800) 833-3570 ou Visitez notre site Web:
www.revell.com
Assurez-vous d’inclure le numéro de plan
(85428510200), la description du numéro de
pièce, votre adresse de retour et votre numéro
de téléphone ou, écrivez à:
Revell Inc Consumer Service Department,
1850 Howard Street Unit A,
Elk Grove Village, Illinois 60007
SERVICIO AL CLIENTE
Si tiene alguna pregunta o comentario, llame
a nuestra línea directa al: (800) 833-3570 o
Visite nuestro sitio web: www.revell.com
Asegúrese de incluir el número de plano
(85428510200), descripción del número de
parte, y su dirección y número de teléfono
para responder o, sírvase escribir a:
Revell Inc Consumer Service Department,
1850 Howard Street Unit A,
Elk Grove Village, Illinois 60007
Kit 4285 - Page 12 Revell Inc Elk Grove Village, IL. Copyright © 2011. All rights reserved.
12
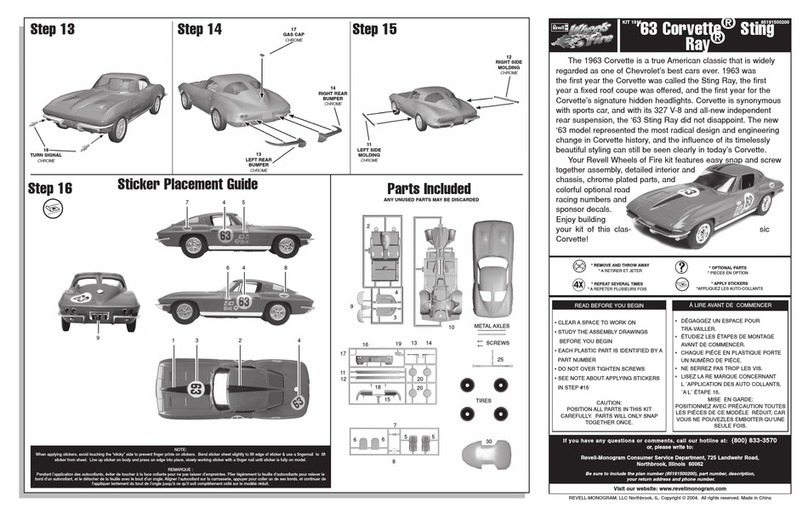
DECAL APPLICATION INSTRUCTIONS
1. Cut desired decal from sheet.
2. Dip decal in water for a few seconds.
3. Place wet decal on paper towel.
4. Wait until decal is movable on paper backing.
5. Place decal in position on model, face up and
slide backing away.
6. Press out air bubbles with a soft damp cloth.
7. Milkiness that may appear is for better decal
adhesion and will dry clear. Wipe away any
excess adhesive.
8. Do not touch decal until fully dry.
9. Allow the decals 48 hours to dry before
applying clear coat.
10. Decals are compatible with setting solutions
or solvents.
INSTRUCTIONS POUR L’APPLICATION DE DÉCALCOMANIE
1. Découpez la décalcomanie désirée sur
la feuille.
2. Trempez la décalcomanie durant quelques
secondes dans l’eau.
3. Placez la décalcomanie sur une serviette de
papier.
4. Attendez jusqu’à ce que la décalcomanie
puisse être retirée de l’endos en papier.
5. Placez la décalcomanie en position sur votre
modèle, face vers le haut, et retirez l’endos.
6. Pressez pour évacuer les bulles d’air avec un
chiffon doux humide.
7. La formation d’un voile blanchâtre qui pourrait
apparaître sert à la meilleure adhésion de la
décalcomanie et deviendra claire une fois
séchée. Nettoyez tout excès d’adhésif.
8. Ne touchez pas la décalcomanie tant qu’elle
ne sera pas entièrement séchée.
9. Laissez sécher la décalcomanie durant
48 heures avant d’appliquer un enduit
protecteur.
10. Les décalcomanies sont compatibles avec
les solutions de séchage et les solvants.
INSTRUCCIONES DE APLICACIÓN DE CALCOMANÍAS
1. Corte la calcomanía deseada de la lámina.
2. Sumerja la calcomanía en agua por unos
segundos.
3. Coloque la calcomanía húmeda sobre una
toalla de papel.
4. Espere hasta que la calcomanía se mueva en
la lámina posterior de papel.
5. Coloque la calcomanía en posición sobre el
modelo, con la cara hacia arriba y deslice la
lámina posterior hasta quitarlo.
6. Presione para quitar las burbujas de aire con
un trapo suave húmedo.
7. La lechosidad que puede aparecer es para
una mejor adhesión de la calcomanía y se
secará completamente. Limpie cualquier
exceso de adhesivo.
8. No toque la calcomanía hasta que esté
totalmente seca.
9. Deje secar las calcomanías 48 horas antes
de aplicar "clear coat".
10. Las calcomanías son compatibles con las
soluciones de fijación o los solventes.
PAINT GUIDE
This paint guide is provided to complete this
kit as shown on the box.
GUIDE DE PEINTURE
Ce guide de peinture est fourni pour compléter
cet ensemble tel qu’indiqué sur l’emballage.
GUÍA DE PINTURA
Esta guía de pintura se suministra para
completar este equipo tal como se muestra
en la caja.
A
Aluminum Aluminium Aluminio
B
Chevrolet Engine Red Rouge moteur Chevrolet Rojo motor Chevrolet
C
Flat Black Noir mat Negro mate
D
Flat White Blanc mat Blanco mate
E
Gloss Red Rouge brillant Rojo brillante
F
Semi Gloss Black Noir satiné Negro semibrillante
G
Silver Argent Plata
H
Steel Acier Acero
I
Tan Havane Habano
* STICKER DECAL
* DÉCALCOMANIE AUTOCOLLANTE
* CALCOMANÍA AUTOADHESIVA
* TRIM OFF
* DÉCOUPEZ
* RECORTE
* HEATED SCREWDRIVER END
* POINTE CHAUFFÉE DE TOURNEVIS
* EXTREMO DE DESTORNILLADOR CALENTADO
* OPEN HOLE
* LAISSEZ SÉCHER LES PIÈCES
* ABRA AGUJERO
* WEIGHT
* POIDS
* PESO
* REMOVE TAPE
* RUBAN AMOVIBLE
* CINTA DEMONTABLE
* RUBBER BAND TOGETHER
* SERRER ENSEMBLE AVEC UNE BANDE ÉLASTIQUE
* UNA CON BANDA ELÁSTICA
* DECAL
* DÉCALCOMANIE
* CALCOMANÍA
* CEMENT TOGETHER
* COLLER ENSEMBLE
* CEMENTAR Y UNIR
* REMOVE AND THROW AWAY
* RETIREZ ET JETER
* RETIRE Y DESCARTE
* DO NOT CEMENT
* NE PAS COLLER
* NO CEMENTAR
* REPEAT SEVERAL TIMES
* A RÉPÉTEZ PLUSIEURS FOIS
* REPITA VARIAS VECES
* ASSEMBLY CAUTION
* AVERTISSEMENT POUR L'ASSEMBLAGE
* PRECAUCIÓN DE ENSAMBLAJE
* REPEAT PROCEDURE
* RÉPÉTEZ LA PROCÉDURE
* REPITA EL PROCEDIMIENTO
* OPTIONAL PARTS
* PIÈCES OPTIONNELLES
* PARTES OPCIONALES
Kit 4285 - Page 2 Kit 4285 - Page 11
80
CLEAR
80
CLEAR
72
CLEAR
76
TRANSPARENT RED
75
TRANSPARENT RED
2
E
54 ★
8 ★
7 ★
57 ★
3 ★
3 ★
5 ★
6 ★
54 ★
F
F
10
11
F
Kit 4285 - Page 10 Kit 4285 - Page 3
#PART NAME NOM DE PARTIE NOMBRE DE PARTE
1Body Carrosserie Cuerpo
2Hood Capot Capó
3Hood Vent Évent de capot Ventilación del capó
4Lt. Rocker Molding Moulage du culbuteur gauche Moldura de balancines izquierda
5Grille Grille Rejilla
6Front Bumper Pare-chocs avant Parachoques delantero
7Rear Bumper Pare-chocs arrière Parachoques trasero
8Side Mirror Miroir latéral Retrovisor lateral
9Rear View Mirror Rétroviseur Espejo retrovisor trasero
10 Outer Wheel Roue externe Rueda externa
11 Inner Wheel Roue intérieure Rueda interna
12 Interior Intérieur Interior
13 Dash Top Dessus du tableau de bord Parte superior del tablero
14 Steering Column Colonne de direction Columna de dirección
16 Steering Wheel Volant Volante de dirección
17 Seat Siège Asiento
18 Seat Back Siège arrière Respaldo de asiento
19 Arm Rest Accoudoir Apoyabrazo
20 Dash Front Avant du tableau de bord Parte delantera del tablero
21 Shifter Embrayage Cambiador de velocidades
22 Radiator Radiateur Radiador
23 Firewall Mur coupe-feu Cortafuego
24 Brake Fluid Reservoir Réservoir de liquide de frein Depósito de fluido de freno
25 Lt. Engine Half Moitié gauche du moteur Mitad izquierda del motor
26 Rt. Engine Half Moitié droite du moteur Mitad derecha del motor
27 Lt. Cylinder Head Culasse gauche Tapa del cilindro izquierda
28 Starter Démarreur Arranque
29 Water Pump Pompe à eau Bomba de agua
30 Fan Belt Courroie de ventilateur Correa del ventilador
31 Fan Ventilateur Ventilador
32 Lt. Exhaust Manifold Collecteur d'échappement gauche Tubo múltiple de escape izquierdo
33 Rt. Exhaust Manifold Collecteur d'échappement droit Tubo múltiple de escape derecho
34 Distributor Distributeur Distribuidor
35 Oil Filter Filtre à huile Filtro de aceite
36 Alternator Alternateur Alternador
37 Lt. Rocker Cover Cache-culbuteurs gauche Tapa de balancines izquierda
38 Rt. Rocker Cover Cache-culbuteurs droit Tapa de balancines derecha
39 Intake Manifold Collecteur d’admission Colector de admisión
40 Carburetor Carburateur Carburador
41 Fuel Pump Pompe à essence Bomba de combustible
42 Upper Radiator Hose Boyau supérieur du radiateur Manguera del radiador superior
LARGE CUSTOM
TIRE
50
F
51
F
48
F
49
F
213 ★
215 ★
4 ★
60 ★
A
CUSTOM
SHOWN IN PLACE
210 ★
210 ★
52
H
53
H
8
9
L REAR 180
R REAR 170
NOTE: TREAD PATTERN IS
DIRECTIONAL
REMARQUE : LE PATRON DES
SCULPTURES EST DIRECTIONNEL.
NOTA: EL PATRÓN DE LAS
BANDAS ES DIRECCIONAL.
Kit 4285 - Page 4 Kit 4285 - Page 9
#PART NAME NOM DE PARTIE NOMBRE DE PARTE
43 Lower Radiator Hose Boyau inférieur du radiateur Manguera del radiador inferior
44 Chassis Châssis Chasis
45 Stock Front Suspension Suspension avant de série Suspensión delantera estándar
46 Upper 'A' Arm Bras en A avant Brazo triangular
48 Rear Axle Essieu avant Eje trasero
49 Coil Spring Ressort en spirale Muellles helicoidales
50 Rear Shock Amortisseur arrière Amortiguador trasero
51 Driveshaft Ligne d'arbre Eje de transmisión
52 Rt. Exhaust Échappement de droite Tubo de escape derecho
53 Lt. Exhaust Échappement de gauche Tubo de escape izquierdo
54 License Plate Plaque d'immatriculation Placa de licencia
55 Steering Box Boîtier de direction Caja de dirección
56 Air Cleaner Filtre à air Limpiador de aire
57 Hood Molding Moulage du capot Moldura del capó
58 Lt. Door Panel Panneau de porte gauche Panel izquierdo de puerta
59 Rt. Door Panel Panneau de porte droite Panel derecho de puerta
60 Rt. Rocker Molding Moulage du culbuteur droit Moldura de balancines derecha
61 Coil Serpentin Bobina
62 Rt. Cylinder Head Culasse droite Tapa del cilindro derecha
63 Console Console Consola
64 Rear Seat Siège arrière Asiento trasero
70 Windshield Pare-brise Parabrisas
71 Rear Window Vitre arrière Ventana trasera
72 Headlight Phare Faro reflector
73 Rt. Vent Window Petite vitre droite Ventana de ventilación derecha
74 Lt. Vent Window Petite vitre gauche Ventana de ventilación izquierda
75 Lt. Taillight Feu arrière gauche Luz trasera izquierda
76 Rt. Taillight Feu arrière droit Luz trasera derecha
80 Backup Light Feu de recul Luz de retroceso
150 Rt. Front Custom Tire Pneu avant droit personnalisé Neumático delantero derecho personalizado
160 Lt. Front Custom Tire Pneu avant gauche personnalisé Neumático delantero izquierdo personalizado
170 Rt. Rear Custom Tire Pneu arrière droit personnalisé Neumático trasero derecho personalizado
180 Lt. Rear Custom Tire Pneu arrière gauche personnalisé Neumático trasero izquierdo personalizado
200 Custom Front Suspension Suspension avant personnalisée Suspensión delantera personalizada
210 Disc Brake Frein à disque Freno de disco
212 Front Inner Wheel Roue interne avant Rueda interna delantera
213 Rear Inner Wheel Roue interne arrière Rueda interna trasera
214 Front Outer Wheel Roue externe avant Rueda externa delantera
215 Rear Outer Wheel Roue externe arrière Rueda externa trasera
-- Tire Pneu Neumático
45
F
11
F
200
F
STOCK TIRE
CUSTOM TIRE
STOCK
STOCK
CUSTOM
CUSTOM
210 ★
210 ★
212 ★
L FRONT 160
R FRONT 150
214 ★
10 ★
22
22
7
NOTE: TREAD PATTERN IS DIRECTIONAL
REMARQUE : LE PATRON DES SCULPTURES
EST DIRECTIONNEL.
NOTA: EL PATRÓN DE LAS BANDAS ES
DIRECCIONAL.
43
C
42
C
22
F
23
F
55
F
30
F
29
B
31
C
34
F
61
F
26
B
25
B
35
F
27
B
62
B
32
H
37 ★
38 ★
36 ★
56 ★
24 ★
40 ★
39 ★
Kit 4285 - Page 8 Kit 4285 - Page 5
1
1
A
A
I
A
F
A
FRONT
TOP
BOTTOM
BOTTOM
NOTE: SOME DETAILS OMITTED FOR CLARITY.
REMARQUE : CERTAINS DÉTAILS SONT OMIS POUR PLUS DE
CLARTÉ.
NOTA: SE OMITIERON ALGUNOS DETALLES PARA CLARIDAD
28
F
33
H
46
F
46
F
44
F
41 ★
2
2
16
SHOWN IN PLACE
Kit 4285 - Page 6 Kit 4285 - Page 7
71
CLEAR
74
CLEAR
73
CLEAR
70
CLEAR
64
F
19
F
58
F
59
F
12
F
1
63
F
19
F
16
F
14
F
20
F
13
F
17
F
18
F
9 ★
21 ★
D
G
C
G G
21
3
18, 20
F
NOTE: PAINT WINDOW TRIM, DOOR HANDLES, EMBLEMS AND BODY TRIM SILVER.
REMARQUE: PEINDRE DE COULEUR ARGENT LA GARNITURE DE FENÊTRE, LES POIGNÉES DE PORTE ET LES GARNITURES DE CARROSSERIE.
NOTA: PINTE LOS MARCOS DE LAS VENTANAS, MANILLAS DE LAS PUERTAS, EMBLEMAS Y PLATINA.
3 4
5
E
43
C
42
C
22
F
23
F
55
F
30
F
29
B
31
C
34
F
61
F
26
B
25
B
35
F
27
B
62
B
32
H
37 ★
38 ★
36 ★
56 ★
24 ★
40 ★
39 ★
Kit 4285 - Page 8 Kit 4285 - Page 5
1
1
A
A
I
A
F
A
FRONT
TOP
BOTTOM
BOTTOM
NOTE: SOME DETAILS OMITTED FOR CLARITY.
REMARQUE : CERTAINS DÉTAILS SONT OMIS POUR PLUS DE
CLARTÉ.
NOTA: SE OMITIERON ALGUNOS DETALLES PARA CLARIDAD
28
F
33
H
46
F
46
F
44
F
41 ★
2
2
16
SHOWN IN PLACE
Kit 4285 - Page 4 Kit 4285 - Page 9
#PART NAME NOM DE PARTIE NOMBRE DE PARTE
43 Lower Radiator Hose Boyau inférieur du radiateur Manguera del radiador inferior
44 Chassis Châssis Chasis
45 Stock Front Suspension Suspension avant de série Suspensión delantera estándar
46 Upper 'A' Arm Bras en A avant Brazo triangular
48 Rear Axle Essieu avant Eje trasero
49 Coil Spring Ressort en spirale Muellles helicoidales
50 Rear Shock Amortisseur arrière Amortiguador trasero
51 Driveshaft Ligne d'arbre Eje de transmisión
52 Rt. Exhaust Échappement de droite Tubo de escape derecho
53 Lt. Exhaust Échappement de gauche Tubo de escape izquierdo
54 License Plate Plaque d'immatriculation Placa de licencia
55 Steering Box Boîtier de direction Caja de dirección
56 Air Cleaner Filtre à air Limpiador de aire
57 Hood Molding Moulage du capot Moldura del capó
58 Lt. Door Panel Panneau de porte gauche Panel izquierdo de puerta
59 Rt. Door Panel Panneau de porte droite Panel derecho de puerta
60 Rt. Rocker Molding Moulage du culbuteur droit Moldura de balancines derecha
61 Coil Serpentin Bobina
62 Rt. Cylinder Head Culasse droite Tapa del cilindro derecha
63 Console Console Consola
64 Rear Seat Siège arrière Asiento trasero
70 Windshield Pare-brise Parabrisas
71 Rear Window Vitre arrière Ventana trasera
72 Headlight Phare Faro reflector
73 Rt. Vent Window Petite vitre droite Ventana de ventilación derecha
74 Lt. Vent Window Petite vitre gauche Ventana de ventilación izquierda
75 Lt. Taillight Feu arrière gauche Luz trasera izquierda
76 Rt. Taillight Feu arrière droit Luz trasera derecha
80 Backup Light Feu de recul Luz de retroceso
150 Rt. Front Custom Tire Pneu avant droit personnalisé Neumático delantero derecho personalizado
160 Lt. Front Custom Tire Pneu avant gauche personnalisé Neumático delantero izquierdo personalizado
170 Rt. Rear Custom Tire Pneu arrière droit personnalisé Neumático trasero derecho personalizado
180 Lt. Rear Custom Tire Pneu arrière gauche personnalisé Neumático trasero izquierdo personalizado
200 Custom Front Suspension Suspension avant personnalisée Suspensión delantera personalizada
210 Disc Brake Frein à disque Freno de disco
212 Front Inner Wheel Roue interne avant Rueda interna delantera
213 Rear Inner Wheel Roue interne arrière Rueda interna trasera
214 Front Outer Wheel Roue externe avant Rueda externa delantera
215 Rear Outer Wheel Roue externe arrière Rueda externa trasera
-- Tire Pneu Neumático
45
F
11
F
200
F
STOCK TIRE
CUSTOM TIRE
STOCK
STOCK
CUSTOM
CUSTOM
210 ★
210 ★
212 ★
L FRONT 160
R FRONT 150
214 ★
10 ★
22
22
7
NOTE: TREAD PATTERN IS DIRECTIONAL
REMARQUE : LE PATRON DES SCULPTURES
EST DIRECTIONNEL.
NOTA: EL PATRÓN DE LAS BANDAS ES
DIRECCIONAL.
Kit 4285 - Page 10 Kit 4285 - Page 3
#PART NAME NOM DE PARTIE NOMBRE DE PARTE
1Body Carrosserie Cuerpo
2Hood Capot Capó
3Hood Vent Évent de capot Ventilación del capó
4Lt. Rocker Molding Moulage du culbuteur gauche Moldura de balancines izquierda
5Grille Grille Rejilla
6Front Bumper Pare-chocs avant Parachoques delantero
7Rear Bumper Pare-chocs arrière Parachoques trasero
8Side Mirror Miroir latéral Retrovisor lateral
9Rear View Mirror Rétroviseur Espejo retrovisor trasero
10 Outer Wheel Roue externe Rueda externa
11 Inner Wheel Roue intérieure Rueda interna
12 Interior Intérieur Interior
13 Dash Top Dessus du tableau de bord Parte superior del tablero
14 Steering Column Colonne de direction Columna de dirección
16 Steering Wheel Volant Volante de dirección
17 Seat Siège Asiento
18 Seat Back Siège arrière Respaldo de asiento
19 Arm Rest Accoudoir Apoyabrazo
20 Dash Front Avant du tableau de bord Parte delantera del tablero
21 Shifter Embrayage Cambiador de velocidades
22 Radiator Radiateur Radiador
23 Firewall Mur coupe-feu Cortafuego
24 Brake Fluid Reservoir Réservoir de liquide de frein Depósito de fluido de freno
25 Lt. Engine Half Moitié gauche du moteur Mitad izquierda del motor
26 Rt. Engine Half Moitié droite du moteur Mitad derecha del motor
27 Lt. Cylinder Head Culasse gauche Tapa del cilindro izquierda
28 Starter Démarreur Arranque
29 Water Pump Pompe à eau Bomba de agua
30 Fan Belt Courroie de ventilateur Correa del ventilador
31 Fan Ventilateur Ventilador
32 Lt. Exhaust Manifold Collecteur d'échappement gauche Tubo múltiple de escape izquierdo
33 Rt. Exhaust Manifold Collecteur d'échappement droit Tubo múltiple de escape derecho
34 Distributor Distributeur Distribuidor
35 Oil Filter Filtre à huile Filtro de aceite
36 Alternator Alternateur Alternador
37 Lt. Rocker Cover Cache-culbuteurs gauche Tapa de balancines izquierda
38 Rt. Rocker Cover Cache-culbuteurs droit Tapa de balancines derecha
39 Intake Manifold Collecteur d’admission Colector de admisión
40 Carburetor Carburateur Carburador
41 Fuel Pump Pompe à essence Bomba de combustible
42 Upper Radiator Hose Boyau supérieur du radiateur Manguera del radiador superior
LARGE CUSTOM
TIRE
50
F
51
F
48
F
49
F
213 ★
215 ★
4 ★
60 ★
A
CUSTOM
SHOWN IN PLACE
210 ★
210 ★
52
H
53
H
8
9
L REAR 180
R REAR 170
NOTE: TREAD PATTERN IS
DIRECTIONAL
REMARQUE : LE PATRON DES
SCULPTURES EST DIRECTIONNEL.
NOTA: EL PATRÓN DE LAS
BANDAS ES DIRECCIONAL.
DECAL APPLICATION INSTRUCTIONS
1. Cut desired decal from sheet.
2. Dip decal in water for a few seconds.
3. Place wet decal on paper towel.
4. Wait until decal is movable on paper backing.
5. Place decal in position on model, face up and
slide backing away.
6. Press out air bubbles with a soft damp cloth.
7. Milkiness that may appear is for better decal
adhesion and will dry clear. Wipe away any
excess adhesive.
8. Do not touch decal until fully dry.
9. Allow the decals 48 hours to dry before
applying clear coat.
10. Decals are compatible with setting solutions
or solvents.
INSTRUCTIONS POUR L’APPLICATION DE DÉCALCOMANIE
1. Découpez la décalcomanie désirée sur
la feuille.
2. Trempez la décalcomanie durant quelques
secondes dans l’eau.
3. Placez la décalcomanie sur une serviette de
papier.
4. Attendez jusqu’à ce que la décalcomanie
puisse être retirée de l’endos en papier.
5. Placez la décalcomanie en position sur votre
modèle, face vers le haut, et retirez l’endos.
6. Pressez pour évacuer les bulles d’air avec un
chiffon doux humide.
7. La formation d’un voile blanchâtre qui pourrait
apparaître sert à la meilleure adhésion de la
décalcomanie et deviendra claire une fois
séchée. Nettoyez tout excès d’adhésif.
8. Ne touchez pas la décalcomanie tant qu’elle
ne sera pas entièrement séchée.
9. Laissez sécher la décalcomanie durant
48 heures avant d’appliquer un enduit
protecteur.
10. Les décalcomanies sont compatibles avec
les solutions de séchage et les solvants.
INSTRUCCIONES DE APLICACIÓN DE CALCOMANÍAS
1. Corte la calcomanía deseada de la lámina.
2. Sumerja la calcomanía en agua por unos
segundos.
3. Coloque la calcomanía húmeda sobre una
toalla de papel.
4. Espere hasta que la calcomanía se mueva en
la lámina posterior de papel.
5. Coloque la calcomanía en posición sobre el
modelo, con la cara hacia arriba y deslice la
lámina posterior hasta quitarlo.
6. Presione para quitar las burbujas de aire con
un trapo suave húmedo.
7. La lechosidad que puede aparecer es para
una mejor adhesión de la calcomanía y se
secará completamente. Limpie cualquier
exceso de adhesivo.
8. No toque la calcomanía hasta que esté
totalmente seca.
9. Deje secar las calcomanías 48 horas antes
de aplicar "clear coat".
10. Las calcomanías son compatibles con las
soluciones de fijación o los solventes.
PAINT GUIDE
This paint guide is provided to complete this
kit as shown on the box.
GUIDE DE PEINTURE
Ce guide de peinture est fourni pour compléter
cet ensemble tel qu’indiqué sur l’emballage.
GUÍA DE PINTURA
Esta guía de pintura se suministra para
completar este equipo tal como se muestra
en la caja.
A
Aluminum Aluminium Aluminio
B
Chevrolet Engine Red Rouge moteur Chevrolet Rojo motor Chevrolet
C
Flat Black Noir mat Negro mate
D
Flat White Blanc mat Blanco mate
E
Gloss Red Rouge brillant Rojo brillante
F
Semi Gloss Black Noir satiné Negro semibrillante
G
Silver Argent Plata
H
Steel Acier Acero
I
Tan Havane Habano
* STICKER DECAL
* DÉCALCOMANIE AUTOCOLLANTE
* CALCOMANÍA AUTOADHESIVA
* TRIM OFF
* DÉCOUPEZ
* RECORTE
* HEATED SCREWDRIVER END
* POINTE CHAUFFÉE DE TOURNEVIS
* EXTREMO DE DESTORNILLADOR CALENTADO
* OPEN HOLE
* LAISSEZ SÉCHER LES PIÈCES
* ABRA AGUJERO
* WEIGHT
* POIDS
* PESO
* REMOVE TAPE
* RUBAN AMOVIBLE
* CINTA DEMONTABLE
* RUBBER BAND TOGETHER
* SERRER ENSEMBLE AVEC UNE BANDE ÉLASTIQUE
* UNA CON BANDA ELÁSTICA
* DECAL
* DÉCALCOMANIE
* CALCOMANÍA
* CEMENT TOGETHER
* COLLER ENSEMBLE
* CEMENTAR Y UNIR
* REMOVE AND THROW AWAY
* RETIREZ ET JETER
* RETIRE Y DESCARTE
* DO NOT CEMENT
* NE PAS COLLER
* NO CEMENTAR
* REPEAT SEVERAL TIMES
* A RÉPÉTEZ PLUSIEURS FOIS
* REPITA VARIAS VECES
* ASSEMBLY CAUTION
* AVERTISSEMENT POUR L'ASSEMBLAGE
* PRECAUCIÓN DE ENSAMBLAJE
* REPEAT PROCEDURE
* RÉPÉTEZ LA PROCÉDURE
* REPITA EL PROCEDIMIENTO
* OPTIONAL PARTS
* PIÈCES OPTIONNELLES
* PARTES OPCIONALES
Kit 4285 - Page 2 Kit 4285 - Page 11
80
CLEAR
80
CLEAR
72
CLEAR
76
TRANSPARENT RED
75
TRANSPARENT RED
2
E
54 ★
8 ★
7 ★
57 ★
3 ★
3 ★
5 ★
6 ★
54 ★
F
F
10
11
F
KIT 4285 85428510200
'67 CHEVELLE
™SS
™
396
Since its introduction in 1964, the 1967
Chevrolet Chevelle™ has been one of the
most favorite American muscle cars. Designed
to fill a niche between the compact Chevy II
and the large full size Chevrolet Impala™, the
Chevelle offered most of the larger power train
options but in a handsome smaller, lighter body.
Your Revell model features an opening hood
with 396 cubic inch engine plus stock or
lowered front suspension, optional stock
rally wheels or larger diameter custom
wheels with disc brake details and decals
with factory stock and custom graphics.
Depuis son introduction en 1964, la Chevrolet Chevelle™
a été l’une des voitures américaines de haute performance
parmi les favorites de tous les temps. Conçue pour
occuper la niche entre la Chevy II compacte et la
grosse Chevrolet Impala™ de pleine grandeur, la Chevelle
offrait la plupart des options des voitures plus grosses
mais dans une magnifique carrosserie plus petite.
Votre modèle Revell offre un capot ouvrant avec son
moteur de 396 po3 en plus de sa suspension de série ou
surbaissée à l’avant, ses roues rallye ou ses roues larges
personnalisées en option avec le détail des freins à disque et
sadécalcomanieavecgraphiquesdesérieoupersonnalisés.
Desde su presentación en 1964, el Chevrolet Chevelle™
1967 fue uno de los automóviles norteamericanos de
alto rendimiento favoritos de todos los tiempos. Diseñado
para llenar la brecha entre el Chevy II compacto y
el Chevrolet Impala™ de gran tamaño, el Chevelle
ofrecía la mayor parte de las opciones de transmisión,
pero en una carrocería más pequeña y liviana.
Su modelo de Revell incluye un capó que se puede
abrir con un motor de 396 pulgadas cúbicas o un
rebaje delantero, ruedas de rally estándar opcionales
o rines personalizados de mayor diámetro con
detalles de los frenos de disco y calcomanías con
gráficos estándares de fábrica y personalizados.
READ THIS BEFORE YOU BEGIN
* Study the assembly drawings.
* Each plastic part is identified by a number.
* In the assembly drawings, some parts will
be marked by a star ★to indicate chrome
plated plastic.
* For better paint and decal adhesion,
wash the plastic parts in a mild detergent
solution. Rinse and let air dry.
* Check the fit of each piece before
cementing in place.
* Use only cement for polystyrene plastic.
* Scrape plating and paint from areas to
be cemented.
* Allow paint to dry thoroughly before
handling parts.
* Any unused parts may be discarded.
LISEZ CECI AVANT DE COMMENCER
* Étudiez les plans d’assemblage.
* Chaque pièce de plastique est identifiée
par un numéro.
* Dans les plans d’assemblage, certaines
pièces seront marquées d’une étoile ★
pour indiquer des pièces en plastique
plaquées chrome.
* Pour une meilleure adhésion de la peinture
et de la décalcomanie, lavez les pièces en
plastique dans une solution de détergent
doux. Rincez et laissez sécher à l’air.
* Vérifiez l’ajustement de chaque pièce avant
de la coller en place.
* Utilisez uniquement de la colle pour
plastique au polystyrène.
* Grattez toute peinture et le placage sur les
régions à coller.
* Laissez sécher la peinture complètement
avant de manipuler des pièces.
* Toute pièce non-utilisée peut être jetée.
LEA ESTO ANTES DE EMPEZAR
* Estudie los dibujos de ensamblaje.
* Cada parte plástica está identificada con
un número.
* En los dibujos de ensamblaje, algunas
partes aparecerán marcadas con una
estrella ★para indicar plástico enchapado
en cromo.
* Para mejor adhesión de pintura y
calcomanías, lave las partes plásticas
en una solución de detergente suave.
Enjuague y deje secar al aire.
* Verifique el encastre de cada pieza antes
de cementar en su lugar.
* Use sólo cemento para plástico de
poliestireno.
* Raspe las placas y la pintura de las áreas
a cementar.
* Deje secar la pintura totalmente antes
de manipular las partes.
* Cualesquiera partes sin usar se
pueden descartar.
CUSTOMER SERVICE
If you have any questions or comments, call
our hotline at: (800) 833-3570 or visit our
website : www.revell.com
Be sure to include the plan number
(85428510200), part number description, and
your return address and phone number or,
please write to:
Revell Inc Consumer Service Department,
1850 Howard Street Unit A,
Elk Grove Village, Illinois 60007
SERVICE À LA CLIENTÈLE
Pour toute question ou commentaire,
contactez notre ligne d’assistance au:
(800) 833-3570 ou Visitez notre site Web:
www.revell.com
Assurez-vous d’inclure le numéro de plan
(85428510200), la description du numéro de
pièce, votre adresse de retour et votre numéro
de téléphone ou, écrivez à:
Revell Inc Consumer Service Department,
1850 Howard Street Unit A,
Elk Grove Village, Illinois 60007
SERVICIO AL CLIENTE
Si tiene alguna pregunta o comentario, llame
a nuestra línea directa al: (800) 833-3570 o
Visite nuestro sitio web: www.revell.com
Asegúrese de incluir el número de plano
(85428510200), descripción del número de
parte, y su dirección y número de teléfono
para responder o, sírvase escribir a:
Revell Inc Consumer Service Department,
1850 Howard Street Unit A,
Elk Grove Village, Illinois 60007
Kit 4285 - Page 12 Revell Inc Elk Grove Village, IL. Copyright © 2011. All rights reserved.
12

Other REVELL Motorized Toy Car manuals

REVELL 4274 User manual

REVELL

REVELL 4274 User manual

REVELL JUNGLE JIM RAIL DRAGSTER User manual

REVELL

REVELL JUNGLE JIM RAIL DRAGSTER User manual

REVELL 7202 User manual

REVELL

REVELL 7202 User manual

REVELL Porsche 962 C User manual

REVELL

REVELL Porsche 962 C User manual

REVELL Chi-Town Hustler '69 DODGE CHARGER NHRA FUNNY... User manual

REVELL

REVELL Chi-Town Hustler '69 DODGE CHARGER NHRA FUNNY... User manual

REVELL Kenworth W-900 User manual

REVELL

REVELL Kenworth W-900 User manual

REVELL Enzo Ferrari User manual

REVELL

REVELL Enzo Ferrari User manual

REVELL ‘70 Dodge Challenger T/A 2’n1 User manual

REVELL

REVELL ‘70 Dodge Challenger T/A 2’n1 User manual

REVELL FOOSE 65 CHEVY  IMPALA User manual

REVELL

REVELL FOOSE 65 CHEVY IMPALA User manual

REVELL SAUBER PETRONAS C22 User manual

REVELL

REVELL SAUBER PETRONAS C22 User manual

REVELL ZZ TOP ELIMINATOR User manual

REVELL

REVELL ZZ TOP ELIMINATOR User manual

REVELL Control 01022 User manual

REVELL

REVELL Control 01022 User manual

REVELL Peterbilt 359 Conventional Tractor User manual

REVELL

REVELL Peterbilt 359 Conventional Tractor User manual

REVELL KIT 1587 User manual

REVELL

REVELL KIT 1587 User manual

REVELL 48' FORD COUPE 2 'N 1 User manual

REVELL

REVELL 48' FORD COUPE 2 'N 1 User manual

REVELL KIT 4242 User manual

REVELL

REVELL KIT 4242 User manual

REVELL VW Golf GTI User manual

REVELL

REVELL VW Golf GTI User manual

REVELL KENWORTH W-900 AERODYNE CONVENTIONAL User manual

REVELL

REVELL KENWORTH W-900 AERODYNE CONVENTIONAL User manual

REVELL Ferrari California 4925 User manual

REVELL

REVELL Ferrari California 4925 User manual

REVELL 07080 User manual

REVELL

REVELL 07080 User manual

REVELL SLT 50-3 Elefant User manual

REVELL

REVELL SLT 50-3 Elefant User manual

REVELL Ferrari California User manual

REVELL

REVELL Ferrari California User manual

REVELL LKW 10t mil gl User manual

REVELL

REVELL LKW 10t mil gl User manual

REVELL MIAMI VICE DAYTONA SPYDER User manual

REVELL

REVELL MIAMI VICE DAYTONA SPYDER User manual

Popular Motorized Toy Car manuals by other brands

Kayoba 018720 operating instructions

Kayoba

Kayoba 018720 operating instructions

Supertrax Bugatti Style Installation and operation instructions

Supertrax

Supertrax Bugatti Style Installation and operation instructions

Heronation Soomo Super Trax manual

Heronation

Heronation Soomo Super Trax manual

Kyosho MINI-Z Racer MR-03W MM Type instruction sheet

Kyosho

Kyosho MINI-Z Racer MR-03W MM Type instruction sheet

Capricorn RC LabC804 SL instruction manual

Capricorn RC

Capricorn RC LabC804 SL instruction manual

Peg-Perego Case IH Magnum Tractor Use and care

Peg-Perego

Peg-Perego Case IH Magnum Tractor Use and care

Costway TY576034 user manual

Costway

Costway TY576034 user manual

World Tech Toys The Outlaw 35984 instruction manual

World Tech Toys

World Tech Toys The Outlaw 35984 instruction manual

Team Losi MICRO 4X4 Operation manual

Team Losi

Team Losi MICRO 4X4 Operation manual

Peg-Perego QUAD Princess Use and care

Peg-Perego

Peg-Perego QUAD Princess Use and care

Mattel FCP39 Pilot's manual

Mattel

Mattel FCP39 Pilot's manual

Jamara Power Drag Ride-On Traktor 12V instructions

Jamara

Jamara Power Drag Ride-On Traktor 12V instructions

Hunter Products TR1701 troubleshooting guide

Hunter Products

Hunter Products TR1701 troubleshooting guide

Excalibur 9344 operating manual

Excalibur

Excalibur 9344 operating manual

Fisher-Price POWER WHEELS W6215 Owner's manual with assembly instructions

Fisher-Price

Fisher-Price POWER WHEELS W6215 Owner's manual with assembly instructions

Jamara Mercedes-AMG GT R Instruction

Jamara

Jamara Mercedes-AMG GT R Instruction

Hasbro G.I.Joe Thunderclap instructions

Hasbro

Hasbro G.I.Joe Thunderclap instructions

Jamara Ride on Mercedes-Benz SLC instructions

Jamara

Jamara Ride on Mercedes-Benz SLC instructions

manuals.online logo
manuals.online logoBrands
  • About & Mission
  • Contact us
  • Privacy Policy
  • Terms and Conditions

Copyright 2025 Manuals.Online. All Rights Reserved.