manuals.online logo
Brands
  1. Home
  2. •
  3. Brands
  4. •
  5. Rohnson
  6. •
  7. Fan
  8. •
  9. Rohnson R-839 User manual

Rohnson R-839 User manual

INSTRUCTION MANUAL
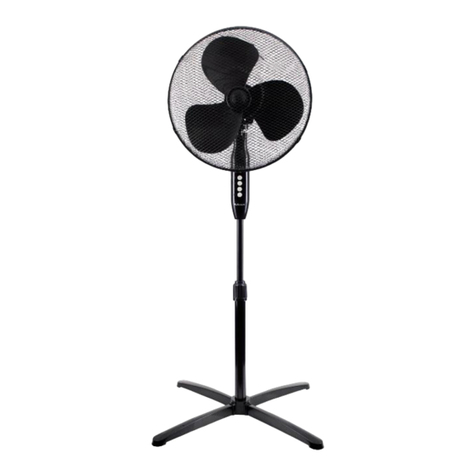
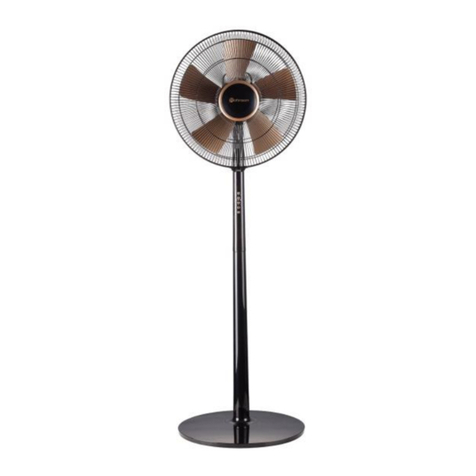
STAND FAN 40cm
MODEL NO. R-839
220-240V~ 50Hz 50W
BEFORE OPERATING THIS PRODUCT, READ, UNDERSTAND, AND
FOLLOW THE INSTRUCTIONS.
IMPORTANT SAFEGUARDS
PLEASE READ ALL INSTRUCTIONS CAREFULLY BEFORE
USING THE PRODUCT.
When using the electrical appliance, the following basic safety
precautions should always be followed.
WARNING- to reduce the risk of fire, electric shock or injury
to persons or property:
⚫Always operate the product from a power source of the
same voltage, frequency and rating as indicated on the
product identification plate.
⚫Do not use this fan with any solid-state speed control
device to reduce the risk of electric shock.
⚫This appliance can be used by children aged from 8 years
and above and persons with reduced physical, sensory or
mental capabilities or lack of experience and knowledge if
they have been given supervision or instruction concerning
use of the appliance in a safe way and understand the
hazards involved.
⚫Children shall not play with the appliance.
⚫Cleaning and user maintenance shall not be made by
children without supervision.
⚫Do not leave the fan running unattended.
⚫Do not operate the product if it is dropped, damaged or
showing signs of product malfunction. Do not operate the
product with a damaged plug or cord. Return the complete
product to the place of purchase for inspection, refund or
replacement.
⚫If it is not working properly, contact a qualified electrician or
service centre for examination and repair, never try to
dismantle it by yourself.
⚫Do not immerse or expose the product or flexible cord to
rain, moisture or any other liquid.
⚫This product should not be used in the immediate vicinity of
water, such as bathtubs, washbowls, swimming pools etc.
where the likelihood of immersion or splashing could occur.
⚫Never install the unit where it could be subject to:
➢Heat sources such as radiators, heat registers, stoves or
other products that produce heat
➢Direct sunlight
➢Mechanical vibration or shock
➢Excessive dust
➢Lack of ventilation, such as a cabinet or bookcase
➢Uneven surface
⚫Switch off and unplug from outlet when the product is not in
use, before assembling or disassembling parts and before
cleaning. Fully assemble the fan before switching on.
⚫Avoid contact with moving parts. Do not insert any body
parts (e.g. finger) or objects through the grill when the fan is
operating.
⚫Do not cover the grille, or operate in close proximity to
curtains, etc.
⚫This product is intended for normal domestic/household use
only.
⚫Always disconnect the fan when moving it from one location
to another.
⚫The use of attachments or accessories not recommended
or sold by the product distributor may cause personal or
property hazards or injuries.
⚫Be sure fan is on a stable surface when operating to avoid
overturning.
⚫Do not immerse in water.
⚫If the supply cord is damaged, It must be replaced by the
manufacturer or its service agent, or similarly qualified
person, in order to avoid a hazard.
READ AND SAVE THESE INSTRUCTIONS FOR FUTURE
REFERENCE
.
PRODUCT ASSEMBLY
1. Base Screw
2. Base Bolt
3. Base
4. Outer tube
5. Height adjustment collar
6. Inner Tube
7. Fixed screw
8. Rotate Switch
9. Motor Housing
10. Fan motor
11. Motor shaft
12. Rear guard
13. Locking nut
14. Fan blade
15. Blade cap
16. Front guard
17. Guard screw
ASSEMBLY OF BASE
⚫Loosen the screw from the bottom of outer pipe.
⚫Place the tube onto base, then fix with the screw.
⚫Attach the motor housing with control box into the inner
pipe.
⚫Ensure the control box is pushed fully into the inner pipe
and secured with the screw provided.
ASSEMBLY OF BLADE AND GRILLE
⚫Unscrew the plastic mounting nut from the front of the
motor housing by rotating it anticlockwise.
⚫Position the rear grille against the front of the motor housing
with the handle uppermost, ensuing that the locating pegs
on the motor housing are engaged correctly in the holes of
the rear grille.
⚫Tighten the Rear Grille Mounting Nut clockwise. DO NOT
OVERTIGHTEN IT.
⚫Push the fan blade onto the motor shaft, locating the slot at
the back of the blade on the drive pin that passes through
the motor shaft.
⚫Tighten the blade cap by turning it anti clockwise. Position
the front grille against the rear grille so that the holes in the
rims that accept the small nut and bolt are in line. Insert the
bolt through the holes and screw on the nut. Do not fully
tighten at the stage.
⚫Push the grille retaining clips into position ensuring that
they engage correctly on the rim of the grille. Fully tighten
the small nut and bolt that passes through the rim of the
grille.
⚫
OPERATION OF THE PRODUCT CAUTION:
⚫Select a suitable location for the fan. Always choose a
safe location in accordance to the safety
recommendations outlined.
⚫Plug the power cord into a suitable socket. Select the
desired speed option.
0-The fan is off.
1-The fan operates at the lowest speed.
2-The fan operates at medium speed.
3-The fan runs at high speed.
Angle Adjustment
⚫The fan can be set to oscillate by pushing Oscillating
Knob downwards. To stop the oscillating feature, pull
up the Oscillation Knob.
⚫To adjust the tilt angle of fan head, you need to push or
pull motor housing directly to adjust.
Caution: The fan should always be switched off when
making this.
CLEANING
⚫Switch off and unplug from the power supply before
assembling or disassembling and cleaning.
⚫Keep the air vents at the rear of the main body free
from dust or fluff–use a vacuum cleaner to remove
these when necessary. Do not probe any opening to
remove fluff.
⚫Fan component parts should be cleaned using mild
soap and a damp cloth or sponge. Do not allow any
water or other liquid to enter the motor housing.
⚫Thoroughly remove soap film with clean water.
CAUTION: Do not use harsh detergents, chemical
cleaners or solvents as they may damage the surface
finish of the fan components.
IMPORTANT INFORMATION FOR CORRECT DISPOSAL OF THE
PRODUCT IN ACCORDANCE WITH EC DIRECTIVE 2002/96/EC.
At the end of its working life, the product must not be disposed of as
urban waste. It must be taken to a special local authority
differentiated waste collection center or to a dealer providing this
service. Disposing of a household appliance separately avoids possible
negative consequences for the environment and health, deriving form
inappropriate disposal and enables the constituent materials to be
recovered to obtain significant savings in energy and resources. As a
reminder of the need to dispose of household appliances separately,
the product is marked with a crossed-out wheeled dustbin.

Other Rohnson Fan manuals

Rohnson R-860 User manual

Rohnson

Rohnson R-860 User manual

Rohnson R-868 User manual

Rohnson

Rohnson R-868 User manual

Rohnson R-8600 User manual

Rohnson

Rohnson R-8600 User manual

Rohnson R-8200 User manual

Rohnson

Rohnson R-8200 User manual

Rohnson R-8361 User manual

Rohnson

Rohnson R-8361 User manual

Rohnson R-837 User manual

Rohnson

Rohnson R-837 User manual

Rohnson R-838 User manual

Rohnson

Rohnson R-838 User manual

Rohnson R-859 User manual

Rohnson

Rohnson R-859 User manual

Rohnson R-818 User manual

Rohnson

Rohnson R-818 User manual

Rohnson R-8400 User manual

Rohnson

Rohnson R-8400 User manual

Rohnson R-836 User manual

Rohnson

Rohnson R-836 User manual

Rohnson R-854 User manual

Rohnson

Rohnson R-854 User manual

Rohnson R-8300 User manual

Rohnson

Rohnson R-8300 User manual

Rohnson R-8500 User manual

Rohnson

Rohnson R-8500 User manual

Rohnson R-858 User manual

Rohnson

Rohnson R-858 User manual

Rohnson R-849 User manual

Rohnson

Rohnson R-849 User manual

Rohnson R-8371 User manual

Rohnson

Rohnson R-8371 User manual

Rohnson R-810 User manual

Rohnson

Rohnson R-810 User manual

Rohnson R-865 User manual

Rohnson

Rohnson R-865 User manual

Rohnson R-8510 User manual

Rohnson

Rohnson R-8510 User manual

Rohnson R-863 User manual

Rohnson

Rohnson R-863 User manual

Popular Fan manuals by other brands

Sanuvox SANUVAIR S1000 VOC instruction manual

Sanuvox

Sanuvox SANUVAIR S1000 VOC instruction manual

Ebmpapst R2S175-AA07-39 operating instructions

Ebmpapst

Ebmpapst R2S175-AA07-39 operating instructions

Bionaire BASF40LM instruction manual

Bionaire

Bionaire BASF40LM instruction manual

Anslut 412-051 operating instructions

Anslut

Anslut 412-051 operating instructions

Excelair ETF 901 instruction manual

Excelair

Excelair ETF 901 instruction manual

Master FS 60 User and Maintenance Book

Master

Master FS 60 User and Maintenance Book

Vents VKP SERIES user manual

Vents

Vents VKP SERIES user manual

Ebmpapst G2D180-BD02-07 operating instructions

Ebmpapst

Ebmpapst G2D180-BD02-07 operating instructions

EWT XTREM user manual

EWT

EWT XTREM user manual

VAN DER ENDE Airmix G installation manual

VAN DER ENDE

VAN DER ENDE Airmix G installation manual

Euramco Safety RAMFAN GX200 owner's manual

Euramco Safety

Euramco Safety RAMFAN GX200 owner's manual

S&P PCD110X manual

S&P

S&P PCD110X manual

Fantech Ezifit installation instructions

Fantech

Fantech Ezifit installation instructions

Helios ZEB EC Installation and operating instructions

Helios

Helios ZEB EC Installation and operating instructions

Broan QTRE100S manual

Broan

Broan QTRE100S manual

Scarlett Comfort SC-DF111S90 instruction manual

Scarlett

Scarlett Comfort SC-DF111S90 instruction manual

LUCCI AIRFUSION BREEZE installation instructions

LUCCI

LUCCI AIRFUSION BREEZE installation instructions

Hunter 41949-01 installation guide

Hunter

Hunter 41949-01 installation guide

manuals.online logo
manuals.online logoBrands
  • About & Mission
  • Contact us
  • Privacy Policy
  • Terms and Conditions

Copyright 2025 Manuals.Online. All Rights Reserved.