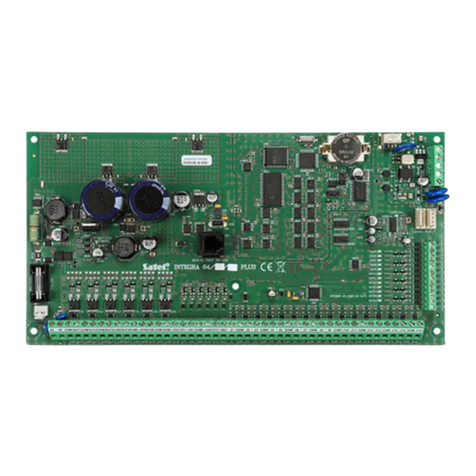
Satel INTEGRA Plus Owner's manual

PROGRAMMING
SATEL sp. z o.o.
ul. Budowlanych 66
80-298 Gdańsk
POLAND
tel. + 48 58 320 94 00
www.satel.eu
integra_plus_p_en 05/19
Alarm Control Panels
INTEGRA Plus
Firmware Version 1.19

Before you start programming, please read carefully this manual in order to avoid mistakes
that can lead to malfunction or even damage to the equipment.
SATEL aims to continually improve the quality of its products, which may result in changes in
their technical specifications and software. Current information about the changes being
introduced is available on our website.
Please visit us at:
http://www.satel.eu
The declaration of conformity may be consulted at www.satel.eu/ce
Service code: 12345
The following symbols may be used in this manual:
- note;
- caution.

Changes made to the firmware version 1.19
Expansion
modules Support for new modules: ACU-220 and ACU-280 (ABAX 2 wireless
system controllers).
Wireless devices Support for ABAX 2 wireless devices.
Zones REPORTING DELAY option available for the 8. EXTERIOR zone type.
Outputs New ON/OFF option (for the 24. MONO SWITCH type outputs).
Mode of operation of the 120. THERMOSTAT type outputs has been
modified.

2 Programming SATEL
CONTENTS
1. General.............................................................................................................................5
2. Configuring the control panel with keypad........................................................................5
2.1 Starting the service mode..........................................................................................5
2.2 Starting the service mode “from pins”........................................................................6
2.3 Hiding the service mode............................................................................................6
2.4 Exiting the service mode............................................................................................6
2.5 Service mode menu...................................................................................................6
2.6 Entering data by means of the keypad ....................................................................25
2.6.1 Selection from the single-choice list............................................................................25
2.6.2 Selection from the multiple-choice list.........................................................................25
2.6.3 Entering decimal and hexadecimal values..................................................................25
2.6.4 Programming telephone numbers ..............................................................................25
2.6.5 Entering names..........................................................................................................26
3. Configuring the control panel with DLOADX program.....................................................27
3.1 Main menu of DLOADX program.............................................................................27
3.1.1 Buttons.......................................................................................................................28
3.2 Parameters related to communication between the control panel and DLOADX
program ...................................................................................................................29
3.2.1 Communication identifiers..........................................................................................29
3.2.2 Modem communication parameters............................................................................30
3.2.3 Ethernet communication parameters..........................................................................31
3.2.4 GPRS communication parameters .............................................................................33
3.3 Local programming..................................................................................................34
3.3.1 Starting local programming.........................................................................................34
3.3.2 Starting local programming “from pins”.......................................................................34
3.3.3 Finishing local programming.......................................................................................34
3.4 Remote programming..............................................................................................35
3.4.1 Starting remote programming via modem...................................................................35
3.4.2 Starting remote programming via Ethernet network....................................................38
3.4.3 Starting remote GPRS programming..........................................................................40
3.5 Control panel data file..............................................................................................43
4. System structure.............................................................................................................43
4.1 Objects ....................................................................................................................44
4.2 Partitions..................................................................................................................44
4.2.1 Creating partitions......................................................................................................44
4.2.2 Programming partitions ..............................................................................................44
4.2.3 Partition parameters...................................................................................................45
4.3 Zones.......................................................................................................................48
4.3.1 Assigning zones to a partition.....................................................................................48
4.3.2 Programming the EOL resistor values........................................................................48
4.3.3 Programming the zones .............................................................................................49
4.3.4 Zone parameters........................................................................................................49
4.3.5 Zone types .................................................................................................................52
4.3.6 Zone options ..............................................................................................................54
4.3.7 Counters ....................................................................................................................57
4.3.8 Bypasses....................................................................................................................57
4.3.9 Groups of partitions....................................................................................................58
4.3.10 Zone testing ...............................................................................................................58
5. Outputs...........................................................................................................................58
5.1 Output parameters...................................................................................................59
5.2 Output functions.......................................................................................................59

SATEL INTEGRA Plus 3
5.3 Options....................................................................................................................64
5.4 Output triggering......................................................................................................65
5.5 Clearing alarm in partitions......................................................................................65
5.6 Output disabling.......................................................................................................65
5.7 120. Thermostat output parameters ........................................................................66
5.8 Output groups..........................................................................................................66
5.9 Logical functions of outputs.....................................................................................67
5.10 Output testing..........................................................................................................67
6. System options...............................................................................................................68
6.1 Telephone options...................................................................................................68
6.2 Printer options .........................................................................................................70
6.2.1 Printout options...........................................................................................................70
6.2.2 Printout contents.........................................................................................................70
6.3 Other options...........................................................................................................70
6.4 Arming options.........................................................................................................73
6.5 Times.......................................................................................................................73
6.6 Service options and parameters..............................................................................74
6.7 Other parameters ....................................................................................................75
6.8 Default user's authority level....................................................................................75
7. Programming the keypads..............................................................................................75
7.1 Keypad parameters and options..............................................................................76
7.1.1 Keypad .......................................................................................................................77
7.1.2 Volume/filter................................................................................................................79
7.1.3 State inspections ........................................................................................................79
7.1.4 User functions definition..............................................................................................81
7.1.5 Proximity cards...........................................................................................................81
8. Timers.............................................................................................................................82
8.1 Programming the timers ..........................................................................................82
8.2 Timer parameters....................................................................................................82
9. User schedules...............................................................................................................82
10. Reporting........................................................................................................................83
10.1 Reporting parameters and options ..........................................................................84
10.1.1 Options.......................................................................................................................84
10.1.2 Monitoring station 1 / Monitoring station 2...................................................................85
10.1.3 SIA-IP.........................................................................................................................87
10.1.4 Identifiers assignment.................................................................................................87
10.1.5 Event codes................................................................................................................88
10.1.6 Test transmissions......................................................................................................88
10.2 Starting the reporting...............................................................................................88
10.2.1 Telephone reporting....................................................................................................88
10.2.2 Reporting via Ethernet network...................................................................................89
10.2.3 GPRS reporting ..........................................................................................................89
10.2.4 SMS reporting.............................................................................................................90
11. Messaging......................................................................................................................91
11.1 Voice / PAGER messaging parameters and options...............................................92
11.1.1 Telephone numbers....................................................................................................92
11.1.2 Events assignment .....................................................................................................93
11.1.3 Clearing......................................................................................................................93
11.1.4 Pager messages.........................................................................................................93
11.1.5 Pager type..................................................................................................................93

4 Programming SATEL
11.2 SMS messaging parameters and options................................................................93
11.2.1 Events assignment.....................................................................................................93
11.3 E-mail messaging parameters and options..............................................................93
11.3.1 Events assignment.....................................................................................................94
11.3.2 E-mail server..............................................................................................................94
11.4 Starting the voice messaging...................................................................................94
12. Answering phone calls and remote control.....................................................................95
12.1 Telephone answering and control parameters and options.....................................95
12.1.1 Users and remote switches ........................................................................................96
12.2 Activation of the phone calls answering...................................................................96
12.3 Activation of the remote control...............................................................................96
13. Control panel firmware update........................................................................................96
14. Manual update history.....................................................................................................97

SATEL INTEGRA Plus 5
1. General
This manual applies to the control panels of the INTEGRA Plus series:
– INTEGRA 64 Plus
– INTEGRA 128 Plus
– INTEGRA 256 Plus
The control panel may be programmed:
•locally
– LCD keypad,
– computer with the DLOADX program installed, connected to the control panel RS-232
or USB port,
•remotely
– computer with the DLOADX program installed, communicating via the telephone
network (through modem or GPRS) or via the Ethernet network. Modem communication
can take place via the built-in control panel modem or an external modem connected to
the control panel. For GPRS communication to be possible, the INT-GSM module must
be installed in the alarm system or the SATEL GSM module must be connected to the
control panel. Communication over Ethernet is possible after connecting the ETHM-1
Plus / ETHM-1 Ethernet module to the control panel.
– virtual keypad available in the internet browser, mobile phone or smartphone.
Programming the control panel is possible when:
– the PERMANENT SERVICE ACCESS option is enabled (the option is enabled by default – the
control panel can be programmed by any method),
– the PERMANENT DLOADX ACCESS option is enabled (the option is enabled by default –
the control panel can only be programmed by means of the DLOADX program),
– the installer has been granted a temporary access to the control panel using the
SERVICE ACCESS function (the control panel can be programmed by any method).
The standards require that the administrators (masters) limit the installer access after
installation is finished.
2. Configuring the control panel with keypad
Programming the control panel with keypad (real or virtual) should be carried out using the
service functions, available in the service mode menu. Some features may not be available in
the virtual keypads.
2.1 Starting the service mode
1. Enter the service code (by default 12345) and press the key.
2. Using the or key, select the item SERVICE MODE from the list and press the or
key.
You can also start the service mode using the key shortcut:
[service code]9
The service mode is indicated in the keypads by lighting of the LED. It can also be
signaled by beeps if the appropriate option is enabled.
In the service mode, only alarms from the 24HVIBRATION, 24HCASH MACHINE, PANIC-
AUDIBLE and PANIC-SILENT type zones are possible.

6 Programming SATEL
2.2 Starting the service mode “from pins”
When entering the service mode in the normal way is not possible (the control panel does not
support LCD keypads, does not accept the service code, etc.), you can use the emergency
procedure, so-called, starting “from pins”.
1. Turn off the control panel power supply (first disconnect the AC power, and then the
battery).
2. Put a jumper on the RESET pins located on the control panel mainboard.
3. Turn on the control panel power supply (first connect the battery and then the AC power).
The DIALER LED will start blinking.
4. Wait a few seconds until the DIALER LED goes out and remove the jumper from the pins.
The control panel will enter the service mode. The service mode menu will be displayed
on the LCD keypad with the lowest address.
The service mode will not start if:
−the computer with running DLOADX program is connected to the RS-232 port,
−the DISABLE SERVICE MODE option is enabled – in such a case a prompt will appear
on the display, whether you want to delete all the control panel data. Pressing the
key number 1 will restore the factory settings and then will start the service mode.
The service mode can be started “from pins” even if the installer does not have access
(the administrator has disabled the PERMANENT SERVICE ACCESS and has not
programmed the service access time). If this is the case, the installer can get access
to the MASTERS function by entering the service code, confirmed by pressing the
key, within about 20 seconds after ending the service mode started “from pins”.
2.3 Hiding the service mode
The installer can hide the service mode using the HIDE SM NOW function (SM SETTINGS HIDE
SM NOW). The control panel will remain in the service mode, but the service mode menu will
not be displayed. This function can be useful, if e.g. the installer has to leave the keypad, but
does not want unauthorized persons to have access in the meantime to the service menu. To
get access to the service mode menu, you must proceed in the same way as when entering
the service mode.
The service mode can be hidden automatically after a specified period of time has elapsed
since the last operation was performed on the keypad (see description of the HIDE SERVICE
MODE AFTER parameter p. 74).
2.4 Exiting the service mode
To exit the service mode you can use the SERVICE END function.
After exiting the service mode, the control panel verifies whether the data in RAM memory
have changed in relation to the data stored in non-volatile FLASH memory. When the data in
RAM have been changed, a prompt will be displayed asking whether the new settings are to
be saved to FLASH memory. Pressing the key with number 1 will save a copy of the settings
to FLASH memory. By saving a copy of the settings to the FLASH memory, the control panel
will be able to restore them from a backup copy if an error is detected in the data stored in
the RAM memory.
2.5 Service mode menu
Service end
SM settings
Service code

SATEL INTEGRA Plus 7
INTEGRA ident.
DLOADX ident.
GUARDX ident.
Ident. ACCO-NET
DLOADX tel. No
GUARDX tel. No
Block SM
Block DWNL
SM sounds
Hide SM now
Hide SM after
Structure
System
Objects
Edit object
New object
Delete object
Partitions
Settings
[select partition by name]
Type
Dep. partitions
Timers 1..32
Timers 33..64
Options
2 cds to arm
2 cds to d-arm
Codes on 2 arm
1st code 30s
Timer priority
Fin.exit delay
Infin.ex.delay
Def.block time
Al.-can disarm
Exit delay
Auto-arm delay
Al. verify time
Bell on 2nd
Guard – armed
Guard – disarm.
Time for guard.
C. mach. blk.del. / Disarm delay
C. mach. blk. time / Arm delay
Zones
Name
Names
[select partition by number]
Hardware
LCD keypads
Settings
[select device by name – see: p. 16]
Names
[select device by type and address]

8 Programming SATEL
DTM short
Tmp.alw.ld.DTM
Expanders
Settings
[select device by name – see: p. 20]
ABAX confirmat.
INT-IT-wt.2cd.
Rem. RX key fobs
Copy RX keyfobs
Rem. ABAX kfobs
Copy ABAX kfobs
Names
[select device by type and address]
DT1 short
Tmp.alw.ld.DT1
DT2 short
Tmp.alw.ld.DT2
Identification
LCD keypads id.
Expanders id.
Keypads addr.
EOL R1 resistor
EOL R2 resistor
EOL R2 resistor
Options
Tel. options.
Mon. TELEPHONE
Mon.GPRS
Mon. ETHM-1
Messaging
SMS messaging
E-MAIL messag.
Modem answer.
Ext.mod.answ.
Voice answer.
Remote control
Tone dialing
Groud start
No dialton.tst
No answer test
Dbl. voice msg.
Double call
External modem
ISDN/GSM modem
Pulse 1/1.5
Printer options
Printing
Monitor. status
Names/descript
Wide paper
2400bps
CR+LF
Parity bit

SATEL INTEGRA Plus 9
Parity EVEN
Zone alarms
Part/mod. al.
Arming/disarm.
Bypasses
Access control
Troubles
User functions
System events
Active rights
Various options
Grade3
Simple codes
Notify of code
Confirm with 1
Autoabort msg.
SM -> menu
Tests -> menu
No AC-no blght
Fast exp. bus
No rest. mon.
Inf. aft. tamper
Arm, view viol
Arm, warn.trb.
Blk aft.w.code
Troubl. memory
Hide alarms
Events limit.
View clear.al.
L.no ABAX=tamp
No shortcuts
Do not arm
If verif. al.
If tamper
If monit. trbl.
If batt. trbl.
If outs. trbl.
If other trbl.
Times
Global entry delay
Global alarm time
Suppr.arm status after
AC loss report delay
Tel. loss report delay
Def.block time
Rings to answer
Min.code length
Prefix length
Clock adjustm.
Daylight saving
Summer time
Winter time
Time server

10 Programming SATEL
Time zone
No t.serv.trbl
No SMTP trbl.
No SATEL trbl.
No LAN(AC) tr.
PING test
PING
PING period
PING tries
Integrate key
Zones
Details
[select zone by name]
EOL
Sensitivity [x20ms] / Pulses time / Sensitiv. [ms] / Output
Pulses count
Type
Entry delay / Alarm delay / Surveillan. time / Signal. delay / Bypass time /
Expander number / Arming mode / Group / Exit delay / Outputs group
Max.viol.time / Max.opening t.
Max.n-viol.time
No viol [min]
Partition
Power up delay
Priority / Disrm.on viol.
Chime in exp. / No al. in kpds.
Video, disarmed
Video, armed
Bypass disabl.
Bypass no exit
Bell delay / Alarm if armed / Clear alarm / Restore=disarm / Alarm / Arm
2,3=delay
Auto-reset 3
Auto-reset 1
Auto-rst. clr
Pre-alarm / Attend verif. / No restore ev.
Abort delay / Part. tmp. block / Event arm fail / No viol.monit. / Arm-inactive /
Disarmd-monit.
Rest.after bell
Rest.aft.dis.
Al.on exit end / Log events / No bp. if armed / Abort voice m.
Al.aft.unbps. / Event in arm
Tamp. alw. loud
Monitor. delay / Chk. if can arm / Restore=bps.v. / Bypass verif.
Name
Parameters
Partition
EOL
Sensit. [x20ms]
Type
Entry delay
Max.violat.time
Max.no-viol.t.

SATEL INTEGRA Plus 11
Zone options
[select option]
Counters
Counter n [n – counter number]
Max. value
Counting time
Omit recurs
Bypasses
Group n [n – number of bypassed group of zones]
Zones
Bypass on/off
Test SIGNAL. OUTPUT
[select zone]
Names
[select zone by number]
Outputs
Details
[select output by name]
Function
Cut-off time
Polarization +
Pulsating
Latch
Timers control
Timers 33..64
Arm - no ctrl.
Off-delay tmr.
Zones / Timers / Expanders / Outputs / Users / Doors / Voice mess. / Tel.
switches (triggering)
LCD keypads / Master users / Arm mode sel. / Dialing mode (triggering)
Partitions / Burg.tst.part. (triggering)
Fire.tst.part. (triggering)
Output
Temperature 1
Temperature 2
Hysteresis
Timers
Bypass. timers
Clear in parts.
Troubles
PING trouble
No LAN cable
Name
Parameters
Function
Cut-off time
Options
[select option]
Test
Names
[select output by number]
Outputs groups

12 Programming SATEL
Group n outputs [n – number of group of outputs]
Group n name [n – number of group of outputs]
Outs state by
Timers
Times
[select timer by name]
Names
[select timer by number]
User schedules
Settings
[select schedule by name]
Names
[select schedule by number]
Monitoring
Mon. TELEPHONE
Mon. GPRS
Mon. ETHM-1
Dont rep. rsts.
Stations
Advanced
Long hsk.s1t1
Long hsk.s1t2
Long hsk.s2t1
Long hsk.s2t2
Long hsk. wait.
Need ack.id.s1
Id. 6-chars s1
Source name s1
Partit.name s1
SIA evr.bl.s1A / TELIM 0ton s1A
SIA evr.bl.s1B / TELIM 0ton s1B
Need ack.id.s2
Id. 6-chars s2
Source name s2
Partit.name s2
SIA evr.bl.s2A / TELIM 0ton s2A
SIA evr.bl.s2B / TELIM 0ton s2B
National chars
Station 1
Tel. 1 number
Tel. 2 number
Tel. 1 format
Tel. 2 format
IP address
Port
Key (MS)
Key (GPRS)
Key (ETHM)
UDP
SIA-IP
SIA-IP acct
MAC
Coded

SATEL INTEGRA Plus 13
Key (SIA-IP)
KeyHEX (SIA-IP)
Timestamp
SIA-IP test
Repetition cnt.
Suspension time
TELIM/SIA prefix
Identifier n [n – identifier number]
Identifier sys.
Event assign.
Station 2
Tel. 1 number
Tel. 2 number
Tel. 1 format
Tel. 2 format
IP address
Port
Key (MS)
Key (GPRS)
Key (ETHM)
UDP
SIA-IP
SIA-IP acct
MAC
Coded
Key (SIA-IP)
KeyHEX (SIA-IP)
Timestamp
SIA-IP test
Repetition cnt.
Suspension time
TELIM/SIA prefix
Identifier n [n – identifier number]
Identifier sys.
Event assign.
Id. assignment
Partitions
[select partition]
Zones
[select zone]
LCD keypads
[select keypad]
Expanders
[select expander]
TELIM codes
Event codes
Identifier n [n – identifier number]
Zones
[select zone]
Partitions
[select partition]
LCD keypads
[select keypad]

14 Programming SATEL
Expanders
[select expander]
Identifier sys.
Troubles
Troubles rst.
Other
Test at
Test MS1 every
Test MS2 every
Independ.test
Messaging
Messaging
Dbl.voice msg.
Repetition cnt.
Tel. names
[select telephone by number]
Tel. settings
[select telephone by name]
Tel. number
Type
Rounds count
Any code
Code
Assignment
Zone alarms
Synthesizer
Pager message
Telephones
Zone tampers
Synthesizer
Pager message
Telephones
Panic alarms
Synthesizer
Pager message
Telephones
Fire alarms
Synthesizer
Pager message
Telephones
Medical alarms
Synthesizer
Pager message
Telephones
Duress alarms
Synthesizer
Pager message
Telephones
Tampers
Synthesizer
Pager message
Telephones
AC (230V) loss

SATEL INTEGRA Plus 15
Synthesizer
Pager message
Telephones
AC (230V) rest.
Synthesizer
Pager message
Telephones
Outputs
Synthesizer
Pager message
Telephones
Arming failed
Synthesizer
Pager message
Telephones
Messages
[select message]
Pager types
[select pager]
Msg.abort in P.
[select telephone by name]
Msg.abort on T.
[select telephone by name]
SMS messaging
SMS messaging
Tel. names
[select telephone by number]
Tel. settings
[select telephone by name]
E-MAIL messag.
E-MAIL messag.
E-mail address
[select e-mail address]
Settings
[select e-mail address]
Active
Zone alarms
Bypasses
Part/mod. al.
Arming/disarm.
Troubles
System events
Partitions
Server (SMTP)
Port
User name
Password
Sender address
Encryption
Subject
Tel.answ./ctrl.
Voice answer.
Double call

16 Programming SATEL
Rings count
On armed part.
Remote control
Users (all)
[select user from the list of all users]
Users (t.code)
[select user from the list of users with telephone code]
NoteText
Valid
From
For
Who can erase
System status
Partitions
Zones
Troubles
Supply voltage
Radio devices
STM prg.version
IP/MAC/IMEI/ID
Modules version
Restarts
Clear all
Clear settings
Clear codes
Settings<-FLASH
STARTER
Devices connected to the keypad bus
[service code]9Structure Hardware LCD keypads Settings
INT-KLCD / INT-KLCDR / INT-KLCDK / INT-KLCDL / INT-KLCDS / INT-KLFR / INT-KSG
Partitions
Alarms
Fire alarms
Chime zones
Chime bps. zone
Chime bps. time
Quickarm part.
Fin.exit delay
Show entry del.
Show exit delay
Sign.entry del.
Sign.exit delay
DateTime format
Name (2nd row)
LCD backlight
Keys backlight
Auto backlight
Alarm messages
Part. al.mess.
Zone al.mess.

SATEL INTEGRA Plus 17
Code + card
Alarms
Fire alarm
Medical alarm
Panic alarm
Silent panic
3 wrong codes
Options
Alarm signal.
New trbl.sign.
Key sounds
Trbl.in p.arm.
Zone violation
Auto-arm delay
Unkn. card sig.
Ev.3 unk. cards
Al.3 unk. cards
Dspl. mode chg.
Show code ent.
Show disarming
Show arm
Control (8#)
RS communicat. (does not apply to INT-KSG)
Sound volume (only INT-KLCD, INT-KLCDR, INT-KLFR and INT-KSG)
Reviews
Zones
Partitions
Alarms log
Troubles log
Troubles
Chime changing
State part.
Zone characters
Part.characters
Code+arrows
Sensitivity (only INT-KLCDR with firmware version 1.06 or newer or INT-KLFR)
Card close
Card close long
Door to open
Tamper in part.
Z1 (n) in LCD [n – number of zone in the system]
Z2 (n) in LCD [n – number of zone in the system]
INT-KWRL2 / INT-KWRL
Partitions
Alarms
Fire alarms
Chime zones
Chime bps. zone
Chime bps. time
Quickarm part.
Fin.exit delay
Show entry del.
Show exit delay

18 Programming SATEL
Sign.entry del.
Sign.exit delay
DateTime format
Name (2nd row)
LCD backlight
Keys backlight
Alarm messages
Part. al.mess.
Zone al.mess.
Code + card
Alarms
Fire alarm
Medical alarm
Panic alarm
Silent panic
3 wrong codes
Options
Alarm signal.
New trbl.sign.
Key sounds
Trbl.in p.arm.
Zone violation
Auto-arm delay
Unkn. card sig.
Ev.3 unk. cards
Al.3 unk. cards
Show code ent.
Show disarming
Show arm
Control (8#)
Sound volume
Reviews
Zones
Partitions
Alarms log
Troubles log
Troubles
Chime changing
State part.
Zone characters
Part.characters
Code+arrows
Sensitivity
Card close
Card close long
Door to open
Tamper in part.
CA-64 PTSA
Zones
Partitions
Alarms
Show
AC loss delay
Other manuals for INTEGRA Plus
2
This manual suits for next models
1
Table of contents
Other Satel Control Panel manuals

Satel
Satel PERFECTA User manual

Satel
Satel PERFECTA-T User manual

Satel
Satel Integra Series User manual

Satel
Satel Integra 128-WRL User guide

Satel
Satel CA-64 PTSA Operating and installation instructions

Satel
Satel CA10 plus User manual

Satel
Satel Integra 24 User manual

Satel
Satel Versa Owner's manual

Satel
Satel CA-6 KLED-S User manual

Satel
Satel PERFECTA User manual