manuals.online logo
Brands
  1. Home
  2. •
  3. Brands
  4. •
  5. Sauder
  6. •
  7. Indoor Furnishing
  8. •
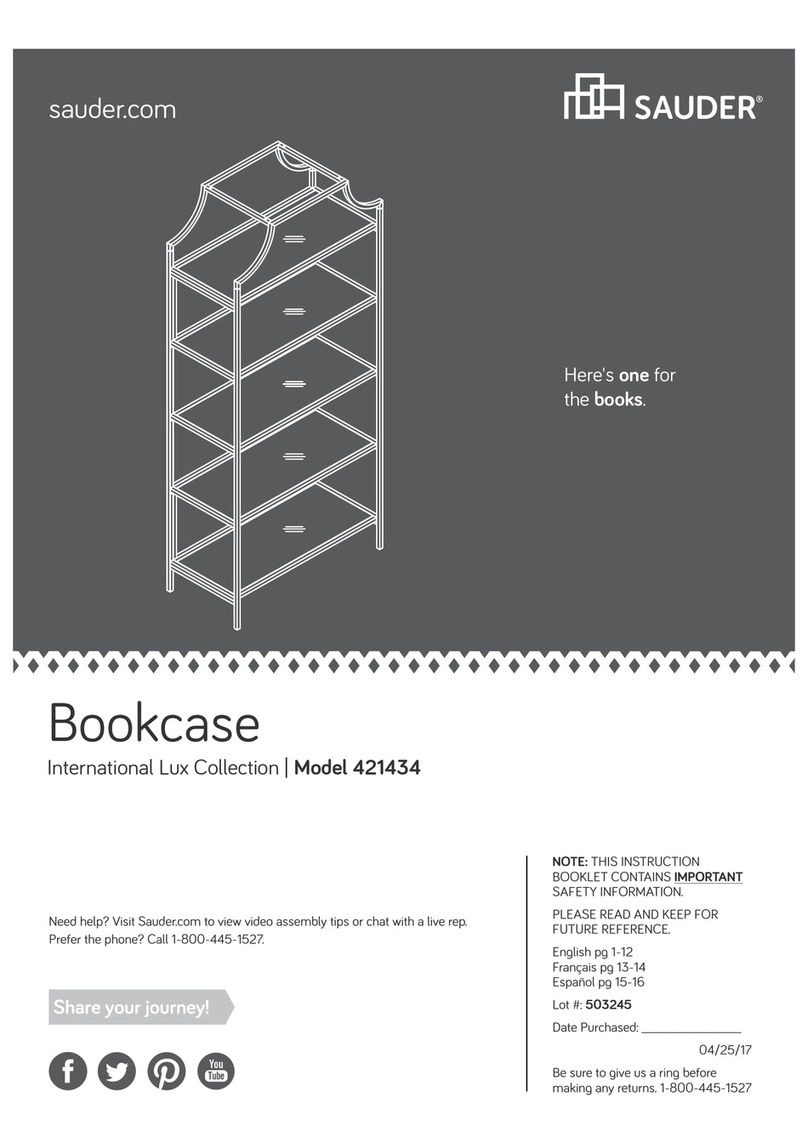
  9. Sauder 423742 User manual

Sauder 423742 User manual

sauder.com
NOTE: THIS INSTRUCTION
BOOKLET CONTAINS IMPORTANT
SAFETY INFORMATION.
PLEASE READ AND KEEP FOR
FUTURE REFERENCE.
sauder.com
CONTACT US FIRST
BEFORE MAKING ANY RETURNS TO THE STORE.
Share your journey!
sauder.com
CONTACT US FIRST
BEFORE MAKING ANY RETURNS TO THE RETAILER.
Visit sauder.com/service to order replacement parts, view video assembly tips, or chat with a live rep.
Prefer the phone? Give us a ring at 1-800-445-1527.
Customer Service is available Monday-Friday - 9 a.m. to 5:30 p.m. EST (except holidays)
Sauder.com English pg 1-28
Français pg 29-32
Español pg 33-36
Lot # 533402 10/10/19
Purchased: __________________
L-Shaped Desk
Coral Cape Collection | Model 423742
For all your
newfangled gadgetry.
Part Identification
Hardware Identification
Assembly Steps
Français
Español
Safety
Warranty
No. 2 Phillips Screwdriver
Tip Shown Actual Size
Table of Contents Assembly Tools Required
3
4
5-28
29-32
33-36
37-38
39
Skip the power trip.
This time.
Page 2 www.sauder.com/service 423742
Part Identification
åWhile not all parts are labeled, some of the parts will have a label or an inked letter on the edge
to help distinguish similar parts from each other. Use this part identification to help identify similar parts.
Now you know
our ABCs.
A SMALL TOP (1)
B LARGE TOP (1)
C TOP UPRIGHT (1)
D BACK (1)
E LEFT END (1)
F RIGHT END (1)
G BOTTOM (1)
H SMALL DRAWER FRONT (1)
J SMALL DRAWER BACK (1)
K SMALL LEFT DRAWER SIDE (1)
L SMALL RIGHT DRAWER SIDE (1)
M SMALL DRAWER BOTTOM (1)
N LARGE DRAWER FRONT (1)
O LARGE DRAWER BACK (1)
P LARGE LEFT DRAWER SIDE (1)
Q LARGE RIGHT DRAWER SIDE (1)
R LARGE DRAWER BOTTOM (1)
S RIGHT END FRAME (1)
T RIGHT UPRIGHT FRAME (1)
U TOP UPRIGHT FRAME BRACE (2)
V LEFT UPRIGHT FRAME (1)
WTOP END/UPRIGHT
FRAME BRACE (1)
X LEFT END FRAME (1)
Y TOP BRACE (1)
ZBOTTOM END/UPRIGHT
FRAME BRACE (1)
AA BOTTOM UPRIGHT
FRAME BRACE (1)
BB DRAWER BOX FRAME BRACE (2)
A
B
C
D
E
F
G
H
J
K
L
M
N
O
P
Q
R
S
T
U
U
V
W
X
Y
Z
AA
BB
BB
Page 3www.sauder.com/service423742
Hardware Identification
åScrews are shown actual size. You may receive extra hardware with your unit.
LARGE HIDDEN
CAM - 6
5SMALL HIDDEN
CAM - 8
6WOOD DOWEL - 12
8
CAM SCREW - 14
7
L-WRENCH - 1
11
PULL - 2
9APPLIQUE CARD - 3
10
(EXTENSION SET SHOWN SEPARATED)
1LARGE EXTENSION
RAIL - 2
2LARGE EXTENSION
SLIDE - 2
(EXTENSION SET SHOWN SEPARATED)
3SMALL EXTENSION
RAIL - 2
4SMALL EXTENSION
SLIDE - 2
12 FILE GLIDE - 2
GOLD 1/2" HEX HEAD SCREW - 4
13 BLACK 1-1/2" HEX HEAD SCREW - 4
14
GOLD 1-3/8" HEX HEAD SCREW - 33
15 GOLD 7/8" HEX HEAD SCREW - 16
16
BLACK 1-7/8" HEX HEAD SCREW - 2
17 SILVER 3/4" MACHINE SCREW - 4
18
GOLD 1-3/8" FLAT HEAD SCREW - 8
19 BLACK 7/16" FLAT HEAD SCREW - 24
20
Page 4 www.sauder.com/service 423742
Step 1
å Assemble your unit on a carpeted floor or on the empty
carton to avoid scratching your unit or the floor.
å Push six LARGE HIDDEN CAMS (5) completely in the holes
of the TOP UPRIGHT (C), and ENDS (E and F).
Look for this icon. It means a
video assembly tip is available at
www.sauder.com/service/tips
Arrow
Arrow 5
(6 used)
C
E
F
The arrow in the HIDDEN
CAM must point toward the
hole in the edge of the board.
Hole
Page 5www.sauder.com/service423742
å Turn fourteen CAM SCREWS (7) into the TOPS (A and B),
and DRAWER FRONTS (H and N).
Step 2
A
B
H
N
7
Page 6 www.sauder.com/service 423742
Meet Parts (A and B). These components
have been engineered to be lighter,
stronger, faster… well ok. Not technically
faster. But definitely makes for a sturdier
L-Shaped Desk that’s easier to assemble
and friendlier to the environment.
(14 used)
å Separate the SMALL EXTENSION SLIDES (4) from the SMALL EXTENSION RAILS (3) as shown in the upper diagram
below. Be prepared, the parts are greasy.
å Fasten two SMALL EXTENSION RAILS (3) to the ENDS (E and F). Use six BLACK 7/16" FLAT HEAD SCREWS (20).
through the holes shown.
å NOTE: For each SMALL EXTENSION RAIL, turn a SCREW into the 1st hole shown in the diagram. Then, slide the inner
cartridge of the EXTENSION RAIL in to find the other holes that line up with the holes in the END. Turn a SCREW into
these holes.
å NOTE: The SMALL EXTENSION SLIDES will be used later for the DRAWERS.
Step 3
E
F
BLACK 7/16" FLAT HEAD SCREW
(6 used in this step)
20
3
3
3
Open end
Groove
Groove
3
4
Page 7www.sauder.com/service423742
Open end
Open end
1st hole
Use these holes.
å Separate the LARGE EXTENSION SLIDES (2) from the LARGE EXTENSION RAILS (1) as shown in the upper diagram
below. Be prepared, the parts are greasy.
å Fasten the LARGE EXTENSION RAILS (1) to the ENDS (E and F). Use six BLACK 7/16" FLAT HEAD SCREWS (20).
through the holes shown.
å NOTE: For each LARGE EXTENSION RAIL, turn a SCREW into the 1st hole shown in the diagram. Then, slide the inner
cartridge of the EXTENSION RAIL in to find the other holes that lines up with the holes in the END. Turn a SCREW into
these holes.
å NOTE: The LARGE EXTENSION SLIDES will be used later for the DRAWERS.
Step 4
E
F
BLACK 7/16" FLAT HEAD SCREW
(6 used in this step)
20
1
1
1
1
2
Page 8 www.sauder.com/service 423742
Open end
Open end
Groove
Groove
Open end
Use these holes.
1st hole
å Fasten a TOP BRACE (Y) to the SMALL TOP (A). Tighten
four GOLD 1-3/8" HEX HEAD SCREWS (15) using the
L-WRENCH (11).
Step 5
A
Y
GOLD 1-3/8" HEX HEAD SCREW
(4 used in this step)
15
Page 9www.sauder.com/service423742
11
Just think. The sooner
you do this, the sooner
you do something else.
å Insert two WOOD DOWELS (8) into the SMALL TOP (A).
å Fasten the TOP UPRIGHT (C) to the SMALL TOP (A).
Tighten two LARGE HIDDEN CAMS.
å NOTE: Be sure the WOOD DOWELS in the TOP insert
into the holes in the TOP UPRIGHT.
Step 6
A
C
1
2
8
Page 10 www.sauder.com/service 423742
å Fasten a BRACE (W) to the SMALL TOP (A).
Tighten two GOLD 1-3/8" HEX HEAD SCREWS (15)
using the L-WRENCH (11).
Step 7
AW
GOLD 1-3/8" HEX HEAD SCREW
(2 used in this step)
15
Page 11www.sauder.com/service423742
11
å Fasten the LEFT END FRAME (X) to the SMALL TOP (A). Tighten two
GOLD 1-3/8" HEX HEAD SCREWS (15) using the L-WRENCH (11).
å Fasten the LEFT END FRAME (X) to the BRACES (W and Y). Tighten four
GOLD 1-3/8" HEX HEAD SCREWS (15) using the L-WRENCH (11).
Step 8
X
W
Y
A
Page 12 www.sauder.com/service 423742
11
GOLD 1-3/8" HEX HEAD SCREW
(6 used in this step)
15
15
å Fasten the BRACE (Z) to the LEFT END FRAME (X).
Tighten two GOLD 7/8" HEX HEAD SCREWS (16) using
the L-WRENCH (11)..
Step 9
Z
X
Page 13www.sauder.com/service423742
11
GOLD 7/8" HEX HEAD SCREW
(2 used in the BRACES)
16
å Insert four WOOD DOWELS (8) to the LARGE TOP (B).
å Fasten the ENDS (E and F) to the LARGE TOP (B). Tighten
four LARGE HIDDEN CAMS.
å NOTE: Be sure the WOOD DOWELS in the LARGE TOP
insert into the holes in the ENDS.
Step 10
B
E
F
Groove
8
(4 used)
Page 14 www.sauder.com/service 423742
å Slide the BACK (D) into the grooves in the ENDS (E and F).
å NOTE: Be sure the BACK slides into the LARGE TOP groove.
Step 11
B
E
D
F
Page 15www.sauder.com/service423742
å Insert four WOOD DOWELS (8) into the BOTTOM (G).
å Fasten the BOTTOM (G) to the BACK (D) and ENDS (E and F).
Tighten four BLACK 1-1/2" HEX HEAD SCREWS (14) using
the L-WRENCH (11).
å NOTE: Be sure the WOOD DOWELS in the BOTTOM insert
into the holes in the ENDS.
å NOTE: Be sure the BOTTOM groove inserts into the BACK.
Step 12
E
F
G
D
BLACK 1-1/2" HEX HEAD SCREW
(4 used in this step)
14
8
(4 used)
Page 16 www.sauder.com/service 423742
11
å Fasten the BRACES (BB) to the BOTTOM (G). Tighten four GOLD 1/2"
HEX HEAD SCREWS (13) using the L-WRENCH (11).
å Fasten the FRAMES (S and T) to the LARGE TOP (B). Tighten four
GOLD 1-3/8" HEX HEAD SCREWS (15) using the L-WRENCH (11).
Step 13
BB
BB
B
G
T
S
GOLD 1/2" HEX HEAD SCREW
(4 used in the BRACES)
13
13
GOLD 1-3/8" HEX HEAD SCREW
(4 used in the FRAMES)
15
Page 17www.sauder.com/service423742
11
å Fasten the FRAMES (S and T) to the BRACES (BB).
Tighten eight GOLD 7/8" HEX HEAD SCREWS (16) using
the L-WRENCH (11).
å Fasten a BRACE (U) to the LARGE TOP (B). Tighten
two GOLD 1-3/8" HEX HEAD SCREWS (15) using
the L-WRENCH (11).
å Fasten a BRACE (U) to the FRAME (T). Tighten two GOLD
1-3/8" HEX HEAD SCREWS (15) using the L-WRENCH (11).
Step 14
U
BB
BB
T
S
GOLD 7/8" HEX HEAD SCREW
(8 used in the BRACES)
16
16
B
GOLD 1-3/8" HEX HEAD SCREW
(4 used in this step)
15
Page 18 www.sauder.com/service 423742
11
å Fasten a FRAME (V) to the BRACE (U). Tighten two GOLD 1-3/8"
HEX HEAD SCREWS (15) using the L-WRENCH (11).
å Fasten the BRACE (AA) to the FRAMES (T and V). Tighten four
GOLD 7/8" HEX HEAD SCREWS (16) using the L-WRENCH (11).
Step 15
VU
AA
GOLD 1-3/8" HEX HEAD SCREW
(2 used in this step)
15
V
T
GOLD 7/8" HEX HEAD SCREW
(4 used in the BRACES)
16
For support, place packing
foam and magazines here.
Page 19www.sauder.com/service423742
11
å Carefully stand the LARGE TOP (B) assembly upright.
å Insert two WOOD DOWELS (8) to the LARGE TOP (B).
å Fasten the TOP UPRIGHT (C) to the LARGE TOP (B). Tighten two BLACK 1-7/8" HEX HEAD SCREWS (17) using
the L-WRENCH (11).
å NOTE: Be sure the WOOD DOWELS in the LARGE TOP insert into the holes in the TOP UPRIGHT .
å Fasten the BRACES (W and Y) to the LARGE TOP (B), and FRAME (V). Tighten five GOLD 1-3/8" HEX
HEAD SCREWS (15) using the L-WRENCH (11).
å Fasten the BRACE (Z) to the FRAME (V). Tighten two GOLD 7/8" HEX HEAD SCREWS (16) using
the L-WRENCH (11).
Step 16
B
C
V
A
Z
Y
W
GOLD 1-3/8" HEX HEAD SCREW
(5 used for the BRACES)
15
Page 20 www.sauder.com/service 423742
11
8
(2 used)
BLACK 1-7/8" HEX HEAD SCREW
(2 used for the TOP UPRIGHT)
17
GOLD 7/8" HEX HEAD SCREW
(2 used in the FRAME)
16

Other Sauder Indoor Furnishing manuals
Sauder Boone Mountain 416971 User manual

Sauder

Sauder Boone Mountain 416971 User manual

Sauder Harvest Mill 404963 User manual

Sauder

Sauder Harvest Mill 404963 User manual

Sauder 109848 User manual

Sauder

Sauder 109848 User manual

Sauder Linen Tower 414819 User manual

Sauder

Sauder Linen Tower 414819 User manual

Sauder Cannery Bridge 429414 User manual

Sauder

Sauder Cannery Bridge 429414 User manual

Sauder Anywhere Console 419230 User manual

Sauder

Sauder Anywhere Console 419230 User manual

Sauder Parklane Series User manual

Sauder

Sauder Parklane Series User manual

Sauder Steel River 427654 User manual

Sauder

Sauder Steel River 427654 User manual

Sauder Anda Norr 427346 User manual

Sauder

Sauder Anda Norr 427346 User manual

Sauder WHISKER CAT PYRAMID User manual

Sauder

Sauder WHISKER CAT PYRAMID User manual

Sauder 401822 User manual

Sauder

Sauder 401822 User manual

Sauder 413081 User manual

Sauder

Sauder 413081 User manual

Sauder Dakota Pass 420410 User manual

Sauder

Sauder Dakota Pass 420410 User manual

Sauder Heritage Hill Lateral File 102702 User manual

Sauder

Sauder Heritage Hill Lateral File 102702 User manual

Sauder 414817 User manual

Sauder

Sauder 414817 User manual

Sauder Harbor View 8070-297 User manual

Sauder

Sauder Harbor View 8070-297 User manual

Sauder Harbor View 402905 User manual

Sauder

Sauder Harbor View 402905 User manual

Sauder 412314 User manual

Sauder

Sauder 412314 User manual

Sauder 419954 User manual

Sauder

Sauder 419954 User manual

Sauder 423408 User manual

Sauder

Sauder 423408 User manual

Sauder Embassy Point 414706 User manual

Sauder

Sauder Embassy Point 414706 User manual

Sauder project 62 User manual

Sauder

Sauder project 62 User manual

Sauder Harbor View 414941 User manual

Sauder

Sauder Harbor View 414941 User manual

Sauder Harbor View 401328 User manual

Sauder

Sauder Harbor View 401328 User manual

Popular Indoor Furnishing manuals by other brands

ROOMS TO GO Ovis 60699 manual

ROOMS TO GO

ROOMS TO GO Ovis 60699 manual

Space Seating 829-R2C728P Assembly and operating instructions

Space Seating

Space Seating 829-R2C728P Assembly and operating instructions

Jysk KETTINGE quick start guide

Jysk

Jysk KETTINGE quick start guide

Style selections EDWARDS 36DC installation manual

Style selections

Style selections EDWARDS 36DC installation manual

Coaster 183452 Assembly instructions

Coaster

Coaster 183452 Assembly instructions

HAMPTON BAY FRS81094B-STL Use and care guide

HAMPTON BAY

HAMPTON BAY FRS81094B-STL Use and care guide

BDI Meriden 8127 Assembly instructions

BDI

BDI Meriden 8127 Assembly instructions

Exclusive Heritage BV-20060D-WMCG installation manual

Exclusive Heritage

Exclusive Heritage BV-20060D-WMCG installation manual

Walker Edison W58CSTBV2D Assembly instructions

Walker Edison

Walker Edison W58CSTBV2D Assembly instructions

Safavieh Furniture DTB1403 manual

Safavieh Furniture

Safavieh Furniture DTB1403 manual

Whalen WF36FVB manual

Whalen

Whalen WF36FVB manual

modway EEI-2266 quick start guide

modway

modway EEI-2266 quick start guide

Seconique MONACO Assembly instructions

Seconique

Seconique MONACO Assembly instructions

modway Marchesa EEI-5015 Assembly instructions

modway

modway Marchesa EEI-5015 Assembly instructions

ASH & EMBER Grade A Teak 25" Barstool user manual

ASH & EMBER

ASH & EMBER Grade A Teak 25" Barstool user manual

Muller TB 224 Assembly instruction

Muller

Muller TB 224 Assembly instruction

RTA Products TECHNI MOBILI RTA-80X5 Assembly instructions

RTA Products

RTA Products TECHNI MOBILI RTA-80X5 Assembly instructions

TOV Gala Assembly instructions

TOV

TOV Gala Assembly instructions

manuals.online logo
manuals.online logoBrands
  • About & Mission
  • Contact us
  • Privacy Policy
  • Terms and Conditions

Copyright 2025 Manuals.Online. All Rights Reserved.