manuals.online logo
Brands
  1. Home
  2. •
  3. Brands
  4. •
  5. Sauder
  6. •
  7. Indoor Furnishing
  8. •
  9. Sauder 414724 User manual

Sauder 414724 User manual

PLEASE CONTACT US
BEFORE RETURNING
YOUR UNIT TO THE STORE
1-800-523-3987
www.sauder.com
Made in the USA
Archbold, OH
NOTE: THIS INSTRUCTION BOOKLET CONTAINS
IMPORTANT SAFETY INFORMATION.
PLEASE READ AND KEEP FOR FUTURE REFERENCE.
English.................... Page 1-16
Français...............Pages 17-18
Espanol.............Páginas 19-20
Lot #: 350716 04 / 10 / 13
Date Purchased: ____________________
414724
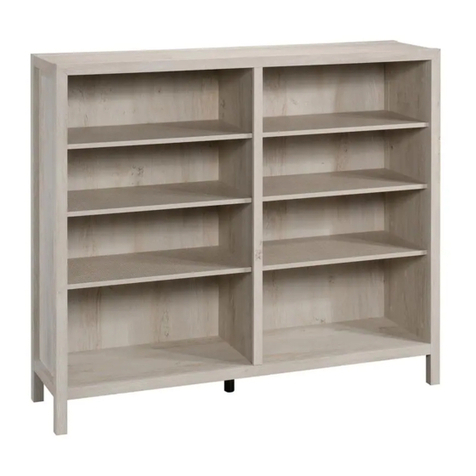
Bookcase
Barrister Lane Collection
ASSEMBLY TOOLS REQUIRED
Hammer
No. 2 Phillips Screwdriver
Tip Shown Actual Size
ADULT ASSEMBLY REQUIRED
PART IDENTIFICATION: While not all parts are labeled, some of the parts will have a label or an inked
letter on the edge to help distinguish similar parts from each other. Use this PART IDENTIFICATION to help
identify similar parts.
A RIGHT END 1
B LEFT END 1
C UPRIGHT 1
D UPPER UPRIGHT 2
E LOWER UPRIGHT 2
F TOP 1
G BOTTOM 2
H SHELF 4
I BACK 2
J FRONT SKIRT 1
K SIDE SKIRT 2
L SIDE RAIL 2
M BACK RAIL 1
N FRONT MOLDING 1
O RIGHT MOLDING 1
P LEFT MOLDING 1
Q SHELF MOLDING 2
TABLE OF CONTENTS
Part Identification...................2-3
Hardware Identification .............4
Assembly Steps....................5-16
Français..............................17-18
Espanol...............................19-20
Safety .................................21-22
Warranty...................................23
Page 2 www.sauder.com/services 414724
Page 3
www.sauder.com/services414724
PART IDENTIFICATION:
A
B
C
D
E
F
G
H
I
J
K
L
M
N
O
P
Q
D
E
G
H
H
H
I
K
L
Q
HARDWARE IDENTIFICATION
Screws are shown actual size. You may receive extra hardware with your unit.
Page 4 www.sauder.com/services 414724
BLACK 1-7/8" FLAT HEAD SCREW - 18
2S
BROWN 1" FLAT HEAD SCREW - 13
12S
MOLDING CONNECTOR - 2
19F
NAIL - 91
1N
METAL PIN - 8
1R
ANGLE BRACKET - 6
27G
BLACK 9/16" LARGE HEAD SCREW - 13
1S
HIDDEN CAM - 38
1F CAM DOWEL - 38
2F
SAFETY BRACKET - 1
1G CARD HOLDER - 8
35M
CAM COVER - 6
36P
SCREW COVER - 5
18P
CARD SHEET - 1
38M
SILVER 3/8" MACHINE SCREW - 16
97S
Look for this icon. It means a video
assembly tip is available at:
www.sauder.com/services/tips
1
1
S
t
e
p
Assemble your unit on a carpeted floor or on the empty carton to avoid scratching your unit or the floor.
Push thirty-eight HIDDEN CAMS (1F) into the ENDS (A and B), UPRIGHT (C), BOTTOMS (G) and SHELVES (H). Then, insert
the metal end of a CAM DOWEL (2F) into each HIDDEN CAM.
Page 5
www.sauder.com/services414724
Do not tighten the HIDDEN CAMS in this step.
Arrow
(38 used)
Arrow Arrow
1F
1F
1F
2F
2F
2F
Insert the metal end of the CAM
DOWEL into the HIDDEN CAM.
Arrow
A
B
C
G
H
G
H
H
H
2
2
S
t
e
p
Page 6 www.sauder.com/services 414724
Tap two MOLDING CONNECTORS (19F) into the notches in the MOLDINGS (N, O, and P).
Flat end
Flat end
Use your hammer to tap the MOLDING CONNECTOR (19F) into the notches in the MOLDINGS.
19F
19F
NO
P
Fasten the RAILS (L and M) to the TOP (F). Use nine BLACK 1-7/8" FLAT HEAD SCREWS (2S).
3
3
S
t
e
p
Page 7
www.sauder.com/services414724
F
M
L
L
Surface with
fewer holes
Long finished edge
BLACK 1-7/8" FLAT HEAD SCREW
(9 used in this step)
2S
Finished surface
Carefully turn your TOP over.
Fasten the MOLDINGS (N, O, and P) to the TOP (F). Use nine BROWN 1" FLAT HEAD SCREWS (12S).
4
4
S
t
e
p
Page 8 www.sauder.com/services 414724
F
Surface with
more holes
Long finished edge
N
O
P
BROWN 1" FLAT HEAD SCREW
(9 used in this step)
12S
Fasten the UPRIGHT (C) to the TOP (F). Tighten two HIDDEN CAMS.
Insert four METAL PINS (1R) into the UPPER UPRIGHTS (D).
Insert the METAL PINS (1R) in the end of the UPPER UPRIGHTS (D) into the holes in the TOP (F).
5
5
S
t
e
p
Page 9
www.sauder.com/services414724
Caution
Risk of damage or
injury. Hidden Cams
must be completely
tightened. Hidden
Cams that are not
completely tightened
may loosen, and parts
may separate.
To completely tighten:
Start Tighten
Arrow
Arrow
Maximum
210 degrees
Minimum
190 degrees
F
Long finished edge
1R
Surface with
more holes
D
D
C
Surface with
HIDDEN CAMS
Finished edge Finished edge
1R
6
6
S
t
e
p
Page 10 www.sauder.com/services 414724
Fasten two SHELVES (H) to the UPRIGHT (C). Tighten four HIDDEN CAMS.
Fasten the SHELVES (H) to the UPPER UPRIGHTS (D). Use four BLACK 1-7/8" FLAT HEAD SCREWS (2S).
Insert four METAL PINS (1R) into the LOWER UPRIGHTS (E).
Insert the METAL PINS (1R) in the end of the LOWER UPRIGHTS (E) into the holes in the SHELVES (H).
D
D
C
H
H
E
E
BLACK 1-7/8" FLAT HEAD SCREW
(4 used in this step)
2S
Surface with
HIDDEN CAMS
Surface with
HIDDEN CAMS
Finished
edge
Finished
edge
1R
Maximum
210 degrees
Minimum
190 degrees
Arrow
1R
Long edge with
HIDDEN CAMS
7
7
S
t
e
p
Page 11
www.sauder.com/services414724
H
H
Surface with
HIDDEN
CAMS
Surface with
HIDDEN
CAMS
C
G
G
Surface with
HIDDEN CAMS
Surface with
HIDDEN CAMS
Fasten the remaining two SHELVES (H) to the UPRIGHT (C). Tighten four HIDDEN CAMS.
Fasten the SHELVES (H) to the LOWER UPRIGHTS (E). Use four BLACK 1-7/8" FLAT HEAD SCREWS (2S).
Fasten the BOTTOMS (G) to the UPRIGHT (C). Tighten four HIDDEN CAMS.
Maximum
210 degrees
Minimum
190 degrees
Arrow
BLACK 1-7/8" FLAT HEAD SCREW
(4 used in this step)
2S
E
E
Long edge with
HIDDEN CAMS
Long edge with
HIDDEN CAMS
These holes
must be here.
These holes
must be here.
Fasten the ENDS (A and B) to the MOLDINGS (O and P) on the TOP (F), BOTTOMS (G), and SHELVES (H). Tighten sixteen
HIDDEN CAMS.
Fasten the SIDE SKIRTS (K) to the ENDS (A and B). Use four BROWN 1" FLAT HEAD SCREWS (12S).
8
8
S
t
e
p
Page 12 www.sauder.com/services 414724
Maximum
210 degrees
Minimum
190 degrees
Arrow
H
H
G
G
H
H
F
K
A
B
BROWN 1" FLAT HEAD SCREW
(4 used in this step)
12S
O
P
Surface without
HIDDEN CAMS
Finished edge
Finished edge
Surface with
HIDDEN
CAMS
K
Finished edge
Finished edge
9
9
S
t
e
p
Page 13
www.sauder.com/services414724
Fasten six ANGLE BRACKETS (27G) to the ENDS (A and B) and BOTTOMS (G). Use six BLACK 9/16" LARGE HEAD
SCREWS (1S).
NOTE: Be sure the edges of the ANGLE BRACKETS are even with the edges of the ENDS and BOTTOMS.
Fasten the FRONT SKIRT (J) to the ENDS (Aand B) and BOTTOMS (G). Use six BLACK 9/16" LARGE HEAD SCREWS (1S)
through the ANGLE BRACKETS and into the FRONT SKIRT.
BLACK 9/16" LARGE HEAD SCREW
(12 used for the BRACKETS)
1S
G
GA
B
J
27G
27G
27G
Fasten four CARD HOLDERS (35M) to each SHELF MOLDING (Q). Use sixteen SILVER 3/8" MACHINE SCREWS (97S).
Fasten the SHELF MOLDINGS (Q) to the SHELVES (H). Tighten eight HIDDEN CAMS.
10
10
S
t
e
p
Page 14 www.sauder.com/services 414724
Maximum
210 degrees
Minimum
190 degrees
Arrow
H
H
H
H
Q
Q
Q
Q
35M
Unfinished surface
Unfinished surface
(8 used)
SILVER 3/8" MACHINE SCREW
(16 used for the CARD HOLDERS)
97S
11
11
S
t
e
p
Page 15
www.sauder.com/services414724
Carefully turn your unit over onto its front edges. Unfold one of the BACKS (I) and lay it over your unit.
Make equal margins along all four edges of the BACK (I). Push on opposite corners of your unit if needed to make it “square”.
Fasten the BACK (I) to your unit using the NAILS (1N). Do not fasten the edge that lays over the UPRIGHT.
Next, fasten the other BACK (I) to your unit using the NAILS. The BACKS will overlap each other. See the enlarged diagram.
NOTE: Be sure to tap NAILS into the holes that line up over the UPRIGHTS (D and E) and SHELVES (H).
Do not stand the unit upright without the
BACK fastened. The unit may collapse.
Caution
NAIL
(91 used in this step)
1N
I
I
Unfinished Unfinished
These holes must line up over
the UPRIGHTS and SHELVES. I
I
Carefully stand your unit upright.
We recommend using the SAFETY BRACKET (1G) for added stability. Use a BLACK 9/16" LARGE HEAD SCREW (1S) into the
underneath surface of the TOP and a BLACK 1-7/8" FLAT HEAD SCREW (2S) into a stud in your wall.
Center a SCREW COVER (18P) over the head of each visible SCREW and press firmly.
Push a CAM COVER (36P) onto each visible HIDDEN CAM.
Separate the CARDS on the CARD SHEET (38M) and insert into the CARD HOLDERS.
NOTE: Please read the back pages of the instruction booklet for important safety information.
This completes assembly. Clean with your favorite furniture polish or a damp cloth. Wipe dry.
12
12
S
t
e
p
Page 16 www.sauder.com/services 414724
BLACK 1-7/8” FLAT HEAD SCREW
(1 used into a stud in your wall)
2S
BLACK 9/16” LARGE HEAD SCREW
(1 used into the underneath surface of the Top)
1S
To cover screws
(5 used)
18P
To cover HIDDEN CAMS
36P
(6 used)
38M
40 lbs.
50 lbs.
40 lbs.
40 lbs.
40 lbs.
40 lbs.
1G
A l’usage exclusif du
Canada Noter la date
d’achat de cet élément
et conserver le livret
pour future référence.
Pour contacter Sauder
en ce qui concerne cet
élément, faire référence
au numéro de lot et
numéro de modèle en
appelant notre numéro
sans frais.
Lot nº : ____________
Date de
l’achat: ____________
LISTE DE PIÈCES
REFERENCE DESCRIPTION QUANTITÉ
LISTE DE PIÈCES
REFERENCE DESCRIPTION QUANTITÉ
NOUS SOMMES LA POUR VOUS AIDER!
Nous faisons de notre mieux pour nous assurer que
votre meuble arrive dans d’excellentes conditions. Nos
représentants du service Clientèle sont aimables et prêts
à vous aider au cas où une pièce aurait été endommagée
ou manquerait (ou si vous aviez besoin d’aide pour
l’assemblage). NE RAMENEZ PAS LE MEUBLE AU
MAGASIN. Au Canada, composez ce numéro d’appel gratuit:
1-800-523-3987
Du lundi au vendredi, de 9 heures du matin à
5:30 heures du soir (horaire Côte Est)
(sauf jours fériés)
Si une pièce a besoin d’être remplacée, la pièce de
remplacement sera envoyée dans les 48 heures. (Sauf
week-ends et jours fériés)
Utilisez les instructions d’assemblage en français avec
les schémas étape par étape du manuel d’instruction
en anglais. Chaque étape en français correspond à la
même étape en anglais. La pièce devant être attachée
à l’élément est représentée en gris sur les schémas de
chaque étape pour plus de précision. Comparer la “Liste
de pièces” ci-dessous avec la “PART IDENTIFICATION”
du manuel en anglais pour vous familiariser avec les
pièces avant l’assemblage.
REMARQUE : CE MANUEL D’INSTRUCTIONS
CONTIENT D’IMPORTANTES INFORMATIONS
RELATIVES À LA SÉCURITÉ. À LIRE ET CONSERVER
POUR TOUTE RÉFÉRENCE FUTURE.
Bibliothèque
1F
EXCENTRIQUE ESCAMOTABLE
.......38
2F CHEVILLE D'EXCENTRIQUE .......38
19F CONNECTEUR DE MOULURE.......2
1G CONSOLE DE SÉCURITÉ ..............1
27G CONSOLE À ÉQUERRE .................6
35M PORTE-CARTES.............................8
38M FEUILLE DE CARTES.....................1
1N CLOU.............................................91
18P CACHE-VIS .....................................5
36P COUVERCLE D'EXCENTRIQUE ....6
1R GOUPILLE EN MÉTAL ....................8
1S VIS TÊTE LARGE 14 mm NOIRE..13
2S VIS TÊTE PLATE 48 mm NOIRE...18
12S VIS TÊTE PLATE 25 mm
MARRON.......................................13
97S VIS À MÉTAUX 10 mm ARGENT ..16
A EXTRÉMITÉ DROITE......................1
B EXTRÉMITÉ GAUCHE....................1
C MONTANT........................................1
D MONTANT SUPÉRIEUR..................2
E MONTANT INFÉRIEUR...................2
F DESSUS..........................................1
G DESSOUS .......................................2
H TABLETTE.......................................4
I ARRIÈRE.........................................2
J PLINTHE AVANT..............................1
K PLINTHE LATÉRALE.......................2
L TRAVERSE LATÉRALE...................2
M TRAVERSE ARRIÈRE.....................1
N MOULURE AVANT...........................1
O MOULURE DROITE.........................1
P MOULURE GAUCHE.......................1
Q MOULURE DE TABLETTE..............2
414724
Page 17
www.sauder.com/services414724
ÉTAPE 6
Fixer deux TABLETTES (H) au MONTANT (C). Serrer
quatre EXCENTRIQUES ESCAMOTABLES.
Fixer les TABLETTES (H) aux MONTANTS SUPÉRIEURS (D).
Utiliser quatre VIS TÊTE PLATE 48 mm NOIRES (2S).
Insérer quatre GOUPILLES EN MÉTAL (1R) dans les
MONTANTS INFÉRIEURS (E).
Insérer les GOUPILLES EN MÉTAL (1R) situées sur l'extrémité des
MONTANTS INFÉRIEURS (E) dans les trous des TABLETTES (H).
ÉTAPE 7
Fixer les deux autres TABLETTES (H) au MONTANT (C).
Serrer quatre EXCENTRIQUES ESCAMOTABLES.
Fixer les TABLETTES (H) aux MONTANTS INFÉRIEURS (E).
Utiliser quatre VIS TÊTE PLATE 48 mm NOIRES (2S).
Fixer les DESSOUS (G) au MONTANT (C). Serrer
quatre EXCENTRIQUES ESCAMOTABLES.
ÉTAPE 8
Fixer les EXTRÉMITÉS (A et B) aux les MOULURES (O et P)
sur le DESSUS (F), les DESSOUS (G) et les TABLETTES (H).
Serrer seize EXCENTRIQUES ESCAMOTABLES.
Fixer les PLINTHES LATÉRALES (K) aux EXTRÉMITÉS (A et B).
Utiliser quatre VIS TÊTE PLATE 25 mm MARRON (12S).
ÉTAPE 9
Fixer six CONSOLES À ÉQUERRE (27G) aux
EXTRÉMITÉS (A et B) et aux DESSOUS (G). Utiliser six
VIS TÊTE LARGE 14 mm NOIRES (1S).
REMARQUE : S'assurer que les chants des
CONSOLES À ÉQUERRE sont à fleur des chants des
EXTRÉMITÉS et des DESSOUS.
Fixer la PLINTHE AVANT (J) aux EXTRÉMITÉS (A et B) et aux
DESSOUS (G). Utiliser six VIS TÊTE LARGE 14 mm NOIRES (1S)
à travers les CONSOLES EN MÉTAL et dans la PLINTHE AVANT.
ÉTAPE 10
Fixer quatre PORTE-CARTES (35M) sur chaque
MOULURE DE TABLETTE (Q). Utiliser seize VIS À
MÉTAUX 10 mm ARGENT (97S).
Fixer les MOULURES DE TABLETTE (Q) aux TABLETTES (H).
Serrer huit EXCENTRIQUES ESCAMOTABLES.
ÉTAPE 5
Fixer le MONTANT (C) au DESSUS (F). Serrer deux
EXCENTRIQUES ESCAMOTABLES.
Insérer quatre GOUPILLES EN MÉTAL (1R) dans les
MONTANTS SUPÉRIEURS (D).
Insérer les GOUPILLES EN MÉTAL (1R) situées sur l'une extrémité
des MONTANTS SUPÉRIEURS (D) dans les trous du DESSUS (F).
Attention
Risque des dégâts ou blessures. Les Excentriques
Escamotables doivent être serrés à bloc. Les
Excentriques Escamotables que ne sont pas serrées
à bloc peuvent desserrer et les pièces peuvent
séparer. Pour serrer à bloc faire tourner l'excentrique
escamotable de 210 degrés.
ÉTAPE 4
Avec précaution, retourner le DESSUS.
Fixer les MOULURES (N, O et P) au DESSUS (F).
Utiliser neuf VIS TÊTE PLATE 25 mm MARRON (12S).
ÉTAPE 2
Enfoncer deux CONNECTEURS DE MOULURE (19F)
dans les crans des MOULURES (N, O et P).
ÉTAPE 3
Fixer les TRAVERSES (L et M) au DESSUS (F). Utiliser
neuf VIS TÊTE PLATE 48 mm NOIRES (2S).
ÉTAPE 1
Ne pas serrer les CAMES ESCAMOTABLES dans cette étape.
Assembler l'élément sur un sol à moquette ou sur le
carton vide pour éviter d'endommager l'élément ou le sol.
Enfoncer trente-huit EXCENTRIQUES ESCAMOTABLES (1F) dans
les EXTRÉMITÉS (A et B), le MONTANT (C), les DESSOUS (G)
et les TABLETTES (H). Ensuite, insérer l'extrémité en métal de la
CHEVILLE D'EXCENTRIQUE (2F) dans chaque
EXCENTRIQUE ESCAMOTABLE.
ÉTAPE 11
Attention
Ne pas relever l'élément dans sa position verticale avant
d'avoir fixé l’ARRIÈRE. L'élément risque de s'effondrer.
Avec précaution, retourner l'élément sur ses chants avant.
Déplier l'un des ARRIÈRES (I) et le placer sur l'élément.
Veiller à avoir des marges égales le long des quatre chants
de l'ARRIÈRE (I). Si besoin est, enfoncer sur les coins
opposés de l'élément pour s'assurer d'être « d'équerre ».
Fixer l'ARRIÈRE (I) à l'élément à l'aide des CLOUS (1N).
Ne pas fixer le chant au-dessus le MONTANT.
Ensuite, fixer l'autre ARRIÈRE (I) à l'élément à l'aide des
CLOUS. Les ARRIÈRES se recouvrent l'une l'autre. Voir
le schéma agrandi.
REMARQUE : S'assurer de bien enfoncer les CLOUS
dans les trous qui sont alignés sur les MONTANTS (D et E)
et les TABLETTES (H).
ÉTAPE 12
Relever, avec précaution, l'élément dans sa position verticale.
Il est recommandé d'utiliser la CONSOLE DE
SÉCURITÉ (1G) pour renforcer la stabilité. Utiliser une
VIS TÊTE LARGE 14 mm NOIRE (1S) dans la surface
inférieure du DESSUS et une VIS TÊTE PLATE 48 mm
NOIRE (2S) dans un montant du mur.
Centrer un CACHE-VIS (18P) sur la tête de chaque VIS
et appuyer fermement.
Enfoncer un COUVERCLE D'EXCENTRIQUE (36P) sur
chaque EXCENTRIQUE ESCAMOTABLE visible.
Séparer les CARTES de la FEUILLE DE CARTES (38M)
et en insérer une dans les PORTE-CARTES.
REMARQUE : Prière de lire les informations importantes sur la
sécurité figurant sur les pages arrière du manuel d’instructions.
Ceci complète l'assemblage. Nettoyer à l’aide d’une
encaustique pour meubles ou d’un chiffon humide. Essuyer.
Page 18 www.sauder.com/services 414724
Use estas instrucciones de ensamblaje en español junto
con las figuras paso-a-paso provistas en el folleto inglés.
Cada paso en español corresponde al mismo paso en
inglés. Se destacan las figuras de cada paso con una
tonalidad oscura para mostrar precisamente cual parte se
debe montar a la unidad. Compare la “Lista de Part” abajo
con la “Part Identification” en el folleto en inglés para
familiarizarse con Las partes de ensamblaje.
NOTA: ESTE FOLLETO DE INSTRUCCIONES
CONTIENE INFORMACIÓN IMPORTANTE SOBRE LA
SEGURIDAD. POR FAVOR LEA Y GUÁRDELO PARA
REFERENCIA EN EL FUTURO.
ESTAMOS AQUI PARA AYUDAR!
Tratamos de asegurar que su mueble llega en condición
excelente. Nuestros representantes de Servicio al Cliente
son amables y listos para ayudarle con servicio rápido
y eficiente si una parte está defectuosa o ausente (o si
necesita ayuda con el ensamblaje). NO DEVUELVA LA
UNIDAD A LA TIENDA. Llame este número sin cargo:
1-800-523-3987
Lunes a viernes, 9:00 a.m. - 5:30 p.m.
Hora oficial del Este
(excepto días festivos)
Si requiere un repuesto de una parte, será enviado dentro
de 48 horas (excepto los fines de semana y días festivos)
Anote la fecha de
comprar esta unidad y
guarde el folleto para
su referencia futura.
Si necesita ponerse
en contacto con
Sauder en cuanto a
esta unidad, refiérase
al número de lote y
al número de modelo
cuando llame a nuestro
número gratis.
No. Lote: ___________
Fecha
de compra: _________
LISTA DE PARTES
ITEM DESCRIPCIÓN CANTIDAD LISTA DE PARTES
ITEM DESCRIPCIÓN CANTIDAD
1F EXCÉNTRICO ESCONDIDO.........38
2F PASADOR DE EXCÉNTRICO.......38
19F CONECTOR DE MOLDURA............2
1G MÉNSULA DE SEGURIDAD ...........1
27G SOPORTE ANGULAR .....................6
35M PORTA-TARJETAS..........................8
38M HOJA DE TARJETAS.......................1
1N CLAVO...........................................91
18P CUBIERTA DE TORNILLO...............5
36P CUBIERTA DE EXCÉNTRICO.........6
1R ESPIGA DE METAL.........................8
1S TORNILLO NEGRO DE
CABEZA GRANDE de 14 mm .......13
2S TORNILLO NEGRO DE
CABEZA PERDIDA de 48 mm.......18
12S TORNILLO MARRÓN DE
CABEZA PERDIDA de 25 mm.......13
97S TORNILLO PLATEADO PARA
METAL de 10 mm ..........................16
A EXTREMO DERECHO ....................1
B EXTREMO IZQUIERDO ..................1
C PARAL..............................................1
D PARAL SUPERIOR..........................2
E PARAL INFERIOR ...........................2
F PANEL SUPERIOR..........................1
G FONDO............................................2
H ESTANTE.........................................4
I DORSO............................................2
J FALDÓN DELANTERO....................1
K FALDÓN LATERAL..........................2
L BORDE ELEVADO LATERAL..........2
M BORDE ELEVADO POSTERIOR ....1
N MOLDURA DELANTERA.................1
O MOLDURA DERECHA.....................1
P MOLDURA IZQUIERDA...................1
Q MOLDURA DE ESTANTE................2
Biblioteca414724
Page 19
www.sauder.com/services414724
PASO 6
Fije dos ESTANTES (H) al PARAL (C). Apriete cuatro
EXCÉNTRICOS ESCONDIDOS.
Fije los ESTANTES (H) a los PARALES SUPERIORES (D). Utilice
cuatro TORNILLOS NEGROS DE CABEZA PERDIDA de 48 mm (2S).
Inserte cuatro ESPIGAS DE METAL (1R) dentro de los
PARALES INFERIORES (E).
Inserte las ESPIGAS DE METAL (1R) sujetadas al
extremo de los PARALES INFERIORES (E) dentro de
los agujeros de los ESTANTES (H).
PASO 7
Fije los otros dos ESTANTES (H) al PARAL (C). Apriete
cuatro EXCÉNTRICOS ESCONDIDOS.
Fije los ESTANTES (H) a los PARALES INFERIORES (E). Utilice
cuatro TORNILLOS NEGROS DE CABEZA PERDIDA de 48 mm (2S).
Fije los FONDOS (G) al PARAL (C). Apriete cuatro
EXCÉNTRICOS ESCONDIDOS.
PASO 8
Fije los EXTREMOS (A y B) a las MOLDURAS (O y P) sobre el
PANEL SUPERIOR (F), los FONDOS (G) y los ESTANTES (H).
Apriete dieciséis EXCÉNTRICOS ESCONDIDOS.
Fije los FALDONES LATERALES (K) a los EXTREMOS (A
y B). Utilice cuatro TORNILLOS MARRONES DE CABEZA
PERDIDA de 25 mm (12S).
PASO 9
Fije seis SOPORTESANGULARES (27G) a los EXTREMOS (A
y B) y a los FONDOS (G). Utilice seis TORNILLOS NEGROS
DE CABEZA GRANDE de 14 mm (1S).
NOTA:Asegúrese que los bordes de los SOPORTES
ANGULARES estén nivelados con los bordes de los
EXTREMOS y de los FONDOS.
Fije el FALDÓN DELANTERO (J) a los EXTREMOS (A y B)
y a los FONDOS (G). Pase seis TORNILLOS NEGROS DE
CABEZA GRANDE de 14 mm (1S) a través de los SOPORTES
ANGULARES y dentro del FALDÓN DELANTERO.
PASO 10
Fije cuatro PORTA-TARJETAS (35M) a cada MOLDURA
DEL ESTANTE (Q). Utilice dieciséis TORNILLOS
PLATEADOS PARA METAL de 10 mm (97S).
Fije las MOLDURAS DE ESTANTE (Q) a los ESTANTES (H).
Apriete ocho EXCÉNTRICOS ESCONDIDOS.
PASO 5
Fije el PARAL (C) al PANEL SUPERIOR (F). Apriete dos
EXCÉNTRICOS ESCONDIDOS.
Inserte cuatro ESPIGAS DE METAL (1R) dentro de los
PARALES SUPERIORES (D).
Inserte las ESPIGAS DE METAL (1R) sujetadas al extremo de
los PARALES SUPERIORES (D) dentro de los agujeros del
PANEL SUPERIOR (F).
Precaución
Riesgo de daños o heridas. Los Excéntricos Escondidos deben
apretarse completamente. Los Excéntricos Escondidos que no
se aprieten completamente se aflojarán y las partes pueden
separarse. Para apretar completamente, atornille el excéntrico
escondido 210 grados.
PASO 4
Cuidadosamente vuelva el PANEL SUPERIOR al revés.
Fije las MOLDURAS (N, O y P) al PANEL SUPERIOR (F).
Utilice nueve TORNILLOS MARRONES DE CABEZA PERDIDA
de 25 mm (12S).
PASO 3
Fije los BORDES (L y M) al PANEL SUPERIOR (F).
Utilice nueve TORNILLOS NEGROS DE CABEZA
PERDIDA de 48 mm (2S).
PASO 2
Ligeramente clave dos CONECTORES DE MOLDURA(19F)
dentro de las muescas de las MOLDURAS (N, O y P).
PASO 1
No apriete los EXCÉNTRICOS ESCONDIDOS en este paso.
Ensamble la unidad sobre un piso alfombrado o sobre el
cartón vacío para evitar rayar la unidad o el piso.
Empuje treinta y ocho EXCÉNTRICOS ESCONDIDOS (1F) dentro
de los EXTREMOS (A y B), el PARAL (C), los FONDOS (G) y los
ESTANTES (H). A continuación, inserte el extremo de metal de un
PASADOR DE EXCÉNTRICO (2F) dentro de cada
EXCÉNTRICO ESCONDIDO.
PASO 11
Precaución
No coloque la unidad en posición vertical hasta que se
fije el DORSO. La unidad podría caerse.
Cuidadosamente voltee la unidad para que repose sobre
los bordes delanteros. Desdoble uno de los DORSOS (I)
y colóquelo sobre la unidad.
Los márgenes a lo largo de los cuatro bordes del DORSO (I)
deben estar uniformes. Empuje sobre las esquinas opuestas
de la unidad si es requerido para hacerla "cuadrada."
Fije el DORSO (I) a la unidad utilizando los CLAVOS (1N).
No fije el borde sobre el PARAL.
Luego, fije el otro DORSO (I) a la unidad utilizando los
CLAVOS. Los DORSOS se montarán uno sobre el otro.
Vea el diagrama agrandado.
NOTA:Asegúrese de clavar ligeramente los CLAVOS
dentro de los agujeros que se alinean sobre los
PARALES (D y E) y los ESTANTES (H).
PASO 12
Cuidadosamente ponga la unidad en posición vertical.
Se recomienda que utilice el SOPORTE DE SEGURIDAD (1G)
para aumentar la estabilidad. Utilice un TORNILLO NEGRO DE
CABEZA GRANDE de 14 mm (1S) a través la superficie inferior
del PANEL SUPERIOR y un TORNILLO NEGRO DE CABEZA
PERDIDA de 48 mm (2S) dentro de un montante de la pared.
Centre una CUBIERTA DE TORNILLO (18P) sobre la
cabeza de cada TORNILLO visible y presione firmemente.
Empuje una CUBIERTA DE EXCÉNTRICO (36P) sobre
cada EXCÉNTRICO ESCONDIDO visible.
Separe las TARJETAS en la HOJA DE TARJETAS (38M)
e inserte una en el PORTA-TARJETAS.
NOTA: Por favor, lea las páginas de atrás del folleto de
instrucciones en cuanto a importante información de seguridad.
Esto completa el ensamblaje. Limpie con su pulimento para
muebles preferido o un paño húmedo. Seque con un paño.
Page 20 www.sauder.com/services 414724

Other Sauder Indoor Furnishing manuals

Sauder Palladia 411861 User manual

Sauder

Sauder Palladia 411861 User manual

Sauder Orchard Hills 401292 User manual

Sauder

Sauder Orchard Hills 401292 User manual

Sauder OfficeWorks AFFIRM 427468 User manual

Sauder

Sauder OfficeWorks AFFIRM 427468 User manual

Sauder 429430 User manual

Sauder

Sauder 429430 User manual

Sauder 415541 User manual

Sauder

Sauder 415541 User manual

Sauder Tremont Row 427971 User manual

Sauder

Sauder Tremont Row 427971 User manual

Sauder 423493 User manual

Sauder

Sauder 423493 User manual
Sauder 413854 User manual

Sauder

Sauder 413854 User manual

Sauder 409086 User manual

Sauder

Sauder 409086 User manual

Sauder Worksense BERGEN CIRCLE 426289 User manual

Sauder

Sauder Worksense BERGEN CIRCLE 426289 User manual

Sauder International Lux 421434 User manual

Sauder

Sauder International Lux 421434 User manual

Sauder Coral Cape 423808 User manual

Sauder

Sauder Coral Cape 423808 User manual

Sauder Harbor View 420471 User manual

Sauder

Sauder Harbor View 420471 User manual

Sauder Harvest Mill 404958 User manual

Sauder

Sauder Harvest Mill 404958 User manual

Sauder Heritage Collection User manual

Sauder

Sauder Heritage Collection User manual

Sauder Cliff ord Place Credenza 429507 User manual

Sauder

Sauder Cliff ord Place Credenza 429507 User manual

Sauder 420174 User manual

Sauder

Sauder 420174 User manual

Sauder OfficeWorks AFFIRM 427424 User manual

Sauder

Sauder OfficeWorks AFFIRM 427424 User manual

Sauder 415107 User manual

Sauder

Sauder 415107 User manual

Sauder Edge Water 408696 User manual

Sauder

Sauder Edge Water 408696 User manual

Sauder 420545 User manual

Sauder

Sauder 420545 User manual

Sauder Hythe 5426439 User manual

Sauder

Sauder Hythe 5426439 User manual

Sauder Carson Forge Technology Pier 412923 User manual

Sauder

Sauder Carson Forge Technology Pier 412923 User manual

Sauder Caraway Etagere 414111 User manual

Sauder

Sauder Caraway Etagere 414111 User manual

Popular Indoor Furnishing manuals by other brands

Safavieh Furniture ACC5707 quick start guide

Safavieh Furniture

Safavieh Furniture ACC5707 quick start guide

AVILO M202255 Safety Warning

AVILO

AVILO M202255 Safety Warning

Datum Storage Ez2 Drawer Assembly instructions

Datum Storage

Datum Storage Ez2 Drawer Assembly instructions

Costway KC53799 manual

Costway

Costway KC53799 manual

Article OSCURO Assembly instructions

Article

Article OSCURO Assembly instructions

Sonder GEORGINA FG0701333 Accessories assembly instructions

Sonder

Sonder GEORGINA FG0701333 Accessories assembly instructions

Forte LNBK211STB Assembling Instruction

Forte

Forte LNBK211STB Assembling Instruction

Sensio Gatsby SE30695P0 manual

Sensio

Sensio Gatsby SE30695P0 manual

VERNAL Y Series Assembly instructions

VERNAL

VERNAL Y Series Assembly instructions

Contractors Wardrobe uDivide Parts and Assembly Instructions

Contractors Wardrobe

Contractors Wardrobe uDivide Parts and Assembly Instructions

Emmezeta ANGEL 20 Assembling instructions

Emmezeta

Emmezeta ANGEL 20 Assembling instructions

Courtyard Creations KTS794T Assembly instructions

Courtyard Creations

Courtyard Creations KTS794T Assembly instructions

Kohler Top Art K-14041 Homeowner's guide

Kohler

Kohler Top Art K-14041 Homeowner's guide

Furniture of America Amarantha CM7362D&M Assembly instructions

Furniture of America

Furniture of America Amarantha CM7362D&M Assembly instructions

Cardinal Gates PG-35 Assembly instructions

Cardinal Gates

Cardinal Gates PG-35 Assembly instructions

Mainstays ARLO MS18-D1-1007-30 Assembly instructions

Mainstays

Mainstays ARLO MS18-D1-1007-30 Assembly instructions

Argos Amalfi Armchair 1425361 Assembly instructions

Argos

Argos Amalfi Armchair 1425361 Assembly instructions

ThunderX3 RC3 user manual

ThunderX3

ThunderX3 RC3 user manual

manuals.online logo
manuals.online logoBrands
  • About & Mission
  • Contact us
  • Privacy Policy
  • Terms and Conditions

Copyright 2025 Manuals.Online. All Rights Reserved.