manuals.online logo
Brands
  1. Home
  2. •
  3. Brands
  4. •
  5. Sauder
  6. •
  7. Indoor Furnishing
  8. •
  9. Sauder Briarbrook 430075 User manual

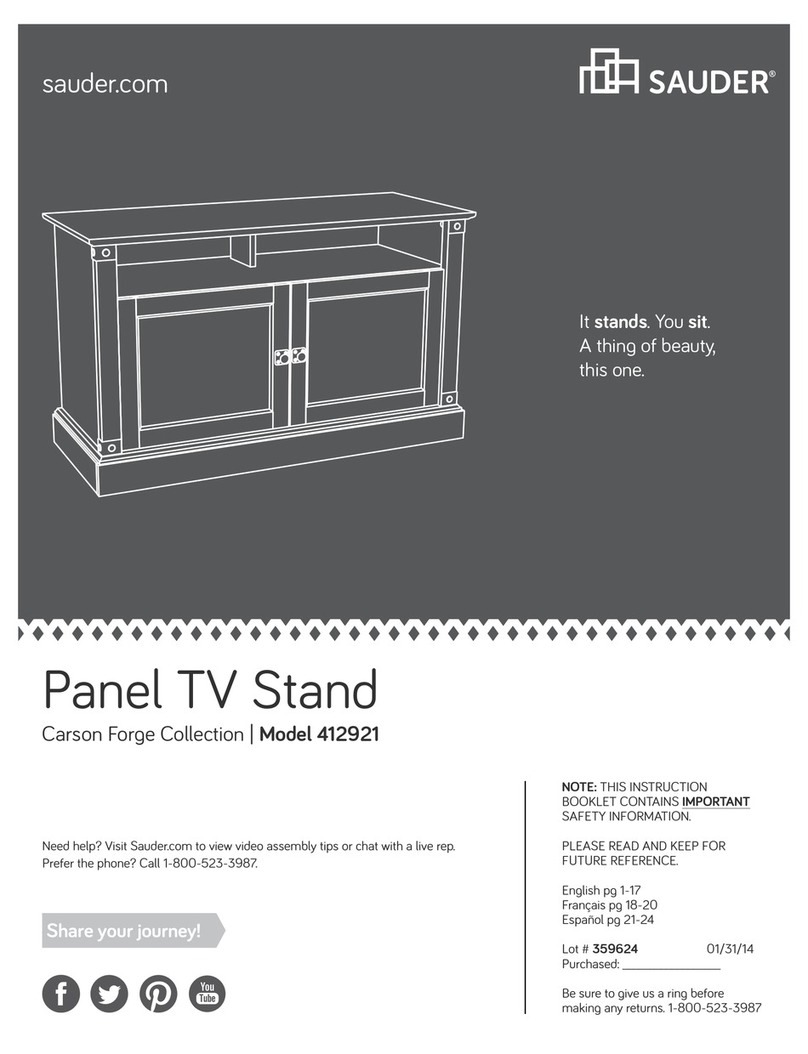
Sauder Briarbrook 430075 User manual

sauder.com
NOTE: THIS INSTRUCTION
BOOKLET CONTAINS IMPORTANT
SAFETY INFORMATION.
PLEASE READ AND KEEP FOR
FUTURE REFERENCE.
sauder.com
CONTACT US FIRST
BEFORE MAKING ANY RETURNS TO THE STORE.
sauder.com
CONTACT US FIRST
BEFORE MAKING ANY RETURNS TO THE RETAILER.
Visit sauder.com/service to order replacement parts, view video assembly tips, or chat with a live rep.
Prefer the phone? Give us a ring at 1-800-445-1527.
Customer Service is available Monday-Friday - 9 a.m. to 5:30 p.m. EST (except holidays)
Sauder.com
Share your journey!
English pg 1-22
Français pg 23-25
Español pg 26-28
Lot # 573699 10/28/21
Purchased: __________________
Library Base
Briarbrook Collection | Model 430075
Store behind
closed doors.
Part Identification
Hardware Identification
Hardware Usage Guide
Assembly Steps
Français
Español
Safety
Warranty
No. 2 Phillips Screwdriver
Tip Shown Actual Size
Table of Contents Assembly Tools Required
3
4
5
6-22
23-25
26-28
29-30
31
Page 2 www.sauder.com/service 430075
Part Identification
åWhile not all parts are labeled, some of the parts will have a label or an inked letter on the edge
to help distinguish similar parts from each other. Use this part identification to help identify similar parts.
Now you know
our ABCs.
A TOP (1)
B BOTTOM (1)
C LEFT END (1)
D RIGHT END (1)
E LEFT BACK (1)
F RIGHT BACK (1)
G ADJUSTABLE SHELF (1)
H DRAWER FRONT (1)
J LEFT DRAWER SIDE (1)
K RIGHT DRAWER SIDE (1)
L DRAWER BACK (1)
M DRAWER BOTTOM (1)
N DRAWER BRACE (1)
P LEFT DOOR (1)
Q RIGHT DOOR (1)
R LEFT FRAME (1)
S RIGHT FRAME (1)
A
B
C
D
E
F
G
H
J
K
L
M
N
P
Q
R
S
Page 3www.sauder.com/service430075
Hardware Identification
åScrews are shown actual size. You may receive extra hardware with your unit.
1-9/16" PAN HEAD SCREW - 2
14 1-3/16" FLAT HEAD SCREW - 4
15
SMALL WOOD
DOWEL - 2
9
PULL - 3
67HOLE
PLUG - 4 PAD CARD - 1
8
L-WRENCH - 1
5
SILVER 1/2" FLAT HEAD SCREW - 24
19
BLACK 1/2" FLAT HEAD SCREW - 12
18
CAM
SCREW - 16
4
HIDDEN
CAM - 16
3
1EXTENSION RAIL - 2 2EXTENSION SLIDE - 2
1/2" HEX HEAD SCREW - 8
16 1/2" PAN HEAD SCREW - 6
17
Page 4 www.sauder.com/service 430075
LARGE WOOD
DOWEL - 18
10 SHELF PIN - 4
12 APPLIQUE CARD - 1
13
HINGE - 4
11
Hardware Usage Guide
HOW TO USE A HIDDEN CAM & CAM SCREW OR CAM DOWEL
NOTE: Various CAM SCREWS or a CAM DOWEL may be used.
Cam Screws Cam Dowel
Turn the CAM SCREW or
gently tap the CAM DOWEL
until the shoulder is against
the surface of the part.
1.
Hidden Cam
Arrow
Push a HIDDEN CAM into
the part. The arrow in the
HIDDEN CAM must point
toward the hole in the
edge of the board.
Hole
2.
3.
1
2
Insert the CAM SCREW or CAM DOWEL into the
HIDDEN CAM. Tighten the HIDDEN CAM.
Page 5www.sauder.com/service430075
Step 1
å Assemble your unit on a carpeted floor or on the empty
carton to avoid scratching your unit or the floor.
å Insert two LARGE WOOD DOWELS (10) into the BACK (F).
å Push the BACK (E) onto the WOOD DOWELS (10) in
the BACK (F).
å Push four HIDDEN CAMS (3) into the BACKS (E and F).
E
F
1
3
Arrow 3
Arrow
Arrow
3
10
Look for this icon. It means a video assembly tip is
available at www.sauder.com/service/tips
Find the numbered video or scan the QR code.
Page 6 www.sauder.com/service 430075
Some assembly
(and snacks) required.
Step 2
Do not stand the unit upright without the
BACK fastened. The unit may collapse.
Caution
å Push four HIDDEN CAMS (3) into the BOTTOM (B).
å Insert a LARGE WOOD DOWEL (10) into each BACK (E and F).
å Fasten the BOTTOM (B) to the BACKS (E and F). Use two
1-9/16" PAN HEAD SCREWS (14).
å NOTE: Be sure the LARGE WOOD DOWELS in the BACKS
insert into the BOTTOM.
E
F
B
1-9/16" PAN HEAD SCREW
(2 used in this step)
14
10
B
3
Arrow
Arrow
3
Page 7www.sauder.com/service430075
1
Step 3
D
C
1
å Turn six CAM SCREWS (4) into the ENDS (C and D).
å Push four HIDDEN CAMS (3) into the ENDS (C and D).
4
Arrow
3
Page 8 www.sauder.com/service 430075
Step 4
D
C
å Separate the EXTENSION SLIDES (2) from the EXTENSION RAILS (1) as shown in the upper diagram below. Be
prepared, the parts are greasy.
å Fasten the EXTENSION RAILS (1) to the ENDS (C and D). Use six BLACK 1/2" FLAT HEAD SCREWS (18).
å NOTE: For each EXTENSION RAIL, turn a SCREW into the hole shown in the enlarged diagram. Then, slide the inner
cartridge of the EXTENSION RAIL in to find the other holes that lines up with the holes in the ENDS. Turn a SCREW
into these holes.
å NOTE: The EXTENSION SLIDES will be used later for the DRAWERS.
Open end
Open end
Push the black lever and pull the SLIDE from the RAIL.
Use these holes.
12
1
1
BLACK 1/2" FLAT HEAD SCREW
(6 used in this step)
18
7
Page 9www.sauder.com/service430075
Step 5
å Insert four LARGE WOOD DOWELS (10) into the
RIGHT END (D).
å Fasten the RIGHT END (D) to the BOTTOM (B) and
RIGHT BACK (F). Tighten three HIDDEN CAMS.
å NOTE: Be sure the LARGE WOOD DOWELS in the RIGHT
END insert into the BOTTOM and BACK.
Do not stand the unit upright without the
BACK fastened. The unit may collapse.
Caution
D
B
F
10
10
1
Page 10 www.sauder.com/service 430075
Step 6
B
E
C
å Insert four LARGE WOOD DOWELS (10) into the
LEFT END (C).
å Fasten the LEFT END (C) to the BOTTOM (B) and
LEFT BACK (E). Tighten three HIDDEN CAMS
å NOTE: Be sure the LARGE WOOD DOWELS in the LEFT
END insert into the BOTTOM and BACK.
10
10
1
Page 11www.sauder.com/service430075
Step 7
10
10
å Turn six CAM SCREWS (4) into the TOP (A).
å Insert six LARGE WOOD DOWELS (10) into the TOP (A).
å Fasten the TOP (A) to the ENDS (C and D) and BACKS (E and F).
Tighten six HIDDEN CAMS.
å NOTE: Be sure the LARGE WOOD DOWELS in the TOP insert
into the ENDS and BACKS.
Page 12 www.sauder.com/service 430075
4
A
A
C
D
F
E
1
Step 8
å Fasten the LEFT FRAME (R) to the LEFT END (C).
Tighten four 1/2" HEX HEAD SCREWS (16) using
the L-WRENCH (5).
å Fasten the RIGHT FRAME (S) to the RIGHT END (D).
Tighten four 1/2" HEX HEAD SCREWS (16) using
the L-WRENCH (5).
å NOTE: You should start each SCREW a few turns
before completely tightening any of them.
å Peel the PADS from the PAD CARD (8) and apply
them to the bottom of the FRAMES (R and S).
R
S
C
D
1/2" HEX HEAD SCREW
(8 used in this step)
16
16
8
Page 13www.sauder.com/service430075
Side Step: Make
nachos. (Optional, but
recommended.)
5
Step 9
å Turn three CAM SCREWS (4) into the DRAWER FRONT (H) and
one CAM SCREW (4) into the DRAWER BACK (L).
å Push four HIDDEN CAMS (3) into the DRAWER SIDES (J and K)
and DRAWER BRACE (N).
H
L
J
K
N
3
Arrow
Arrow
3
1
4
Page 14 www.sauder.com/service 430075
Step 10
å Fasten the DRAWER SIDES (J and K) to the DRAWER
BACK (L). Use four 1-3/16" FLAT HEAD SCREWS (15).
å Slide the DRAWER BOTTOM (M) into the grooves in the
DRAWER SIDES (J and K) and DRAWER BACK (L).
K
K
L
M
L
J
J
Unfinished surface
1-3/16" FLAT HEAD SCREW
(4 used in this step)
15
Page 15www.sauder.com/service430075
Groove
Step 11
å Insert a SMALL WOOD DOWEL (9) into the DRAWER BACK (L).
å Fasten the DRAWER BRACE (N) to the DRAWER BACK (L). Tighten the HIDDEN CAM.
å NOTE: Be sure the WOOD DOWEL in the DRAWER BACK inserts into the DRAWER BRACE.
å Insert a SMALL WOOD DOWEL (9) into the DRAWER BRACE (N).
å Fasten the DRAWER FRONT (H) to the DRAWER SIDES (J and K) and DRAWER BRACE (N). Tighten three HIDDEN CAMS.
å NOTE: Be sure the WOOD DOWEL in the DRAWER BRACE inserts into the DRAWER FRONT.
Be sure the DRAWER
BOTTOM inserts into the
DRAWER FRONT groove.
H
L
K
J
N
N
Surface with
HIDDEN CAMS
9
9
Page 16 www.sauder.com/service 430075
Step 12
K
J
å Fasten the EXTENSION SLIDES (2) to the DRAWER SIDES (J and K).
Use six BLACK 1/2" FLAT HEAD SCREWS (18).
å Fasten a PULL (6) to the DRAWER FRONT (H). Use two 1/2" PAN
HEAD SCREWS (17).
Open end
Open end
BLACK 1/2" FLAT HEAD SCREW
(6 used in this step)
18
1/2" PAN HEAD SCREW
(2 used in this step)
17
6
2
2
H
Page 17www.sauder.com/service430075
Step 13
å Carefully stand your unit upright.
å To insert the drawer into your unit, line up the EXTENSION
SLIDES on the drawer with the EXTENSION RAILS on the
unit and push the drawer into the unit until the drawer is
fully inserted. The drawer will push in hard until it is all the
way in, then it will slide in and out easier.
å Peel APPLIQUES from the APPLIQUE CARD (13) and
stick them onto each visible HIDDEN CAM.
13
Page 18 www.sauder.com/service 430075
Pro Tip: Lift with your
legs. And, you know,
your arms.
Step 14
P
Q
11
SILVER 1/2" FLAT HEAD SCREW
(8 used in this step)
19
17
å Fasten the HINGES (11) to the DOORS (P and Q). Use eight
SILVER 1/2" FLAT HEAD SCREWS (19).
Page 19www.sauder.com/service430075
Step 15 17
å Before fastening the DOOR to your unit, be sure the
mounting screw is against the stops as shown in the
right diagram. If it isn't, loosen the adjusting screw and
mounting screw to slide it against the stops. Then tighten
the mounting screw.
å Fasten the DOORS (P and Q) to the ENDS (C and D) as
shown in the lower diagram. Use sixteen SILVER 1/2"
FLAT HEAD SCREWS (19). You should start each screw a
few turns before completely tightening any of them.
å Fasten a PULL (6) to each DOOR (P and Q). Use four 1/2"
PAN HEAD SCREWS (17).
å See the next step for DOOR adjustments.
Mounting
screw
Stop
Hinge
Adjusting
screw
P
Q
C
D
6
1/2" PAN HEAD SCREW
(4 used for the PULLS)
17
17
Page 20 www.sauder.com/service 430075
SILVER 1/2" FLAT HEAD SCREW
(16 used for the HINGES)
19

Other Sauder Indoor Furnishing manuals
Sauder Beginnings 429357 User manual

Sauder

Sauder Beginnings 429357 User manual

Sauder Orchard Hills 401346 User manual

Sauder

Sauder Orchard Hills 401346 User manual

Sauder Dakota Pass 424120 User manual

Sauder

Sauder Dakota Pass 424120 User manual

Sauder Palladia 420613 User manual

Sauder

Sauder Palladia 420613 User manual

Sauder Palladia 412116 User manual

Sauder

Sauder Palladia 412116 User manual

Sauder 416821 User manual

Sauder

Sauder 416821 User manual

Sauder OfficeWorks AFFIRM 427414 User manual

Sauder

Sauder OfficeWorks AFFIRM 427414 User manual

Sauder Craft Table 421417 User manual

Sauder

Sauder Craft Table 421417 User manual

Sauder Office Port 408293 User manual

Sauder

Sauder Office Port 408293 User manual

Sauder Cottage Road 416039 User manual

Sauder

Sauder Cottage Road 416039 User manual

Sauder 535782 User manual

Sauder

Sauder 535782 User manual

Sauder Cottage Road 418072 User manual

Sauder

Sauder Cottage Road 418072 User manual

Sauder 414724 User manual

Sauder

Sauder 414724 User manual

Sauder 412913 User manual

Sauder

Sauder 412913 User manual

Sauder Bookcase 414726 User manual

Sauder

Sauder Bookcase 414726 User manual

Sauder Dakota Pass 419440 User manual

Sauder

Sauder Dakota Pass 419440 User manual

Sauder Cannery Bridge 415910 User manual

Sauder

Sauder Cannery Bridge 415910 User manual

Sauder Costa 420654 User manual

Sauder

Sauder Costa 420654 User manual

Sauder 414254 User manual

Sauder

Sauder 414254 User manual

Sauder 417244 User manual

Sauder

Sauder 417244 User manual

Sauder Parklane 419152 User manual

Sauder

Sauder Parklane 419152 User manual

Sauder Summer Home 401902 User manual

Sauder

Sauder Summer Home 401902 User manual

Sauder Shoal Creek 420272 User manual

Sauder

Sauder Shoal Creek 420272 User manual

Sauder 158085 User manual

Sauder

Sauder 158085 User manual

Popular Indoor Furnishing manuals by other brands

Costway HW61596 user manual

Costway

Costway HW61596 user manual

NOA & NANI Järstorp Assembly instructions

NOA & NANI

NOA & NANI Järstorp Assembly instructions

Mizuho MOT-6302X Operator's manual

Mizuho

Mizuho MOT-6302X Operator's manual

Workrite Ergonomics Sierra HX Assembly instructions

Workrite Ergonomics

Workrite Ergonomics Sierra HX Assembly instructions

VECELO KHD-XF-NT12-BRN Assembly instructions

VECELO

VECELO KHD-XF-NT12-BRN Assembly instructions

Dorset KY006 Assembly instructions

Dorset

Dorset KY006 Assembly instructions

LAMS 700630 Quick start manual

LAMS

LAMS 700630 Quick start manual

Costway HU10226 user manual

Costway

Costway HU10226 user manual

Polywood SHD19 Assembly instructions

Polywood

Polywood SHD19 Assembly instructions

Fiesta 45218WAL Assembly instructions

Fiesta

Fiesta 45218WAL Assembly instructions

Closet Maid Divided Horizontal Organizer 10140 instruction sheet

Closet Maid

Closet Maid Divided Horizontal Organizer 10140 instruction sheet

FMD Furniture MANHATTAN 1 Assembly instructions

FMD Furniture

FMD Furniture MANHATTAN 1 Assembly instructions

Kaboodle 750mm overhead cabinet manual

Kaboodle

Kaboodle 750mm overhead cabinet manual

Eurobib Direct Sara Mini Assembly guide

Eurobib Direct

Eurobib Direct Sara Mini Assembly guide

Living Spaces SEDONA 4710 Assembly instructions

Living Spaces

Living Spaces SEDONA 4710 Assembly instructions

EUROSTYLE ANDERSON-79 Assembly instructions

EUROSTYLE

EUROSTYLE ANDERSON-79 Assembly instructions

Baumax Dreamer RMRS62411 Assembling Instruction

Baumax

Baumax Dreamer RMRS62411 Assembling Instruction

Woltra MIRIAM MI-06 Assembly instructions

Woltra

Woltra MIRIAM MI-06 Assembly instructions

manuals.online logo
manuals.online logoBrands
  • About & Mission
  • Contact us
  • Privacy Policy
  • Terms and Conditions

Copyright 2025 Manuals.Online. All Rights Reserved.