manuals.online logo
Brands
  1. Home
  2. •
  3. Brands
  4. •
  5. Sauder
  6. •
  7. Indoor Furnishing
  8. •
  9. Sauder Costa 428729 User manual

Sauder Costa 428729 User manual

sauder.com
NOTE: THIS INSTRUCTION
BOOKLET CONTAINS IMPORTANT
SAFETY INFORMATION.
PLEASE READ AND KEEP FOR
FUTURE REFERENCE.
sauder.com
CONTACT US FIRST
BEFORE MAKING ANY RETURNS TO THE STORE.
sauder.com
CONTACT US FIRST
BEFORE MAKING ANY RETURNS TO THE RETAILER.
Sauder.com
Share your journey! Lot # 548908 10/06/20
Purchased: __________________
Enlish p 1-33
Français p 34-38
Español p 39-44
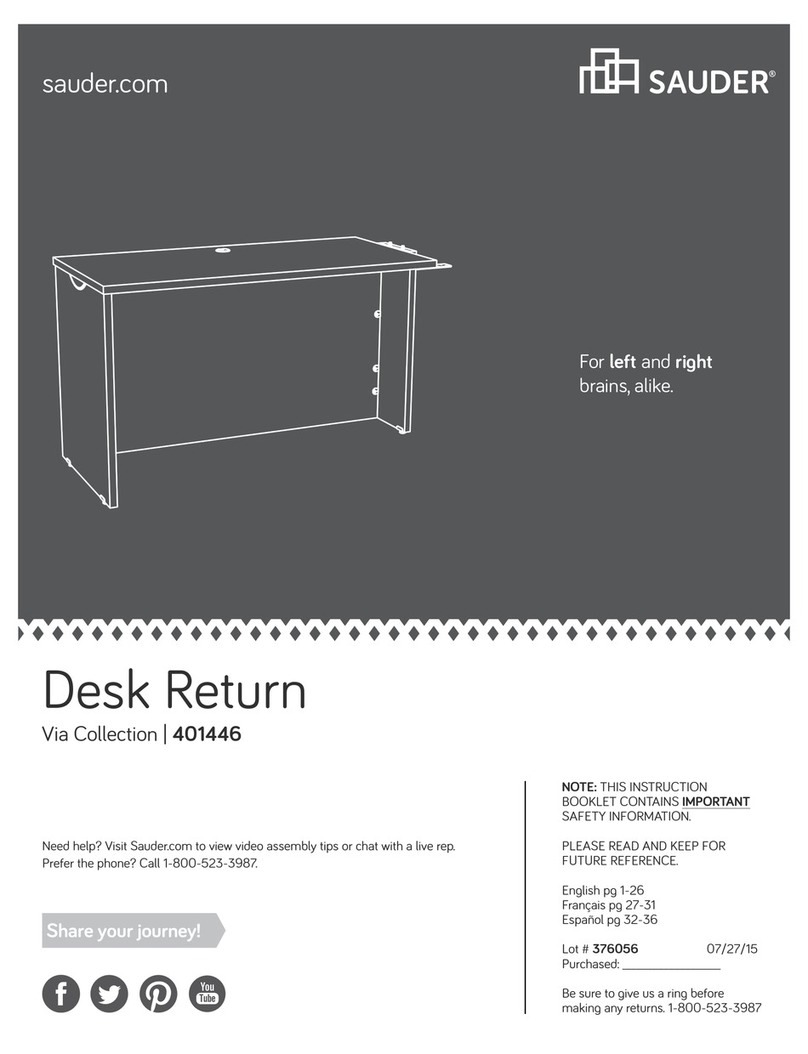
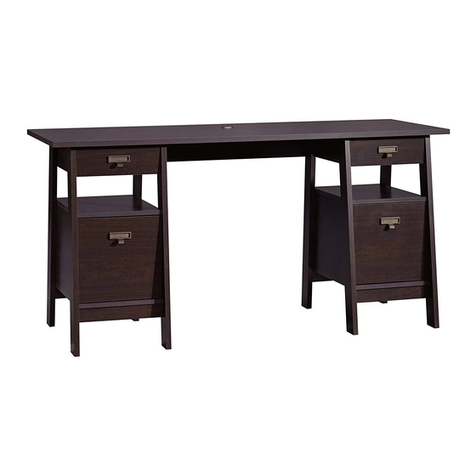
Executive Desk
Costa Collection | Model 428729
Business or pleasure.
Works both ways.
Visit sauder.com/service to order replacement parts, view video assembly tips, or chat with a live rep.
Prefer the phone? Give us a rin at 1-800-523-3987.
Customer Service is available Monday-Friday - 8:30 a.m. to 5 p.m. EST (except holidays)
Table of Contents Assembly Tools Required
Part Identification
Hardware Identification
Hardware Usage Guide
Assembly Steps
Français
Español
Safety
Warranty
Hammer
Not actual size
No. 2 Phillips Screwdriver
Tip Shown Actual Size
2-3
4
5
6-33
34-38
39-44
45-46
47
428729 www.sauder.com/servicePae 2
Part Identification
åWhile not all parts are labeled, some of the parts will have a label or an inked letter on the ede
to help distinuish similar parts from each other. Use this part identification to help identify similar parts.
A RIGHT END (1)
B LEFT END (1)
B37 PENCIL DRAWER BOTTOM (1)
C BOTTOM (2)
D2 RIGHT UPRIGHT (1)
D24 SMALL RIGHT DRAWER SIDE (4)
D25 SMALL LEFT DRAWER SIDE (4)
D28 LARGE RIGHT DRAWER SIDE (2)
D29 LARGE LEFT DRAWER SIDE (2)
D78 LARGE DRAWER BACK (2)
D109 SMALL DRAWER BACK (4)
D425 PENCIL DRAWER BACK (1)
D427 PENCIL RIGHT DRAWER SIDE (1)
D428 PENCIL LEFT DRAWER SIDE (1)
D506 PENCIL DRAWER BOX FRONT (1)
D707 LARGE DRAWER BOTTOM (2)
D716 SMALL DRAWER BOTTOM (4)
E2 LEFT UPRIGHT (1)
F BACK (2)
G MODESTY PANEL (1)
H RIGHT FRONT LEG (2)
I END MOLDING (4)
J BOTTOM MOLDING (2)
K BACK MOLDING (2)
L PENCIL DRAWER FRONT (1)
M PENCIL DRAWER MOLDING (1)
N SHELF (1)
O SHELF FRONT (1)
P LEFT FRONT LEG (2)
Q RIGHT REAR LEG (2)
R LEFT REAR LEG (2)
S MODESTY PANEL MOLDING (2)
T EXTENSION BLOCK (2)
U2 TOP (1)
V SMALL DRAWER FRONT (4)
W LARGE DRAWER FRONT (2)
Part Identification Now you know
our ABCs.
428729www.sauder.com/service Pae 3
A
B
C
D2
E2
F
G
H
I
J
K
LM
N
O
P
Q
R
S
T
U2
V
W
B37
D428
D425
D427
D716
D24
D109
D25
V
D716
D24
D109
D25
D707
D28
D78
D29
J
C
F
I
T
S
I
I
D506
Q
H
P
R
K
Hardware Identification
åScrews are shown actual size. You may receive extra hardware with your unit.
428729 www.sauder.com/servicePae 4
(EXTENSION SET SHOWN SEPARATED)
WIDE EXTENSION
RAIL - 4
40MA WIDE EXTENSION
SLIDE - 4
40MC
(EXTENSION SET SHOWN SEPARATED)
40NA NARROW EXTENSION
RAIL - 10 40NC NARROW EXTENSION
SLIDE - 10
FILE ROD - 4
8B FILE GLIDE - 4
15B
10A SLIDE CAM - 12 HIDDEN
CAM - 34
1F CAM
SCREW - 34
8F
37F TWIST-LOCK®
FASTENER - 22
WOOD
DOWEL - 16
15F
GROMMET CAP - 2
1P GROMMET - 2
10P
BLACK 1-1/4" FLAT HEAD SCREW - 4
7S
BLACK 7/8" LARGE HEAD SCREW - 3
17S BLACK 1-1/8" MACHINE SCREW - 6
21S
30S BLACK 1-9/16" FLAT HEAD SCREW - 28 BLACK 9/16" FLAT HEAD SCREW - 18
32S
BLACK 7/8" MACHINE SCREW - 2
37S BLACK 1-15/16" FLAT HEAD SCREW - 10
113S
KNOB SET - 8
136K GLUE - 2
177M
3S GOLD 5/16" FLAT HEAD SCREW - 48
Hardware Usage Guide
1. Insert the dowel end of the FASTENER into the
hole of the adjoining part.
NOTE: The dowel end of the FASTENER must
remain fully inserted in the hole of the adjoining
part while locking the FASTENER.
2. Tighten the FASTENER with a Phillips
screwdriver as tight as possible.
Dowel end
2.
Push a TWIST-LOCK® FASTENER
into the large hole in the part.
1.
HOW TO USE A TWIST-LOCK®FASTENER
Cam Screw
Hidden Cam
Arrow
Push a HIDDEN CAM into
the part. The arrow in the
HIDDEN CAM must point
toward the hole in the
edge of the board.
Hole
2. 3.
1
2
Insert the CAM SCREW into the HIDDEN CAM.
Tighten the HIDDEN CAM.
HOW TO USE A HIDDEN CAM & CAM SCREW
Turn the CAM SCREW until
the shoulder is against the
surface of the part.
1.
428729www.sauder.com/service Pae 5
Step 1 Look for this icon. It means a video assembly tip is
available at www.sauder.com/service/tips
Find the numbered video or scan the QR code.
428729 www.sauder.com/servicePae 6
å Assemble your unit on a carpeted floor or on the
empty carton to avoid scratchin your unit or the floor.
å To bein assembly, push a SAUDER TWIST-LOCK®
FASTENER (37F) into the lare holes in the
ENDS (A and B) and UPRIGHTS (D2 and E2).
å Repeat this step for the BOTTOMS (C), MODESTY
PANEL (G), and SHELF (N).
A
B
D2
E2
Do not tihten the TWIST-LOCK® FASTENERS in this step.
(22 used)
37F
2
Step 2
428729www.sauder.com/service Pae 7
Arrow
The arrow in the HIDDEN
CAM must point toward the
hole in the ede of the board.
Hole
å Push thirty-four HIDDEN CAMS (1F) into the
ENDS (A and B), UPRIGHTS (D2 and E2), BACKS (F),
and PENCIL DRAWER FRONT (L).
Arrow
1F
1F
Arrow
A
B
D2
E2
L
F
F
Some assembly
(and snacks) required.
(34 used)
1
Step 3
428729 www.sauder.com/servicePae 8
M
H
P
Q
R
Q
H
P
R
8F
å Turn thirty-four CAM SCREWS (8F) into
the LEGS (H, P, Q, and R) and PENCIL
DRAWER MOLDING (M).
(34 used)
8F
1
Step 4
428729www.sauder.com/service Pae 9
å Turn the ENDS (A and B), UPRIGHTS (D2 and E2), and BACKS (F) over.
å Turn twelve BLACK 9/16" FLAT HEAD SCREWS (32S) into the ENDS (A and B), UPRIGHTS (D2 and E2), and BACKS (F)
until the shoulders of the SCREWS rest on the surfaces of the ENDS, UPRIGHTS, and BACKS.
å NOTE: Do not overtihten the SCREWS.
å Slide the MOLDINGS (I and K) onto the ENDS (A and B), UPRIGHTS (D2 and E2), and BACKS (F). Line up the rooves in
the MOLDINGS over the heads of the SCREWS in the ENDS, UPRIGHTS, and BACKS.
å NOTE: If the MOLDING comes up o of the SCREWS, remove it and slide it on aain. The MOLDINGS should be centered
over the ENDS, UPRIGHTS, and BACKS.
BLACK 9/16" FLAT HEAD SCREW
(12 used in this step)
32S
Shoulder
Apply pressure with your hands as you
uide the MOLDINGS over the SCREWS
and onto the ENDS, UPRIGHTS, and BACKS.
A
B
D2
E2
F
K
I
I
K
I
I
Surface
without
HIDDEN
CAMS
F
Surface
without
HIDDEN
CAMS
Surface without
HIDDEN CAMS Surface without
HIDDEN CAMS
Surface without
HIDDEN CAMS Surface without
HIDDEN CAMS
Step 5
428729 www.sauder.com/servicePae 10
å Turn three BLACK 9/16" FLAT HEAD SCREWS (32S) into the
MODESTY PANEL (G) until the shoulders of the SCREWS rest on
the surface of the MODESTY PANEL.
å NOTE: Do not overtihten the SCREWS.
å Slide a MODESTY PANEL MOLDING (S) onto the MODESTY
PANEL (G). Line up the roove in the MOLDING over the heads of
the SCREWS in the MODESTY PANEL.
å NOTE: If the MOLDING comes up o of the SCREWS, remove it
and slide it on aain. The MOLDING should be centered
over the MODESTY PANEL.
å Turn the MODESTY PANEL (G) over and
repeat this step to the other surface
of the MODESTY PANEL.
Shoulder
Apply pressure with your hands as you
uide the MOLDING over the SCREWS
and onto the MODESTY PANEL.
S
G
S
G
S
Surface with
TWIST-LOCK®
FASTENERS
BLACK 9/16" FLAT HEAD SCREW
(6 used in this step)
32S
32S
Surface without
TWIST-LOCK®
FASTENERS
Step 6
428729www.sauder.com/service Pae 11
Inspect the parts thorouhly before
assemblin. Disassembly of lued
parts is extremely dicult.
Caution
!
15F
å First, fill two holes in the ENDS (A and B) 1/4 to 1/2 full with GLUE (177M). Then,
insert two WOOD DOWELS (15F) into the holes. Wipe away the excess GLUE.
å NOTE: Be sure to position the parts exactly as shown.
å Now, fill the holes in the FRONT LEGS (H and P) 1/4 to 1/2 full with GLUE (177M).
å Fasten the FRONT LEGS (H and P) to the ENDS (A and B). Tihten six
HIDDEN CAMS.
å NOTE: Be sure the WOOD DOWELS in the ENDS insert into the FRONT LEGS.
Wipe away the excess GLUE.
15F
A
B
P
H
These surfaces
should be even.
These surfaces
should be even.
Surface with
TWIST-LOCK®
FASTENERS
Surface with
TWIST-LOCK®
FASTENERS
Ede with
TWIST-LOCK®
FASTENERS
Ede with
TWIST-LOCK®
FASTENERS
End without hole
End with hole
177M
Fill the holes 1/4 to 1/2 full with GLUE.
1
Step 7
428729 www.sauder.com/servicePae 12
15F
å First, fill two holes in the REAR LEGS (Q and R) 1/4 to 1/2 full
with GLUE (177M). Then, insert two WOOD DOWELS (15F)
into the holes. Wipe away the excess GLUE.
å Now, fill the holes in the ENDS (A and B) 1/4 to 1/2 full
with GLUE (177M).
å Fasten the REAR LEGS (Q and R) to the ENDS (A and B).
Tihten six HIDDEN CAMS.
å NOTE: Be sure the WOOD DOWELS in the REAR LEGS
insert into the ENDS. Wipe away the excess GLUE.
15F
A
B
R
Q
These surfaces
should be even.
Surface with
TWIST-LOCK®
FASTENERS
Surface with
TWIST-LOCK®
FASTENERS
These surfaces
should be even.
Ede with
TWIST-LOCK®
FASTENERS
Ede with
TWIST-LOCK®
FASTENERS
End with hole
End without hole
177M
Fill the holes 1/4 to 1/2 full with GLUE.
Inspect the parts thorouhly before
assemblin. Disassembly of lued
parts is extremely dicult.
Caution
!
1
Step 8
428729www.sauder.com/service Pae 13
15F
å First, fill two holes in the UPRIGHTS (D2 and E2) 1/4 to 1/2 full with GLUE (177M).
Then, insert two WOOD DOWELS (15F) into the holes. Wipe away the
excess GLUE.
å NOTE: Be sure to position the parts exactly as shown.
å Now, fill the holes in the REAR LEGS (Q and R) 1/4 to 1/2 full with GLUE (177M).
å Fasten the REAR LEGS (Q and R) to the UPRIGHTS (D2 and E2). Tihten six
HIDDEN CAMS.
å NOTE: Be sure the WOOD DOWELS in the UPRIGHTS insert into the REAR
LEGS. Wipe away the excess GLUE.
15F
D2
E2
Q
R
These surfaces
should be even.
These surfaces
should be even.
Surface with
TWIST-LOCK®
FASTENERS
Surface with
TWIST-LOCK®
FASTENERS
Ede with
TWIST-LOCK®
FASTENERS
Ede with
TWIST-LOCK®
FASTENERS
End without hole
End with hole
177M
Fill the holes 1/4 to 1/2 full with GLUE.
Inspect the parts thorouhly before
assemblin. Disassembly of lued
parts is extremely dicult.
Caution
!
1
Step 9
428729 www.sauder.com/servicePae 14
15F
å First, fill two holes in the FRONT LEGS (H and P) 1/4 to 1/2 full
with GLUE (177M). Then, insert two WOOD DOWELS (15F) into
the holes. Wipe away the excess GLUE.
å Now, fill the holes in the UPRIGHTS (D2 and E2) 1/4 to 1/2 full
with GLUE (177M).
å Fasten the FRONT LEGS (P and H) to the UPRIGHTS (D2 and E2).
Tihten six HIDDEN CAMS.
å NOTE: Be sure the WOOD DOWELS in the FRONT LEGS insert
into the UPRIGHTS. Wipe away the excess GLUE.
15F
D2
E2
H
P
These surfaces
should be even.
Surface with
TWIST-LOCK®
FASTENERS
Surface with
TWIST-LOCK®
FASTENERS
These surfaces
should be even.
Ede with
TWIST-LOCK®
FASTENERS
Ede with
TWIST-LOCK®
FASTENERS
End with hole
End without hole
177M
Fill the holes 1/4 to 1/2 full with GLUE.
Inspect the parts thorouhly before
assemblin. Disassembly of lued
parts is extremely dicult.
Caution
!
1
Step 10
428729www.sauder.com/service Pae 15
å Separate the WIDE EXTENSION SLIDES (40MC) from the WIDE EXTENSION RAILS (40MA) as shown in the upper
diaram below. Be prepared, the parts are reasy.
å Fasten the WIDE EXTENSION RAILS (40MA) to the ENDS (A and B) and UPRIGHTS (D2 and E2). Use eiht GOLD 5/16"
FLAT HEAD SCREWS (3S) throuh holes #1 and #3.
å NOTE: For each WIDE EXTENSION RAIL, turn a SCREW into the hole shown in the enlared diaram. Then, slide the inner
cartride of the WIDE EXTENSION RAIL in to find the other hole that lines up with the hole in the END and UPRIGHT. Turn
a SCREW into this hole.
å NOTE: The WIDE EXTENSION SLIDES will be used later for the LARGE DRAWERS.
Open end
Open end
Open end
A
B
E2
D2
Ede with
TWIST-LOCK®
FASTENERS
Ede with
TWIST-LOCK®
FASTENERS
Surface with
TWIST-LOCK®
FASTENERS
Surface with
TWIST-LOCK®
FASTENERS
Surface with
TWIST-LOCK®
FASTENERS
Surface with
TWIST-LOCK®
FASTENERS
Open end
P
H
P
H
1
3
2
4
1
3
2
4
1
3
2
4
1
3
2
4
Push the black lever in and pull the SLIDE from the RAIL.
40MA40MC
GOLD 5/16" FLAT HEAD SCREW
(8 used for the RAILS)
3S
40MA
40MA
40MA
7
Step 11
428729 www.sauder.com/servicePae 16
å Separate the NARROW EXTENSION SLIDES (40NC) from the NARROW EXTENSION RAILS (40NA) as shown in the
upper diaram below. Be prepared, the parts are reasy.
å Fasten eiht NARROW EXTENSION RAILS (40NA) to the ENDS (A and B) and UPRIGHTS (D2 and E2). Use sixteen
GOLD 5/16" FLAT HEAD SCREWS (3S) throuh holes #1 and #3.
å NOTE: For each NARROW EXTENSION RAIL, turn a SCREW into the hole shown in the enlared diaram. Then, slide
the inner cartride of the NARROW EXTENSION RAIL in to find the other hole that lines up with the hole in the END and
UPRIGHT. Turn a SCREW into this hole.
å NOTE: The NARROW EXTENSION SLIDES will be used later for the SMALL DRAWERS and PENCIL DRAWER.
A
B
E2
D2
Open end
Open end
Open end
Open end
1
3
2
4
1
3
2
4
1
3
2
4
1
3
2
4
1
3
2
4
1
3
2
4
1
3
2
4
1
3
2
4
GOLD 5/16" FLAT HEAD SCREW
(16 used for the RAILS)
3S
Push the black lever in and pull the SLIDE from the RAIL.
40NA40NC
40NA
40NA
40NA
40NA
7
Step 12
428729www.sauder.com/service Pae 17
å Turn the UPRIGHTS (D2 and E2) over.
å Fasten the EXTENSION BLOCKS (T) to the UPRIGHTS (D2 and E2). Use four BLACK 1-1/4" FLAT HEAD SCREWS (7S).
å Fasten the remainin two NARROW EXTENSION RAILS (40NA) to the UPRIGHTS (D2 and E2). Use four GOLD 5/16"
FLAT HEAD SCREWS (3S) throuh holes #1 and #3.
å NOTE: For each NARROW EXTENSION RAIL, turn a SCREW into the hole shown in the enlared diaram. Then,
slide the inner cartride of the NARROW EXTENSION RAIL in to find the other hole that lines up with the hole in the
EXTENSION BLOCK.
E2
D2
Open end
Open end
BLACK 1-1/4" FLAT HEAD SCREW
(4 used for the EXTENSION BLOCKS)
7S
T
T
Surface without
TWIST-LOCK®
FASTENERS
Surface without
TWIST-LOCK®
FASTENERS
The lare hole
must be here.
H
P
1
3
2
4
1
3
2
4
Surface with
more holes
Unfinished
strip
GOLD 5/16" FLAT HEAD SCREW
(4 used for the RAILS)
3S
7
Step 13
428729 www.sauder.com/servicePae 18
å Fasten the BOTTOMS (C) to the ENDS (A and B). Tihten
four TWIST-LOCK® FASTENERS.
å Slide the BOTTOM MOLDINGS (J) onto the notched
edes of the BOTTOMS (C).
Surface with
TWIST-LOCK®
FASTENERS
Surface with
TWIST-LOCK®
FASTENERS
J
C
J
C
Dowel end
Slide the BOTTOM MOLDING (J)
onto the notched ede.
Notched ede
Notched ede
These surfaces
should be even.
B
A
H
P
The roove
is closer to
this ede.
The roove
is closer to
this ede.
How to use the SAUDER TWIST-LOCK® FASTENER
1. Insert the dowel end of the FASTENER into the
hole of the adjoinin part.
NOTE: The dowel end of the FASTENER must
remain fully inserted in the hole of the adjoinin
part while lockin the FASTENER.
2. Tihten the FASTENER with a Phillips
screwdriver as tiht as possible.
2
Step 14
428729www.sauder.com/service Pae 19
å Fasten the BACKS (F) to the REAR LEGS (Q and R) that are on the ENDS (A and B). Tihten four
HIDDEN CAMS.
å Fasten the RIGHT UPRIGHT (D2) to the BOTTOM (C) and BACK (F). Tihten two HIDDEN
CAMS and two TWIST-LOCK® FASTENERS.
å Fasten the LEFT UPRIGHT (E2) to the BOTTOM (C) and BACK (F). Tihten two HIDDEN CAMS
and two TWIST-LOCK® FASTENERS.
The lare hole
must be here.
F
Surface with
HIDDEN CAMS
Surface with
HIDDEN CAMS
F
B
A
K
K
R
Q
F
F
C
C
D2
E2
B
A
Surface without
TWIST-LOCK®
FASTENERS
Surface without
TWIST-LOCK®
FASTENERS
1
2
2
1
Step 15
428729 www.sauder.com/servicePae 20
2
Surface with holes
The lare hole
must be here.
Meet Part (U2). This component has
been enineered to be lihter, stroner,
faster… well ok. Not technically faster.
But definitely makes for a sturdier
Executive Desk that’s easier to assemble
and friendlier to the environment.
15F
å NOTE: You will need someone's help in this step.
å First, fill four small holes in the TOP (U2) 1/4 to 1/2 full with GLUE (177M). Then,
insert four WOOD DOWELS (15F) into the holes. Wipe away the excess GLUE.
å Now, fill the holes in the LEGS (H, P, Q, and R) 1/4 to 1/2 full with GLUE (177M).
å Fasten the RIGHT END (A) and RIGHT UPRIGHT (D2) to the TOP (U2). Tihten
four TWIST-LOCK® FASTENERS.
å NOTE: Be sure the WOOD DOWELS in the TOP insert into the LEGS. Wipe away
the excess GLUE.
U2
(4 used)
A
D2
H
Q
P
R
177M
Fill the holes 1/4 to 1/2 full with GLUE.
Inspect the parts thorouhly before
assemblin. Disassembly of lued
parts is extremely dicult.
Caution
!

Other Sauder Indoor Furnishing manuals
Sauder Dakota Pass 420410 User manual

Sauder

Sauder Dakota Pass 420410 User manual

Sauder Edge Water 422406 User manual

Sauder

Sauder Edge Water 422406 User manual

Sauder Nova Loft 425211 User manual

Sauder

Sauder Nova Loft 425211 User manual

Sauder Steel River 427851 User manual

Sauder

Sauder Steel River 427851 User manual

Sauder Cannery Bridge 429515 User manual

Sauder

Sauder Cannery Bridge 429515 User manual

Sauder OfficeWorks AFFIRM 426277 User manual

Sauder

Sauder OfficeWorks AFFIRM 426277 User manual

Sauder Sewing/Craft Cart User manual

Sauder

Sauder Sewing/Craft Cart User manual

Sauder Stockbridge 409128 User manual

Sauder

Sauder Stockbridge 409128 User manual

Sauder North Avenue 420275 User manual

Sauder

Sauder North Avenue 420275 User manual

Sauder Whitaker Point 429369 User manual

Sauder

Sauder Whitaker Point 429369 User manual

Sauder Worksense MASON PEAK 427835 User manual

Sauder

Sauder Worksense MASON PEAK 427835 User manual

Sauder Palladia Collection 412902 User manual

Sauder

Sauder Palladia Collection 412902 User manual

Sauder OfficeWorks AFFIRM 426279 User manual

Sauder

Sauder OfficeWorks AFFIRM 426279 User manual

Sauder 535782 User manual

Sauder

Sauder 535782 User manual

Sauder Avenue Eight 416513 User manual

Sauder

Sauder Avenue Eight 416513 User manual

Sauder Anywhere Dakota Pass 418231 User manual

Sauder

Sauder Anywhere Dakota Pass 418231 User manual

Sauder Edge Water Credenza 415321 User manual

Sauder

Sauder Edge Water Credenza 415321 User manual

Sauder Via 419606 User manual

Sauder

Sauder Via 419606 User manual

Sauder Registry Row 412922 User manual

Sauder

Sauder Registry Row 412922 User manual

Sauder 417771 User manual

Sauder

Sauder 417771 User manual

Sauder 423450 User manual

Sauder

Sauder 423450 User manual

Sauder Harvest Mill 404963 User manual

Sauder

Sauder Harvest Mill 404963 User manual

Sauder Carson Forge 420422 User manual

Sauder

Sauder Carson Forge 420422 User manual

Sauder Pogo 414435 User manual

Sauder

Sauder Pogo 414435 User manual

Popular Indoor Furnishing manuals by other brands

byLIVING BOSSE 115 Assembly instructions

byLIVING

byLIVING BOSSE 115 Assembly instructions

TyloHelo Classic manual

TyloHelo

TyloHelo Classic manual

Forte ENXK421 Assembling Instruction

Forte

Forte ENXK421 Assembling Instruction

aspenhome I205-284 Assembly instructions

aspenhome

aspenhome I205-284 Assembly instructions

Luxor BC45-G instruction manual

Luxor

Luxor BC45-G instruction manual

OSP Home Furnishings CREATOR DESK CRE25 Assembly instructions

OSP Home Furnishings

OSP Home Furnishings CREATOR DESK CRE25 Assembly instructions

OSP Designs CSM2524-ES Assembly instructions

OSP Designs

OSP Designs CSM2524-ES Assembly instructions

Triarch Indoor Lighting 31412 Assembly instructions

Triarch

Triarch Indoor Lighting 31412 Assembly instructions

Monarch Specialties I 4290 Assembly instructions

Monarch Specialties

Monarch Specialties I 4290 Assembly instructions

KI CR Assembly instructions

KI

KI CR Assembly instructions

Casa Lusso MVL800SR-MB installation instructions

Casa Lusso

Casa Lusso MVL800SR-MB installation instructions

Safavieh Furniture FOX7504 quick start guide

Safavieh Furniture

Safavieh Furniture FOX7504 quick start guide

Denver 359/2807 Assembly instructions

Denver

Denver 359/2807 Assembly instructions

Argos Home Canterbury 553/4801 Assembly instructions

Argos Home

Argos Home Canterbury 553/4801 Assembly instructions

Habitat Marlyne 817551 manual

Habitat

Habitat Marlyne 817551 manual

Mocka Jesse Bedside Table Assembly instructions

Mocka

Mocka Jesse Bedside Table Assembly instructions

IKEA ASPVIK ROLLFRONT CABINET 19X24" instructions

IKEA

IKEA ASPVIK ROLLFRONT CABINET 19X24" instructions

Coaster 505394 Assembly instructions

Coaster

Coaster 505394 Assembly instructions

manuals.online logo
manuals.online logoBrands
  • About & Mission
  • Contact us
  • Privacy Policy
  • Terms and Conditions

Copyright 2025 Manuals.Online. All Rights Reserved.