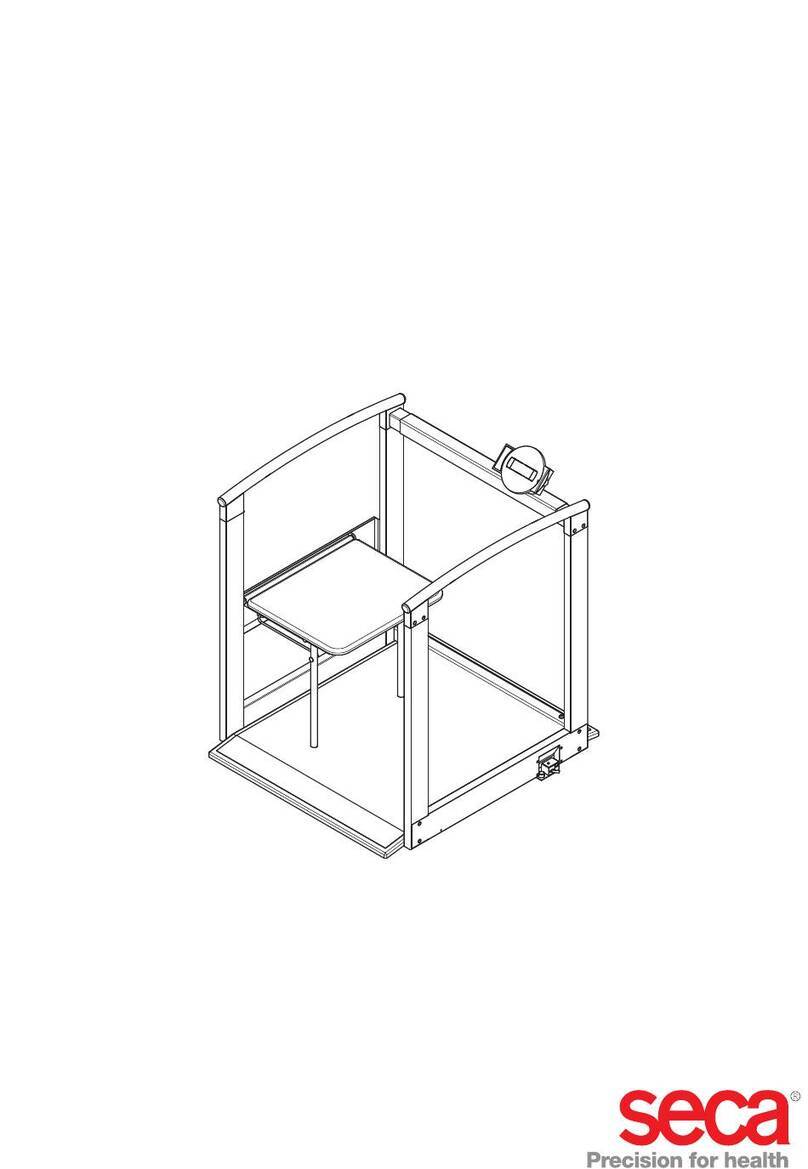
Seca 955 User manual

seca 955
Instructions for use

2 •
English
17-10-07-602-002d_10-2019S
English
1. Description of device . . . . . . . . . . . . . . . . . . . . . . . 3
1.1 Intended use . . . . . . . . . . . . . . . . . . . . . . . . . . . 3
1.2 Description of function . . . . . . . . . . . . . . . . . . . . 3
1.3 User qualification . . . . . . . . . . . . . . . . . . . . . . . . 3
2. Safety information . . . . . . . . . . . . . . . . . . . . . . . . . 3
2.1 Safety precautions in these instructions
for use . . . . . . . . . . . . . . . . . . . . . . . . . . . . . . . . 3
2.2 Basic safety precautions . . . . . . . . . . . . . . . . . . 4
Handling the device . . . . . . . . . . . . . . . . . . . . 4
Preventing electric shock . . . . . . . . . . . . . . . . 5
Preventing injuries and infections . . . . . . . . . . 5
Preventing damage to device . . . . . . . . . . . . . 6
Handling measuring results . . . . . . . . . . . . . . 6
Handling packaging material . . . . . . . . . . . . . 7
Handling batteries and rechargeable
batteries . . . . . . . . . . . . . . . . . . . . . . . . . . . . 7
3. Overview . . . . . . . . . . . . . . . . . . . . . . . . . . . . . . . . . 8
3.1 View of device . . . . . . . . . . . . . . . . . . . . . . . . . . 8
3.2 Symbols in the display . . . . . . . . . . . . . . . . . . . . 9
3.3 Markings on the device and on the
type plate . . . . . . . . . . . . . . . . . . . . . . . . . . . . 10
3.4 Markings on the packaging . . . . . . . . . . . . . . . 11
3.5 Menu structure . . . . . . . . . . . . . . . . . . . . . . . . 12
4. Starting up device . . . . . . . . . . . . . . . . . . . . . . . . 13
4.1 Scope of delivery . . . . . . . . . . . . . . . . . . . . . . . 13
4.2 Establishing the power supply . . . . . . . . . . . . . 13
Inserting the rechargeable battery block . . . . 13
Connecting the power supply unit . . . . . . . . 14
4.3 Aligning the scale. . . . . . . . . . . . . . . . . . . . . . . 14
5. Operation . . . . . . . . . . . . . . . . . . . . . . . . . . . . . . . 15
5.1 Weighing . . . . . . . . . . . . . . . . . . . . . . . . . . . . . 15
Switching on the device . . . . . . . . . . . . . . . . 15
Starting the weighing procedure . . . . . . . . . 16
Taring off additional weight (TARE) . . . . . . . . 16
Displaying weight permanently (HOLD) . . . . 17
Determining Body Mass Index (BMI) . . . . . . 17
Automatic switchover of weighing range . . . 17
Switching off the device . . . . . . . . . . . . . . . . 18
5.2 Other functions (menu). . . . . . . . . . . . . . . . . . . 18
Navigating in the menu . . . . . . . . . . . . . . . . 18
Clearing stored values automatically (ACLr) . 19
Permanently storing additional weight (Pt) . . 19
Activating the Autohold function (AHOLd) . . 20
Activating acoustic signals (bEEP) . . . . . . . . 20
Selecting attenuation (FIL) . . . . . . . . . . . . . . 20
Restoring factory settings (rESEt) . . . . . . . . . 21
6. Hygiene treatment . . . . . . . . . . . . . . . . . . . . . . . . 21
6.1 Cleaning . . . . . . . . . . . . . . . . . . . . . . . . . . . . . 21
6.2 Disinfection . . . . . . . . . . . . . . . . . . . . . . . . . . . 22
6.3 Sterilizing . . . . . . . . . . . . . . . . . . . . . . . . . . . . . 22
7. Function check . . . . . . . . . . . . . . . . . . . . . . . . . . 22
8. What to do if …? . . . . . . . . . . . . . . . . . . . . . . . . . 23
9. Servicing/verification . . . . . . . . . . . . . . . . . . . . . 24
9.1 Information on servicing and verification. . . . . . 24
9.2 Checking the content of the verification
counter . . . . . . . . . . . . . . . . . . . . . . . . . . . . . . 24
10. Technical data . . . . . . . . . . . . . . . . . . . . . . . . . . . 25
10.1 General technical data . . . . . . . . . . . . . . . . . . 25
10.2 Weighing data . . . . . . . . . . . . . . . . . . . . . . . . 26
11. Spare parts . . . . . . . . . . . . . . . . . . . . . . . . . . . . . . 26
12. Disposal . . . . . . . . . . . . . . . . . . . . . . . . . . . . . . . . 26
12.1 Device . . . . . . . . . . . . . . . . . . . . . . . . . . . . . . 26
12.2 Batteries and rechargeable batteries . . . . . . . 26
13. Warranty . . . . . . . . . . . . . . . . . . . . . . . . . . . . . . . . 27
14. Declaration of conformity . . . . . . . . . . . . . . . . . . 27
CONTENTS
Description of device • 3
English
17-10-07-602-002d_10-2019S
1. DESCRIPTION OF DEVICE
1.1 Intended use
The medical scale is mainly used at hospitals, practices and inpatient care
facilities in accordance with national regulations.
The scale seca 955 is for conventional determination of weight and establish-
ment of general state of nutrition; it assists the physician supervising treat-
ment in making a diagnosis or deciding on a course of treatment.
To make an accurate diagnosis, however, other specific examinations have to
be ordered by the physician and their results taken into account, in addition to
determining a weight value.
1.2 Description of function
The scale is used to determine weight.
Some versions of these scales allow you to switch the weight display
between kilos (kg), pounds (lbs) and stones (sts).
The height value can be entered manually to calculate the body mass index.
The seca 955 is not intended for the transport of people or objects.
1.3 User qualification
The device may only be operated by healthcare professionals.
2. SAFETY INFORMATION
2.1 Safety precautions in these instructions for use
DANGER!
Used to identify an extremely hazardous situation. If you fail to take
note of this information, serious irreversible or fatal injuries will occur.
WARNING!
Used to identify an extremely hazardous situation. If you fail to take
note of this information, serious irreversible or fatal injuries may result.
CAUTION!
Used to identify a hazardous situation. If you fail to take note of this
information, minor to moderate injuries may result.
NOTICE!
Used to identify possible incorrect usage of the device. If you fail to
take note of this information, you may damage the device, or the mea-
suring results may be incorrect.
NOTE
Includes additional information about use of the device.

4 •
17-10-07-602-002d_10-2019S
2.2 Basic safety precautions
Handling the device ►Please take note of the information in these instructions for use.
►Keep the instructions for use in a safe place. The instructions for use are a
component of the device and must be available at all times.
DANGER!
Risk of explosion
Do not use the device in an environment in which one of the following
gases has accumulated:
►oxygen
►flammable anesthetics
►other flammable substances/air mixtures
CAUTION!
Patient hazard, damage to device
►Additional devices which are connected to electrical medical devic-
es must provide evidence of compliance with the relevant IEC or ISO
standards (e.g. IEC 60950 for data-processing devices). Further-
more, all configurations must comply with the requirements of stan-
dards for medical systems (see IEC 60601-1-1 or Section 16 of
edition 3.1 of IEC 60601-1, respectively). Anyone connecting addi-
tional devices to electrical medical devices is considered a system
configurer and is therefore responsible for ensuring that the system
complies with the requirements of standards for systems. Your at-
tention is drawn to the fact that local laws take precedence over the
above-mentioned requirements of standards. In the event of any
queries, please contact your local specialist dealer or Technical Ser-
vice.
►Have servicing and verification carried out regularly as described in
the relevant section of this document.
►Technical modifications may not be made to the device. The device
does not contain any parts for servicing by the user. Only have ser-
vicing and repairs performed by an authorized seca service partner.
You can find service partners in your area at www.seca.com or by
sending an e-mail to servic[email protected].
►Only use original seca accessories and spare parts, otherwise seca
will not grant any warranty.
CAUTION!
Patient hazard, malfunction
►Keep other electrical medical devices, e.g. high-frequency surgical
devices, a minimum distance of approx. 1 meter away to prevent in-
correct measurements or wireless transmission interference.
►Keep HF devices such as cell phones a minimum distance of ap-
prox. 1 meter away to prevent incorrect measurements or wireless
transmission interference.
►The actual transmission output of HF equipment may require mini-
mum distances of more than 1 meter. Details can be found at
www.seca.com.
CAUTION!
Patient hazard, damage to device
►Use the chair scale only under the supervision of specialist staff.
►Prior to each use, ensure that the wheel brakes work properly.
►Secure the scales against accidental rolling. Lock the wheel brakes.
►Do not transport any persons or objects with the chair scales.
►Move the scales only with the wheel brakes released.

Safety information • 5
English
17-10-07-602-002d_10-2019S
Preventing electric shock WARNING!
Electric shock
►Set up the device so that the power supply socket is easy to reach
and the device can be disconnected from the power supply quickly.
►Ensure that your local power supply matches the information on the
power supply unit.
►Do not touch the power supply unit with wet hands.
►Do not use extension cables or power strips.
►Make sure that cables are not pinched or damaged by sharp edges.
►Make sure that cables do not come into contact with hot objects.
►Do not operate the device at an altitude of more than 3000 m above
sea level.
Preventing injuries and infections NOTICE!
Incorrect measurement due to force shunts
If accessories (e.g. power supply pouch) or pieces of clothing become
trapped between the seat and the base frame, the weight will not be
measured correctly.
If the patient's feet are not on the footrests, the weight measurement
will be incorrect.
►Ensure that there are no objects between the seat and the base
frame.
►Ensure that the armrests are folded down during the weighing pro-
cess.
►Make sure that the patient's feet are placed on the footrests during
the weighing process.
WARNING!
Risk of infection
►Before and after every measurement, wash your hands to reduce
the risk of cross-contamination and nosocomial infections.
►Hygienically reprocess the device regularly as described in the
respective section in this document.
►Make sure that the patient has no infectious diseases.
►Make sure that the patient has no open wounds or infectious skin
alterations, which may come into contact with the device.

6 •
17-10-07-602-002d_10-2019S
Preventing damage to device NOTICE!
Damage to device
►Ensure that no liquids enter the device. They can damage the elec-
tronics.
►Switch off the device before disconnecting the power supply unit
from the mains socket.
►For devices with power supply operation: Disconnect the power
supply unit from the mains socket if you intend to not use the device
for a longer period of time. Only this way it can be ensured that the
device is de-energized.
►For devices with battery or rechargeable battery operation: If you do
not use the device for an extended period of time, remove batteries
or rechargeable batteries. Only this way it can be ensured that the
device is de-energized.
►Make sure not to drop the device.
►Do not expose the device to any impacts or vibrations.
►Perform function controls regularly as described in the relevant sec-
tion in this document. Do not operate the device if it is damaged or
not working properly.
►Ensure that there is no heat source in the immediate vicinity. Do not
expose to direct sunlight. The excessive temperature could damage
the electronics.
►Avoid rapid temperature fluctuations. When the device is transport-
ed so that a temperature difference of more than 20 °C occurs, it
must stay turned off for at least 2 hours before it can be turned on
again. Otherwise, condensation water will form which can damage
the electronics.
►Use the device only in intended ambient conditions.
►Store the device only in the intended storage conditions.
►Use only chlorine and alcohol-free disinfectants which are explicitly
suitable for acrylic sheet and other sensitive surfaces (active ingre-
dient: quaternary ammonium compounds, for example).
►Do not use aggressive or abrasive cleaning agents.
►Do not use organic solvents (e.g. white spirit or petroleum spirit).
Handling measuring results WARNING!
Patient hazard
This device is no diagnostic device. It simply assists the treating phy-
sician in establishing a diagnosis.
►In order to make a precise diagnosis and initiate therapeutic mea-
sures, besides determination of the weight, further targeted exam-
inations must be set up by the physician, and their results must be
considered.
►The responsibility for diagnosis and treatment lies with the treating
physician.
NOTICE!
Inconsistent measuring results
►Before you electronically save measured values determined using
this device and use them further (e.g. in seca PC software or in a
hospital information system), make sure that the measured values
are plausible.
►If measured values are transmitted to seca PC software or a hospital
information system, make sure prior to further use that the mea-
sured values are plausible and are assigned to the correct patient.

Safety information • 7
English
17-10-07-602-002d_10-2019S
Handling packaging material WARNING!
Risk of suffocation
Packaging material made of plastic foil (bags) is a choking hazard.
►Keep packaging material out of reach of children.
►In the event that the original packing material may not be available
anymore, only use plastic bags with security holes in order to reduce
the risk of suffocation. Use recyclable materials if possible.
NOTE
Keep the original packing material for future use (e.g. returning for
servicing).
Handling batteries and
rechargeable batteries
WARNING!
Personal injury as a result of improper handling
Batteries and rechargeable batteries contain harmful substances
which may explode if not handled properly.
►Do not try to recharge batteries.
►Do not expose (rechargeable) batteries to heat.
►Do not burn (rechargeable) batteries.
►If acid is leaking out, avoid contact with the skin, eyes and mucous
membranes. Rinse affected areas with plenty of clean water and
seek medical help at once.
NOTICE!
Damage to device and malfunctions with improper handling
►Only use the type of (rechargeable) battery specified in this
document.
►When replacing (rechargeable) batteries, always replace a complete
set at a time.
►Do not short-circuit (rechargeable) batteries.
►If you do not use the device for a long period of time, remove the
batteries (incl. rechargeable batteries). This prevents acid from leak-
ing into the device.
►If acid leaked into the device, discontinue use. Have the device
checked by an authorised seca Service partner and repaired if
necessary.

8 •
17-10-07-602-002d_10-2019S
3. OVERVIEW
3.1 View of device
5
6
1
2
4
3
7
8
9
10
11
12
13
Pos. Device component Function
1ON/OFF key
To switch the device off and on
2
Arrow key
• While weighing:
- Short press: Activate hold function
- Long press: Activate tare function
• In the menu:
- Select submenu, select menu element
- Increase value
3
Arrow key
• During weighing:
- Press briefly: Activate BMI function
- Hold down: Call up menu
• In the menu:
- Select submenu, select menu item
- Reduce value
4
Enter key
- Confirm selected menu element
- Save set value
5Display Display element for measuring results and for device configuration
6Battery
compartment Accommodation for the rechargeable battery block
7Power supply unit
connection Serves to connect the included power supply unit
8Spirit level Indicates whether device is horizontal
9Transport rollers
• Steerable
• Height adjustable
• With wheel brakes
• The scale can be moved on these rollers.
• The scale can be aligned precisely with these rollers.
tare

Overview • 9
English
17-10-07-602-002d_10-2019S
3.2 Symbols in the display
10 Armrests Can be folded toward the back, so that it is easier for the patient to sit down
11 Footrests • Can be folded up/down
• For correct measurement, the patient’s feet must be on the footrests
12 Foot screw 2 screws, for precise alignment of device
13 Transport rollers The scales can be moved about with these rollers
Pos. Device component Function
A
B
C
D
Pos. Symbol Meaning
ARechargeable battery block is weak
BOperation with power supply unit
CNon-verifiable function active
DCurrently used weighing range

10 •
17-10-07-602-002d_10-2019S
3.3 Markings on the device and on the type plate
Text/symbol Meaning
Name and address of manufacturer, date of manufacture
Model number
Serial number, consecutive
GAL
Value in m/s² (verified models)
• Gravitational acceleration on earth
• Depends on the intended location
ProdID Product identification number, consecutive
Approval Type Type designation of design approval
Follow instructions for use
Electrical medical device, type B
e
Value in mass units (verified models)
• States the difference between two consecutive display values
• Used to classify and verify a scale
Weighing range (verified models)
Device complies with EU standards and directives.
•M: Conformity label according to Directive 2014/31/EU governing non-automatic weighing
instruments (verified models)
•18: (Example: 2018) Year in which conformity verification was performed and the CE label
was applied (verified model)
•0102: Notified body metrology (verified models)
•0123: Notified body medical products
Class III scale to Directive 2014/31/EU and OIML R76-1 (verified models)
Type plate on the power supply connection socket
•x-y V: Supply voltage required
•max xx A: Maximum current consumption
• : Note polarity of connector plug
• : Operate device with direct current
Do not dispose of device with household waste
x
M18 0102
0123
use compatible
seca adapter only
xx V
max. xxx mA

Overview • 11
English
17-10-07-602-002d_10-2019S
3.4 Markings on the packaging
Protect from moisture
Arrows indicate top of product
Transport and store in an upright position
Fragile
Do not throw or drop
Permitted min. and max. temperature for transport and
storage
Permitted min. and max. humidity for transport and
storage
Open packaging here
Packaging material can be disposed of through
recycling programs

12 •
17-10-07-602-002d_10-2019S
3.5 Menu structure
Other functions are available in the menu of the device. This enables you to
configure the device perfectly to suit the conditions in which you use it (details
from page 18).
Reset
Autohold
•On
•Off
Fil
•0
•1
•2
Beep •On
•Off
•On
•Off
Press
Hold
PT Weight
PT Net Weight
•On
•Off
Autoclear
Navigation:
Call up menu:

Starting up device • 13
English
17-10-07-602-002d_10-2019S
4. STARTING UP DEVICE
4.1 Scope of delivery
4.2 Establishing the power supply
Power is supplied to the scale with a rechargeable battery block or a power
supply unit (both included in the scope of delivery).
Inserting the rechargeable battery
block
1. Press on latch of battery compartment.
2. Move down lid of battery compartment.
3. Remove the connector cable from the battery compartment.
4. Connect the connector cable to the rechargeable battery block.
5. Insert the rechargeable battery block into the battery compartment.
6. Close the battery compartment.
ab
c
d
Pos. Components Pcs.
aScale 1
bPower supply unit 1
cRechargeable battery block 1
dPower supply unit carrier pouch seca 471 1
Instructions for use, not shown 1

14 •
17-10-07-602-002d_10-2019S
Connecting the power supply unit The rechargeable battery compartment is charged with the included power
supply unit.
WARNING!
Personal injury and damage to device if incorrect power supply unit is
used
The voltage provided by standard power supply units may be higher
than their indicated rating. This may cause the scales to overheat,
catch fire, melt or short-circuit.
►Only use genuine seca plug-in power supply units with 9 V or a
controlled 12 V output voltage.
1. Insert the power plug necessary for your power supply in the power
supply unit.
2. Insert the connector plug of the power supply unit in the connecting
socket of the scales.
3. Plug the power supply unit into a mains socket.
4. Allow the scale to charge on the network for at least 24 hours when it is
first charged so that the rechargeable battery block is completely
charged.
4.3 Aligning the scale
1. Place the scale on firm and even ground.
2. Align the scale:
– with the foot screws on the front transport rollers
– with the knurled head screws on the rear transport rollers
The air bubble in the spirit level must be located in the centre of the circle.
Air bubble
Spirit level

Operation • 15
English
17-10-07-602-002d_10-2019S
5. OPERATION
5.1 Weighing
CAUTION!
Injury from falls
People with restricted mobility may fall if they try to get onto the scale
or to stand up again.
►Route connecting cables (if present) in such a way that neither user
nor patient can trip over them.
►Ensure that the wheel brakes on the chair scales are set.
►Support people with restricted mobility as they sit down and stand
up.
►Ensure that the footrests are pushed in (depending on model) and
folded up before the patient gets onto the scale or stands up again.
CAUTION!
Injury due to trapping
Hands and arms of the patient and the user can become trapped
between seat and base frame as well as between seat and armrests.
►Keep your arms and hands above the seat when you help the pa-
tient to sit down.
►Make sure that the patient's hands and arms are placed on the arm-
rests or in his or her lap during the weighing process.
NOTICE!
Incorrect measurement due to force shunts
If accessories (e.g. power supply pouch) or pieces of clothing become
trapped between the seat and the base frame, the weight will not be
measured correctly.
If the patient's feet are not on the footrests, the weight measurement
will be incorrect.
►Ensure that there are no objects between the seat and the base
frame.
►Ensure that the armrests are folded down during the weighing pro-
cess.
►Make sure that the patient's feet are placed on the footrests during
the weighing process.
Switching on the device
►Press the ON/OFF key.
The display will read seca and then quickly run through all elements of the
display.
The scales are ready for operation when the display reads 0.00.
If the device is being operated with a power supply unit, the symbol will
appear in the display.

16 •
17-10-07-602-002d_10-2019S
Starting the weighing procedure
1. Set the wheel brakes of the rear transport rollers.
2. Fold the armrest toward the back in order to make it easier for the patient
to sit down.
3. Make sure that the scale has no load.
4. Switch the scale on.
5. Ask the patient to sit down on the scale.
6. Fold the footrests down.
7. Ask the patient to put his feet on the footrests.
8. Fold the armrests down.
9. Read the measuring result.
Taring off additional weight (TARE) You can use the TARE function to prevent the weighing result from being
affected by an additional weight (e.g. a towel or pad on the weighing surface).
NOTICE!
Incorrect measurement as a result of force shunt
If an additional weight is in contact with the surface on which the
device is resting, measuring results will be incorrect.
►Make sure that additional weights are placed only on the weighing
platform.
1. Switch the scale on.
2. Place the additional weight on the scales.
3. Hold down the arrow key hold/tare until “NET” appears in the display.
4. Wait until the display stops flashing and is replaced by 0.00.
5. Weigh the patient as described in section “Starting the weighing proce-
dure”.
6. Read off the measuring result.
The additional weight has been automatically deducted.
tare

Operation • 17
English
17-10-07-602-002d_10-2019S
7. To disable the TARE function, press the arrow key hold/tare until “NET”
no longer appears in the display or switch off the scales.
NOTE
The maximum weight that can be displayed is reduced by the weight
of the objects already placed on the scales.
Displaying weight
permanently (HOLD)
If you activate the HOLD function, the weighing value will continue to be dis-
played after the load has been removed. This allows you to attend to the
patient before noting down the weight.
1. Check that there is no load on the scales.
2. Switch the scale on.
3. Weigh the patient as described in section “Starting the weighing proce-
dure”.
4. Briefly press the arrow key hold/tare.
The display will flash until a stable weight is measured. The weighing value
will then be displayed continuously. The symbol (non-verifiable function)
and the message “HOLD” will be displayed.
5. To disable the HOLD function, briefly press the arrow key hold/tare.
The symbol and the message “HOLD” will no longer be displayed.
NOTE
If the auto hold function is activated, the weight value is displayed per-
manently automatically until the scale switches itself off or is switched
off ((see “Activating the Autohold function (AHOLd)” on page 20)).
Determining Body Mass Index (BMI) The body mass index compares height and weight.
1. Check that there is no load on the scales.
2. Switch the scale on.
3. Briefly press the arrow key bmi/menu.
The message “BMI” appears.
Arrows can be seen flashing in the display.
The height last entered is displayed.
4. You can either accept this height or select another value using the arrow
keys.
5. Confirm your selection with the Enter key.
6. Weigh the patient as described in section “Starting the weighing proce-
dure”.
7. Read off the BMI.
8. To disable the BMI function, briefly press the Enter key.
Automatic switchover of
weighing range
The scales are equipped with two weighing ranges. Weighing range 1 ( )
offers a more precise weight indication with a reduced load-bearing capacity.
Weighing range 2 ( ) allows you to take advantage of the maximum load-
bearing capacity of the scales.
When the scales are switched on, weighing range 1 is activated. If a specific
weight value is exceeded, the scales automatically switch to weighing range
2.
tare
tare
tare
tare

18 •
17-10-07-602-002d_10-2019S
To switch back to weighing range 1 proceed as follows:
►Remove all loads on the scales.
Weighing range 1 is activated again.
Switching off the device
►Press the ON/OFF key.
NOTE
In rechargeable battery operation, the scale switches off after a short
time if there is no load on it.
5.2 Other functions (menu)
Other functions are available in the menu of the device. This allows you to
configure the scales perfectly to your own needs.
Navigating in the menu 1. Switch on the scale.
2. Hold down the arrow key bmi/menu until the menu is called up.
The last menu item selected is shown in the display (here: Autohold
“AHOLd”).
3. Keep pressing one of the arrow keys until the required menu item appears
in the display (here: attenuation “FIL”).
Reset
Autohold
•On
•Off
Fil
•0
•1
•2
Beep •On
•Off
•On
•Off
Press
Hold
PT Weight
PT Net Weight
•On
•Off
Autoclear
tare

Operation • 19
English
17-10-07-602-002d_10-2019S
4. Confirm your selection with the Enter key.
The current selection for the menu item or a submenu is displayed (here
level “0”).
5. To change your selection or call up another submenu, keep pressing one
of the arrow keys until the required selection is displayed (here: level “2”).
6. Confirm the selection with the Enter key.
You will leave the menu automatically.
7. To make further selections, call up the menu again and proceed as de-
scribed above.
NOTE
If no key is pressed for approx. 24 seconds, you will leave the menu
automatically.
Clearing stored values
automatically (ACLr)
To avoid storing obsolete measuring results in the device memory and so cal-
culating the BMI incorrectly, you can set the scales to ensure measured val-
ues are automatically cleared after 5 minutes.
NOTE
With certain models this function is already activated at the factory. If
required, you can disable this function.
1. Select the item “ACLr” in the menu.
2. Confirm the selection.
3. Select the setting you require:
– On
– Off
4. Confirm the selection.
You will leave the menu automatically.
Permanently storing additional
weight (Pt)
You can use the Pre-Tare function to permanently store an additional weight
and automatically deduct it from the measuring result. You can for example
store a flat-rate figure as the weight of shoes and clothing and then always
deduct it from the measuring result when a patient is weighed fully dressed.
1. Select the item “Pt” in the menu.
The message “Pt” appears.
2. Confirm your selection.
Arrows can be seen flashing in the display.
The additional weight last stored is displayed.
3. You can accept the stored value or adjust it using the arrow keys.
NOTE
If you enter the value “0”, the function will be switched off. The
message “Pt” will no longer be displayed.
4. Confirm your selection.
5. Ask the patient to sit down on the scale.
The patient's weight is displayed.
The additional weight stored has been automatically deducted.
6. To disable this function, select the item “Pt” in the menu again.
7. Confirm your selection.
The function is disabled.
You will leave the menu automatically.
NOTE
When you switch the scale off, the function is switched off. The mes-
sage “Pt” is no longer displayed when you switch the scale on again.
tare

20 •
17-10-07-602-002d_10-2019S
Activating the Autohold function
(AHOLd)
If you activate the Autohold function, the measuring result for each weighing
operation will continue to be displayed after the load has been removed. This
means you no longer have to manually activate the Hold function for every
weighing operation.
NOTE
With certain models this function is already activated at the factory. If
required, you can disable this function.
1. Select the item “AHOLd” in the menu.
2. Confirm the selection.
The current selection is displayed.
3. Select the setting you require:
– On
– Off
4. Confirm your selection.
You will leave the menu automatically.
Activating acoustic signals (bEEP) You can select whether an acoustic signal is to be emitted whenever a key is
pressed or a stable weighing value has been attained. The latter is relevant for
the Hold/Autohold function.
NOTE
The function “Acoustic signal with stable weighing value” is activated
at the factory. If required, you can disable this function.
1. Select the item “bEEP” in the menu.
2. Confirm the selection.
3. Select a menu item:
– PrESS: Acoustic signal whenever a key is pressed
– Hold: Acoustic signal with a stable weighing value
4. Confirm your selection.
The current selection is displayed.
5. Select the setting you require:
– On
– Off
6. Confirm your selection.
You will leave the menu automatically.
7. If you also wish to activate the acoustic signal for the second function,
repeat this procedure.
Selecting attenuation (FIL) You can use attenuation (FIL = filter) to reduce any interference during
weighing (e.g. caused by patient moving).
1. Select the item “FIL” in the menu.
2. Confirm the selection.
The current selection is displayed.
FIL Weight display Hold
0 Sensitive Slow
1 Medium Medium
2 Slow Fast
Other manuals for 955
2
Table of contents
Other Seca Scale manuals
Popular Scale manuals by other brands

AWS
AWS Digital Kitchen Scale user manual

Adam Equipment
Adam Equipment MTB manual

Optima Home Scales
Optima Home Scales COMMANDER-BT Series user manual

DigiWeight
DigiWeight DWP-1000R user manual

Tanita
Tanita RD-901 innerScan Dual instruction manual

Rice Lake
Rice Lake 250-10 Series Technical and operating instructions