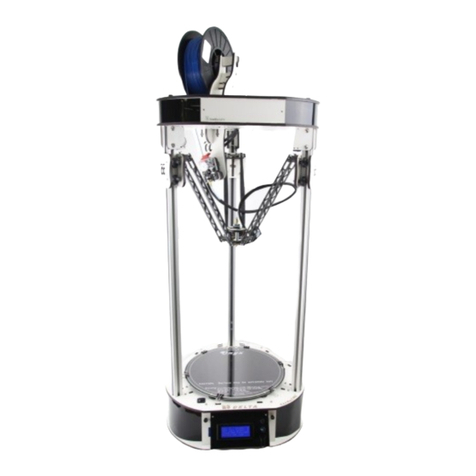
SeeMeCNC orion delta User manual

Orion Delta™ 3D Printer Manual
Third Edition – Firmware 0.91 and Higher
V3.0 , September 28th, 2016
MatterControl v1.2.2
Copyright 201 By Gene Buckle – [email protected]
Licensed as Creative Commons, Attribution-ShareAlike 3.0
This guide will take you through the steps to set up and operate your new 3D
printer from SeeMeCNC. You’ll find instructions on calibration, software, maintenance
and more all in this manual. As a new SeeMeCNC™ owner, you’ll also find a ton of great
resources on the forums at forum . seemecnc . com
1

Introduction – Read Me First!
This document is your instruction manual for your new SeeMeCNC® 3D printer machine.
Before using your new 3D printer thoroughly read and understand this manual for safe and
effective operation of the machine.
2
Warning
Adult supervision required. Children under 18 years of age require supervision.
Risk of Fire. Do not leave machine unattended.
Use genuine parts manufactured or designated y SeeMeCNC.
Keep a copy of this manual near the machine, easily accessi le to all operators.
Use of this machine is at your own risk.
Personal property damage, serious injury or death can result from not following
instructions or warning in the manual or misuse of the machine.
Automatic machine can start unexpectedly. Pay close attention and keep clear
while power is connected to the machine
The machine power supply is connected to AC voltage
and can e hazardous. Disconnect power efore
servicing this machine.
The hot end of the machine can reach very high
temperatures of 700F and can cause serious urns.
The heated print surfaces (heated ed) can also reach
temperatures high enough to cause severe urns. Allow
oth to cool for 20 minutes after turning off power.
Use caution near moving parts of the machine. Keep
ody and loose articles clear.
Poisonous gas, smoke, or fumes could e emitted y some materials you could
use with the machine. In such case, you should install ventilation.
Choking Hazard. This machine contains small parts and
can produce small parts which can e a choking hazard
to children.
Visit http://www.seemecnc.com to contact us if you have any questions.

Table of Contents
Un-Boxing your new Orion Delta™ 3D Printer.............................................................................5
Installing the LCD Control Panel USB Cable and SD Card.........................................................9
Installing the Power Cord and Spool Holder..............................................................................14
Loading Filament.......................................................................................................................18
Powering Up your new Orion Delta™ 3D Printer for the First Time............................................21
The LCD Control Panel..............................................................................................................22
Setting the Z height.................................................................................................................... 25
Leveling your new Orion Delta™ 3D Printer (The Easy Way!)...................................................27
A Simple Guide to Hot End Priming...........................................................................................32
Printing from the SD Card..........................................................................................................34
Changing Filament.....................................................................................................................37
Printing From Your Computer.....................................................................................................40
MatterControl Basics: Slicing.....................................................................................................48
MatterControl Basics: Loading and Printing an Object...............................................................61
Advanced MatterControl: Configuration.....................................................................................67
Advanced MatterControl: Settings – Print..................................................................................71
Advanced MatterControl: Settings – Filament............................................................................81
Advanced MatterControl: Settings – Printer...............................................................................85
Using the 3D View and Layer View............................................................................................88
A Strategy for Successful (and Great!) Prints.............................................................................96
3

Attention! If your Orion Delta™ has a serial number of 100169 or
less you may need to download the First Edition of the user
guide here:
http://www.geneb.org/orion/O RIONUserManual.pdf
The First Edition covers the older firmware that originally shipped
with the Orion Delta™ 3D printer.
Before downloading the First Edition please make sure that you
actually need it. Compare the LCD idle screen (shown on power-on
after the initialization sequence takes place) on your machine to the
first LCD screen photo shown in the “The LCD Control Panel” chapter.
If they match you've got the newer firmware and do not need the
second edition. You can follow this edition to reach the power-on
point in order to definitively identify which firmware your machine
was shipped with.
4

Un-Boxing your new Orion Delta™ 3D Printer
With your box standing in the upright position carefully cut the packing tape along the
top edges and across the taped seam in the box.
After you’ve cut the tape open the top of the box being careful of any packaging staples.
You’ll find the machine tucked inside and wrapped in a protective expanding foam shell.
Remove the machine and foam all as one by pulling straight up out of the box. Be careful not to
drop the machine once it’s out of the box and the foam is still around it.
5

Carefully cut and remove the stretch wrap film that is holding the power/USB cables
Orion control panel and accessories on the top plate as well as the stretch wrap holding your
filament to the table top and glass build surface.
6

In order to prevent damage during shipping the hot end on the Orion Delta™ is locked in
place over the bed by lowering the delta arms as low as they'll go on each tower. These arms
need to be raised in order for the Orion Delta™ to be used.
The process is very simple – just grasp the Cheapskate bearing for each arm and raise
them one at a time to the top of the Orion as shown in the photos below.
7

Once you've got the hot end in the operation position you'll need to remove the tape that
covers the end stop switches as shown below:
This tape helps prevent damage to the end stop switches when the packing film is being
removed.
8

Installing the LCD Control Panel USB Cable and SD Card
Note that the blue acrylic face plate on your Orion Delta™ will likely differ from the
photos shown here but the installation instructions are identical.
Gently pull the pair of flat ribbon cables out a bit from the Orion Delta™ and install them
as shown. The “first” cable is marked by an “X” and has a matching “X” on the back of the LCD
controller.
9

The USB cable only needs to be used if you wish to manually control the machine from
the software on your PC. You can print and do most calibration standalone without the USB
cable attached. We recommend hooking it up now so if you need to connect it to your
computer to make changes etc. the cable is already installed.
Pass the end of the USB cable up through the hole in the bottom left of the base and
plug it into the USB input on the electronics board.
10

Next replace the front panel by putting the bottom in first then tilting the top in. Please
be careful as it’s a tight fit. Re-install the two black thumb screws and tighten them finger tight.
Remove the two black thumb screws as shown and set them aside.
Now you'll install the LCD control panel into the Orion Delta™. Please take care as the
parts are a tight fit. Align the LCD mounting plate as shown below – there's small locking tabs
that fit into the slots shown.
11

Carefully raise the panel into place and fit it flush against the mating surface making
sure that not wires get pinched between the two panels – this is a tight fit so please be careful.
Insert the black thumbscrews you'd removed earlier in the mounting holes and tighten
them using only your fingers.
12

In the accessories box you should find a small SD card. Insert the SD card into the side
of the LCD enclosure as shown below.
13

Installing the Power Cord and Spool Holder
In order to reach the power supply you'll need to remove the panel that covers it.
Remove the two black thumb screws and set them and the panel aside. Get the power
cable from the box the accessories came in.
14

If you're outside the USA and live in a country where the A/C electrical power is 240V
you'll need to flip the switch on the power supply to its 240V setting. This switch is located right
below the power socket as shown. You can use a flat tip screwdriver to change its position.
The power cable is installed by routing it through the hole in the base of the Orion
Delta™ and plugging it into the socket on the power supply. It's a tight fit so take your time.
15

Now replace the door as shown replacing the black thumbscrews you'd removed
previously. As with the others tighten them only with your fingers.
The spool holder is made from two identical laser cut parts.
16

Holding the spool holder parts together install in the spool holder mount as shown.
Press down firmly once the hooks on the spool holder are fully inserted into the mounting
holes. This will lock the spool holder into place.
17

Loading Filament
Hang your filament spool on the hanger as shown – you want to make sure that the
filament is oriented such that the filament comes off the top of the spool not the bottom.
Route the filament through the first filament guide as shown and then route the filament
through the second filament guide that's located on the other side of the rear tower.
18

To load the filament through the EZStruder you'll need to depress the red lever with your
thumb (press up) and thread the filament in from the bottom as shown.
Continue to feed filament until the filament enters the hot end through the bowden tube.
19

Finally you'll want to remove the protective plastic sheet that covers the LCD.
20
Other manuals for orion delta
2
Table of contents
Other SeeMeCNC 3D Printer manuals
SeeMeCNC
SeeMeCNC Rostock Max v3 User manual

SeeMeCNC
SeeMeCNC Rostock MAX v2 User manual
SeeMeCNC
SeeMeCNC DropLit User manual
SeeMeCNC
SeeMeCNC Rostock Max v3 User manual
SeeMeCNC
SeeMeCNC rostock max v2.0 User manual

SeeMeCNC
SeeMeCNC Rostock Max User manual

SeeMeCNC
SeeMeCNC Delta User manual
SeeMeCNC
SeeMeCNC ERIS DELTA User manual
SeeMeCNC
SeeMeCNC orion delta User manual

SeeMeCNC
SeeMeCNC orion delta User manual

