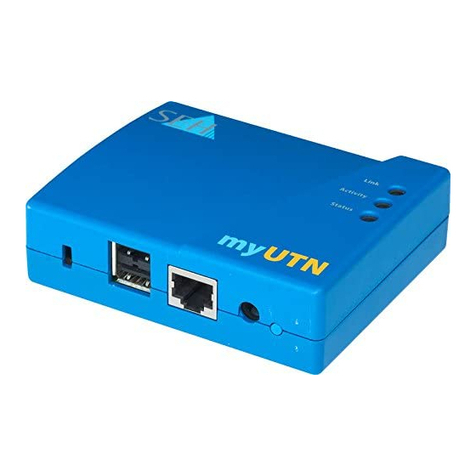
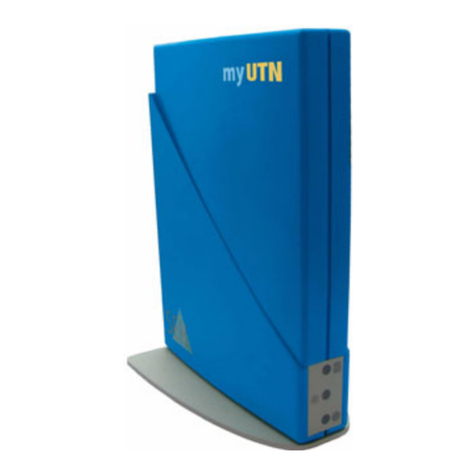
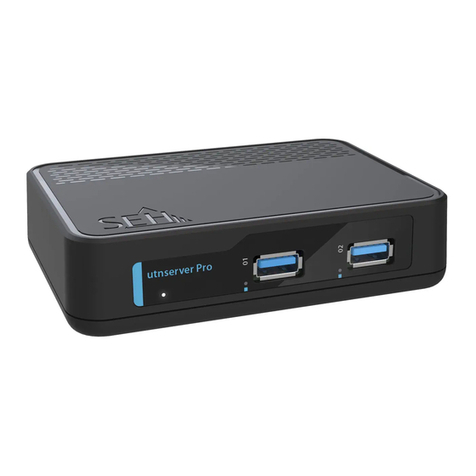
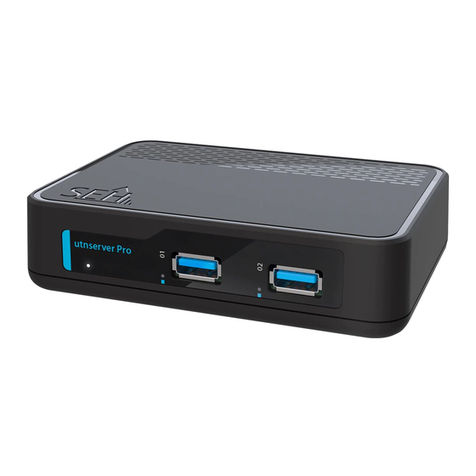
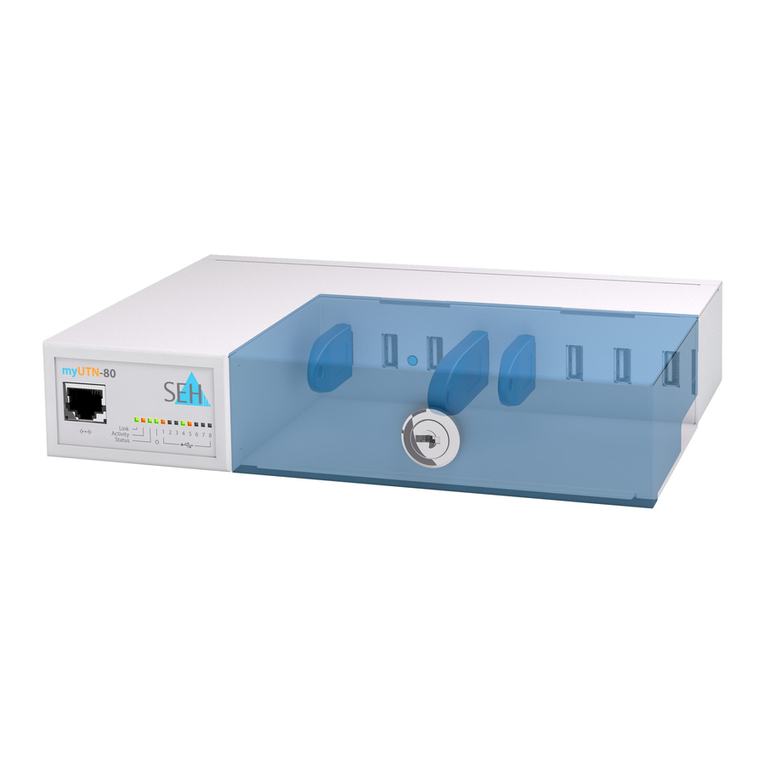
SEH myUTN-50 User manual

USB Device Server
myUTN-50 / myUTN-52 / myUTN-54
User Manual

Manufactured by:
SEH Computertechnik GmbH
Suedring 11
33647 Bielefeld
Germany
Phone: +49 (0)521 94226-29
Fax: +49 (0)521 94226-99
Support: +49 (0)521 94226-44
Email: [email protected]
Web: http://www.seh.de
Document:
Type: User Manual
Titel: USB Device Server
Version: 1.2
Online Links to important Internet Resources:
Free Guarantee Extension:
Support Contacts and Information:
Sales Contacts and Information:
http://www.seh-technology.com/guarantee
http://www.seh-technology.com/support
http://www.seh-technology.com/sales
InterCon is a registered trademark of SEH Computertechnik GmbH.
SEH Computertechnik GmbH has endeavoured to ensure that the information in all manuals is correct. If you detect any inaccuracies
please inform us at the address indicated below. SEH Computertechnik GmbH will not accept any liability for any error or omission. The
information in this manual is subject to change without notification.
All rights are reserved. Copying, other reproduction or translation without the prior written consent from SEH Computertechnik GmbH
is prohibited.
© 2009 SEH Computertechnik GmbH
All trademarks, registered trademarks, logos and product names are property of their respective owners.

myUTN User Manual 3
Table of Contents
1 General Information. . . . . . . . . . . . . . . . . . . . . . . . . . . . . . . . . . . . . . 5
1.1 myUTN . . . . . . . . . . . . . . . . . . . . . . . . . . . . . . . . . . . . . . . . . . . . . . . . . . . . . . . . . . . . 6
1.2 Documentation. . . . . . . . . . . . . . . . . . . . . . . . . . . . . . . . . . . . . . . . . . . . . . . . . . . . 7
1.3 Support and Service . . . . . . . . . . . . . . . . . . . . . . . . . . . . . . . . . . . . . . . . . . . . . . . 9
1.4 Your Safety . . . . . . . . . . . . . . . . . . . . . . . . . . . . . . . . . . . . . . . . . . . . . . . . . . . . . . . 10
1.5 First Steps . . . . . . . . . . . . . . . . . . . . . . . . . . . . . . . . . . . . . . . . . . . . . . . . . . . . . . . . 11
1.6 Saving the IP Address in the UTN Server . . . . . . . . . . . . . . . . . . . . . . . . . . . 12
2 Administration Methods . . . . . . . . . . . . . . . . . . . . . . . . . . . . . . . . 16
2.1 Administration via the myUTN Control Center . . . . . . . . . . . . . . . . . . . . . 17
2.2 Administration via the SEH UTN Manager. . . . . . . . . . . . . . . . . . . . . . . . . . 19
2.3 Administration via the InterCon-NetTool . . . . . . . . . . . . . . . . . . . . . . . . . . 26
2.4 Administration via the Status Button of the Device. . . . . . . . . . . . . . . . . 28
3 Network and Device Settings . . . . . . . . . . . . . . . . . . . . . . . . . . . . 29
3.1 How to Configure IPv4 Parameters . . . . . . . . . . . . . . . . . . . . . . . . . . . . . . . . 29
3.2 How to Configure IPv6 Parameters . . . . . . . . . . . . . . . . . . . . . . . . . . . . . . . . 32
3.3 How to Configure the DNS . . . . . . . . . . . . . . . . . . . . . . . . . . . . . . . . . . . . . . . . 34
3.4 How to Configure SNMP . . . . . . . . . . . . . . . . . . . . . . . . . . . . . . . . . . . . . . . . . . 35
3.5 How to Configure Bonjour . . . . . . . . . . . . . . . . . . . . . . . . . . . . . . . . . . . . . . . . 36
3.6 How to Configure WLAN (Only myUTN-54) . . . . . . . . . . . . . . . . . . . . . . . . 38
3.7 How to Determine a Description . . . . . . . . . . . . . . . . . . . . . . . . . . . . . . . . . . 42
3.8 How to Configure the Device Time . . . . . . . . . . . . . . . . . . . . . . . . . . . . . . . . 43
3.9 How to Configure the UTN (SSL) Port . . . . . . . . . . . . . . . . . . . . . . . . . . . . . . 44
4 Connected USB Devices . . . . . . . . . . . . . . . . . . . . . . . . . . . . . . . . . 45
4.1 How to Add USB Devices to the Selection List. . . . . . . . . . . . . . . . . . . . . . 46
4.2 How to Get Information about the USB Device. . . . . . . . . . . . . . . . . . . . . 47
4.3 How to Assign a Name to an USB Device. . . . . . . . . . . . . . . . . . . . . . . . . . . 48
4.4 How to Connect an USB Device to a Client . . . . . . . . . . . . . . . . . . . . . . . . . 49
4.5 How to Cut the Connection between the USB Device and the Client . 50
4.6 How to Configure Auto Connections . . . . . . . . . . . . . . . . . . . . . . . . . . . . . . 51
myUTN User Manual 4
5 Security . . . . . . . . . . . . . . . . . . . . . . . . . . . . . . . . . . . . . . . . . . . . . . . . 52
5.1 How to Control Access to the myUTN Control Center . . . . . . . . . . . . . . 52
5.2 How to Control Access to the UTN Server . . . . . . . . . . . . . . . . . . . . . . . . . . 54
5.3 How to Control Access to USB Devices. . . . . . . . . . . . . . . . . . . . . . . . . . . . . 56
5.4 How to Use Certificates Correctly . . . . . . . . . . . . . . . . . . . . . . . . . . . . . . . . . . 58
5.5 How to Use Authentication Methods . . . . . . . . . . . . . . . . . . . . . . . . . . . . . . 65
5.6 How to Encrypt Data Transfer . . . . . . . . . . . . . . . . . . . . . . . . . . . . . . . . . . . . . 72
6 Maintenance . . . . . . . . . . . . . . . . . . . . . . . . . . . . . . . . . . . . . . . . . . . 74
6.1 How to Secure UTN Parameters (Backup) . . . . . . . . . . . . . . . . . . . . . . . . . . 74
6.2 How to Reset the UTN Parameters to their Default Values . . . . . . . . . . 76
6.3 How to Perform an Update. . . . . . . . . . . . . . . . . . . . . . . . . . . . . . . . . . . . . . . . 79
6.4 How to Restart the UTN Server . . . . . . . . . . . . . . . . . . . . . . . . . . . . . . . . . . . . 80
7 Appendix. . . . . . . . . . . . . . . . . . . . . . . . . . . . . . . . . . . . . . . . . . . . . . . 81
7.1 Glossary . . . . . . . . . . . . . . . . . . . . . . . . . . . . . . . . . . . . . . . . . . . . . . . . . . . . . . . . . . 82
7.2 Parameter List . . . . . . . . . . . . . . . . . . . . . . . . . . . . . . . . . . . . . . . . . . . . . . . . . . . . 85
7.3 LED Display. . . . . . . . . . . . . . . . . . . . . . . . . . . . . . . . . . . . . . . . . . . . . . . . . . . . . . . 95
7.4 Troubleshooting. . . . . . . . . . . . . . . . . . . . . . . . . . . . . . . . . . . . . . . . . . . . . . . . . . 96
7.5 List of Figures. . . . . . . . . . . . . . . . . . . . . . . . . . . . . . . . . . . . . . . . . . . . . . . . . . . .100
7.6 Index . . . . . . . . . . . . . . . . . . . . . . . . . . . . . . . . . . . . . . . . . . . . . . . . . . . . . . . . . . . .101

General Information
myUTN User Manual 5
1 General Information
What information do
you need?
• ’myUTN’ Ö6
• ’Documentation’ Ö7
• ’Support and Service’ Ö9
• ’Your Safety’ Ö10
• ’First Steps’ Ö11
• ’Saving the IP Address in the UTN Server’ Ö12
This chapter contains information concerning the
device and the documentation as well as notes about
your safety. You will learn how to benefit from your UTN
server and how to operate the device properly.

General Information
myUTN User Manual 6
1.1 myUTN
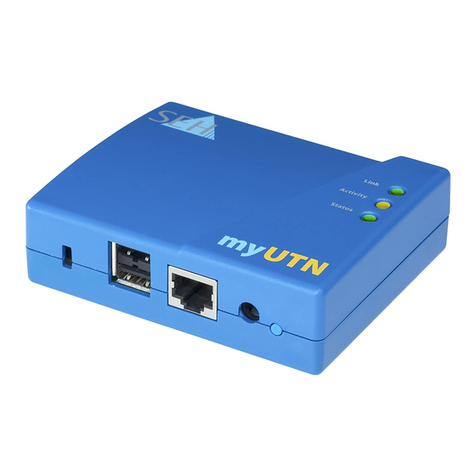
Purpose myUTN (myUSB to Network) allows you to access
non-network-ready USB devices (e.g. hard disks, printers etc.) in the
network. The USB devices will be connected to the USB port of the
UTN server. The software tool ’SEH UTN Manager’ regulates the
access of the USB devices.
The software is installed on all clients that are meant to access a
USB device in the network. The SEH UTN Manager shows the
availability of all USB devices that exist in the network and
establishes a connection between the client and the USB device.
System
Requirements
myUTN has been designed for the use in TCP/IP-based networks. The
SEH UTN Manager has been designed for use in Windows systems
(XP and later).
Procedure and Basic
Functions
After the SEH UTN Manager is started, the network will be scanned
for connected UTN servers. The network range to be scanned is freely
definable. All UTN servers found will be shown in the network list
together with the connected devices. The preferred devices will be
selected and added to the selection list. The devices in the selection
list can be connected to the client.
Fig. 1: UTN Server in the Network

General Information
myUTN User Manual 7
1.2 Documentation
Structure of the
Documentation
The myUTN documentation consists of the following documents:
Document Features This documentation has been designed as an electronic document
for screen use. Many programs (e.g. Adobe Reader) offer a bookmark
navigation feature that allows you to view the entire document
structure.
This document contains hyperlinks to the associated information
units. If you want to print this documentation, we recommend using
the printer setting ’Duplex’ or ’Booklet’.
Terminology Used in
this Document
The explanation of technical terms used in this document is
summarized in a glossary. The glossary provides a quick overview of
technical matters and background information; see: Ö82.
User Manual
Detailed description of the myUTN configuration and
administration.
Quick Installation Guide
Information about security, hardware installation, and the
initial operation procedure.
Online Help (myUTN Control Center)
The Online Help contains detailed information about how
to use the ’myUTN Control Center’.
Online Help (SEH UTN Manager)
The Online Help contains detailed information about how
to use the software tool ’SEH UTN Manager’.
PDF
Printed
PDF
HTML
HTML

General Information
myUTN User Manual 8
Symbols and
Conventions
A variety of symbols are used within this document. Their meaning is
listed in the following table:
Table 1: Conventions within the documentation
Symbol / Convention Description
Warning
A warning contains important information that
must be heeded. Non-observance may lead
to malfunctions.
Note
A notice contains information that should be
heeded.
Proceed as follows:
1. Mark ...
The ’hand’ symbol marks the beginning of
instructions. Individual instructions are set in
italics.
ªConfirmation The arrow confirms the consequence of an
action.
;Requirements Hooks mark requirements that must be met
before you can begin the action.
Option A square marks procedures and options that
you can choose.
• Eye-catchers mark lists.
This sign indicates the summary of a chapter.
Ö The arrow marks a reference to a page within
this document. In the PDF file, you can jump
to this page by clicking the symbol.
Bold Established terms (of buttons or menu items,
for example) are set in bold.
Courier Command lines are set in Courier font.
’Proper names’ Proper names are put in inverted commas

General Information
myUTN User Manual 9
1.3 Support and Service
Support If questions remain, please contact our hotline. SEH
Computertechnik offers extensive support and user training sessions.
Current Services The following services can be found on the website www.myutn.net.
• current firmware
• current tools
• current documentation
• current product information
• product data sheet
• FAQ
• and much more
Monday through Thursday
Friday
from 8:00 a.m. to 5:45 p.m. and
from 8:00 a.m. to 4:15 p.m. (CET)
℡+49 (0)521 94226-44

General Information
myUTN User Manual 10
1.4 Your Safety
Read and observe all safety regulations and warnings found in the
documentation, on the device and on the packaging. This will avoid
potential misuse and prevent damages to people and devices.
SEH Computertechnik GmbH will not accept any liability for
personal injuries, property damages and consequential damages
resulting from the non-observance of the mentioned safety
regulations and warnings. Non-observance will result in the
warranty claims becoming void.
Intended Use
The UTN server is used in TCP/IP networks. myUTN allows you to
access non-network-ready USB devices in the network. The UTN
server has been designed for use in office environments.
Improper Use
All uses of the device that do not comply with the myUTN
functionalities described in the documentation are regarded as
improper uses. It is not allowed to make modifications to the
hardware and software or to try to repair the device.
Safety Regulations Before starting the initial operation procedure of the UTN server,
please note the safety regulations in the Quick Installation Guide.
The Hardware Installation Guide is enclosed in the packaging.
Warnings Read and observe all warnings mentioned in this document.
Warnings are found before any instructions known to be dangerous.
They are presented as follows:
Warning!

General Information
myUTN User Manual 11
1.5 First Steps
This section provides all the information that you need for a fast
operational readiness.
Proceed as follows:
1. Read and observe the security regulations in order to avoid
damages to people and devices; see: Ö10.
2. Carry out the hardware installation. The hardware installation
comprises the connection of the UTN server to the network, the
USB device and the power supply; see: ’Quick Installation Guide’.
3. Make sure that an IP address is stored in the UTN server; see:
Ö12.
4. Install and start the software tool ’SEH UTN Manager’ on your
Windows client; see: Ö19.
5. Add the devices that you want to use to the selection list; see:
Ö46.
6. Activate the connection between the client and the USB device;
see: Ö49.
ªThe connection will be established. The USB device can be used
by the client.

General Information
myUTN User Manual 12
1.6 Saving the IP Address in the UTN Server
Why IP Addresses? An IP address is used to address network devices in an IP network.
TCP/IP network protocols require the storing of the IP address in the
UTN server so that the device can be addressed within the network.
How Does the UTN
Server Obtain IP
Addresses?
UTN servers are shipped without an IP address. The UTN server is able
to assign itself an IP address during the initial installation. Boot
protocols are used to assign an IP address automatically to the UTN
server. Upon delivery, the boot protocols ’BOOTP’ and ’DHCP’ are
enabled.
Once the UTN server is connected to the network, it checks whether
an IP address can be obtained from the boot protocols BOOTP or
DHCP. If this is not the case, the UTN server assigns itself an IP
address from the address range (169.254.0.0/16) which is reserved
for ZeroConf.
Once the UTN server has automatically received an IP address via a
boot protocol, you can save a freely definable IP address in the UTN
server. The UTN server’s assigned IP addresses can be determined and
changed using the software tools, ’SEH UTN Manager’ and
’InterCon-NetTool’; see: Ö16.
Different methods for the assignment of the IP address are described
in the following.
Automatic Methods
of IP Address
Assignments
• ’ZeroConf’ Ö13
• ’BOOTP’ Ö13
• ’DHCP’ Ö13
• ’Auto-Configuration (IPv6 Standard)’ Ö14
Manual Methods
of IP Address
Assignments
• ’InterCon-NetTool’ Ö14
• ’SEH UTN Manager’ Ö14
• ’myUTN Control Center’ Ö15
• ’ARP/PING’ Ö15

General Information
myUTN User Manual 13
ZeroConf
If no IP address can be assigned via boot protocols, the UTN server
assigns itself an IP address via ZeroConf. For this purpose, the UTN
server picks an IP address at random from the address range
(169.254.0.0/16) which is reserved for ZeroConf.
The Domain Name Service via Bonjour can be used to resolve the IP
address.; see: ’How to Configure Bonjour’ Ö36.
BOOTP
The UTN server supports BOOTP, which means that the IP address of
the UTN server can be assigned via a BOOTP server.
Requirements ;The 'BOOTP' parameter has been activated, see: Ö29.
If the UTN server is connected, it asks the BOOTP host for the IP
address and the host name. The BOOTP host answers and sends a
data packet containing the IP address. The IP address is saved in the
UTN server.
DHCP
The UTN server supports DHCP, which means that the IP address of
the UTN server can be assigned dynamically via a DHCP server.
Requirements ;The 'DHCP' parameter has been activated, see: Ö29.
After the hardware installation, the
UTN server
asks a DHCP server for
an IP address by means of a broadcast query. The DHCP server
identifies the
UTN server
on the basis of its hardware address and
sends a data packet to the
UTN server
.
This data packet contains, among others, the IP address of the
UTN
server
, the default gateway, and the IP address of the DNS server. The
data is saved in the
UTN server
.

General Information
myUTN User Manual 14
Auto-Configuration (IPv6 Standard)
The UTN server can have an IPv4 address and several IPv6 addresses
at the same time. The IPv6 standard is used to automatically assign
IP addresses in IPv6 networks. When connected to an IPv6 network,
the UTN server will automatically obtain an additional link-local IP
address from the IPv6 address range.
The UTN server uses the link-local IP address to search for a router.
The UTN server sends so-called 'router solicitations' (RS) to the
special multicast address FF02::2. The available router will then
return a router advertisement (RA) containing the required
information.
With a prefix from the range of the global unicast addresses, the
UTN server can compose its own address. It simply replaces the first
64 bits (prefix FE80::) with the prefix that was sent in the RA.
Requirements ;The 'IPv6' parameter has been activated.
;The 'Automatic configuration' parameter has been activated.
To configure the assignment of IPv6 addresses; see: Ö32.
InterCon-NetTool
The IP Wizard of the InterCon-NetTool helps you to configure the
TCP/IP parameters, e.g. the IP address. You can manually enter the
desired IPv4 address and save it in the UTN server using the IP
Wizard. To configure an IPv4 address via the InterCon-NetTool; see:
Ö31.
SEH UTN Manager
You can manually enter the
desired IPv4 address and save it in the
UTN server using the SEH UTN Manager.
To configure an IPv4 address
via the SEH UTN Manager; see:
Ö
30.

General Information
myUTN User Manual 15
myUTN Control Center
You can manually enter the desired
IP address and save it in the UTN
server using the myUTN Control Center.
• To configure an IPv4 address via the myUTN Control Center; see:
Ö30.
• To configure an IPv6 address via the myUTN Control Center; see:
Ö32.
ARP/PING
The assignment of the IP address to the hardware address can be
done via the ARP table. The ARP table is an internal system file in
which the assignment is temporarily saved (about 15 min). This table
is administered by the ARP protocol.
By means of the 'arp' and 'ping' commands, you can save the IP address
in the UTN server. If the UTN server already has an IP address, the 'arp'
and 'ping' commands cannot be used to save a new IP address.
However, an IP address from the address range (169.254.0.0/16)
which is reserved for ZeroConf can be overwritten by means of the
'arp' and 'ping' commands.
The 'arp' command is used for editing the ARP table. The 'ping'
command transfers a data packet containing the IP address to the
hardware address of the UTN server. If the data packet has been
successfully sent and received, the UTN server permanently saves the
IP address.
The implementation of the 'arp' and 'ping' command depends on the
system used. Read the documentation for your operating system.
Requirements ;The 'ARP/PING' parameter has been activated, see: Ö29.
Edit the ARP table:
Syntax: arp -s <IP address><hardware address>
Example: arp -s 192.168.0.123 00-c0-eb-00-01-ff
Assign a new IP address to the UTN server:
Syntax: ping <IP address>
Example: ping 192.168.0.123

Administration Methods
myUTN User Manual 16
2 Administration Methods
You will get information on when to use these methods and which
functions these methods support.
What information do
you need?
• ’Administration via the myUTN Control Center’ Ö17
• ’Administration via the SEH UTN Manager’ Ö19
• ’Administration via the InterCon-NetTool’ Ö26
• ’Administration via the Status Button of the Device’ Ö28
You can administer and configure the UTN server in a
number of ways. The following chapter gives you an
overview of the various administration options.

Administration Methods
myUTN User Manual 17
2.1 Administration via the myUTN Control Center
Which Functions Are
Supported?
The myUTN Control Center comprises all features for the
administration of the UTN server.
The myUTN Control Center is stored in the UTN server and can be
displayed by means of a browser software (Internet Explorer,
Netscape, Firefox, Safari).
Requirements ;The UTN server is connected to the network and the mains
voltage.
;The UTN server has a valid IP address.
Starting the myUTN
Control Center
Proceed as follows:
1. Open your browser.
2. Enter the IP address of the UTN server as the URL.
ªThe myUTN Control Center - START page appears.
If the myUTN Control Center is not displayed, check the proxy
settings of your browser.
The myUTN Control Center can also be started via the software tools
’SEH UTN Manager’ and ’InterCon-NetTool’.
• To start the myUTN Control Center via the InterCon-NetTool,
mark the UTN server in the device list and select Actions –
Launch Browser from the menu bar.
• To start the myUTN Control Center via the SEH UTN Manager,
mark the UTN server in the selection list and select UTN Server –
Configure from the menu bar.

Administration Methods
myUTN User Manual 18
Fig. 2: myUTN Control Center - START
Structure of the
myUTN Control
Center
The available menu items are located in the navigation bar (top).
After selecting a menu item (simple mouse click), the available
submenu items are displayed at the left. After selecting a submenu
item, the corresponding page with its content is displayed (at the
right).
You can set the language via the menu item START. Simply select
the relevant flag.
The manufacturer’s contact details and additional information
regarding the product are displayed under Product &Company. The
Sitemap provides an overview of and direct access to all pages of
the myUTN Control Center.
All other menu items refer to the UTN server’s configuration. They
are described in the Online Help of the myUTN Control Center. To
start the Online Help, click the icon.

Administration Methods
myUTN User Manual 19
2.2 Administration via the SEH UTN Manager
Area of Application The software tool 'SEH UTN Manager' regulates the access of the
USB devices. The SEH UTN Manager shows the availability of all UTN
servers and USB devices that exist in the network and establishes a
connection between the client and the USB device. The software is
installed on all clients that are meant to access a USB device in the
network.
Basic Functions After the SEH UTN Manager is started, the network will be scanned
for connected UTN servers. The network range to be scanned is
freely definable.
After the network scan all UTN servers found – together with the
connected devices – will be shown in the 'network list'. The preferred
devices will be selected and added to the 'selection list'. The devices
in the selection list can be configured or connected to the client.
Automatisms The SEH UTN Manager supports, among other things, the following
automatisms:
• Autostart: Upon booting the user’s computer the SEH UTN
Manager is activated.
• Auto-Connect: A connection between the USB device and the
client will be automatically created after the program start of
the SEH UTN Manager.
• Application: A connection between the USB device and the
client will be automatically created after the program start of a
freely definable application.
• Print-on-Demand: A connection between the USB device
(printer or MFP) and the client will be automatically created as
soon as a print job is received. After completion of the print job,
the connection will be automatically disabled.

Administration Methods
myUTN User Manual 20
Program Structure After the program start you will see the main dialog with the
following elements. The dialog may vary, depending on which
elements you have chosen to be shown or hidden.
Fig. 3: SEH UTN Manager - Main Dialog
Which Functions Are
Supported?
The SEH UTN Manager offers the following features:
• ’Adding USB Devices to the Selection List’ Ö46
• ’Connecting the USB Device to the Client’ Ö49
• ’Disconnecting USB Device and Client’ Ö50
• ’Configuring an Automatic Device Connection’ Ö51
• ’Assigning an IPv4 Address to UTN Servers’ Ö30
• ’Starting the myUTN Control Center’ Ö17
• ’Controlling Access to USB Devices’ Ö56
Detailed information on how to use the SEH UTN Manager can be
found in the Online Help. To start the Online Help, select Help –
Online Help from the menu bar.
Buttons for editing the
selection list
Menu bar
Buttons for managing the USB
device connection
Selection list
Display area fort he device
properties
Other manuals for myUTN-50
3
This manual suits for next models
2
Table of contents
Other SEH Server manuals

SEH
SEH Dongleserver myUTN-800 User manual

SEH
SEH mySND-120 User manual

SEH
SEH myUTN-50 User manual

SEH
SEH myUTN-50a User manual

SEH
SEH myUTN-250 User manual

SEH
SEH Mac OS 8 User manual

SEH
SEH myUTN-50a User manual

SEH
SEH myUTN-52 User manual

SEH
SEH Dongleserver myUTN-800 User manual

SEH
SEH myUTN-50 User manual
Popular Server manuals by other brands

ELPRO
ELPRO 450U-E installation guide

Sun Microsystems
Sun Microsystems Ultra Enterprise 450 Product notes

Dell
Dell PowerEdge T420 Technical guide

Huawei
Huawei FusionServer Pro 5885H V5 Technical white paper

Avaya
Avaya 1000M Installation and commissioning guide

Lenovo
Lenovo ThinkServer RD530 Informações de Garantia e Suporte do