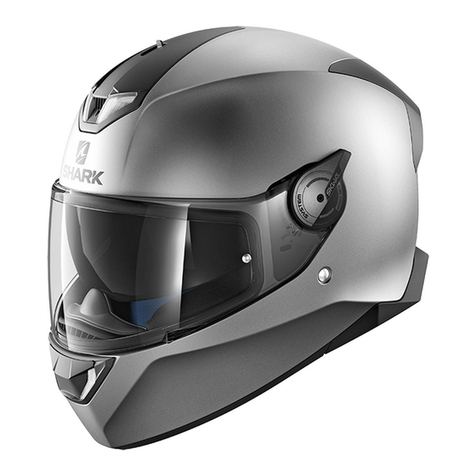
Shark SKWAL User manual

1
SKWAL
Skwal - V1a - 17112014
OWNER’S MANUAL - MANUEL D’UTILISATION - BENUTZERHANDBUCH - LIBRETTO ISTRUZIONI
MANUAL DE UTILIZADOR - MANUAL DEL USUARIO
WARNING
Carefully read, understand and follow the instructions
provided in this manual, and keep it in a safe place for future
reference. If you have any doubt whatsoever regarding the use
or care of your helmet, please see your retailer for assistance or
advice. Failure to follow the warnings and instructions provided
herein can result in the failure of the helmet to protect you in an
accident, resulting in a head injury or death.
ATTENTION
Veuillez lire avec attention, comprendre et suivre les
instructions fournies dans ce manuel, et veuillez le garder
en lieu sûr pour vous en servir ultérieurement. En cas de
doute concernant l’utilisation ou l’entretien du casque, veuillez
demander l’aide ou l’avis de votre revendeur. Tout non respect
des précautions et recommandations fournies dans ce manuel
peut entraîner une défaillance dans l’efficacité du casque à vous
protéger en cas d’accident, provoquant une blessure grâve ou
la mort.
WARNUNG
Lesen Sie diese Anleitung aufmerksam durch und bewahren
Sie sie sorgfältig auf. Bei Fragen zur Verwendung oder
Pflege Ihres Helms wenden Sie sich an Ihren Einzelhändler.
Falls Sie die Warnungen und Hinweise dieser Anleitung nicht
befolgen, kann das die Schutzwirkung des Helms im Falle eines
Unfalls beeinträchtigen, was zu einer schweren oder tödlichen
Kopfverletzung führen kann.
ATTENZIONE
Leggere con attenzione, capire e seguire le istruzioni
fornite in questo libretto e conservarlo in luogo sicuro per
potersene servire ulteriormente. In caso di dubbio riguardo
l’utilizzo o la manutenzione del casco, chiedere l’aiuto o l’avviso
del proprio rivenditore. Il non rispetto delle precauzioni e
raccomandazioni fornite in questo libretto può provocare
una mancanza dell’efficacità del casco a proteggere in caso
d’incidente, provocando una ferita grave o la morte.
ATENCIÓN
Lea atentamente, siga las instrucciones de este manual y
guárdelo en lugar seguro para futuras referencias. Si tuviera
cualquier duda sobre la utilización o cuidado de su casco por
favor diríjase a su establecimiento habitual. No seguir los avisos
y consejos de utilización presentes en este manuscrito podría
disminuir la protección para la cual este casco esta diseñado,
pudiendo causar traumatismos craneales o incluso la muerte en
caso de accidente.

2
CONTENTS ANATOMY OF THE HELMET
• Anatomy of the helmets ..........................................................3
• A helmet in your size ....................................................................4-5
• Chin strap ....................................................................................6-7
• Visor .............................................................................................. 8
• Auto seal.........................................................................................9
• The sun shield...............................................................................10
• Textile parts..............................................................................11-12
• Cleaning........................................................................................13
• Nose mask / chin cover............................................................14-15
• Easy Fit. ........................................................................................14
• LED...............................................................................................15
• Ventilations....................................................................................16
• 5 year guarantee...........................................................................17
• Legally required information..........................................................20
Thank you for purchasing this SHARK SKWAL
helmet.
We are certain that you will be completely sa-
tised with this helmet.
Meeting the most rigorous international safety
standards, however this helmet cannot protect
the user in every circumstance, it is so recom-
mended to drive carefully.
Your helmet has been designed for a motorcy-
cle use only and not for any other purpose.
This SHARK SKWAL helmet is approved and
meets the ECE R 22/05 standards, so it meets the
demands imposed in every country recognizing
this regulation on its own territory.
WARNING! The United-States have a spe-
cic regulation, the helmets ECE approved
only cannot be used in these territories without
the complementary DOT FMVSS 218 approval.
WARNING! For French trafc, the Highway
Code requires safety reectors (supplied
separately in a packet) to be tted in accordance
with the enclosed plan.
WARNING! According to the version, your
helmet is equipped with a LED system that
you can switch off.
WARNING! Check if the national or local le-
gislation in power in your country does not
limit the use of LED on public highway.

3
6
2
7
3
8
9
11
10
10
10
12
13
14
5
1
4
CONTENTS ANATOMY OF THE HELMET
• Anatomy of the helmets ..........................................................3
• A helmet in your size ....................................................................4-5
• Chin strap ....................................................................................6-7
• Visor .............................................................................................. 8
• Auto seal.........................................................................................9
• The sun shield...............................................................................10
• Textile parts..............................................................................11-12
• Cleaning........................................................................................13
• Nose mask / chin cover............................................................14-15
• Easy Fit. ........................................................................................14
• LED...............................................................................................15
• Ventilations....................................................................................16
• 5 year guarantee...........................................................................17
• Legally required information..........................................................20
1) Visor
2) Sun shield
3) Sun shield mechanism handle
4) Upper ventilation
5) Lower ventilation
6) Venturi exhaust
7) Precise Lock” chin strap buckle
8) Anti-fog mask (optional equipment)
9) Chin cover(optional equipment)
10) LED
7 - Double-D ring chinstrap buckle
WARNING! The United-States have a spe-
cic regulation, the helmets ECE approved
only cannot be used in these territories without
the complementary DOT FMVSS 218 approval.
WARNING! For French trafc, the Highway
Code requires safety reectors (supplied
separately in a packet) to be tted in accordance
with the enclosed plan.
WARNING! According to the version, your
helmet is equipped with a LED system that
you can switch off.
WARNING! Check if the national or local le-
gislation in power in your country does not
limit the use of LED on public highway.
7 - “Precise Lock“ chinstrap buckle
11) LED switch
(optional equipment)
12) Base seal
13) Visor seal
14) Easy fit

4
B
WARNING! No helmet can protect
the wearer from all foreseeable
high or low speed impacts. However, for
maximum protection, the helmet must be
of proper t and the chin strap must be
securely fastened as described in this
manual. Failure to have a proper t and
to securely fasten the chin strap is dange-
rous, as the helmet could come off in an
accident, resulting in severe head injury
or death.
CHOOSE YOUR SIZE
Each helmet is designed to corres-
pond to a head measurement (from for
XS up to XL). To measure your head size,
wrap a tape measure horizontally around
your head at a height of approximately
one inch (2.5cm) above your eyebrows.
If your head measurement falls between
two sizes, rst try on the smaller helmet.
However, because of different head
shapes, this size reference can only be
considered as a guide. For maximum pro-
tection, it is necessary to check that the
helmet is well suited for the shape of your
head. When trying a brand new helmet,
make sure that your head is pushed into
the helmet as far as possible, with the
front part just above your eyebrows, and
with the chin strap securely fastened as
described on the next page.
1. The helmet should feel very snug all
around your head and fairly tight on the
cheek pads. If not, it is too big for you;
select a smaller size.
See gure A.
2. With the chin strap properly fastened
(see instructions), be sure that the helmet
cannot be moved excessively from side to
side or up and down.
You should feel the skin of your head and
face being pulled as you move the helmet.
If not, the helmet is too big for you; select
A HELMET IN YOUR SIZE
a smaller size. See gure B.
3. Grasp the back of the helmet at the
base and attempt to pull the helmet
off your head. Next, push the helmet
upwards from beneath the chin
guard. You should push and pull with
relatively signicant force. If the helmet
starts to come off, the helmet is too big
for you; select a smaller size.
4. Bend your head forward as far as pos-
sible. The chin guard must not touch your
chest. See gure C.
5. Bend your head backwards as far as
possible. The helmet shell must not touch
your back. See gure D.
Never wrap your hair inside the
helmet, or place anything in or on your
hair inside the helmet. Never insert
padding to modify the position of the
helmet on the head.
If you have any questions about properly
sizing your helmet, see your retailer for
A HELMET IN YOUR SIZE

5
CD
XS 53/54
S55/56
M57/58
L59/60
XL 61
shapes, this size reference can only be
considered as a guide. For maximum pro-
tection, it is necessary to check that the
helmet is well suited for the shape of your
head. When trying a brand new helmet,
make sure that your head is pushed into
the helmet as far as possible, with the
front part just above your eyebrows, and
with the chin strap securely fastened as
described on the next page.
1. The helmet should feel very snug all
around your head and fairly tight on the
cheek pads. If not, it is too big for you;
select a smaller size.
See gure A.
2. With the chin strap properly fastened
(see instructions), be sure that the helmet
cannot be moved excessively from side to
side or up and down.
You should feel the skin of your head and
face being pulled as you move the helmet.
If not, the helmet is too big for you; select
A HELMET IN YOUR SIZE
a smaller size. See gure B.
3. Grasp the back of the helmet at the
base and attempt to pull the helmet
off your head. Next, push the helmet
upwards from beneath the chin
guard. You should push and pull with
relatively signicant force. If the helmet
starts to come off, the helmet is too big
for you; select a smaller size.
4. Bend your head forward as far as pos-
sible. The chin guard must not touch your
chest. See gure C.
5. Bend your head backwards as far as
possible. The helmet shell must not touch
your back. See gure D.
Never wrap your hair inside the
helmet, or place anything in or on your
hair inside the helmet. Never insert
padding to modify the position of the
helmet on the head.
If you have any questions about properly
sizing your helmet, see your retailer for
assistance.
Each of these tests must be repeated
throughout the life of the helmet, as the
comfort padding may wear or change
over time. If, during the life of your helmet,
your helmet does not maintain the correct
t, you must replace the helmet.
WARNING! Never lend your helmet
to others without insuring a proper
t in accordance with these instructions.
WARNING! If you cannot obtain
a proper t in accordance with
these instructions, DO NOT USE THE
HELMET. Select a different helmet size or
model.
Sizing (cm)
A HELMET IN YOUR SIZE
6
ABC
DEF
CHIN STRAP
Depending on the various versions and the
country concerned, your SHARK SKWAL helmet
is equipped with a chin strap with a “Precise
Lock” rapid buckle with a snap lock or one with a
double-D ring. Proper use of the chin strap is cri-
tical for proper performance of the helmet. Never
alter your chin strap in any way. For example, never
cut it or add holes, or apply buttons, studs or other
items to your chin strap. During the life of your
helmet, be sure that the chin strap never suffers
any type of abrasion or cut, and that its total length
does not change. If it does, replace your helmet.
PRECISE LOCK
The “Precise Lock” snap lock system gives you
precise and accurate adjustment because of the
considerable length of its notched section.
However, it is essential on purchase to adapt the
length of the chin strap to your measurements.
Adjust the length of the strap using the adjusting
buckle (Figs. A, B, C and D).
Choose your SHARK SKWAL helmet and attach
the holding system. When the “Precise Lock” is
adjusted to the medium position, the chin strap
must be correctly tensioned under the chin to
hold the helmet firmly without causing you any
discomfort or pain.
To fasten the chin strap, all you have to do is to
thread the tongue into its place on the buckle until
tension is perfect (Fig. E). The tongue connects and
is automatically blocked.
To release the chin strap, you have to pull on the
lever (Fig. F) and remove the tongue from the buc-
kle. Although the notched tongue enables you to
change the adjustment precisely on each use, it is
important to check frequently that the adjustment
of the strap length is correct.
WARNING! Never ride with the chin strap loose
or insufficiently tightened. Even though the
interior padding gives you the impression of being
held, your helmet risks coming off in a fall.
Never apply lubricating or acid products or grease or
solvents to the chin strap buckle parts. DOUBLE-D RING
A - Slide the long part of the chin strap through
the two D rings, positioning the comfort pad correctly
between the chin strap and your neck.
B - Then bring the end of the chin strap
back through the lower of the two D rings
CHIN STRAP

7
B
C
D
A
Choose your SHARK SKWAL helmet and attach
the holding system. When the “Precise Lock” is
adjusted to the medium position, the chin strap
must be correctly tensioned under the chin to
hold the helmet firmly without causing you any
discomfort or pain.
To fasten the chin strap, all you have to do is to
thread the tongue into its place on the buckle until
tension is perfect (Fig. E). The tongue connects and
is automatically blocked.
To release the chin strap, you have to pull on the
lever (Fig. F) and remove the tongue from the buc-
kle. Although the notched tongue enables you to
change the adjustment precisely on each use, it is
important to check frequently that the adjustment
of the strap length is correct.
WARNING! Never ride with the chin strap loose
or insufficiently tightened. Even though the
interior padding gives you the impression of being
held, your helmet risks coming off in a fall.
Never apply lubricating or acid products or grease or
solvents to the chin strap buckle parts.
WARNING! Never use the strap loop to
secure your helmet to your head. In order to
be properly fastened, you must thread the strap
through the double-D-rings. Failure to properly
use the double-D-rings will cause your helmet
to become dislodged during an accident, leaving
your head completely unprotected and resulting
in severe head injury or death. Try to pull down
on the chin strap with your ngers. If the strap
loosens in any way, you have not properly tightened
the chin strap with the double-D rings.
Repeat the steps above. Never ride with the chin strap
loose, improperly fastened or improperly positioned.
Even though the comfort padding gives you the
impression that the helmet is securely held in place,
it will come off in an accident, leaving your head
completely unprotected.
If you have any doubt concerning the fastening
system of your helmet, do not use the helmet. Contact
your dealer for assistance.
DOUBLE-D RING
A - Slide the long part of the chin strap through
the two D rings, positioning the comfort pad correctly
between the chin strap and your neck.
B - Then bring the end of the chin strap
back through the lower of the two D rings
as shown in the diagram.
C - Pull the strap until you feel resistance from
the strap and it is held in place under your chin
without being too tight, so that you have no
difficulty in breathing.
D - Slide the free end of the chin strap into the
plastic strap loop on the comfort padding, in order
to prevent the strap from uttering in the wind.
CHIN STRAP

8
A B
QRVS System
VISOR
AUTO SEAL
Your helmet SKWAL has a patented system
SHARK “AUTOSEAL”. This system ensures a
perfect sealing of the visor by clinging the visor
on the seal, by spring effect backward the visor
when it is in lower position.
SUN VISOR.
SHARK SKWAL is equipped with a sun visor
with an integrated external control.
This ergonomic command allows to ope-
rate the visor from the outside with ease and
whatever the type of gloves worn, offering you
a fast and full protection security. The R&D
department has developed a mechanism
for obtaining a progressive movement of the
control. The sun visor has a 380 UV protection
to lter out 100% of UVA and UVB.
WARNING! This sun visor cannot be used
when the light is strong and you ride in an
area where you may have a sudden change in
visibility (ex tunnel). In all cases where visibi-
lity is reduced, the beginning or end of the day,
night, rain or fog, the sun visor must be set
high to not to degrade your vision.
Dismantling.
Raise visor in the upper position (A).
Exerting a traction on the side of the
visor (B).
Repeat the operation on the other side.
This visor has a system of easy disassembly
without tools, allowing you to clean it easily.
Assembly.
Place the visor face to the helmet.
Place the visor hooks in the side anges (C).
Exerting a homogeneous pression on both
sides (D).
WARNING! If you are not sure that you properly
replaced the visor, do not use the helmet. The visor
could suddenly and without warning become detached
from the helmet while riding, causing you to lose control
of your motorcycle, resulting in an accident, personal
injury, or death.
Contact your retailer for any assistance or advice. Do not
ride with an open visor and do not try to open or adjust the
visor while riding. The visor could suddenly and without
warning become detached from the helmet, leaving your
eyes and face unprotected. In addition, your head could
be pulled to the side, causing you to lose control of your
motorcycle. These events could cause you to lose control
of your motorcycle, resulting in an accident, personal
injury or death.
WARNING! Tinted or dark visors should never be
used at night or under poor visibility conditions
as they reduce your ability to see. Never ride with
a fogged visor.
WARNING! If your visor no longer provides you
with clear visibility after a period of service, you
must immediately replace it. Never ride if your visor is
scratched, dirty, foggy or with your vision obscured in any
way. Always ride with perfect visibility.

9
C D
AUTO SEAL - SUN VISOR
AUTO SEAL
Your helmet SKWAL has a patented system
SHARK “AUTOSEAL”. This system ensures a
perfect sealing of the visor by clinging the visor
on the seal, by spring effect backward the visor
when it is in lower position.
SUN VISOR.
SHARK SKWAL is equipped with a sun visor
with an integrated external control.
This ergonomic command allows to ope-
rate the visor from the outside with ease and
whatever the type of gloves worn, offering you
a fast and full protection security. The R&D
department has developed a mechanism
for obtaining a progressive movement of the
control. The sun visor has a 380 UV protection
to lter out 100% of UVA and UVB.
WARNING! This sun visor cannot be used
when the light is strong and you ride in an
area where you may have a sudden change in
visibility (ex tunnel). In all cases where visibi-
lity is reduced, the beginning or end of the day,
night, rain or fog, the sun visor must be set
high to not to degrade your vision.
The visor is operated by the button located
on the left side of the helmet (A-B).MAINTE-
NANCE.
For protection and improve its life, the ou-
ter surface of your sun visor SHARK SKWAL is
anti-scratch treated. When cleaning the screen,
use lukewarm water (below 40 degrees) and
a soft cloth (100% cotton and lint) to wipe the
screen. Neutral soap as “savon de Marseille”
can help you clean up.
WARNING! If your visor and/or sun
shield no longer provides you with
clear visibility, you must immediately replace
it. Never ride if your sun shield is scratched,
dirty, foggy or with your vision obscured in any
way. Always ride with perfect visibility. Never
ride with the sun shield as eye protection. You
must always ride with the visor in the lowered
position.
Contact your retailer for any assistance or advice. Do not
ride with an open visor and do not try to open or adjust the
visor while riding. The visor could suddenly and without
warning become detached from the helmet, leaving your
eyes and face unprotected. In addition, your head could
be pulled to the side, causing you to lose control of your
motorcycle. These events could cause you to lose control
of your motorcycle, resulting in an accident, personal
injury or death.
WARNING! Tinted or dark visors should never be
used at night or under poor visibility conditions
as they reduce your ability to see. Never ride with
a fogged visor.
WARNING! If your visor no longer provides you
with clear visibility after a period of service, you
must immediately replace it. Never ride if your visor is
scratched, dirty, foggy or with your vision obscured in any
way. Always ride with perfect visibility.

10
A
B
C
C
B-1
B-1
C-1
C-1
C-1
C-1
SUN VISOR
REMOVAL (A)
- Move the sun shield to the lower position (A).
- Pull the sun shield delicately downward. (B-1).
- Pull the sun shield forward, one side at a
time, to unclip it from the mounting points in
the helmet (C-1).
REPLACEMENT (B)
- Move the handling button to the low position
(A).
- Push, at one side at a time, the sun shield
forward to clip it onto the mounting points in
the helmet (C-1).
- And then clip the sun shield back on by lifting
it slightly (C-1).
WARNING! If you are not sure that you pro-
perly replaced the sun shield, do not use the
helmet. The sun shield could suddenly and without
warning become detached from the helmet while ri-
ding, causing you to lose control of your motorcycle,
resulting in an accident, personal injury, or death.
Contact your retailer for any assistance or advice.
REMOVAL
- Turn your helmet over.
- Separate the two parts of the chin strap.
- Remove the neck pad by holding one of its sides.
Pull out the end and then detach its rear section (Fig.
A).
- Unclip the two cheek pads (Fig. B) and slide them
along the chin straps to extract them.
- Withdraw the rear part of the head section from its
housing in order to remove it (Fig. C -D).
- To complete the operation, unclip the front of the
head section, starting with one side (Fig. E) and re-
move the head section.

11
C
D
A
A
B E
SUN VISOR TEXTILE PARTS - REMOVAL
REMOVAL
- Turn your helmet over.
- Separate the two parts of the chin strap.
- Remove the neck pad by holding one of its sides.
Pull out the end and then detach its rear section (Fig.
A).
- Unclip the two cheek pads (Fig. B) and slide them
along the chin straps to extract them.
- Withdraw the rear part of the head section from its
housing in order to remove it (Fig. C -D).
- To complete the operation, unclip the front of the
head section, starting with one side (Fig. E) and re-
move the head section.

12
A
C
B
D
TEXTILE PARTS - REPLACE TEXTILE PARTS - CLEANING
REPLACE
- Start the operation by engaging the plastic part of
the front of the head section in its housing beginning
with one side (Fig. A).
Replace the rear part of the head section within its
housing (B).
- Position the textile part correctly.
- Reposition the cheek pads by passing the chin
straps through the slit in the foam (Fig. C).
- Replace the neck pad, inserting one of its side parts,
then position it correctly in its housing (D).
WARNING!
If you have any doubt what-
soever regarding the removal or replace-
ment of the interior padding, DO NOT USE YOUR
HELMET. Contact your retailer for assistance or
advise. NEVER use your helmet with any part of
the interior padding removed. The helmet will not
protect you in an accident.
WARNING!Damaged interior padding
will compromise the fit of your helmet on
your head and could allow the helmet to come
off your head in an accident, resulting in a head
injury or death.
THE TEXTILES
The SKWAL make it easy for you to appre-
ciate fully the performance of your helmet.
The parts in contact with the skin are made
in a fabric that is guaranteed to feel pleasant,
to absorb perspiration well and to resist wear
satisfactorily. We treat surfaces to limit the
risk of mould and bacteria.
WARNING! Although they are selected
for their quality of resistance and satis-
factory wear, all the interior padding is subject
to normal wear depending on use and care
and maintenance, the length of use and also
the degree of acidity of your perspiration. If
you note any wear, we
advise you to replace the interior padding
in order to keep your helmet perfectly clean
and comfortable.
Your SHARK supplier can propose you with
replacement parts and also offer you cheek
pads of different thicknesses and densities,
should the standard selection not correspond
to the contours of your face.

13
TEXTILE PARTS - REPLACE TEXTILE PARTS - CLEANING
THE TEXTILES
The SKWAL make it easy for you to appre-
ciate fully the performance of your helmet.
The parts in contact with the skin are made
in a fabric that is guaranteed to feel pleasant,
to absorb perspiration well and to resist wear
satisfactorily. We treat surfaces to limit the
risk of mould and bacteria.
WARNING! Although they are selected
for their quality of resistance and satis-
factory wear, all the interior padding is subject
to normal wear depending on use and care
and maintenance, the length of use and also
the degree of acidity of your perspiration. If
you note any wear, we
advise you to replace the interior padding
in order to keep your helmet perfectly clean
and comfortable.
Your SHARK supplier can propose you with
replacement parts and also offer you cheek
pads of different thicknesses and densities,
should the standard selection not correspond
to the contours of your face.
CLEANING THE INTERIOR
The interior textile parts are washable; it is im-
portant to follow the instructions below scru-
pulously to avoid damaging them:
The cheek pads and head section must be
hand washed in warm, soapy water (about
30°). Do not use aggressive detergents but
either a product for delicate materials in
low dilution or household soap. It is essential
to dry textile and foam parts completely before
using them. They must be dried at room tem-
perature. Never iron textile parts. For parts with
a leather appearance or textiles attached to
safety elements, use a slightly damp sponge or
cloth and household soap and rinse with clean
water. Avoid allowing too much water to
come into contact with polystyrene parts.
WARNING! It is essential to ensure that
all interior parts are perfectly dry before
using the helmet. The battery feeding the LED
as its electric cable could be damaged by the
moisture of fabrics and corrode.

14
CLEANING - ANTI-FOG MASK - EASY FIT CHIN COVER - SHARKTOOTH - LED
LED
Your helmet SHARK SKWAL is equipped with a LED
system (depending of model and version).
To control it, press the button (Fig. A)
First pulse: light (Fig. B)
2nd pulse: twinkling (Fig. B)
3rd: Off (Fig. C)
The service time in xed mode is about 5 hours and
10 hours in twinkling mode.
WARNING! Check if the national or local le-
gislation in power in your country does not
limit the use of LED on public highway.
Charging of the LED system.
To reload your system, to use the cable micro USB
placed in the neck pad and connect it to the provided
cable (Fig. D). This cable can be connected on USB
port fed or a sector adapter.
Time for a battery charged with 100% is approxima-
tely of 5:00 hours.
WARNING! This system not being equipped
with load indicator, be careful to the duration of
the load attentively. The system musn’t be connected
to the charge more than 5 hours.
WARNING! This product has an embedded,
non-replaceable battery, do not attempt to
open the product or remove the battery as this may
cause injury and damage the product.
Correct Disposal of This Product
(Waste Electrical & Electronic Equipment.
Applicable in the European Union and other Euro-
pean countries with separate collection systems)
This marking shown on the product or its litera-
ture, indicates that it should not be disposed with
other household wastes at the end of its working
life. To prevent possible harm to the environment
or human health from uncontrolled waste dis-
posal, please separate this from other types of
wastes and recycle it responsibly to promote the
NOSE MASK (OPTIONAL EQUIMENT)
Your SKWAL is tted with a removable breath guard.
CHIN COVER
Your SKWAL is tted with a chin cover (ventilation
open).
EASY FIT
Your helmet SKWAL has been designed to provide
additional comfort for eyeglasses wearers with the
SHARK EASY FIT.
The 2 cheeks are made with a pocket shape fabric
part to provide the passage to the glasses arms.
SHARKTOOTH
Your helmet SHARK SKWAL is designed to be
equipped with audio system SHARKTOOTH.
You will nd a specic location designed for
battery at the rear of the helmet, behind the
neck pad (A) and a space for the microphone
to the front of the helmet. Concerning the
headphones, a cavity has been devise in the
cheek Velcro.
Battery is easily rechargeable thanks to its
access from the outside without dismantling
neck pad.
SHARKTOOTH® system offers the possibility
to communicate easily by Bluetooth
For urban, Touring or road riders who want
to communicate while they are driving. SHAR-
TOOTH® Bluetooth hands-free bike kit for mo-
bile phones and Smartphones is a must-have
accessory.
It provides a bike to bike intercom system
with another SHARKTOOTH® (500m). It can
be easily connected with most of the mobile
phones and Smartphones. It switches on by the
voice, there is an automatic volume control and
it enables riders to reduce background noise. It
is waterproof. You can receive audio informa-
tion from motorbike Bluetooth® GPS navigator
and music streaming thanks to Stereo Bluetoo-
th® A2DP.
To access this function, connect the
SHARKTOOTH® to an appropriate Bluetooth®
device.
WARNING! SHARK disclaims all liability in case
of adaptation into the SKWAL of a communica-
tion system other than the SHARKTOOTH.

15
A
B C
D
CLEANING - ANTI-FOG MASK - EASY FIT CHIN COVER - SHARKTOOTH - LED
LED
Your helmet SHARK SKWAL is equipped with a LED
system (depending of model and version).
To control it, press the button (Fig. A)
First pulse: light (Fig. B)
2nd pulse: twinkling (Fig. B)
3rd: Off (Fig. C)
The service time in xed mode is about 5 hours and
10 hours in twinkling mode.
WARNING! Check if the national or local le-
gislation in power in your country does not
limit the use of LED on public highway.
Charging of the LED system.
To reload your system, to use the cable micro USB
placed in the neck pad and connect it to the provided
cable (Fig. D). This cable can be connected on USB
port fed or a sector adapter.
Time for a battery charged with 100% is approxima-
tely of 5:00 hours.
WARNING! This system not being equipped
with load indicator, be careful to the duration of
the load attentively. The system musn’t be connected
to the charge more than 5 hours.
WARNING! This product has an embedded,
non-replaceable battery, do not attempt to
open the product or remove the battery as this may
cause injury and damage the product.
Correct Disposal of This Product
(Waste Electrical & Electronic Equipment.
Applicable in the European Union and other Euro-
pean countries with separate collection systems)
This marking shown on the product or its litera-
ture, indicates that it should not be disposed with
other household wastes at the end of its working
life. To prevent possible harm to the environment
or human health from uncontrolled waste dis-
posal, please separate this from other types of
wastes and recycle it responsibly to promote the
sustainable reuse of material resources.
Household users should contact either the retailer
where they purchased this product, or their local
government office, for details of where and how
they can take this item for environmentally safe
recycling.
Business users should contact their supplier and
check the terms and conditions of the purchase
contract. This product should not be mixed with
other commercial wastes for disposal.
Please contact the local recycling facility for re-
moval of the battery.
SHARKTOOTH
Your helmet SHARK SKWAL is designed to be
equipped with audio system SHARKTOOTH.
You will nd a specic location designed for
battery at the rear of the helmet, behind the
neck pad (A) and a space for the microphone
to the front of the helmet. Concerning the
headphones, a cavity has been devise in the
cheek Velcro.
Battery is easily rechargeable thanks to its
access from the outside without dismantling
neck pad.
SHARKTOOTH® system offers the possibility
to communicate easily by Bluetooth
For urban, Touring or road riders who want
to communicate while they are driving. SHAR-
TOOTH® Bluetooth hands-free bike kit for mo-
bile phones and Smartphones is a must-have
accessory.
It provides a bike to bike intercom system
with another SHARKTOOTH® (500m). It can
be easily connected with most of the mobile
phones and Smartphones. It switches on by the
voice, there is an automatic volume control and
it enables riders to reduce background noise. It
is waterproof. You can receive audio informa-
tion from motorbike Bluetooth® GPS navigator
and music streaming thanks to Stereo Bluetoo-
th® A2DP.
To access this function, connect the
SHARKTOOTH® to an appropriate Bluetooth®
device.
WARNING! SHARK disclaims all liability in case
of adaptation into the SKWAL of a communica-
tion system other than the SHARKTOOTH.

16
A
2
2
1
1
VENTILATIONS
VENTILATION INSIDE THE HELMET.
The upper air intake (Fig. A) allows air to enter onto
the upper part of the head and thus renew the air in
the head section. The channels incorporated in the
internal shock absorbers facilitate the circulation of
air over the surface of the head.
The quality and design of the textile comfort parts
contribute to the proper distribution of air. The posi-
tion of the upper ventilation system is designed to op-
timise the effectiveness of its intake of air. Depending
on the type of your motorbike, the fairing may reduce
the effectiveness of this ventilation.
The ventilation is in the open position when the
tongue is pushed backwards (1) and closed when the
tongue is pushed forwards (2).
LOWER VENTILATION.
The principal function of this air intake is to direct a
flow of fresh air over the interior surface of the visor in
order to limit the risk of misting. The fresh air diffused
cuts off contact with the hot air emitted by breathing
or even by the head inside the helmet.
To open (1) or close (2) the lower ventilation, press
the button as indicated.
WARNING! Do not open or close any vents
while operating your motorcycle. You could
lose control of your motorcycle, resulting in an
accident, personal injury or death.
AERODYNAMICS AND ACOUSTICS
The SKWAL has been carefully designed to offer you
the greatest pleasure in use.
The profile of the helmet, its impermeability and the
quality of the materials used enable air noise on the
crown of the head and aerodynamic turbulence to be
filtered as far as possible. In order for the use of your
helmet to be as pleasant as possible, it is important
for turbulence or air eddies created by the fairings not
to impair the aerodynamic qualities of your SKWAL
helmet. The shape of the fairings of your motorcycle
and/or your size should not cause air eddies to reach
the lower part of your helmet.
5 YEARS WARRANTY
5 YEARS WARRANTY
You have recently purchased a SHARK helmet for your safety
and pleasure. It has been designed with the greatest care to
satisfy your every requirement. For your safety, and that of
your passenger, you must respect all the rules of prudence
when using your two-wheeled vehicle. The SHARK 5-YEARS
warranty guarantees the initial purchaser that any possible
manufacturing fault or material defect will be covered by the
SHARK warranty.
Limitations
If during the warranty period (5 years as from the date of
purchase), a problem covered by the warranty were to arise,
SHARK, through the intermediary of its sales network, under-
takes to repair or replace any defective components, up to a
maximum limit which is the purchase value of the helmet.
Any labour costs are normally paid by the SHARK network,
but are submitted for approval prior to the work being car-
ried out. If the repair requires components to be dispatched
incurring transportation costs, the SHARK network shall cover
these costs up to a limit which is the cost of transport by the
national postal service at the normal rate.
Exclusions
This warranty only covers problems related to materials or
manufacturing. SHARK cannot be held liable with regard to
the product in the following cases :
Any damage following
1) a fall or accident
2) a technical modication made by the user or a third party
(glue, adhesives, paint, screws, etc.)
3) use of or contact with: harmful chemical products (inclu-
ding methylated spirits on the visor treatments), or an intense
heat source
4) incorrect use: abnormal conditions (e.g. underwater), lack
of maintenance or care
5) ageing due to normal wear of the inner fabrics or foams,
the appearance of the external parts, or the visor (scratches,
marks, etc.)
6) abnormal and prolonged exposure to ultra-violet light, in
particular for the decorative colours. In addition, SHARK can-
not consider subjective considerations related to use of the
helmet as defects covered by the warranty : problems with
comfort, size, noise or whistling, aerodynamics, etc.

17
5 YEARS WARRANTY
5 YEARS WARRANTY
You have recently purchased a SHARK helmet for your safety
and pleasure. It has been designed with the greatest care to
satisfy your every requirement. For your safety, and that of
your passenger, you must respect all the rules of prudence
when using your two-wheeled vehicle. The SHARK 5-YEARS
warranty guarantees the initial purchaser that any possible
manufacturing fault or material defect will be covered by the
SHARK warranty.
Limitations
If during the warranty period (5 years as from the date of
purchase), a problem covered by the warranty were to arise,
SHARK, through the intermediary of its sales network, under-
takes to repair or replace any defective components, up to a
maximum limit which is the purchase value of the helmet.
Any labour costs are normally paid by the SHARK network,
but are submitted for approval prior to the work being car-
ried out. If the repair requires components to be dispatched
incurring transportation costs, the SHARK network shall cover
these costs up to a limit which is the cost of transport by the
national postal service at the normal rate.
Exclusions
This warranty only covers problems related to materials or
manufacturing. SHARK cannot be held liable with regard to
the product in the following cases :
Any damage following
1) a fall or accident
2) a technical modication made by the user or a third party
(glue, adhesives, paint, screws, etc.)
3) use of or contact with: harmful chemical products (inclu-
ding methylated spirits on the visor treatments), or an intense
heat source
4) incorrect use: abnormal conditions (e.g. underwater), lack
of maintenance or care
5) ageing due to normal wear of the inner fabrics or foams,
the appearance of the external parts, or the visor (scratches,
marks, etc.)
6) abnormal and prolonged exposure to ultra-violet light, in
particular for the decorative colours. In addition, SHARK can-
not consider subjective considerations related to use of the
helmet as defects covered by the warranty : problems with
comfort, size, noise or whistling, aerodynamics, etc.
SHARK cannot be held liable for the temporary non-availa-
bility of the helmet while it is being enhanced to satisfy the
needs of its owner. In all cases, the maximum warranty period
is 5 years. Replacement of a component during this period
does not prolong this period.
Procedure
When the helmet is sold go to our website www.shark-
helmets.com in order to activate your warranty.
All warranty claims must be made to the SHARK dealer that
sold the helmet.
For a warranty claim to be considered, the purchaser must
notify the dealer of the problem that has arisen, and return
the helmet that is the subject of the claim, together with the
warranty card lled out when the helmet was purchased. This
warranty does not affect in any way the statutory rights of the
purchaser as stipulated by directive 1999/44CE.
The effects of this specic and limited warranty shall
come to an end after a period of 5 years as from the
date of purchase. After this period, if you continue to
use a helmet regularly, we recommend that to bene-
t from optimum protection and comfort you should
replace your helmet. This is because certain external
factors - general wear, certain impacts - could be prejudicial
to the safety characteristics of this essential piece of protec-
tive equipment.
Limit SHARK reserves the right to carry out work within the
terms of the warranty using replacement parts from the most
recent version compatible with the model concerned, and is
unable to guarantee perfect harmonisation of the paint or
decorative elements associated with specic production runs
and/or limited editions. In addition, the natural deterioration of
colours over a period of time can cause mismatching in the
adaptation of colours of spare parts.
If SHARK is unable to carry out the repair for technical reasons
or because a component is not available, SHARK undertakes
to make the customer an advantageous offer, taking account
of the age of the helmet, consisting in either an identical new
helmet or an equivalent model manufactured at the time of
the repair, if the original model is no longer available.
This warranty is only valid for european continent.

2
SOMMAIRE ANATOMIE DU CASQUE
1) Ecran VZ160
2) Pare-soleil
3) Levier de mécanisme de pare-soleil
4) Ventilation supérieure
5) Ventilation inférieure
6) Venturi
7) Jugulaire
8) Masque anti-buée (selon version)
9) Bavette anti-remous (selon version)
10) LED
11) Commande LED (selon version)
Nous vous remercions d’avoir choisi un SHARK
SKWAL.
Nous sommes certains que ce casque vous
donnera entière satisfaction.
Conforme aux normes internationales les plus
sévères, ce casque ne peut toutefois protéger
son utilisateur en toutes circonstances, nous
vous recommandons de rester prudent.
Votre casque a été conçu pour une utilisation
sur un deux-roues motorisé, vous ne devez pas
l’employer pour un autre usage.
Ce casque SHARK SKWAL est homologué et
conforme au règlement ECE R 22/05, ce casque
est donc conforme aux exigences imposées dans
tous les pays reconnaissant cette norme sur leur
territoire.
Attention ! Les États-Unis ayant une
réglementation spécifique, les casques uni-
quement homologués ECE ne doivent pas être
utilisés sur ces territoires sans l’homologation
complémentaire DOT FMVSS 218.
Attention ! pour la circulation en France,
le code de la route exige que les réfléchis-
sants de sécurité (fournis à part dans une po-
chette) soient apposés conformément au plan
joint.
Attention ! Ce casque est vendu avec un
système de LED que vous pouvez éteindre.
Important : conduisez prudemment et en res-
pectant le code de la route en vigueur. Vérifiez
que la législation de votre pays ne limite pas
l’utilisation de LED.
• Anatomie du casque ...............................................................3
• Un casque à votre taille ...................................................... 4-5
• Jugulaire ............................................................................6-7
• Ecran .................................................................................... 8
• Auto seal.................................................................................9
• Pare-soleil ..........................................................................10
• Textiles ..........................................................................11-12
• Nettoyage ........................................................................... 13
• Masque anti-buée/bavette anti-remous ..........................14-15
• Easy Fit.................................................................................14
• LEDS.....................................................................................15
• Ventilations ......................................................................... 16
• Garantie 5 ans ....................................................................17
• Mentions légales .................................................................20

3
6
2
7
3
8
9
11
10
10
10
12
13
14
5
1
4
SOMMAIRE ANATOMIE DU CASQUE
1) Ecran VZ160
2) Pare-soleil
3) Levier de mécanisme de pare-soleil
4) Ventilation supérieure
5) Ventilation inférieure
6) Venturi
7) Jugulaire
8) Masque anti-buée (selon version)
9) Bavette anti-remous (selon version)
10) LED
11) Commande LED (selon version)
7 - Boucle de jugulaire double anneaux.
Attention ! Les États-Unis ayant une
réglementation spécifique, les casques uni-
quement homologués ECE ne doivent pas être
utilisés sur ces territoires sans l’homologation
complémentaire DOT FMVSS 218.
Attention ! pour la circulation en France,
le code de la route exige que les réfléchis-
sants de sécurité (fournis à part dans une po-
chette) soient apposés conformément au plan
joint.
Attention ! Ce casque est vendu avec un
système de LED que vous pouvez éteindre.
Important : conduisez prudemment et en res-
pectant le code de la route en vigueur. Vérifiez
que la législation de votre pays ne limite pas
l’utilisation de LED.
7 - Boucle de jugulaire “Precise Lock”
• Anatomie du casque ...............................................................3
• Un casque à votre taille ...................................................... 4-5
• Jugulaire ............................................................................6-7
• Ecran .................................................................................... 8
• Auto seal.................................................................................9
• Pare-soleil ..........................................................................10
• Textiles ..........................................................................11-12
• Nettoyage ........................................................................... 13
• Masque anti-buée/bavette anti-remous ..........................14-15
• Easy Fit.................................................................................14
• LEDS.....................................................................................15
• Ventilations ......................................................................... 16
• Garantie 5 ans ....................................................................17
• Mentions légales .................................................................20
12) Joint d’embase
13) Joint d’écran
14) easy fit

4
B
CHOISIR SA TAILLE CHOISIR SA TAILLE
ATTENTION ! Aucun casque ne peut
protéger entièrement l’utilisateur de
tous les chocs possibles à haute ou basse
vitesse. Toutefois, pour une protection
efficace, le casque doit être à la bonne taille et
la jugulaire doit être correctement serrée
comme indiqué dans le manuel. Il est
dangereux de ne pas utiliser un casque à sa
taille ou de ne pas serrer correctement le
système de fermeture de la jugulaire, car le
casque pourrait se séparer de la tête en cas
d’accident, entrainant des blessures graves
ou mortelles.
CHOISIR SA TAILLE
Chaque casque de XS à XL est conçu
pour une taille de tête donnée. Pour mesurer
votre tour de tête, utiliser un mètre ruban
en l’enroulant horizontalement à 2,5 cm au
dessus de vos sourcils. Si la mesure se trouve
entre deux tailles,essayez d’abord le casque le
plus petit. Toutefois, en raison des différentes
morphologies de crânes, les références de
taille servent uniquement à vous orienter vers
la taille la mieux adaptée à votre tête. Pour
une protection efficace, il est nécessaire de
vérifier que le casque correspond bien à votre
tête. Lorsque que vous choisissez un nouveau
casque, vérifier que votre tête soit bien
enfoncée dans le casque, le haut du champ
de vision étant positionné au dessus des
sourcils. Vérifier également que la jugulaire
soit correctement serrée comme indiqué dans
la page suivante.
1. La tête doit être bien enveloppée par le
casque et les joues doivent apporter un bon
maintien. Si ce n’est pas le cas, le casque
choisi est trop grand, essayer donc une taille
plus petite. Voir la figure A.
2. Avec la jugulaire correctement
serrée (voir page 10), assurez-vous que le
casque ne bouge pas trop de gauche à droite
et de haut en bas. Vous devez sentir votre
peau se tirer au niveau de la tête et du visage
lorsque vous bougez le casque. Si ce n’est pas
le cas, le casque choisi est trop grand, essayer
donc une taille plus petite. Voir la figure B.
3. Avec la jugulaire serrée, attraper l’arrière
du casque par la base et essayer de le retirer
de votre tête dans un mouvement rotationnel.
Ensuite essayer d’enlever le casque en le
saisissant par la base de la mentonnière. Vous
devez faire ces mouvements de manière
suffisamment énergique. Si le casque com-
mence à se déchausser, le casque choisi est
trop grand, essayer donc une taille plus petite.
4. Penchez la tête vers l’avant le plus pos-
sible. La base de la mentonnière ne doit pas
toucher la poitrine. Voir la figure C.
5. Penchez la tête à l’arrière le plus loin pos-
sible. La base du casque ne doit pas toucher
le dos. Voir la figure D.
N’ayez pas les cheveux enroulés ou attachés
à l’intérieur du casque.
Ne pas mettre quelque chose dans/ou sur
ses cheveux à l’intérieur du casque. Ne rien
ajouter à l’intérieur du casque afin d’ajuster sa
position sur votre tête.
Table of contents
Languages:
Other Shark Motorcycle Accessories manuals

Shark
Shark Spartan GT Carbon User manual

Shark
Shark RSJ User manual

Shark
Shark Evojet User manual

Shark
Shark SX 2 User manual

Shark
Shark Evoline 3 Series User manual

Shark
Shark SPARTAN RS User manual

Shark
Shark SX 2 User manual

Shark
Shark ATV-DRAK User manual

Shark
Shark S 700 User manual

Shark
Shark S 800 User manual

Shark
Shark Vancore 2 User manual

Shark
Shark Race-R PRO User manual

Shark
Shark Explore-R User manual

Shark
Shark CITYCRUISER User manual

Shark
Shark SPEED-R User manual

Shark
Shark Raw User manual

Shark
Shark Evoline 3 Series User manual

Shark
Shark RIDILL User manual

Shark
Shark SPARTAN GT PRO User manual

Shark
Shark SK User manual