6
GETTING STARTED
I
I
I
I
I
I
I
I
COPY RATIO
100%
AUTO
READY TO COPY
AUTO SELECT
2.
3. A3
EXPOSURE 1. A4
B4
A4
EXPOSURE
LIGHT DARK
AUTO
MANUAL
PHOTO
AUTO IMAGE
REDUCTION
SORT
GROUP
STAPLE
SORT
SORTER
ORIGINAL TO COPY
ENLARGEMENT
ZOOM
2
11
11
ORIGINALS
)
(
EVEN NUMBER
ODD NUMBER
2
2
2
1
1
PRE-COUNT
ORIGINAL
100%
qwe r
!3 !4 !5 !6 !8 @0 @1!7 !9
1
2
3
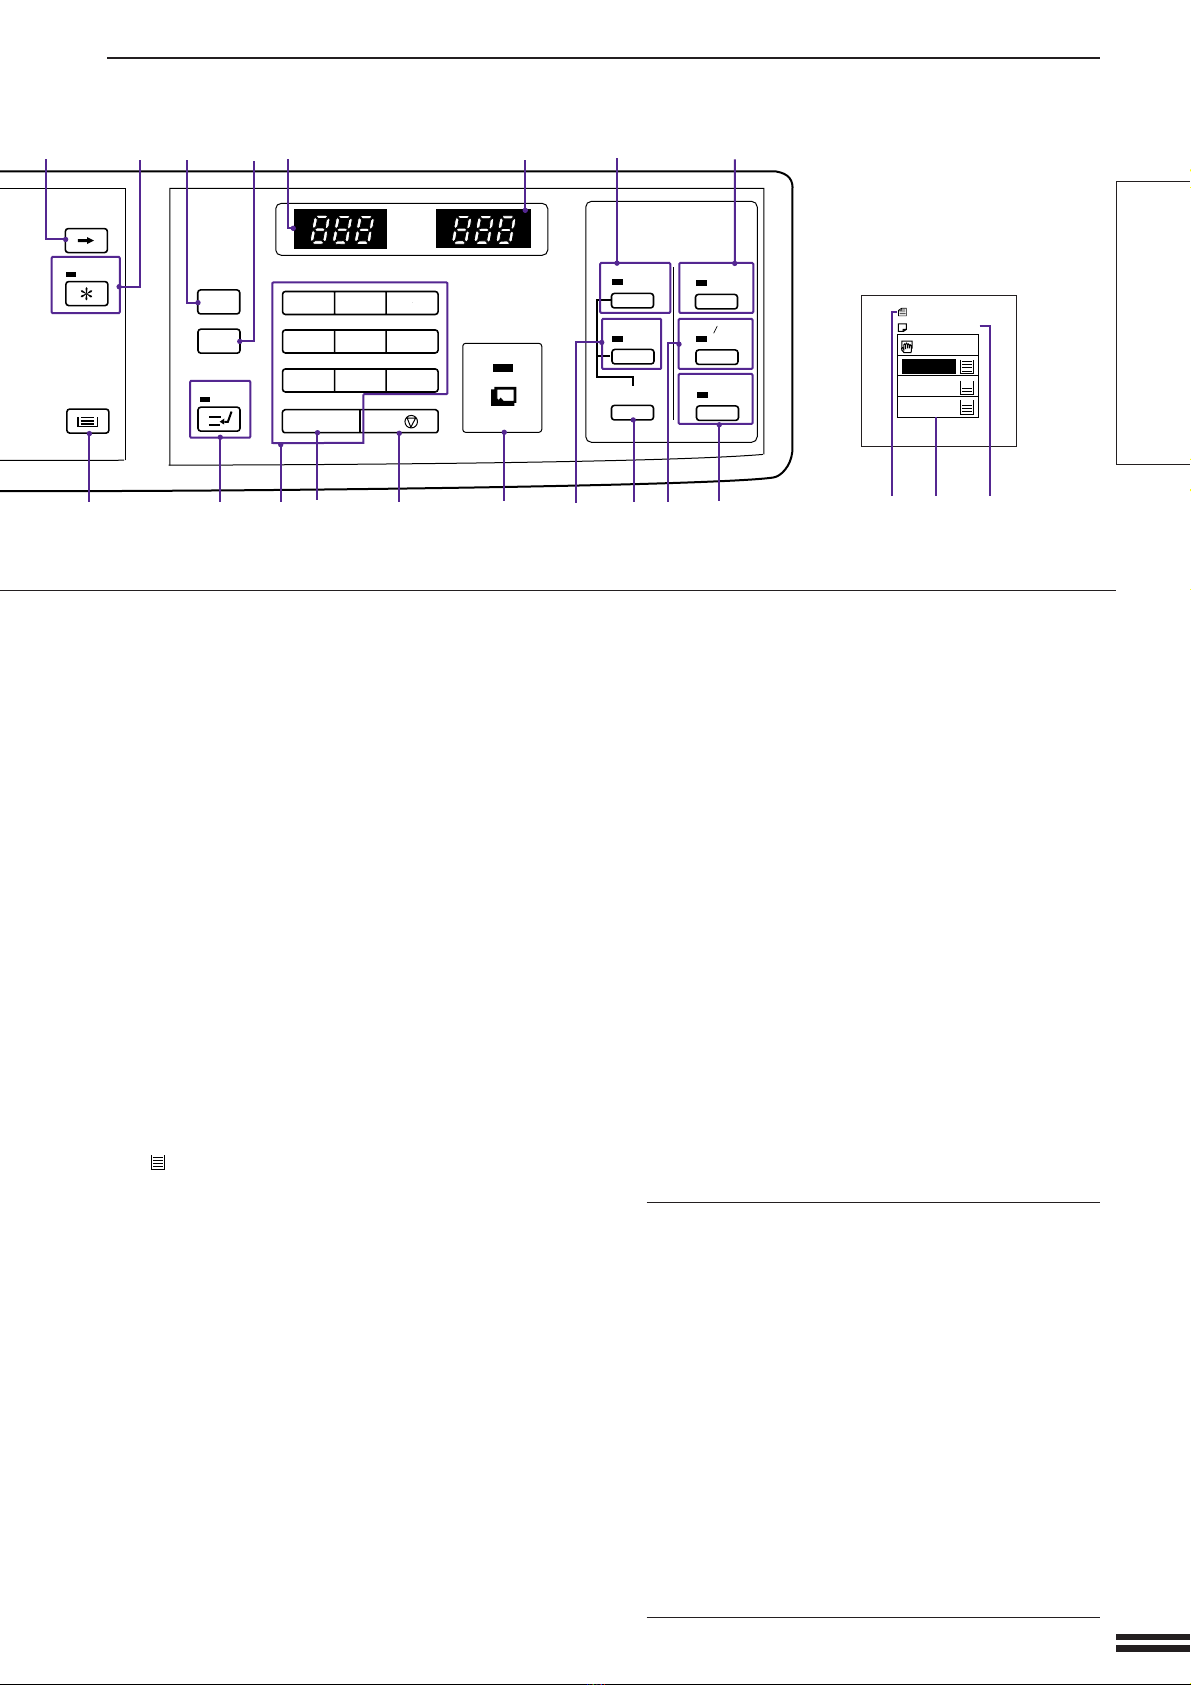
iCLEAR ALL (CA) key
Clears all selected settings and returns the cop-
ier to the initial settings.
oCOPIES SELECTED display
Displays the selected number of copies.
!0 COPIES MADE display
Displays the number of copies made in the cur-
rent copy run.
!1 MARGIN SHIFT key and indicator (p.23)
Press to select the margin shift mode.
!2 DUAL PAGE COPY key and indicator (p.21)
Makes individual copies of two originals placed
side by side on the document glass.
!3 SORT/GROUP key and indicators (p.71)
Press to select the sorter modes when a sorter is
installed. (Sorters are optional.)
!4 STAPLE SORT key and indicator (p.71)
Press to select the staple sort mode when a sta-
ple sorter is installed; finished copies will be sta-
pled. (Staple sorters are optional.)
!5 ORIGINAL TO COPY key and indicators
Press to select simplex and duplex copy modes.
: Single-sided copies of single-
sided originals.
: Two-sided copies of single-sid-
ed originals. “EVEN NUMBER”
or “ODD NUMBER” must be se-
lected in accordance with the
number of originals.
: Two-sided copies of two-sided
originals.
: Single-sided copies of two-sid-
ed originals.
PRE-COUNT : Indicates that the number of
originals will be counted.
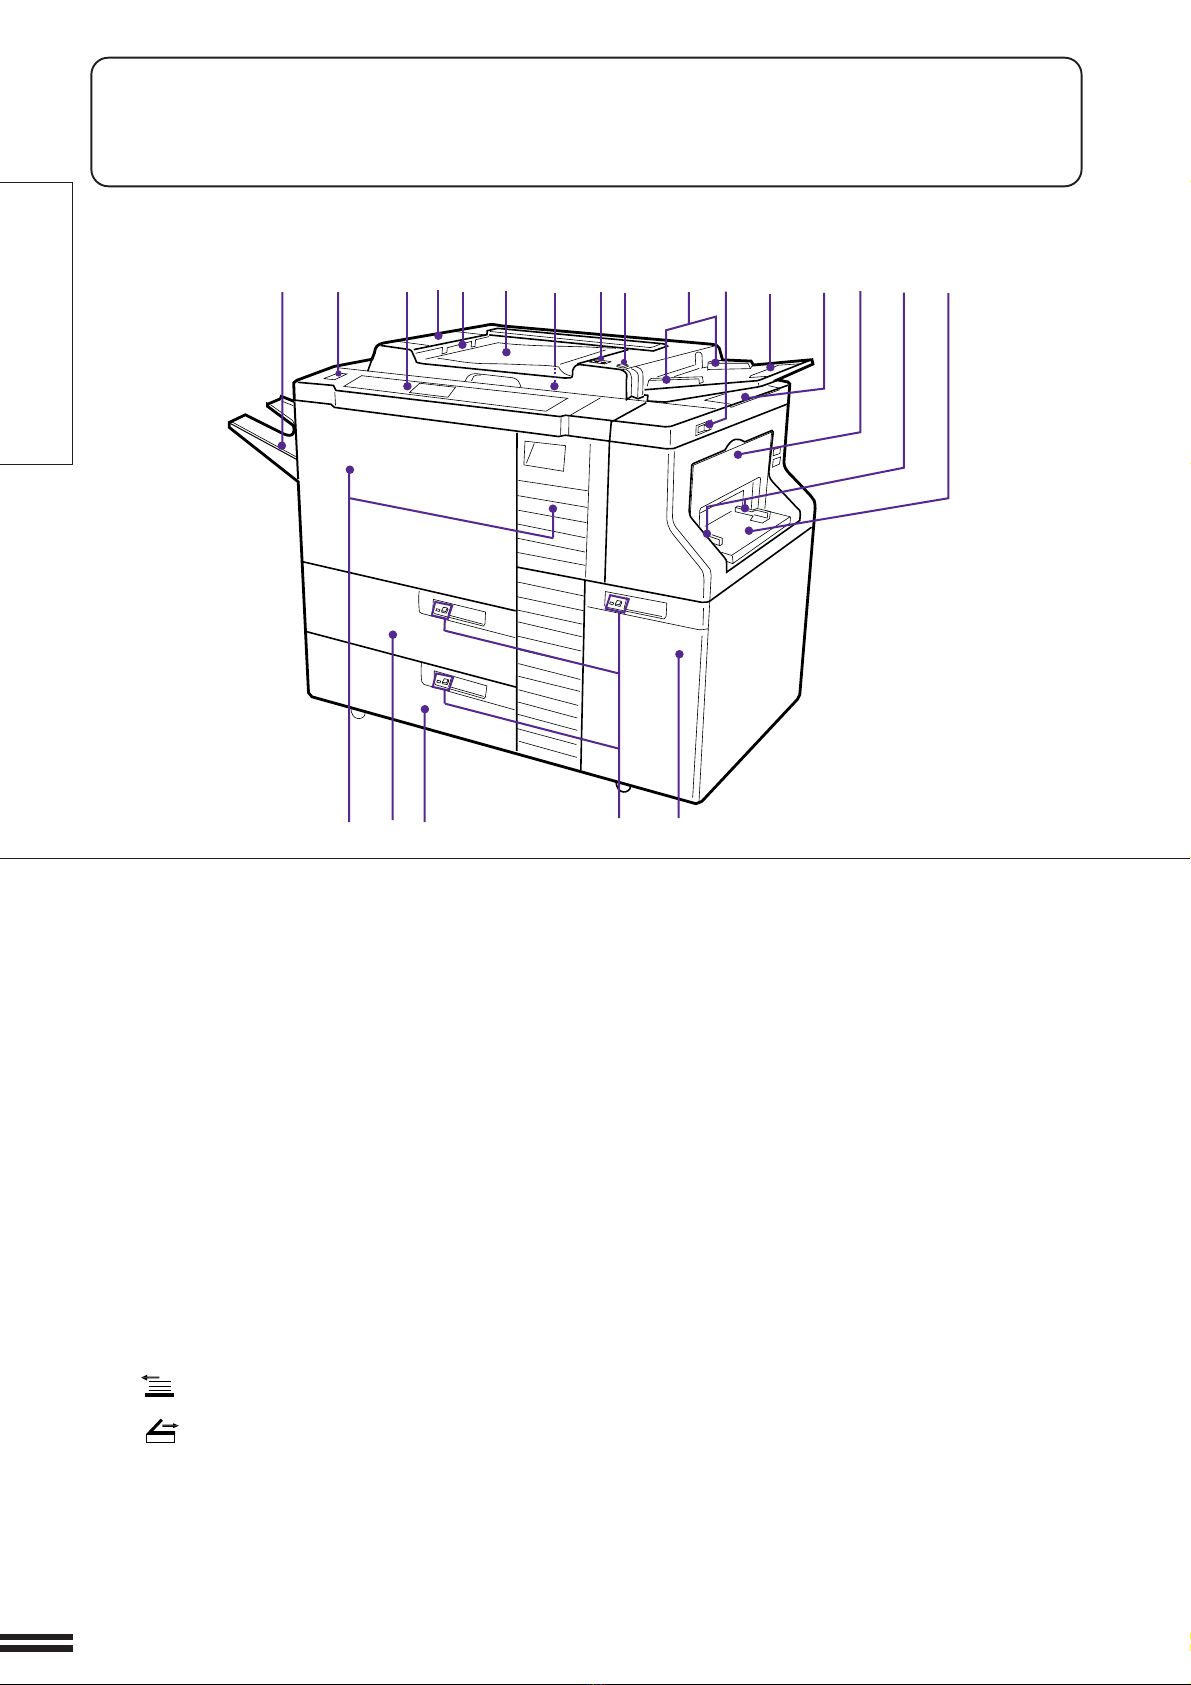
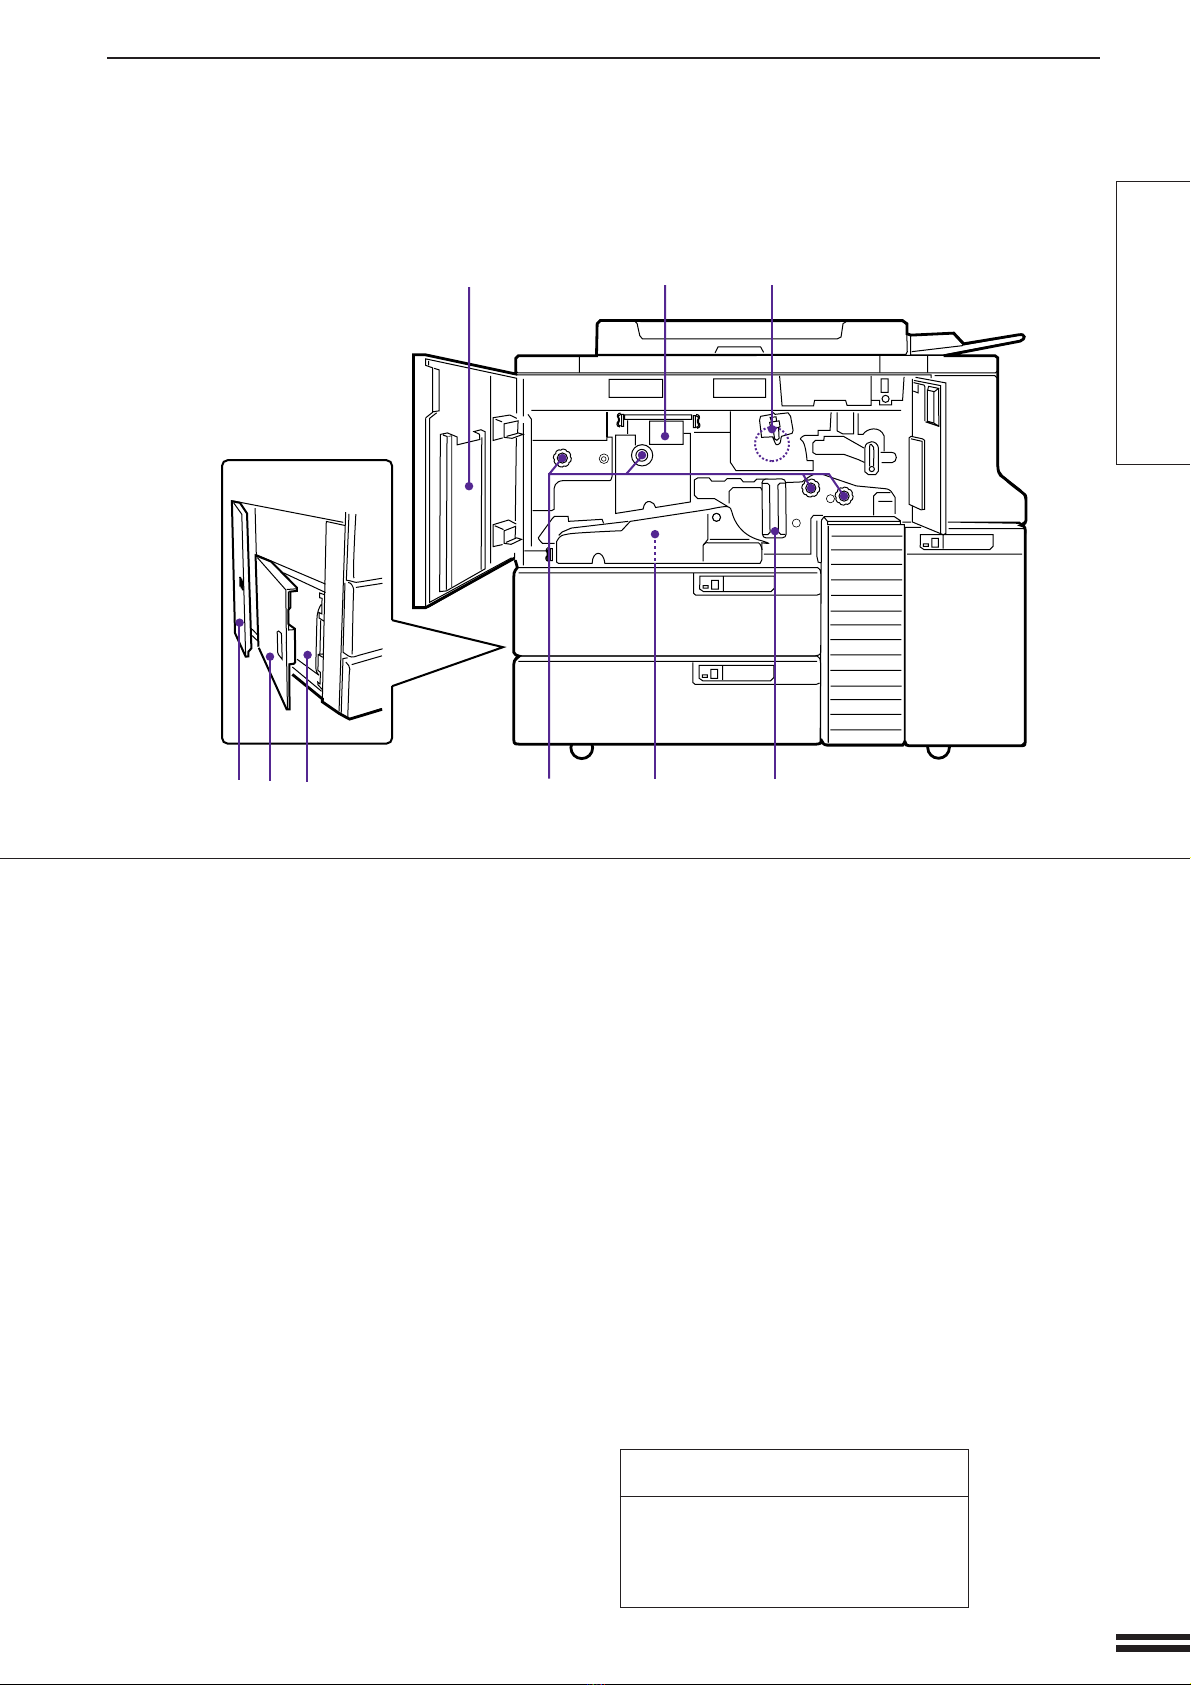
PART LOCATIONS AND FUNCTIONS
Operation Panel
qAUTO IMAGE key (p.17)
Press for automatic copy ratio selection in the
RADF mode.
wREDUCTION, 100%, and ENLARGEMENT
keys (p.18)
REDUCTION key: Selects one of four preset re-
duction copy ratios: 50%, 70%, 81%, or 86%
(50%, 64%, 77%, or 95%). (Two additional
presets can be added.)
100% key: Press to reset the copy ratio to 100%
for same-size copies.
ENLARGEMENT key: Selects one of four preset
enlargement copy ratios: 115%, 122%, 141%,
or 200% (121%, 129%, 141%, or 200%).
(Two additional presets can be added.)
eZOOM keys (p.18)
Used to select any enlargement or reduction
copy ratio from 50% to 200% in 1% increments.
rMessage display
Displays information to assist the operator in
programming the copier and in recovering a job
after a misfeed. Information about copier fea-
tures can also be displayed.
tSCROLL DISPLAY key
Press to scroll the display for more information
when the symbol (a) appears at the end of a
message.
Displays the total number of copies made to
date if pressed during standby.
yINFORMATION key and indicator (p.9)
Press for operation guidance on 1. DUPLEX, 2.
DOCUMENT FEEDER, 3. SORTER, and 4.
OTHER FEATURES. Press after a misfeed for
misfeed removal guidance.
uPROGRAM (P) key
Press to select the job memory mode (p.45) or to
use key operator programs (p.5, KEY OPERA-
TOR’S GUIDE).
1
1
2
1
1
2
2
ORIGINAL
1
21
Part locations and functions
Downloaded from: http://www.usersmanualguide.com/