manuals.online logo
Brands
  1. Home
  2. •
  3. Brands
  4. •
  5. Siemens
  6. •
  7. Controllers
  8. •
  9. Siemens sqm50 User manual

Siemens sqm50 User manual

Installation Instructions
Document No. 129-399
January 18, 2008
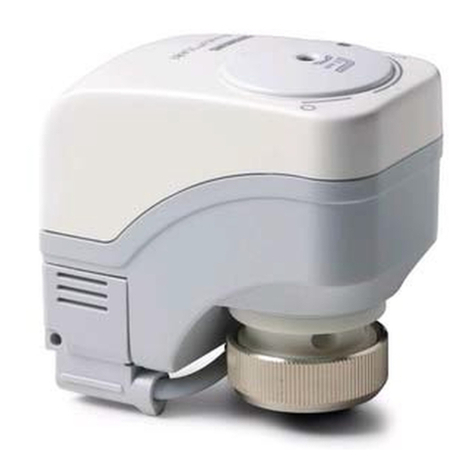
SQM5… Reversing Actuator with Line Voltage Input Signal
Item Number 129-399, Rev. BA Page 1 of 4
Product Description
Reversing actuator used to position flow control
valves, butterfly valves, dampers, or any application
requiring rotary motion with line voltage input signal
for Position Proportioning or Floating Control.
Product Numbers
SQM5x.xxxRxAx for line voltage input signals
Actuator Torque:
SQM50.2… 90 in/lb
SQM50.3… 90 in/lb
SQM50.4… 140 in/lb
SQM53.4… 200 in/lb
SQM56.5… 310 in/lb
SQM56.6… 400 in/lb
Max Shaft Torque:
AGA58.1 200 in/lb
AGA58.3 220 in/lb
AGA58.4 270 in/lb
AGA58.7 400 in/lb
SQM… motors allow torque on either end of the
AGA58.3 and AGA58.4 shafts.
NOTE: For detailed information, see Technical
Instructions 155-517P25.
Caution Notation
CAUTION:
Equipment damage may
occur if procedures are not
followed as specified.
Installation
Cover Removal
Use a Phillips screwdriver to loosen the two screws
on the actuator cover corners. See Figure 1.
Lift the screws and raise the cover. See Figure 2.
EA0564R1
EA0568R1
Figure 1. Figure 2.
Rotational Direction Verification
Actuator model numbers that end with “R” are
factory configured for clockwise (cw), minimum to
maximum rotation when facing the gear end of the
actuator, or counterclockwise (ccw) rotation when
facing the other end of the actuator. The gear end of
the actuator is the side opposite of the visual
position indicator
Actuator Mounting
SQM5… actuators can be mounted in any
orientation. Optional base mounting brackets are
available.
SQM5… actuators can also be face-mounted using
self-tapping screws in combination with the various
holes on the face of the actuator gear end.
Switch Adjustment
SQM5…actuators are factory-wired with Switch I
(maximum), Switch II (fully closed/economy position)
and Switch III (minimum/low-fire). The individual
switch cams I, II, and III are factory set to 90°, 0°
and 10°, respectively. See Figures 3 and 4.
Document No. 129-399
Installation Instructions
January 18, 2008
Page 2 of 4 Siemens Building Technologies, Inc.
10
0
30
50
00
10
0
30
50
50
10
10
0
30
70 0
10
0
30
50
CAM DRUM
RELEASE BUTTON
GEAR END
EA0561R3
ACTUATOR
POSITION SCALE SWITCH CAM I
SET AT MAXIMUM
SWITCH CAM II
SET AT ZERO ("ECONOMY")
SWITCH CAM III
SET AT MINIMUM
ACTUATOR POSITION
INDICATING POINTER CAM DRUM
ASZ... (1000 Ohm)
FEEDBACK POTENTIOMETER
DIAL POINTER ACTUATOR POSITION
INDICATING DIAL
SINGLE SWITCH
CAM POINTER
DOUBLE SWITCH CAM POINTER
Figure 3. Component Identification on the Cam Drum Side of the SQM5…Actuator.
NOTE: The single switch cam pointers are used
together with the black scales when
configured for ccw operation.
The double switch cam pointers are used
together with the red scales when
configured for cw operation.
The individual switch cams can be
adjusted by hand or with the use of the tool
attached to the outside of the hinged
switch terminal protection lid.
SQM5x.xxxRxA actuators without
potentiometer must be adjusted only
between 0° and 160°.
If a potentiometer is installed, the
adjustable range of the switches depends
on the range of the potentiometer.
SQM5x.xxxRxA3actuators have a 90°
potentiometer and the switches must be
adjusted between 0° and 90°.
SQM5x.xxxRxA4actuators have a 135°
potentiometer and the switches must be
adjusted between 0° and 135°.
Shaft Adjustment
The actuator shaft can be disengaged by pressing
the silver shaft release button. The button is located
above the grounding screw, under the hinged
terminal protection cover, and to the right of the
auto/manual switch. After pressing the shaft release
button in and slightly upward, the shaft can be
manually rotated. After the shaft has been manually
aligned to the closed position, re-engage the shaft
by pushing the shaft release button downwards.
Cam Drum Adjustment
Once the shaft has been set, the cam drum must be
manually aligned by pressing and holding the black
cam drum release button (see Figure 3). Rotate the
cam drum until the “0” mark on the actuator position
scale (left scale on the cam drum) is aligned with the
gray actuator position indicating pointer.
Position Indicating Dial Adjustment
The actual position of the SQM5… actuator is
indicated by the gray actuator position indicating
pointer (see Figure 3). The position is also displayed
by the indicating dial through the housing’s window.
Ensure that the actuator position indicating dial is
aligned with the actuator position scale. If
necessary, rotate the dial in the clockwise direction.
Document No. 129-399
Installation Instructions
January 18, 2008
CAUTION:
Turning the dial in the counterclockwise
direction may loosen the potentiometer
locking screw.
Electrical Connection
SQM5… actuators are equipped with two removable
conduit connection plates located on the upper
corner of the gear housing. Each plate is provided
with two threaded connections for 1/2-inch NPSM
conduit connectors. The use of flexible 14 gauge or
smaller stranded wire is recommended.
NOTE: SQM5… Actuators require a single-source,
single-phase power supply.
EA0555R3
AGA56.1A97
MAN AUTO
12
11 21
M
III III IV V
12 22 13 23 14 15
24 25
345
"Economy"/Fully closed
Minimum/Low fire
Maximum/High fire
Auxilliary
IV...VI
III
II
I
1213
21 12
N
VI
16 26
6
51
A
actuator switch
wire leads
LZ
shown in
auto position
ASZ...
(1000 Ohm)
b
a
c
Figure 4. Basic Functional Diagram of AGA56.1…
0
AZ L
AZ L
AUTO.
MAN.
AGA56.1A97
EA0554R3
Figure 5 AGA56.1A97 Terminal and Auto-Manual Board.
Commissioning
Manual Operation
1. Set the AUTO/MAN switch in the MAN position.
2. Connect ground to the screw located below the
shaft release button.
3. Connect neutral to the double terminal block,
located on the left side of the gray switch housing.
4. Only terminal "L" must be powered to enable
manual operation. The actuator can now be driven
to the maximum position (switch cam I) or the fully
closed "economy position" (switch cam II) by using
the toggle switch located to the left of the
AUTO/MAN switch.
Automatic Operation
1. Set the AUTO/MAN switch in the AUTO position.
2. Connect ground to the screw located below the shaft
release button.
3. Connect neutral to the double terminal block, located
on the left side of the gray switch housing.
4. Connect line voltage to terminal A to drive the
actuator in the opening direction.
5. Connect line voltage to terminal Z to drive the
actuator in the closing direction.
CAUTION:
Actuator damage will result if power is supplied
to terminals A and Z simultaneously.
Siemens Building Technologies, Inc. Page 3 of 4
Document No. 129-399
Installation Instructions
January 18, 2008
6. Use feedback potentiometer ASZ… for Position
Proportioning Control. This potentiometer is located
at the end of the cam drum.
For information on potentiometer installation, see
Technical Instructions 155-517P25.
Cover Installation
1. Lift the two screws on the cover corners and slide
the cover end into the groove at the gear end of the
actuator (See Figure 6).
2. Press the cover into place and then press the
screws inward and tighten (See Figure 7).
EA0567R1
EA0563R1
Figure 6. Figure 7.
The installation is now complete.
Dimensions
M 8
1-3/4
(44.5) 2-3/16
(55.5)
ALLOW 3.5" SPACE FOR
COVER REMOVAL
1-3/16
(30)
5/8
(16)
2-5/8
(67)
1/4
(6)
1-3/16
(30)
2-1/16
(52.5) 2-1/16
(52.5)
1-7/16
(36)
EA0522R2
5-1/4
(133)
7-1/16
(180)
2-1/16
(52.5) 2-1/16
(52.5)
3/8
(10)
Pg 13.5 / 1/2"
NPSM
M6
7-1/16
(180)
5/16
(8.5)
6-7/16
(164) 5/16
(7.5)
1/16
(1) 1/8
(3.5)
EA0542R3
4-7/16
(113) 3-1/8
(80)
5-3/16
(132)
M6
Figure 8. SQM5x.xxxRxx Dimensions in Inches (Millimeters).
Information in this publication is based on current specifications. The company reserves the right to make changes in specifications and models as
design improvements are introduced. Other product or company names mentioned herein may be the trademarks of their respective owners.
© 2008 Siemens Building Technologies, Inc.
Siemens Building Technologies, Inc.
1000 Deerfield Parkway
Buffalo Grove, IL 60089-4513
U.S.A.
Your feedback is important to us. If you have
comments about this document, please send them
to SBT_technical.editor.us.sbt@siemens.com
Document No. 129-399
Country of Origin: US
Page 4 of 4

Other Siemens Controllers manuals

Siemens Simatic S7-300 User manual

Siemens

Siemens Simatic S7-300 User manual
Siemens ST750 User manual

Siemens

Siemens ST750 User manual

Siemens PXC Series User manual

Siemens

Siemens PXC Series User manual

Siemens SINUMERIK ONE PPU 1740 Series Technical Document

Siemens

Siemens SINUMERIK ONE PPU 1740 Series Technical Document

Siemens ecofast 3RK1702-2GB18-0AA1 User manual

Siemens

Siemens ecofast 3RK1702-2GB18-0AA1 User manual

Siemens SIPROTEC 7SJ61 User manual

Siemens

Siemens SIPROTEC 7SJ61 User manual

Siemens Acvatix SAS31.03 User manual

Siemens

Siemens Acvatix SAS31.03 User manual

Siemens SQL321B Series User manual

Siemens

Siemens SQL321B Series User manual

Siemens SINAMICS S120 Technical Document

Siemens

Siemens SINAMICS S120 Technical Document

Siemens SINAMICS S120 Quick start guide

Siemens

Siemens SINAMICS S120 Quick start guide

Siemens GDB 9E Series User manual

Siemens

Siemens GDB 9E Series User manual

Siemens SIMATIC S5-90U User guide

Siemens

Siemens SIMATIC S5-90U User guide

Siemens Acvatix SAS Series Operator's manual

Siemens

Siemens Acvatix SAS Series Operator's manual

Siemens OpenAir GDE131.1U User manual

Siemens

Siemens OpenAir GDE131.1U User manual

Siemens KNX RL 524D23 User manual

Siemens

Siemens KNX RL 524D23 User manual

Siemens SINUMERIK 840D sl Owner's manual

Siemens

Siemens SINUMERIK 840D sl Owner's manual

Siemens Desigo RXC32.1 User manual

Siemens

Siemens Desigo RXC32.1 User manual

Siemens Ertec 400 User manual

Siemens

Siemens Ertec 400 User manual

Siemens LME7 Series Operator's manual

Siemens

Siemens LME7 Series Operator's manual

Siemens SIRIUS 3RW44 User manual

Siemens

Siemens SIRIUS 3RW44 User manual

Siemens 81000 series User manual

Siemens

Siemens 81000 series User manual

Siemens Synco 200 Operator's manual

Siemens

Siemens Synco 200 Operator's manual

Siemens SIRIUS 3RA68 Series User manual

Siemens

Siemens SIRIUS 3RA68 Series User manual

Siemens RMU7 Sereis User manual

Siemens

Siemens RMU7 Sereis User manual

Popular Controllers manuals by other brands

Lenze c250-S Mounting instructions

Lenze

Lenze c250-S Mounting instructions

baxiroca RWF40 Installation, use and maintenance instructions

baxiroca

baxiroca RWF40 Installation, use and maintenance instructions

Emerson Fisher 67C Series instruction manual

Emerson

Emerson Fisher 67C Series instruction manual

Contemporary Research ICA-FT6 product manual

Contemporary Research

Contemporary Research ICA-FT6 product manual

Samson TROVIS 5500 operating instructions

Samson

Samson TROVIS 5500 operating instructions

Prozeda BDC 102 Installation and operating instructions
Prozeda

Prozeda BDC 102 Installation and operating instructions
Emerson EXD-HP1/2 Operating	 instruction

Emerson

Emerson EXD-HP1/2 Operating instruction

Aerotech ABL9000 Series user manual

Aerotech

Aerotech ABL9000 Series user manual

ABB RELION REM615 Product guide

ABB

ABB RELION REM615 Product guide

SmartLine SL1600 installation instructions

SmartLine

SmartLine SL1600 installation instructions

Stageline LE-500C instruction manual

Stageline

Stageline LE-500C instruction manual

VDH LNG EXT RS D/N user manual

VDH

VDH LNG EXT RS D/N user manual

GameSir G7 SE user manual

GameSir

GameSir G7 SE user manual

Mueller SENTRY II Installation operation & maintenance

Mueller

Mueller SENTRY II Installation operation & maintenance

Playcore Colorado Time Systems Championship Elite Start... User instructions

Playcore

Playcore Colorado Time Systems Championship Elite Start... User instructions

BENDIX EC-15 ANTILOCK CONTROLLER ASSY manual

BENDIX

BENDIX EC-15 ANTILOCK CONTROLLER ASSY manual

EasyIO FG-32 installation guide

EasyIO

EasyIO FG-32 installation guide

Parker Pneumatic BSP Series Setting instructions

Parker Pneumatic

Parker Pneumatic BSP Series Setting instructions

manuals.online logo
manuals.online logoBrands
  • About & Mission
  • Contact us
  • Privacy Policy
  • Terms and Conditions

Copyright 2025 Manuals.Online. All Rights Reserved.