manuals.online logo
Brands
  1. Home
  2. •
  3. Brands
  4. •
  5. Siemens
  6. •
  7. Telephone System
  8. •
  9. Siemens HiPath 3000 SMG Use and care manual

Siemens HiPath 3000 SMG Use and care manual

s
HiPath 3000 SMG / HiPath 5000 RSM
HiPath 3000 / HiPath AllServe
HiPath 4000
Hicom 150 E/H
Hicom 300 E/H
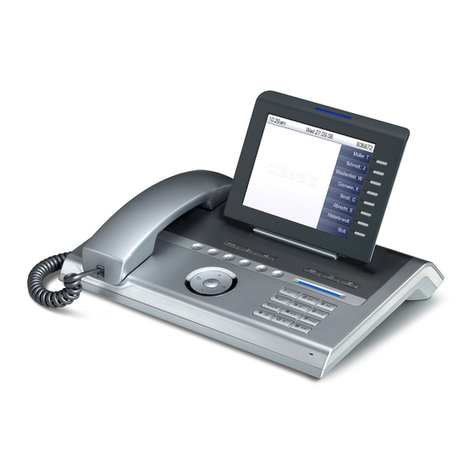
optiPoint 600 office
Administrator Manual
2
Safety Precautions
For Your Safety
The IP telephone optiPoint 600 office complies with the European standard EN 60 950
which deals with the safety of information technology appliances including electronic office
equipment. This de ice has been designed with safety in mind, thus protecting both indi-
iduals and objects.
There is always the danger of small objects being swallowed by young children. In the case
of the optiPoint 600 office, this applies in particular to the connecting cord clip.
Please make sure that such items are not accessible to children.
• Use only the enclosed power supply together with the special LAN cable.
• Ne er open the power supply enclosure.
Protection of the Telephone
• The telephone must not be used in bathrooms, etc. as it is not splashproof.
• Before connecting or disconnecting the LAN cable or the headset cord, pull the power
plug out of the plug receptacle first.
Location of the Telephone
• The telephone should be operated in a controlled en ironment with an ambient tem-
perature between 5 °C and 40 °C (41 °F and 104 °F).
• To ensure good handsfree talking quality, the area in front of the microphone (front
right) should be kept clear. The optimum handsfree distance is 20 in (50 cm).
• Do not install the telephone in a room where large quantities of dust accumulate; this
can considerably reduce the ser ice life of the telephone.
• Do not expose the telephone to direct sunlight or any other source of heat, as this is
liable to damage the electronic equipment and the plastic casing.
• Do not operate the telephone in damp en ironments such as bathrooms.
Table of Contents
3
General Information . . . . . . . . . . . . . . . . . . . . . . . . . . 5
About the Manual . . . . . . . . . . . . . . . . . . . . . . . . . . . . . . . . . . . . . . . . . . 5
Intended Use. . . . . . . . . . . . . . . . . . . . . . . . . . . . . . . . . . . . . . . . . . . . . . 5
Product Identification. . . . . . . . . . . . . . . . . . . . . . . . . . . . . . . . . . . . . . . . 5
Echo Effect . . . . . . . . . . . . . . . . . . . . . . . . . . . . . . . . . . . . . . . . . . . . . . . 6
Ser ice. . . . . . . . . . . . . . . . . . . . . . . . . . . . . . . . . . . . . . . . . . . . . . . . . . . 6
Display menu. . . . . . . . . . . . . . . . . . . . . . . . . . . . . . . . . . . . . . . . . . . . . . 7
Notes and Symbols . . . . . . . . . . . . . . . . . . . . . . . . . . . . . . . . . . . . . . . . . 8
Safety. . . . . . . . . . . . . . . . . . . . . . . . . . . . . . . . . . . . . . . . . . . . . . . . . 8
Symbols in the Manual . . . . . . . . . . . . . . . . . . . . . . . . . . . . . . . . . . . 8
Setting Up the Telephone. . . . . . . . . . . . . . . . . . . . . . 9
Installing the Telephone . . . . . . . . . . . . . . . . . . . . . . . . . . . . . . . . . . . . 10
Starting up the optiPoint 600 office . . . . . . . . . . . . . . . . . . . . . . . . . . . 11
Connection of a HFA phone. . . . . . . . . . . . . . . . . . . . . . . . . . . . . . . 12
Connection of a UP0/E Phone . . . . . . . . . . . . . . . . . . . . . . . . . . . . . . 12
Preparing for Operation . . . . . . . . . . . . . . . . . . . . . . . . . . . . . . . . . . . . 13
Deacti ate "DHCP ser er assignment". . . . . . . . . . . . . . . . . . . . . . . 14
Assigning IP address and Network Mask to the telephone. . . . . . . 14
Assigning Gateway address . . . . . . . . . . . . . . . . . . . . . . . . . . . . . . 15
Virtual LAN settings . . . . . . . . . . . . . . . . . . . . . . . . . . . . . . . . . . . . . 15
Entering the IP address of the HiPath 3000/4000 and the subscriber
number of the optiPoint 600 office . . . . . . . . . . . . . . . . . . . . . . . . . 16
Restarting the system . . . . . . . . . . . . . . . . . . . . . . . . . . . . . . . . . . . 16
Admini tration . . . . . . . . . . . . . . . . . . . . . . . . . . . . . . 17
Administration Menu. . . . . . . . . . . . . . . . . . . . . . . . . . . . . . . . . . . . . . . 17
Access to the Administration Menu . . . . . . . . . . . . . . . . . . . . . . . . 17
File transfer . . . . . . . . . . . . . . . . . . . . . . . . . . . . . . . . . . . . . . . . . . . . . . 18
Download software . . . . . . . . . . . . . . . . . . . . . . . . . . . . . . . . . . . . . 18
Download LDAP template . . . . . . . . . . . . . . . . . . . . . . . . . . . . . . . . 19
Download ser er settings . . . . . . . . . . . . . . . . . . . . . . . . . . . . . . . . 20
Personal directory transfer. . . . . . . . . . . . . . . . . . . . . . . . . . . . . . . . 21
Diagnostics . . . . . . . . . . . . . . . . . . . . . . . . . . . . . . . . . . . . . . . . . . . . . . 23
File transfer status . . . . . . . . . . . . . . . . . . . . . . . . . . . . . . . . . . . . . . 23
ROM test . . . . . . . . . . . . . . . . . . . . . . . . . . . . . . . . . . . . . . . . . . . . . 24
PING test . . . . . . . . . . . . . . . . . . . . . . . . . . . . . . . . . . . . . . . . . . . . . 25
LAN status . . . . . . . . . . . . . . . . . . . . . . . . . . . . . . . . . . . . . . . . . . . . 26
Configuration . . . . . . . . . . . . . . . . . . . . . . . . . . . . . . . . . . . . . . . . . . . . . 27
Phone IP address. . . . . . . . . . . . . . . . . . . . . . . . . . . . . . . . . . . . . . . 27
Network access . . . . . . . . . . . . . . . . . . . . . . . . . . . . . . . . . . . . . . . . 29
Layer 2/3 settings . . . . . . . . . . . . . . . . . . . . . . . . . . . . . . . . . . . . . . 31
SNMP settings. . . . . . . . . . . . . . . . . . . . . . . . . . . . . . . . . . . . . . . . . 32
LAN port settings. . . . . . . . . . . . . . . . . . . . . . . . . . . . . . . . . . . . . . . 33
LDAP ser er settings . . . . . . . . . . . . . . . . . . . . . . . . . . . . . . . . . . . . 33

Table of Contents
4
WAP settings. . . . . . . . . . . . . . . . . . . . . . . . . . . . . . . . . . . . . . . . . . 34
Gatekeeper settings . . . . . . . . . . . . . . . . . . . . . . . . . . . . . . . . . . . . 35
Audio settings . . . . . . . . . . . . . . . . . . . . . . . . . . . . . . . . . . . . . . . . . 36
Housekeeping . . . . . . . . . . . . . . . . . . . . . . . . . . . . . . . . . . . . . . . . . . . . 37
Passwords . . . . . . . . . . . . . . . . . . . . . . . . . . . . . . . . . . . . . . . . . . . . 37
Restart Phone . . . . . . . . . . . . . . . . . . . . . . . . . . . . . . . . . . . . . . . . . 38
Restore phone data . . . . . . . . . . . . . . . . . . . . . . . . . . . . . . . . . . . . . 38
Change operating mode . . . . . . . . . . . . . . . . . . . . . . . . . . . . . . . . . 40
Character Entrie . . . . . . . . . . . . . . . . . . . . . . . . . . . . 41
Entering Characters . . . . . . . . . . . . . . . . . . . . . . . . . . . . . . . . . . . . . . . . 41
Touchscreen Keypad . . . . . . . . . . . . . . . . . . . . . . . . . . . . . . . . . . . . 41
Entering Characters ia the Keypad. . . . . . . . . . . . . . . . . . . . . . . . . 43

External Keyboard . . . . . . . . . . . . . . . . . . . . . . . . . . . . . . . . . . . . . . 44
Index. . . . . . . . . . . . . . . . . . . . . . . . . . . . . . . . . . . . . . . 45
General Information
5
General Information
About the Manual
The instructions within this manual will help you in administering and main-
taining the optiPoint 600 office. The instructions contain important infor-
mation for safe and proper operation of the optiPoint 600 office. Follow
them carefully to a oid improper operation and get the most out of your
multi-function telephone in a network en ironment.
These instructions should be read and followed by e ery person installing,
maintaining or programming the optiPoint 600 office.
These instructions are laid out in a user-oriented manner, which means that
you are led through the operation of the optiPoint 600 office step by step
– from the setup, through descriptions of tools and extensions discussions
of special administrati e and ser ice tasks at the end of the manual. For
the operators, a separate manual is pro ided. The separate quick-reference
guide is meant to pro ide quick and brief explanations regarding frequently
used functions. The Quick Reference Guide is meant to gi e you quick and
reliable explanations regarding frequently used functions. The guide for In-
stallation and Startup describes how to connect the components of the
optiPoint 600 office telephone and how to integrate the telephone into a
LAN en ironment.
Intended U e
The optiPoint 600 office telephone is a desktop unit designed for oice
transmission and for connection to LAN. Any other use is regarded as not
prescribed.
Product Identification
The identification details of your telephone are gi en on the nameplate
containing the exact product designation and serial number on the bottom
of the base unit. Please ha e these ready whene er you call our ser ice
department because of trouble with or defects on the unit itself.
For your own protection, please read the section dealing with safety.
Follow the safety instructions carefully in order to a oid endangering
yourself or other persons and to pre ent damage to the unit.
General Information
6
Echo Effect
In some cases, while using the telephone you may hear an echo, which
can be quite strong. This is not due to any design defect or other fault with
your IP telephone, but caused by the other client. For example, if the echo
occurs during a teleconference, it may be that the loudspeakers and micro-
phones need to be repositioned.
Service
In the case of any trouble or defects on the unit itself, please dial the ser-
ice number of your country.
The Siemens ser ice department can only help you with trouble or
defects on the unit itself.
Should you ha e any questions regarding the operation, your spe-
cialist retailer or network administrator will gladly help you with the
right answers.
General Information
7
Di play menu
A number of functions can be acti ated in the lower field of the display.
The Phone tab pro ides situation-dependent information on the idle or talk
state of your optiPoint 600 office from the communication platform.
The Applications tab contains local applications as follows:
• Personal Telephone Directory
• Corporate Telephone Directory
• WAP-Browser
• Ser ice menu for settings page 17
The Menu key opens up the menu selection option where one of the local
applications can be acti ated and the "Applications" tab can be quickly ac-
cessed.
If the Status information softkey is displayed, system messages ha e
been recei ed (flashing light = unread messages).
Using the Display keypad softkey, you can enter characters ia the display
page 41.
Character input ia the display keypad is useful if there is no external USB
keyboard a ailable.
Phone Directory
Phone tab
Status information
Display keypad
Applications tab
Menu key
mark symbol to read the message(s).
Click the exclamation
General Information
8
Note and Symbol
Safety
Information that is important for pre enting injury or damages is marked
specially, as they are important instructions for correct use of the unit.
This symbol indicates a hazard. Failure to follow the instructions gi en may
result in injury or in damage to the unit.
Symbols in the Manual
The operating steps of actions are shown as follows:
• Lift the handset.
• Dial the required number.
•...
Where se eral different options or possibilities are described, they are
shown like this:
– Option A
– Option B
–...
The symbols located on the telephone keys are used to show the indi idual
operating steps or actions.
oEnter a telephone number or code.
Enter alphanumeric or numeric characters (e.g. ia display keypad).
Click on menu item or softkey on display using the pen pro ided with the
optiPoint 600 office.
If the pen-symbol lacks, the input can also take place without pen (e.g.,
with the help of the na igation keys on the telephone or the external
USB keyboard).
u or vIncrease or reduce the alue depending on the current operating mode.
Basic and enhanced-convenience functions
This symbol indicates a hazard. Failure to follow the instructions gi -
en may result in injury or in damage to the unit.
Key information important for the proper use of the unit is marked
with this symbol.
A B C
Setting Up the Telephone
9
Setting Up the Telephone
This chapter describes how to connect the indi idual elements of the
optiPoint 600 office with each other and how to set up the unit ready for
operation.
Setting Up the Telephone
1
In talling the Telephone
Connectors on the bottom of the telephone
Type of Connection:
UP0/E (with plug-in
mains unit)
Type of Connection:
HFA (with plug-in
mains unit)
Type of Connection:
HFA (power ia LAN)
1USB-Sla e - -
2optiPoint key module, BLF (not HiPath 4000)
LAN connection to network LAN connection to PC
4LAN connection to PC LAN connection
to network
5Communications plat-
form (looped through
at plug-in mains unit)
Plug-in mains unit -
6Headset
7Handset
8Adapter
9USB Master (e.g. for external keyboard)
542167
8
9
Setting Up the Telephone
11
Starting up the optiPoint 600 office
• Plug the short end of the handset cable into the handset and the other
end into the connector 7 at the bottom of the telephone and feed the
cable through the guide channel in the base unit.
• Using a headset:
Plug the jack of the headset cable into connector 6 at the bottom of the
telephone and feed the cable through the guide channel in the base
unit.
• For USB connection:
Plug the offset end of the USB cable into the USB connector 1 at the
bottom of the telephone.
• Using optiPoint key module/optiPoint BLF:
Mount this de ice following the instructions in the installation guide
(A31003-H8400-B934-*-6ZD1).
• Using an adapter:
Mount this de ice following the instructions in the installation guide
(A31003-H8400-B934-*-6ZD1).
• Using the external USB keypad:
Plug the keypad cable into the USB connector 9 at the bottom of the
telephone.
Use only the plug-in power supply unit fitting the
optiPoint 600 office:
– GER/IM: AUL:06D1284
– GBR: AUL:06D1287
– USA: AUL:51A4827
The Western plugs of all cable connections must audibly snap into
place.
Setting Up the Telephone
12
Connection of a HFA phone
... power supported by separate plug-in power supply unit
• Plug the plug-in power supply unit into the mains (please refer to note
on page 11).
• Plug the connector 5 at the bottom of the telephone into the plug-in
power supply unit.
• Connection to PC:
Plug the jack of the connection cable into the connector 4 at the bottom
of the telephone.
• Plug the jack of the LAN cable into the connector at the bottom of the
telephone and connect the cable with LAN.
• Feed the cables through the relief on the back of the housing and fix
them by means of the cable clip.
... power supported by LAN
• Connection to PC:
Plug the jack of the connection cable into the connector at the bottom
of the telephone.
• Plug the jack of the LAN cable into the connector 4 at the bottom of the
telephone and connect the cable with LAN.
• Feed the cables through the relief on the back of the housing and fix
them by means of the cable clip.
After establishing the LAN connection follow the instructions on
page 13.
Connection of a UP0/E Phone
• Plug the plug-in power supply unit into the mains (please refer to note
on page 11).
• Plug the one end of the UP0/E cable into the plug-in power supply unit.
• Connect the other end of the UP0/E cable with the connector 5 at the
bottom of the telephone.
• Feed the cables through the relief on the back of the housing and fix
them by means of the cable clip.
Aprox. 10 sec. after establishing the UP0/E connection the initialization of
the optiPoint 600 office will be displayed. After 10 sec. more the idle dis-
play will be signalling the optiPoint 600 office is ready for operation.
If connecting the optiPoint 600 office without using the plug-in pow-
er supply unit only emergency mode will be useable. Further the
LEDs of the function keys as well as the external USB keypad will
be out of operation.
Setting Up the Telephone
13
Step by Step
Preparing for Operation
A new optiPoint 600 office connected o er HFA in an
HiPath network en ironment without DHCP ser er
that has not yet been used must first be prepared for
operation.
In order to do this,
• the DHCP function (standard setting is on) must be
switched off (see page 14),
• the IP address and Network Mask of the
optiPoint 600 office ha e to be entered
(see page 14),
• the IP address of the HiPath 3000/4000 and the
subscriber number of the optiPoint 600 office ha e
to be entered (see page 16).
After connection the following messages are displayed:
Start display.
Display during boot process.
Display during initialization.
Display after initialization.
Continue as described subsequent.
When the optiPoint 600 office is connected ia
UP0/E (with or without LAN connection) no fur-
ther configuration is neccessary.
When the optiPoint 600 office is connected ia
HFA with an existing DHCP ser er, only the
IP address of the HiPath 3000/4000 and the Call
Number of the phone ha e to be entered. Go into
the "Network settings" menu (see page 29)
and continue as described on page 16.
OptiPoint 600 ROM-Bootimage
...
OptiPoint 600 ROM-Bootimage
ROM boot: Decompressing ...
OptiPoint 600 office
Starting
Out of service
Gatekeeper not foun
Step by Step
Setting Up the Telephone
14
Deactivate "DHCP server assignment"
Click Menu key.
Select "Ser ice".
Select "Administration".
Enter the "Administration password"
(Factory setting: 123456). Text input see page 41.
Click softkey to confirm entry.
Select "Configuration".
Select "Network settings".
Select "Phone IP address".
Click checkbox at "DHCP IP address assignment" to re-
mo e tick.
You must now assign an IP address and Network Mask
to the telephone (see next section).
Assigning IP a ress an Network Mask to
the telephone
Stay in the "Phone IP address" menu and enter an
IP address for the telephone and the Network Mask.
Enter Phone IP address.
Enter Network Mask,
e.g. "255.255.255.0" with a class C network or
"255.255.0.0" with a class B network.
Click softkey to confirm entry.
This configuration should only be executed if
there is no DHCP ser er in the HiPath communi-
cation platform!
4
3
ABC
OK
3
1
1

This configuration should only be executed if
there is no DHCP ser er in the HiPath communi-
cation platform!
ABC
ABC
Save
Setting Up the Telephone
15
Step by Step
Assigning Gateway a ress
Stay in the "Network settings" menu.
Select "Network access".
Select "Default route".
Enter Gateway address.
Click softkey to confirm entry.
Click softkey.
Virtual LAN settings
Stay in the "Network settings" menu.
Select "Layer 2/3 settings".
Select "Quality of ser ice".
Acti ate the checkbox at "Layer 2".
Click softkey to confirm entry.
Select "Virtual LAN".
Enter the number of the VLAN, e.g. "0005".
Click softkey to confirm entry.
Click softkey.
It is recommended to enter a gateway address al-
though this is not necessary to operate an
optiPoint 600 office in a HiPath network en iron-
ment without DHCP ser er.
2
2
A B C
Save
Cancel
If you are working within a irtual LAN (VLAN),
the "Layer2/3 settings" ha e to be changed and
the "Virtual LAN Identifier" has to be specified.
Otherwise you can continue as described on
page 16.
3
1

Save
2
A B C
Save
Cancel
Step by Step
Setting Up the Telephone
16
Entering the IP a ress of the HiPath 3000/
4000 an the subscriber number of the
optiPoint 600 office
You are in the "Network settings" menu.
Click softkey toreturn to the "Configuration" menu.
Select "System settings".
Select "Gatekeeper settings".
Enter Gatekeeper address.
Enter Subscriber number of the optiPoint 600 office.
Acti ate the checkbox at "Status message transfer acti-
ated".
Click softkey to enter the second input screen.
Set the Subscriber password. Repeat the password
entry in the field "Confirm Password".
Click softkey to confirm the entry.
Click softkey.
Click softkey.
Restarting the system
You are in the "Administration" menu.
Click softkey.
The optiPoint 600 office will be restarted automatically.
After restart, the optiPoint 600 office operates in HFA
mode within HiPath 3000/4000 (the display shows
"LAN access mode"). It is in Basic mode then and ready.
For further information concerning configuration, see
chapter "Administration" on page 17.
Cancel
2
3
ABC
ABC

Next
ABC
Save
Cancel
Cancel
Exit
Administration
17
Step by Step
Administration
This chapter and the following chapter "Ser ice Docu-
mentation" describe more detailed settings and the ad-
ministration of the optiPoint 600 office. These opera-
tions require good knowledge of network technology as
well as of network protocols, and they are normally car-
ried out by network administrators.
The optiPoint 600 office can be considered as a normal
data terminal within an indi idual LAN and be managed
as such.
Admini tration Menu
All settings and administrati e tasks are processed ia
the menu "Administration". This menu is protected
against illegal accesses by the Administrator password.
Access to the A ministration Menu
Click Menu key.
Select "Ser ice".
Select "Administration".
Enter the "Administration password"
(Factory setting: 123456). Text input see page 41.
Click softkey to confirm entry.
Within the Administration menu you will find a number
of menus concerning the settings of different function
groups.
File transfer page 18
Diagnostics page 23
Configuration page 27
Housekeeping page 37
2
3
A B C
OK
1
2
3
4
Step by Step
Administration
18
File tran fer
Enter this menu to manage data associated with the
transferring files to and from the phone.
The following menus are pro ided:
• Download software
• Download LDAP template page 19
• Download ser er settings page 20
• Personal directory transfer page 21.
Downloa software
The optiPoint 600 office is supplied from the factory
with a complete executable software package. After the
optiPoint 600 office phone has been installed success-
fully and the download parameters
• Terminal IP address and mask page 28
• IP address of FTP ser er page 20
• User name page 20
• Account name page 20
• Password page 20
• Path page 20
• File name page 20
ha e been initialized, you can in oke an application
download.
Enter the Administration menu. Access page 17.
Select "File transfer".
Select "Downloads".
Select "Download software".
Click softkey to initiate the download.
Click softkey to start the download.
The phone will download and then restart.
1
1
1
OK
OK
Administration
19
Step by Step
Downloa LDAP template
The LDAP template file pro ides the Corporate directo-
ry application with information about the structure of
the remote LDAP directory (e. g. which fields can be
searched, which fields can be retrie ed and which of
the retrie ed fields can be passed to the "Phone" appli-
cation for dialling).
The LDAP template file has to be present on the same
Download Ser er that is the source of software down-
loads.
Example of an LDAP template file (*.txt)
SEARCHBASE "O=SIEMENS COMM, C=GB"
SEARCHFILTER1 = "surnameNational,Surname"
SEARCHFILTER2 = "gi enNameNational,First-name"
SEARCHFILTER3 = "department,Department"
SEARCHFILTER4 = "localityShortCode,Locality"
SEARCHFILTER5 = "ou,Organisational Unit"
SEARCHATTRIB1 = "commonNameNational,Name,0"
SEARCHATTRIB2 = "telephoneNumber,Telephone,1"
SEARCHATTRIB3 = "alternatePhone,Telephone 2,1"
SEARCHATTRIB4 =
"mobileTelephoneNumber,Mobile,1"
SEARCHATTRIB5 = "ou,Organisational Unit,0"
SEARCHATTRIB6 = "localityNational,Location,0"
SEARCHATTRIB7 = "department,Department,0"
SEARCHATTRIB8 = "mainFunction,Function,0"
EOF
Syntax of the LDAP template file
SEARCHFILTER# = "LDAP name,Prompt"
SEARCHATTRIB# = "LDAP name,description, [1=dial,
0= no dial]"
Enter the Administration menu. Access page 17.
Select "File transfer".
Select "Downloads".
Select "Download LDAP template".
Enter LDAP template filename.
1
1
2
A B C
Step by Step
Administration
2
Enter folder name.
The file is expected to be in a sub-folder (different to the
software sub-folder) under the top le el folder as de-
fined on the "Download ser er settings" page 20.
Click softkey to start the download.
Wait until the download is completed.
Click softkey to confirm the sucessfull download.
Downloa server settings
The screen prompts for the location of the download
ser er and the path to the required download files on
that ser er.
Enter the Administration menu. Access page 17.
Select "File transfer".
Select "Download ser er settings".
Enter download ser er address and path to download
files (Text input see page 41).
Click softkey to enter the second input screen.
Enter FTP parameters.
Data is entered in the 3 fields to match the require-
ments of the remote download ser er. The password
content is echoed with asterisks.
Click softkey.
Changes to the abo e fields can be made without re-
starting the phone.
ABC
OK
OK
1
2
ABC
Next
ABC
Save

This manual suits for next models

9

Other Siemens Telephone System manuals

Siemens HIPATH 2000 Instruction Manual

Siemens

Siemens HIPATH 2000 Instruction Manual

Siemens Hicom 150 E Office User manual

Siemens

Siemens Hicom 150 E Office User manual

Siemens HIPATH HIPATH 1190 User manual

Siemens

Siemens HIPATH HIPATH 1190 User manual

Siemens HiPath 5000 RSM User manual

Siemens

Siemens HiPath 5000 RSM User manual

Siemens Profiset 3015 User manual

Siemens

Siemens Profiset 3015 User manual

Siemens HiPath 4000 User manual

Siemens

Siemens HiPath 4000 User manual

Siemens Gigaset 3070/75 ISDN User manual

Siemens

Siemens Gigaset 3070/75 ISDN User manual

Siemens OpenStage 60 T User manual

Siemens

Siemens OpenStage 60 T User manual

Siemens HiPath 3000 V3.0 or later Gigaset M1... User manual

Siemens

Siemens HiPath 3000 V3.0 or later Gigaset M1... User manual

Siemens FTS Series User manual

Siemens

Siemens FTS Series User manual

Siemens Hicom 300 optiset E Standard User manual

Siemens

Siemens Hicom 300 optiset E Standard User manual

Siemens Gigaset S45 User manual

Siemens

Siemens Gigaset S45 User manual

Siemens Profiset 3020 User manual

Siemens

Siemens Profiset 3020 User manual

Siemens HIPATH 2000 User manual

Siemens

Siemens HIPATH 2000 User manual

Siemens SX763 User manual

Siemens

Siemens SX763 User manual

Siemens Gigaset 2415 User manual

Siemens

Siemens Gigaset 2415 User manual

Siemens Gigaset 4010 User manual

Siemens

Siemens Gigaset 4010 User manual

Siemens Profiset 3005 User manual

Siemens

Siemens Profiset 3005 User manual

Siemens HiPath 3000 V3.0 or later Gigaset M1... User manual

Siemens

Siemens HiPath 3000 V3.0 or later Gigaset M1... User manual

Siemens Gigaset 4170 User manual

Siemens

Siemens Gigaset 4170 User manual

Siemens Hicom 102 User manual

Siemens

Siemens Hicom 102 User manual

Siemens HiPath 1100 User manual

Siemens

Siemens HiPath 1100 User manual

Siemens Profiset 3010 User manual

Siemens

Siemens Profiset 3010 User manual

Siemens HiPath 3000 SMGI Use and care manual

Siemens

Siemens HiPath 3000 SMGI Use and care manual

Popular Telephone System manuals by other brands

Panasonic KX-HGT100 Configurations and user instructions

Panasonic

Panasonic KX-HGT100 Configurations and user instructions

Lectrosonics DMTH4 Installation and quick start guide

Lectrosonics

Lectrosonics DMTH4 Installation and quick start guide

SLT ipLDK-60 user guide

SLT

SLT ipLDK-60 user guide

Nortel ICS 7.1 Coordinator Guide

Nortel

Nortel ICS 7.1 Coordinator Guide

Snom 4S Media Server Frequently asked questions

Snom

Snom 4S Media Server Frequently asked questions

SAN/BAR SB6620B Circuit description

SAN/BAR

SAN/BAR SB6620B Circuit description

comwave HT 801 installation guide

comwave

comwave HT 801 installation guide

Telos Hx1 Quick start installation guide

Telos

Telos Hx1 Quick start installation guide

Solidyne HL 203-VQ user manual

Solidyne

Solidyne HL 203-VQ user manual

Aastra Venture IP Telephone System release note

Aastra

Aastra Venture IP Telephone System release note

Panasonic KX-TCA151AZV Service manual

Panasonic

Panasonic KX-TCA151AZV Service manual

TIPTEL 82 IP 8 Quick installation guide

TIPTEL

TIPTEL 82 IP 8 Quick installation guide

Mircom TX3 Series Installation and operation manual

Mircom

Mircom TX3 Series Installation and operation manual

Panasonic KX-TA624-4 Brochure & specs

Panasonic

Panasonic KX-TA624-4 Brochure & specs

EasyPBX EPDH008 Quick user guide

EasyPBX

EasyPBX EPDH008 Quick user guide

Panasonic KX-TS5 user guide

Panasonic

Panasonic KX-TS5 user guide

Samsung OFFICESERV 500 Series General description

Samsung

Samsung OFFICESERV 500 Series General description

Mitel Superset 1000 Quick installation guide

Mitel

Mitel Superset 1000 Quick installation guide

manuals.online logo
manuals.online logoBrands
  • About & Mission
  • Contact us
  • Privacy Policy
  • Terms and Conditions

Copyright 2025 Manuals.Online. All Rights Reserved.