7
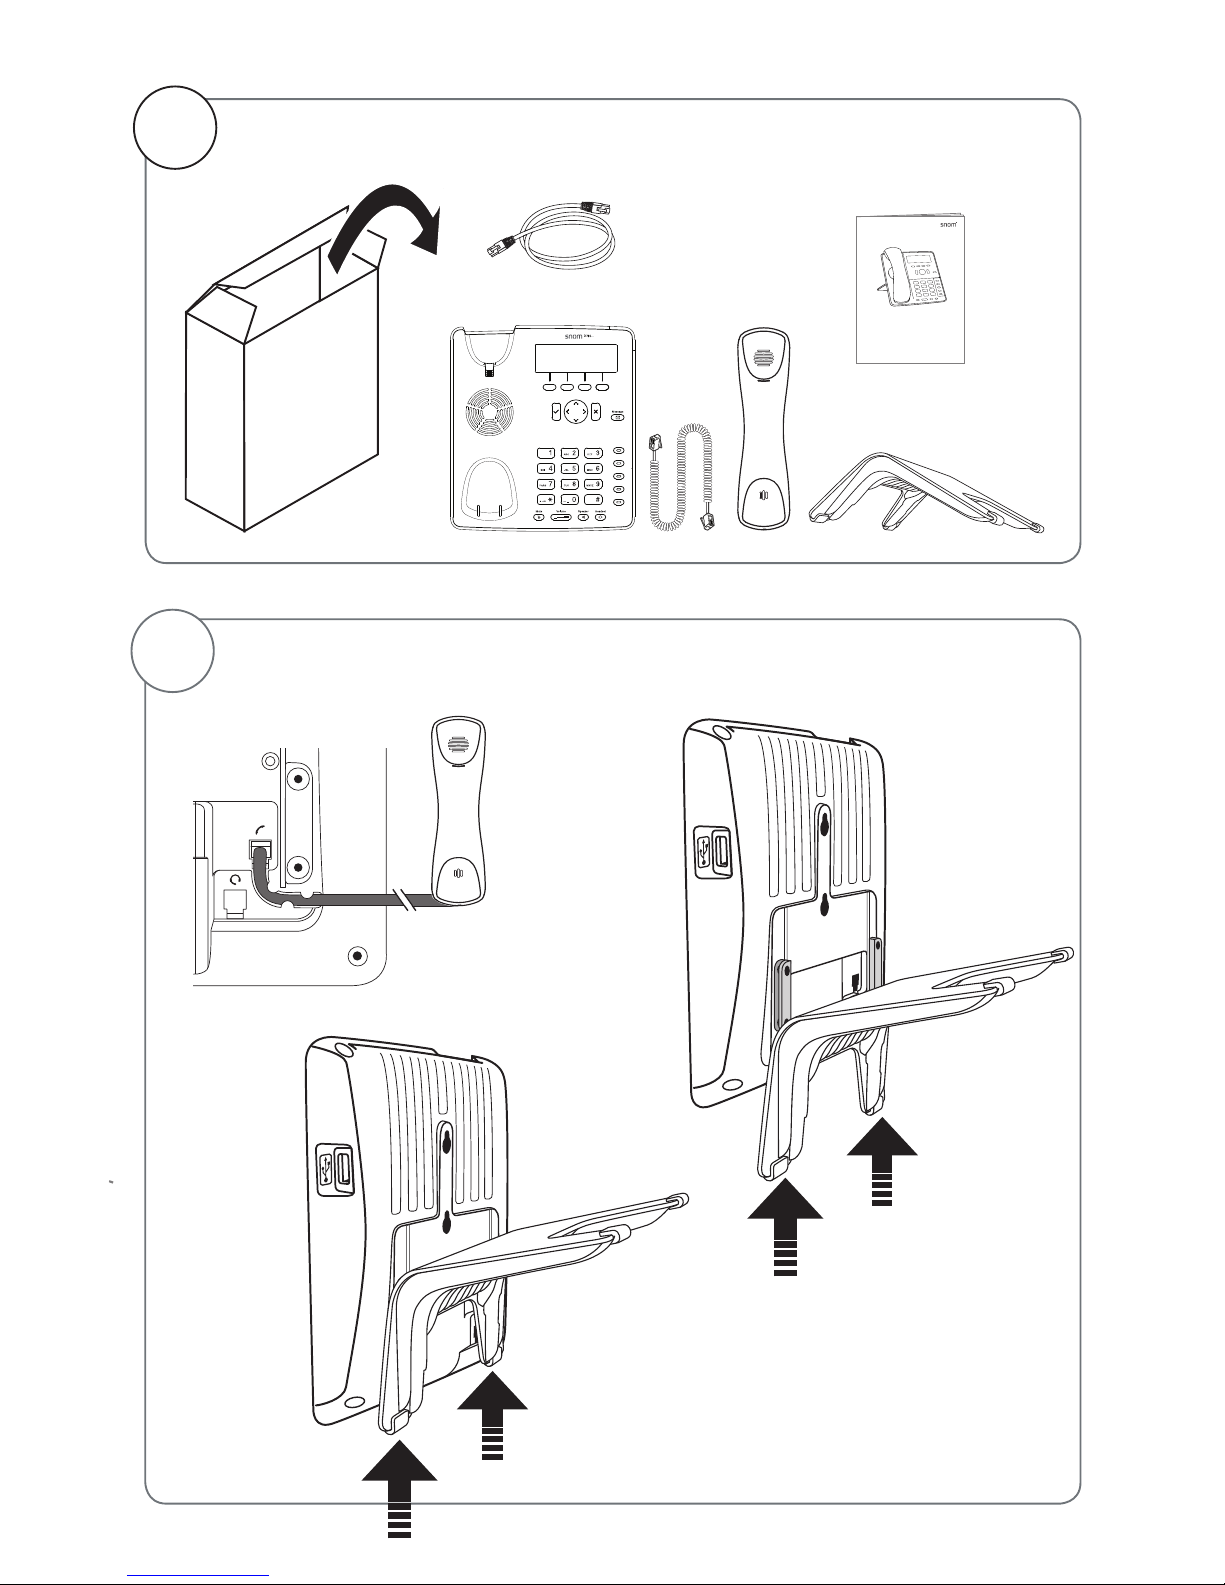
snom D715 Quick Start Guide
E
N
G
L
I
S
H
This quick start guide describes the installation, setup, and operation of the
snom D715. For further information please refer to the manual on our web
page, http://wiki.snom.com.
Copyright, Trademarks, GPL, Legal Disclaimers
© 2014 snom technology Aktiengesellschaft. All Rights Reserved.
snom, the names of snom products, and snom logos are trademarks owned by snom
technology AG. All other product names and names of enterprises are the property of
their respective owners.
snom technology AG reserves the right to revise and change this document at any time,
without being obliged to announce such revisions or changes beforehand or after the
fact.
Texts, images, and illustrations and their arrangement in this document are subject to
the protection of copyrights and other legal rights worldwide. Their use, reproduction,
and transmittal to third parties without express written permission may result in legal
proceedings in the criminal courts as well as civil courts.
Although due care has been taken in the compilation and presentation of the
information in this document, the data upon which it is based may have changed in the
meantime. snom therefore disclaims all warranties and liability for the accurateness,
completeness, and currentness of the information published, except in the case of
intention or gross negligence on the part of snom or where liability arises due to binding
legal provisions.
Our firmware includes some source code that may be used and modified by anyone
and everyone under the GNU Public License (GPL) (see Appendix on page 59),
provided they, in turn, make it available to everyone else with the same licensing
agreement. Please go to http://www.snom.com/en/support/download/gpl-open-
source/ for the original GPL license and the source code of components licensed
under GPL and used in snom products.
Important Information
Please read the instructions on safety and disposal and on how to set up and use the
device before using it and also give them to other users to read or inform those users of
their contents. Save this manual and do not give the device to third parties without it.
Safety Instructions
Follow the instructions in this manual and other applicable documentation of the device.
• If the phone is not supplied with power via an Ethernet cable, use only a power
adapter expressly recommended by snom technology. Other power supplies may
damage or destroy the phone, affect its behavior, or induce noise.
• Avoid placing the cables where people may trip over them or where they may be
exposed to mechanical pressure as this may damage them.
• This device is for indoor use only! NOT FOR OUTDOOR USE!