Sojag Octogonal Sunshelter 12x15 User manual

Assembly Manual
Octogonal Sunshelter 12 x 15 ft.
Exact dimension of the roof, corner-to-corner: 142.9 x 180 inch
Min. dimension suggested for the base: 139 x 176 inch
Sojag code: 500-6159233
UPC code: 772830159233
Guide d’assemblage
Abri-soleil octogonal 3,65 x 4,57 m
Dimension exacte du toit, coin à coin : 363 x 457 cm
Dimension min. suggérée pour la base : 355 x 450 cm
Code Sojag : 500-6159233
Code CUP : 772830159233
© Sojag inc. 2016
Hard Top Sun Shelter
Assembly Instructions
IMPORTANT: RETAIN FOR FUTURE REFERENCE, READ CAREFULLY
Consult with your local governing authority / local municipality codes regarding
installation of temporary structures before assembly. Some jurisdictions may
require permits for, or otherwise regulate, installation and use.
For parts and customer service, please call 1-855-659-4402 in Canada and U.S.
(English and French) Monday to Friday , from 8:30 AM to 4:30 PM, EST.
Abri-soleil à toit rigide
Instruction d’assemblage
IMPORTANT : GARDER POUR RÉFÉRENCE FUTURE, LIRE ATTENTIVEMENT
Veuillez consulter vos autorités municipales avant de compléter l’assemblage
d’un abri temporaire. Certaines municipalités demandent un permis
ou réglementent l’installation ou l’utilisation de l’abri.
Pour contacter le service à la clientèle ou pour commander des pièces,
composer le 1-855-659-4402 au Canada et USA (français et anglais)
du lundi au vendredi, de 8 h 30 à 16 h 30, HNE.

2
© Sojag inc. 2016
IMPORTANT
Read the owner’s manual PRIOR
to start assembly the product.
The unit must be anchored using the
appropriate screws based on the flooring
which it is being anchored to (not included).
IMPORTANT
Lire le guide de l’utilisateur AVANT
de débuter l’assemblage du produit.
Le produit doit être ancré au sol en utilisant
les vis appropriées au type de plancher
sur lequel il sera installé (non inclus).

3
© Sojag inc. 2016
SOLARIUMS, MURAL SOLARIUMS,
and HARD TOP GAZEBO
1. Those are four-season products, meaning that it may be left
up year-round. However, any accumulation of snow must
always be removed from the roof of the unit.
2. The unit must be anchored using the appropriate screws
based on the flooring which it is being anchored to
(not included).
3. If your model has polycarbonate roof panels, the roof panels
must be installed with the UV protected side facing the sun
such as identified.
4. Winter cover and winter bar are offered for certain models
of shelters so allowing the storage. Contact your retailer
for more details.
5. Check all screws for tightness before and during usage of
the unit. Tighten the screws at least twice a year.
6. If you wish to suspend products to the structure, ensure
that the total weight of articles does not exceed 6,8 kg
(15 pounds). Suspend nothing from the structure in case
of strong winds as well as during the winter.
7. The application of silicone is not recommended for solariums
and mural solariums. An inapropriate use of silicone would
prevent the water to evacuate by the holes provided for
this purpose.
8. If your product allows it, remove fabric mosquito nets, mica
and fabric curtains for winter storage.
FABRIC ROOF SUN SHELTERS
1. The fabric roof, mosquito nets, mica and curtains must be
removed and stored during winter.
2. The unit must be anchored using the appropriate screws
based on the flooring to which it is being anchored to
(not included).
3. Check all screws for tightness before and during the usage
of the unit. Tighten the screws at least twice a year.
4. Do not hang any items to the structure.
GARDEN SWINGS
1. The fabric roof must be removed and stored during winter.
2. Check all screws for tightness before and during the usage
of the swing. Tighten the screws at least twice a year.
3. Do not hang any items to the structure.
4. Do not cover the structure with tarpaulin during winter.
SOLARIUMS, SOLARIUMS MURAUX
et ABRIS À TOIT RIGIDE
1. Ces produits sont quatre saisons, ce qui signifie qu’ils peuvent
être laissés à l’extérieur durant toute l’année. Cependant, toute
accumulation de neige doit être retirée du toit en tout temps.
2. Le produit doit être ancré au sol en utilisant les vis appropriées
au type de plancher sur lequel il sera installé (non inclus).
3. Si le produit comprend des panneaux de toit en polycarbonate,
les panneaux de toit doivent être installés en plaçant le côté
protégé contre les rayons UV vers l’extérieur afin que ce côté
soit placé face au soleil tel qu’identifié.
4. Une toile et une barre hivernale sont offertes pour certains
modèles d’abris permettant ainsi l’entreposage. Contacter
votre marchand pour plus de détails.
5. Vérifier l’ensemble des vis avant et pendant l’utilisation du
produit et les resserrer au minimum deux fois par année.
6. Si vous désirez suspendre des produits à la structure,
assurez-vous que le poids total des articles ne dépasse
pas 6,8 kg (15 livres). Ne rien suspendre à la structure en
cas de forts vents ainsi que pendant l’hiver.
7. L’application de silicone est déconseillée pour les solariums et
les solariums muraux. Une utilisation inapropriée de silicone
empêcherait l’eau de s’évacuer par les trous prévus à cet effet.
8. Si votre produit le permet, enlever les moustiquaires, les micas
et les rideaux pour l’hiver.
ABRIS À TOIT SOUPLE
1. Le toit en tissu, les moustiquaires, les rideaux et les micas
doivent être enlevés et mis de côté durant l’hiver.
2. L’abri doit être ancré au sol en utilisant les vis appropriées
au type de plancher sur lequel il sera installé (non inclus).
3. Vérifier l’ensemble des vis avant et pendant l’utilisation
de l’abri et les resserrer au minimum 2 fois par année.
4. Ne rien suspendre à la structure.
BALANÇOIRES DE JARDIN
1. Le toit en tissu doit être enlevé et mis de côté durant l’hiver.
2. Vérifier les vis avant et pendant l’utilisation de la balançoire
et les resserrer au minimum 2 fois par année.
3. Ne rien suspendre à la structure.
4. Ne pas recouvrir la structure d’une bâche durant l’hiver.
OPERATION FONCTIONNEMENT

4
© Sojag inc. 2016
It is very important to read and follow the
safety precautions before assembly and
during the use of the product.
FOR ALL PRODUCTS
1. Keep all children and pets away from assembly area.
2. When assembling and using this product, basic safety
precautions must always be followed to reduce risks
of personal injuries and damages to the product and
its surroundings.
3. Ensure that all the parts are in the boxes before starting
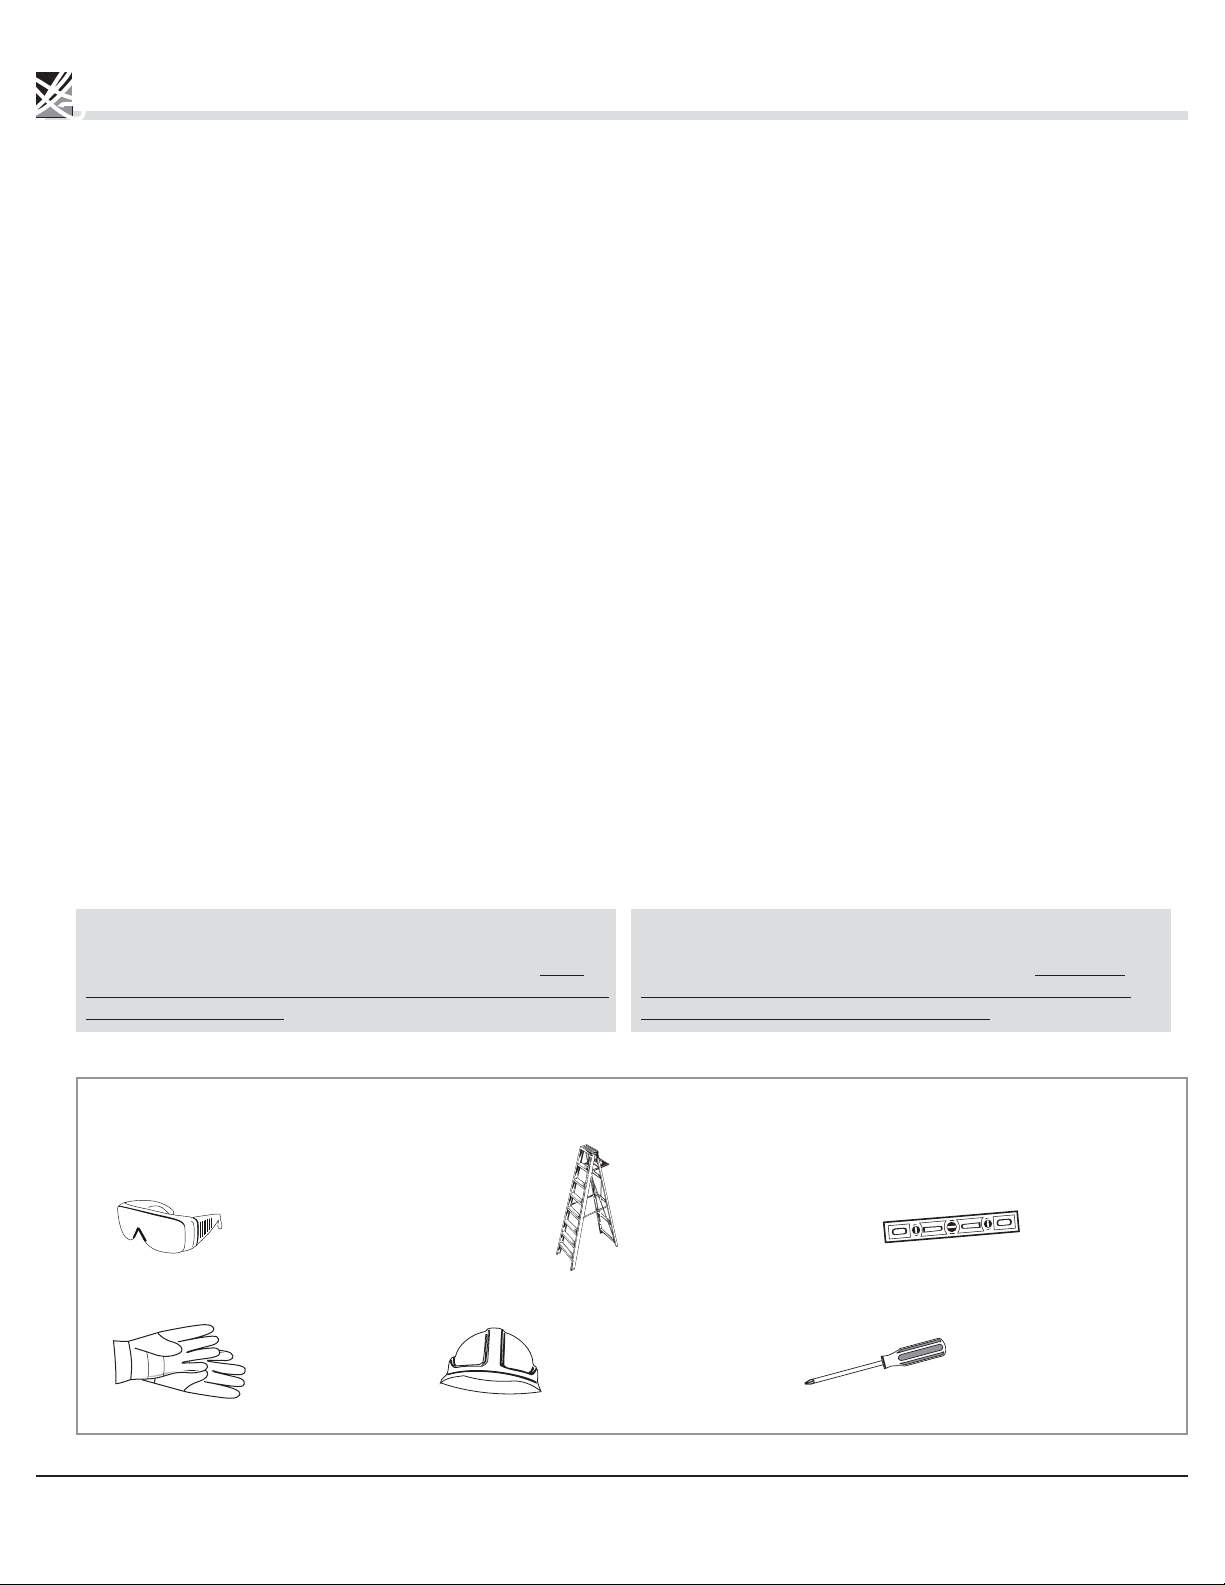
the assembly. It is recommended to wear protective
gloves since some of the parts have sharp edges.
4. Solarium and shed will take at least 8 hours to put up.
Hard top gazebo will take at least 6 hours to put up.
Garden swing and fabric roof sunshelter will take at least
2 hours to put up. You must schedule enough time to
complete the assembly. You cannot leave the product
unattended if it is not fully assembled, even if bolted
to the ground. It is recommended to be at least 3 people
for a safe assembly of the product.
5. Except for mural products, begin the assembly and
install the product more than 1.8 m (6 ft.) away from
any obstructions including, but not limited to, a fence,
overhanging branches, a laundry line or electrical wires
and as much as possible in a place protected from the wind.
6. Always install the product on a leveled platform. Except
garden swing, all products must be anchored to either
wood or concrete using the appropriate screws for the
chosen flooring. (not included)
7. Check all screws for tightness before and during the use
of the product. Tighten the screws at least twice a year.
8. Do not place any type of heat source on/under the
structure or within 1.5 m (5 ft.) of the unit including,
but not limited to, a barbecue or a space heater.
9. Do not install the product in a space where there is the
possibility of high winds.
FOR ALL PRODUCTS
1. For cleaning: use a domestic soap or a soft detergent
and wash with warm water using a sponge or fabric cloth.
Rinse with clean water.
2. Snow must always be removed from the roof of the unit.
Il est très important de lire et de suivre
les règles de sécurité avant de procéder
à l’assemblage et durant l’utilisation de
ce produit.
POUR TOUS LES PRODUITS
1. Garder les enfants et les animaux loin de la zone d’assemblage.
2. Pendant l’assemblage et l’utilisation de ce produit, les règles
de sécurité de base doivent toujours être suivies dans le but de
réduire les risques de blessures et les dommages causés sur le
produit et son environnement.
3. Vérifier que toutes les pièces soient dans la boîte avant d’en
faire l’assemblage. Certaines pièces peuvent avoir des côtés
coupants, il est recommandé de porter des gants de protection.
4. Les solariums et les cabanons prendront au moins huit heures
à assembler. Les abris à toit rigide prendront au moins six
heures à assembler. Les balançoires de jardin et les abris
à toit souple prendront au moins deux heures à assembler.
Il est important de planifier assez de temps pour compléter
l’assemblage. On ne doit pas laisser le produit sans surveillance
si l’assemblage n’est pas terminé, même si ce dernier est vissé
au sol. Il est recommandé d’être au minimum trois personnes
pour effectuer l’assemblage du produit.
5. À l’exception des produits muraux, débuter l’assemblage et
installer le produit à plus de 1,8 m (6 pi) de toutes obstructions,
incluant, mais ne se limitant pas à une clôture, des branches,
une corde à linge ou des fils électriques et le plus possible à
un endroit protégé du vent.
6. Toujours installer la structure sur un sol nivelé. À l’exception
des balançoires de jardin, le produit doit être ancré à un
plancher de bois ou de béton en utilisant les vis appropriées
pour chaque type de plancher. (non inclus)
7. Vérifier l’ensemble des vis avant et pendant l’utilisation du
produit et les resserrer au minimum deux fois par année.
8. Ne placer aucune source de chaleur sous/sur le produit ou
à moins de 1,5 m (5 pi) incluant, sans toutefois s’y limiter,
un BBQ ou un chauffage d’appoint.
9. Ne pas installer le produit dans un endroit où il y a possibilité
de vent important.
POUR TOUS LES PRODUITS
1. Pour le nettoyage : utiliser un savon domestique ou un
détergent doux et laver avec une éponge (ou un linge en
microfibre) et de l’eau tiède. Rincer à l’eau claire.
2. Toute accumulation de neige doit être retirée du toit en
tout temps.
SAFETY INFORMATION RÈGLES DE SÉCURITÉ
CARE AND CLEANING SOINS ET NETTOYAGE

5
© Sojag inc. 2016
FOR ALL PRODUCTS
1. It is the consumer’s responsibility to comply with building
rules, regulations/zoning restrictions orders or any other
regional restrictions and obtain the required permits before
purchasing this product and installing it.
2. Make sure that every part is in the box before
beginning installation.
3. Some parts may have sharp edges; it is recommended to
wear gloves, protection glasses and closed shoes.
4. You must schedule enough time to complete the assembly.
5. You cannot leave the product unattended if it is not fully
assembled, even if bolted to the ground.
6. A minimum of 3 people is required for a safe assembly
of the product.
7. Follow each instruction carefully to ensure the strength
of the product.
8. To avoid damages to the product and its parts, use the
proper tools. Do not use the product as a support. The use
of a ladder is recommended.
9. Keep the instruction manual and the parts list in case of
future needs or references.
10. Do not assemble the product in days of wind or rain.
PRODUCTS WITH POLYCARBONATE ROOF PANELS
POUR TOUS LES PRODUITS
1. Il est de la responsabilité du consommateur de se conformer
aux règles de bâtiment, aux règlements/limitation de zonage,
aux ordonnances ou toutes autres restrictions régionales et
d’obtenir les permis requis avant l’achat de ce produit et d’en
faire son installation.
2.
S’assurer que toutes les pièces soient dans la boîte avant de
débuter l’assemblage
.
3. Certaines pièces peuvent avoir des côtés coupants. Il est
recommandé de porter des gants et des lunettes de protection
et des souliers fermés.
4. Planifier assez de temps pour compléter l’assemblage le
jour même.
5. On ne doit pas laisser ce produit sans surveillance si
l’assemblage n’est pas terminé, même si ce dernier est
vissé au sol.
6. Un minimum de trois personnes est requis pour effectuer
l’assemblage du produit.
7. Suivre toutes les instructions pour s’assurer de la solidité
du produit.
8. Pour éviter les dommages au produit et à ses composantes,
utilisez les outils appropriés. Ne pas utiliser la structure comme
support. L’utilisation d’un escabeau est recommandée.
9. Garder le manuel d’instructions et la liste de pièces en cas
de besoins futurs.
10. Ne pas assembler le produit par journée de vent ou de pluie.
PRODUITS AVEC PANNEAUX DE TOIT EN POLYCARBONATE
PLANNING ASSEMBLY
PLANIFICATION DE L’ASSEMBLAGE
IMPORTANT :
Ne pas retirer la pellicule protectrice des panneaux de
polycarbonate avant leur installation. S’assurer d’exposer le côté protégé
contre les rayons UV du soleil vers l’extérieur de l’unité. Ceci est une
procédure très importante, sans quoi, si elle n’est pas suivie telle que
décrite, le toit ne sera pas couvert par la garantie.
IMPORTANT:
Do not remove the protective film on the polycarbonate
roof panels before
installation. Ensure to put the UV protected side facing the sun. It is a
very important procedure; if not followed as described, your roof will not
be covered by the warranty.
OUTILS REQUIS
Non inclus à l’intérieur de la boîte.
SAFETY GOGGLES
LUNETTES DE SÉCURITÉ
GLOVES
GANTS
STEPLADDER
ESCABEAU
SAFETY HAT
CASQUE DE SÉCURITÉ
LEVEL
NIVEAU
PHILLIPS SCREWDRIVER
TOURNEVIS ÉTOILE
TOOLS REQUIRED
Not included in the box.

6
© Sojag inc. 2016
Pièce Description Qté Surplus
S Vis et écrou borgne M6X47 20 2
T Vis et écrou borgne M6X23 72 8
U Vis M6X23 5 2
V Vis M6X15 118 10
W2 Clé plate 1 10
X Vis M6X10 (D10X20) 16 2
X1 Vis et écrou borgne M6X42 2 1
Y Vis St4.8X12 104 -
Z Clé hexagonale 2 -
Item Description Qty Over
S Screw and cap nut M6X47 20 2
T Screw and cap nut M6X23 72 8
U Screw M6X23 5 2
V Screw M6X15 118 10
W2 Wrench 1 10
X Screws M6X10 (D10X20) 16 2
X1 Screws and cap nut M6X42 2 1
Y Screw St4.8X12 104 -
Z Allen Key 2 -
HARDWARE KIT TROUSSE DE QUINCAILLERIE
NOTE: Parts not shown to actual size and not to scale. NOTE : Le matériel n’est pas représenté à l’échelle.
SX20
UX5
TX72
VX118
YX104
XX16 X1 X2
ZX2
W2 X1
This list do not include the parts required for the options enumerated in page 10.
Cette liste ne comprend pas les pièces nécessaires pour les options énumérées en page 10.

7
© Sojag inc. 2016
NOTE: Parts not shown to actual size and not to scale. NOTE : Le matériel n’est pas représenté à l’échelle.
Item Description Qty
A Column 2
A1 Column 2
A2 Column 4
B Ogee 6
B1 Ogee 2
C Roof Bar 8
C1 Roof Bar 2
E Solidifying Bar 6
E1 Solidifying Bar 4
Pièce Description Qté
A Colonne 2
A1 Colonne 2
A2 Colonne 4
B Moulure 6
B1 Moulure 2
C Barre de toit 8
C1 Barre de toit 2
E Barre de renfort 6
E1 Barre de renfort 4
PARTS LIST LISTE DES PIÈCES
AX2
A1 X2
A2 X4
BX6
B1 X2
X2
C1
X8
C
EX6E1 X4
This list do not include the parts required for the options enumerated in page 10.
Cette liste ne comprend pas les pièces nécessaires pour les options énumérées en page 10.

8
© Sojag inc. 2016
Item Description Qty
F Gap Cover Bar 6
F1 Gap Cover Bar 2
F2 Gap Cover Bar 2
G Track 6
G1 Track 2
H Iron angle 8
H1 Iron angle 2
L Inside Roof Connector 1
M Outside Roof Connector 1
M5 Spacer 96
O Base 8
Pièce Description Qté
F Barre couvre espacement 6
F1 Barre couvre espacement 2
F2 Barre couvre espacement 2
G Rail 6
G1 Rail 2
H Fer angle 8
H1 Fer angle 2
L Connecteur de toit intérieur 1
M Connecteur de toit extérieur 1
M5 Entretoise 96
O Base 8
PARTS LIST LISTE DES PIÈCES
FX6
F1 X2
F2 X2
X6
G
X2
G1
LX1MX1
OX8
HX8
H1 X2
M5 X96
NOTE: Parts not shown to actual size and not to scale. NOTE : Le matériel n’est pas représenté à l’échelle.
This list do not include the parts required for the options enumerated in page 10.
Cette liste ne comprend pas les pièces nécessaires pour les options énumérées en page 10.

9
© Sojag inc. 2016
Item Description Qty
K1 Roof Panel 6
K2 Roof Panel 6
K3 Roof Panel 6
N1 Roof Panel 2
N2 Roof Panel 2
N3 Roof Panel 2
N4 Roof Panel 2
P Corner Cover 8
R Metal bracket 12
D2 Metal bracket 12
D3 Metal bracket 52
Pièce Description Qté
K1 Panneau de toit 6
K2 Panneau de toit 6
K3 Panneau de toit 6
N1 Panneau de toit 2
N2 Panneau de toit 2
N3 Panneau de toit 2
N4 Panneau de toit 2
P Cache-coin 8
R Attache de métal 12
D2 Attache de métal 12
D3 Attache de métal 52
D2 X12
D3 X52
RX12
PX8
K1 X6
K2 X6
K3 X6
N1 X2
N2 X2
N3 X2
N4 X2

10
© Sojag inc. 2016
PERSONALIZE YOUR SHELTER PERSONNALISER VOTRE ABRI
OPTION 1
Decorative fence
Clôture décorative
OPTION 1 + 2
Decorative fence and mosquito net
(with or without curtain)
Clôture décorative et moustiquaires
(avec ou sans rideau)
OPTION 3
Textilene screen wall with mesh front/back doors
(with or without curtain)
Murs en textilène avec moustiquaires en mesh
entrées avant et arrière (avec ou sans rideau)
OPTION 2
Mosquito nets OR mosquito nets with curtains
Moustiquaires OU moustiquaires avec rideaux
To ensure a good assembly of your product, refer to the option bellow while assembling your product.
Référez-vous aux numéro d’options ci-bas pendant l’assemblage de votre produit.

ASSEMBLY ASSEMBLAGE
11
© Sojag inc. 2016
Parts required for this step / Pièces requises pour cette étape :
Step 1 Étape 1
IMPORTANT:
Always install the sun shelter on a level platform, wood or concrete.
IMPORTANT :
Toujours installer l’abri sur une surface nivelée, en bois ou en béton.
X8
O
A/A1/A2
A/A1/A2
V
O
AX2
A1 X2
A2 X4
OX8
VX24

ASSEMBLY ASSEMBLAGE
Parts required for this step / Pièces requises pour cette étape :
12
© Sojag inc. 2016 Need help? Besoin d’aide ?
Step 2 Étape 2
BX6
VX24
XX12
B
B
B
A1
A2
A2
A
B
X
X
V
B
1
1
2
2
1
X2
X4
X
V
B
A/A1
2
X4

ASSEMBLY ASSEMBLAGE
Parts required for this step / Pièces requises pour cette étape :
13
© Sojag inc. 2016
A1 A1
A
A
B1
X4
X
V
B
B1
1
1
1
1
1
B1
VX8
XX4
B1 X2
Step 3 Étape 3

ASSEMBLY ASSEMBLAGE
Parts required for this step / Pièces requises pour cette étape :
14
© Sojag inc. 2016 Need help? Besoin d’aide ?
Step 4 Étape 4
PP
P
P
X8
Y
Y
P
1
1
1
1
1
1
1
1
1
P
P
P
P
PX8YX32

ASSEMBLY ASSEMBLAGE
Parts required for this step / Pièces requises pour cette étape :
15
© Sojag inc. 2016
Step 5.1 Étape 5.1
Process with this step only
if you have the OPTION 3. Procéder avec cette étape
uniquement si vous avez
l’OPTION 3.
Hooks
Crochets
X2
G1
OPTION 3
G
G1
X2
X8
Hook/Crochet
for mosquito nets
pour moustiquaires
X8
Hook/Crochet
for curtain
pour rideaux
SOLD SEPARATELY
VENDUS SÉPARÉMENT
G1
G
X6
X6
Hook/Crochet
for curtain
pour rideaux
SOLD SEPARATELY
VENDUS SÉPARÉMENT
X6
G

ASSEMBLY ASSEMBLAGE
Parts required for this step / Pièces requises pour cette étape :
16
© Sojag inc. 2016 Need help? Besoin d’aide ?
X6
G
X2
G1
Step 5.2 Étape 5.2
Process with this step only
if you have the OPTION 2. Procéder avec cette étape
uniquement si vous avez
l’OPTION 2.
G
G1
X2
X8
Hook/Crochet
for mosquito nets
pour moustiquaires
X8
Hook/Crochet
for curtain
pour rideaux
SOLD SEPARATELY
VENDUS SÉPARÉMENT
G1
G
X6
X6
Hook/Crochet
for mosquito nets
pour moustiquaires
X6
Hook/Crochet
for curtain
pour rideaux
SOLD SEPARATELY
VENDUS SÉPARÉMENT
OPTION 2
Hooks
Crochets

ASSEMBLY ASSEMBLAGE
Parts required for this step / Pièces requises pour cette étape :
17
© Sojag inc. 2016
G
G1
G1
Y
X8
G
G
G
G
G
G
YX36
X6
G
X2
G1
Step 6 Étape 6

Parts required for this step / Pièces requises pour cette étape :
ASSEMBLY ASSEMBLAGE
18
© Sojag inc. 2016 Need help? Besoin d’aide ?
Step 7 Étape 7
YX36
FX6
F1 X2
F2 X2

19
© Sojag inc. 2016
F
F
F
F
F
F
F1
F1
Y
F2
F2
F/F1/F2
F/F1/F2
Y

Parts required for this step / Pièces requises pour cette étape :
ASSEMBLY ASSEMBLAGE
20
© Sojag inc. 2016 Need help? Besoin d’aide ?
Step 8 Étape 8
X8
C
LX1
VX16
C
C
C
C
C
C
C
L
C
L
V
C
X8
1
1
1
Table of contents
Other Sojag Shelter manuals

Sojag
Sojag Romanesque User manual

Sojag
Sojag 500-9162387 User manual

Sojag
Sojag Meridian User manual

Sojag
Sojag 500-6159233 User manual

Sojag
Sojag MERIDIEN User manual

Sojag
Sojag SJDEN85 Instructions for use

Sojag
Sojag Four Seasons User manual

Sojag
Sojag Luxor User manual

Sojag
Sojag 375506 User manual

Sojag
Sojag 445-7159325 User manual

Sojag
Sojag 500-9163285 User manual

Sojag
Sojag 39166 User manual

Sojag
Sojag 852897 User manual

Sojag
Sojag Moreno User manual

Sojag
Sojag 500-9162394 User manual

Sojag
Sojag 500-6159684 User manual

Sojag
Sojag 999-6158779 User manual

Sojag
Sojag 500-9165463 User manual

Sojag
Sojag Four Seasons Sunshelter E442-6159318 User manual

Sojag
Sojag Four Seasons 500-6160222 User manual