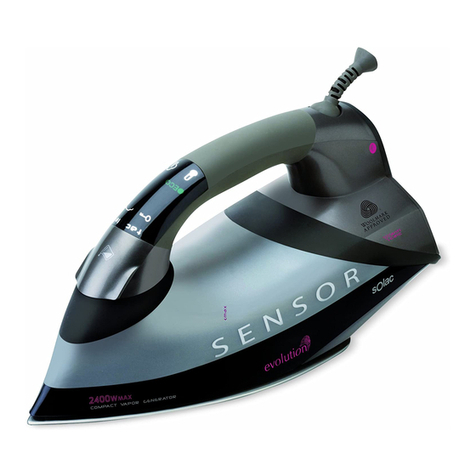
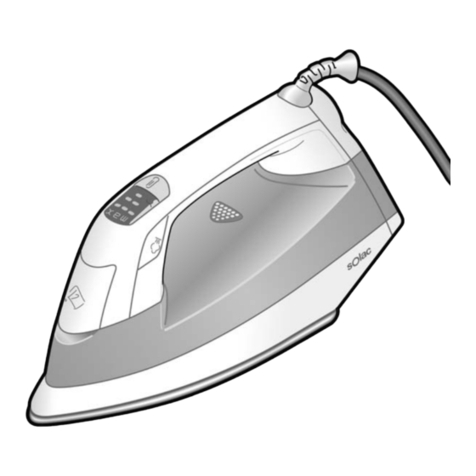
SOLAC CVG 98 series User manual

CENTRO DE PLANCHADO COMPACTO INSTRUCCIONES DE USO
COMPACT VAPOR GENERATOR INSTRUCTIONS FOR USE
CENTRALE DE REPASSAGE COMPACTEC MODE D’EMPLOI
KOMPAKT-BÜGEL-STATION GEBRAUCHSANLEITUNG
CENTRO DE PASSAR COMPACTO INSTRUÇÕES DE USO
CENTRO DI STIRATURA COMPATTO ISTRUZIONI PER L’USO
COMPACTE STRIJKINRICHTING GEBRUIKSAANWIJZING
ŽEHLÍCÍ CENTRUM COMPACT NÁVOD K POUZITÍ
ŻELAZKO KOMPAKTOWE INSTRUCJA OBSLUGI
KOMPAKTNÝ ŽEHLIACI STROJ NÁVOD NA POUZITIU
HASZNALATI ÚTMUTATÓ HASNÁLATI UTASÍTÁS
КОМПАКТЕН ГЛАДЕЩ ЦЕНТЪР
KOMPAKTNI SUSTAV ZA GLAČANJE UPUTE ZA UPOTREBU
EVOLUTION COMPACT IRONING CENTRE INSTRUCŢIUNI DE UTILIZARE
MOD. CVG 98…
Solac is a registered Trade Mark 10/2008
CVG9800.indd 1 28/10/09 17:40:56

5- 9
9
Ê
Č
българск
CVG9800.indd 2 28/10/09 17:40:56

3
CVG9800.indd 3 28/10/09 17:40:56

4
CVG9800.indd 4 28/10/09 17:40:56

5
Gracias por haber elegido Evolution de Solac, el único Centro de Planchado Compacto del mundo, con el
que disfrutará de un planchado profesional con las ventajas de una plancha tradicional.
-
Antes de utilizar su CPC (Centro de Planchado Compacto), retire todas las bolsas de papel o plástico, láminas
plásticas, cartones y pegatinas eventuales que se encuentran dentro o fuera del aparato que sirvieron como
protección de transporte o promoción de venta.
que lo acompaña.
-
mente.
planchado vertical debe hacerse con la prenda sobre un colgador y aislada de otras prendas, elementos
o personas.
-
niente utilizarlo sobre una mesa de planchado estable.
Se debe utilizar el CPC sobre una superficie de planchado estable.
observa alguno de estos problemas lleve el CPC a un S.A.T. autorizado por SOLAC.
supervisión o instrucciones relativas al uso del aparato por una persona responsable de su seguridad.
¡¡ATENCIÓN!! Cuando desee desprenderse del aparato, NUNCA lo deposite en la basura, sino que
acuda al PUNTO LIMPIO o de recogida de residuos más cercano a su domicilio, para su posterior
tratamiento. De esta manera, está contribuyendo al cuidado del medio ambiente.
1. Tapa del orificio de llenado de agua.
2. Salida de spray.
3. Pulsador de spray.
4. Depósito del agua.
CVG9800.indd 5 28/10/09 17:40:57

6
6. Pies antideslizantes.
7. Pantalla LCD.
a) Indicador cambio temperatura.
b) Temperatura seleccionada.
c) Vapor seleccionado.
d) Indicador llenado de agua.
e) Icono filtro antical.
g) Interruptor On-Off vapor.
h) Botón selección de la temperatura.
i) Botón selección caudal de vapor.
8. Vaso.
de llenado ) girándola hacia atrás (ver flecha).
utilizar siempre . De esta forma, usted garantizará que
tiempo. Si por determinadas circunstancias no puede localizar agua destilada, asegúrese de utilizar un agua
pobre en minerales ( blanda ).
-
.
y manteniendo
el CPC en posición vertical, apoyado sobre los pies anti-deslizantes de la tapa trasera Una vez
lleno el depósito cierre la tapa.
Recomendamos clasifique las prendas en función de la temperatura que requieran para su planchado
)
SEDA, temperatura media ()
ALGODÓN, temperatura alta ()
NOTA: Planchar prendas delicadas con una temperatura superior a la necesaria, perjudica al tejido
y provoca la adherencia de residuos quemados a la suela.
Adicionalmente, aparecerá un icono con el
cartucho antical, durante 30 seg, indicando que su plancha dispone de un sistema antical
se enciende, marca estas posiciones.
conectarlo bastará con volver a pulsarlo y se repetirán los pasos descritos en el párrafo anterior.
CVG9800.indd 6 28/10/09 17:40:57

7
-
cionada y está listo para planchar, ya que en la pantalla de comunicación el icono del termómetro dejará
de parpadear y al mismo tiempo sonará un pitido.
de temperatura
hasta alcanzar la temperatura seleccionada.
Los niveles 3
y en la
pantalla aparecerá el icono del vapor en su mayor caudal. Para volver al caudal medio de vapor sólo
tiene que presionar de nuevo el botón de selección. Fig 2 (i).
una vez el interruptor del vapor Fig 6 (g) y ya puede comenzar a planchar.
Para cortar la salida del vapor, presione
de nuevo el interruptor del vapor
-
-
desde la última vez que se utilizó, este se desactiva de forma automática. Esto significa que una vez que
actúa el dispositivo, el CPC deja de calentar y comienza a enfriarse. En ese momento sonará un pitido y apa-
recerá el icono parpadeando durante 5 segundos sobre la pantalla iluminada, y que posteriormente
seguirá parpadeando sobre la pantalla apagada , indicándole que el aparato se ha desconectado. Para
volverlo a activar, basta con moverlo ligeramente o bien pulsar cualquiera de los tres botones de control
en el tiempo que necesite el CPC para volver a recuperar la temperatura seleccionada anteriormente.
-
recomendamos primero planchar con vapor (el adecuado a la prenda que vaya a planchar) y repasar en
seco para deshumedecer la ropa y obtener los resultados de un planchado profesional.
del vapor NO es necesario
vaciar el depósito de agua.
-
CVG9800.indd 7 28/10/09 17:40:57

•
-
quetas, abrigos, cortinas, prendas de ante, etc.
), sitúe el CPC en posición vertical y accione
el vapor es más seco y aunque sigue manteniendo el mismo caudal le será más
icono indicando que se ha de rellenar de agua. Si no se rellena el depósito, la micro-bomba se
desconectará automáticamente en el plazo de 1 minuto para evitar ser dañada. Si se llegase a quedar
interruptor On-Off, desconecte el aparato y rellene el depósito de agua. Al pulsar nuevamente el interruptor
, dicho ruido desaparecerá.
, en posición vertical
según se indica en la figura
y
comience a planchar de nuevo ( esto no es inmediato, sino que transcurrirán unos segundos ).
de la suela dando como resultado un alargamiento de la vida del CPC. Este modelo permite, en caso de
desearlo, reemplazar la resina por una nueva con el objeto de que el CPC se mantenga siempre en óptimo
estado. En caso de desear reemplazar la resina, le recomendamos que lo haga cada 6 meses. El cambio de
la resina no implica que se puedan evitar los consejos sobre la dureza del agua mencionadas en el apartado
reloj, siguiendo las indicaciones del dibujo, presionando a su vez la pieza hacia el interior, hasta situarse en el
candado cerrado. -
8
CVG9800.indd 8 28/10/09 17:40:57

9
-
cuación de conformidad a las leyes nacionales vigentes. Solicite información detallada a este respecto a su
Distribuidor, Ayuntamiento o Administración local.
que para cada aparato se incluyen en el folleto de instrucciones.
Thank you for choosing Solac Evolution, the unique Compact Vapor Generator in the world, with which you
will obtain the benefits of professional pressing combined with the advantages of traditional ironing.
-
Certificate number: M0601
cards and possible stickers that may be on the outside or inside of the appliance that acted as handling
protection or sales promotion material.
voltage.
the independent steam chamber.
be removed from the socket-outlet before the water reservoir is filled with water.
be done with the garment on a hanger and away from other garments, elements or persons.
-
face.
unplug the appliance from the mains first.
SOLAC or a similarly qualified person in order to avoid a hazard.
any of these problems, take the CVG to a one service authorized by SOLAC.
CVG9800.indd 9 28/10/09 17:40:57

10
The CVG should be used on a stable ironing surface.
without supervision.
-
instructed in the use of the appliance by a person responsible for their safety.
IMPORTANT: When you want to dispose of the appliance, NEVER throw it in the rubbish. Take it
to your nearest CLEAN POINT or waste collection centre for treatment. If you do that, you will
be helping to look after the environment.
1. Water filler hole cap.
2. Spray outlet.
3. Spray button.
4. Water tank.
5. Removable anticalc filter.
6. Non-slip legs.
7. LCD display.
a) Temperature change indicator.
b) Temperature selected.
c) Steam selected.
d) Water filling indicator.
e) Anticalc filter icon.
g) Steam On-Off switch.
h) Temperature selector button.
i) Steam flow selector button.
8. Beaker.
turning it backwards (see arrow).
perfect condition for as long as possible. If you cannot find distilled water for any reason, be sure to use
water that is low in minerals (soft).
ironing water. These products can damage the interior of the steam generation system.
the CPC in the vertical position, supported on the non-slip feet of the rear cover (see Figure 2). After the
tank is full, close the cap.
frequently.
-
mend that you classify garments by their required ironing temperature and that you begin ironing with the
)
SILK, medium temperature ()
COTTON, high temperature ()
NB: Ironing delicate garments with a temperature higher than necessary is harmful for the fabric and causes
burnt residue to get stuck to the soleplate.
CVG9800.indd 10 28/10/09 17:40:57

11
-
medium steam position Fig.2. In addition, an icon will appear with the scale-preventing cartridge, for 30 sec,
indicating that your iron has a scale-prevention system Fig 2 (e). To replace it, follow the instructions in the
is ready for ironing, as on the communication display the thermometer icon will cease to blink and at the
same time a buzzer will sound.
button
that it is at temperature level 2. The thermometer will go on the blink again until the selected temperature
is reached. When it has reached it, the warning buzzer will sound and the thermometer will cease to blink
with 1 temperature dot, and so on. Press the temperature button for 2 seconds to disconnect the iron. To
restart it, simply press the button again.
, and the steam icon
will appear in the display at its highest flow. . To revert to medium flow, you just have to press the
selector button again.
switch once and you may start to iron
, just press once and the steam will issue without interruption. To cut off steam output, press
the steam switch again and it will cease to issue automatically.
after the last time it was used. This means that once the device is actuated, the CIS ceases to heat and
begins to cool down. At that moment a buzzer will sound and the icon will appear on the blink
for 5 seconds on the illuminated display, and it will continue blinking afterwards on the display when it
is not lit up indicating that the appliance has been switched off. To switch it back on, just move it
slightly or else press any of the three control buttons ). The CIS will revert to the temperature
and steam position it had before being switched off.
that the CVG may need to regain the temperature selected previously.
appropriate to the garment you are going to iron) and go over the clothes dry to remove the moisture
and obtain results comparable with professional pressing.
CVG9800.indd 11 28/10/09 17:40:57

12
switch It is NOT necessary to drain
the water tank.
jackets, coats, curtains, suede garments, etc.
place the iron in the vertical position and
the steam is drier and, although the same flow is maintained, it will be
harder for you to see.
be refilled. If the tank is not filled, pump will stop automatically within 1 minute to prevent
damaging it.
, in the vertical position as
shown in figure
switch
and start ironing again.
which retains the limy substances in the water, preventing these from reaching the steam chamber in the
resin so that the CVG is kept in optimum condition. If you want to replace the resin, we recommend you
to do it every 6 months. Changing the resin does not mean that you may overlook the advice about water
directions in the drawing, pressing the part inwards at the same time, until reaching the padlock closed
position
CVG9800.indd 12 28/10/09 17:40:57

13
.
according to current national legislation.
of the warranty conditions or failure to follow the operating or maintenance directions included in the
instruction brochure for every appliance.
vous obtiendrez un repassage professionnel tout en conservant les avantages du fer traditionnel.
-
-
l’appareil ayant servi de protection pendant son transport ou sa promotion commerciale.
de la chambre de vapeur autonome.
fourni avec l’appareil.
-
paraîtra rapidement.
CVG9800.indd 13 28/10/09 17:40:58

14
Utiliser la Centrale de Repassage Compacte sur une surface de repassage stable.
1. Couvercle de l’orifice de remplissage de l’eau.
2. Sortie du vaporisateur.
3. Bouton du vaporisateur.
4. Cuve d’eau.
5. Filtre anticalcaire amovible.
7. Ecran LCD.
d) Indicateur de remplissage d’eau.
e) Symbole filtre anticalcaire.
g) Interrupteur On-Off vapeur.
-
-
CVG9800.indd 14 28/10/09 17:40:58

15
-
-
LAINE)
)
)
-
veau de vapeur moyenne Fig.2. De plus, le symbole du dispositif anticalcaire s’affichera pendant 30 s pour
.
fois sur l’interrupteur de la vapeur
, il suffit d’appuyer une seule fois
l’interrupteur On-Off de vapeur et la vapeur stoppera automatiquement.
-
CVG9800.indd 15 28/10/09 17:40:58

16
bip retentira et le symbole
d’un repassage professionnel.
-
actionner l’interrupteur de la vapeur Il n’est
, mettez le fer en position verticale et ac-
sera maintenu, il vous sera plus difficile de vous en rendre compte.
bouton
automatiquement pour ne pas endommager la pompe.
en position
CVG9800.indd 16 28/10/09 17:40:58

17
de garantie ou d’inobservation des instructions de fonctionnement et d’entretien figurant pour chaque
appareil dans la notice d’instructions.
CVG9800.indd 17 28/10/09 17:40:58

18
-
Sehr geehrte Kunden, bevor Sie die Bedienungsanleitung lesen, möchten wir Ihnen einige Hinweise geben,
Hier die wichtigsten Vorteile auf einem Blick:
- eine Pumpe garantiert Ihnen bei jeder Sohlentemperatur permanenten Dampf vertikal und horizontal
- ein großer 430 Wassertank garantiert Ihnen eine hohe Arbeitsautonomie
- kein feuchtes Tuch mehr zum Vermeiden von Glanzstellen bei dunklen Stoffen
Schutz bzw. zur Absatzförderung dienen.
-
verschwindet schnell.
-
Den Betrieb der Mikropumpe hören Sie in Form eines leichten Brummens, wenn der in der Dampfkammer
produzierte Dampf in Richtung der Dampfaustrittsöffnungen der Sohle gepumpt wird.
-
organgs entleeren, muss vorher der Netzstecker gezogen werden.
CVG9800.indd 18 28/10/09 17:40:58

19
-
Feststellung derartiger Probleme bringen Sie die KBS bitte zu einem von Solac anerkannten Kundendienst.
verschwindet schnell.
benutzt werden, es sei denn unter der Aufsicht oder entsprechenden Anleitung einer sicherheits-
verantwortlichen Person.
-
Umweltschutz.
3. Spraytaste
4. Wassertank
5. Austauschbare Anti-Kalk-Kassette
6. Anti-Rutsch-Pads
7. LCD-Anzeige
a) Temperaturampel
d) Symbol Wassermangel
e) Symbol Anti-Kalk-Filter-Wechsel
h) Temperaturwahlschalter
i) Dampfmengen-Wahlschalter
-
(weiches) Wasser zu verwenden.
CVG9800.indd 19 28/10/09 17:40:58

20
WOLLE
diese Stufen anzeigt.
In diesem Fall blinkt das Thermometersymbol (a) nicht mehr und gleichzeitig ertönt ein akustisches Signal.
einstellen können
-
ertönt ein akustisches Signal.
. Im Display erscheint das große Dampfsymbol.
zu beenden, erneut den Dampfschalter (g)
CVG9800.indd 20 28/10/09 17:40:58
Other manuals for CVG 98 series
1
Table of contents
Languages:
Other SOLAC Iron manuals

SOLAC
SOLAC CVG 9800 User manual

SOLAC
SOLAC CVG9511 User manual

SOLAC
SOLAC Optima Center 2400 User manual

SOLAC
SOLAC PV1610 User manual

SOLAC
SOLAC Easy Temp Evolution User manual

SOLAC
SOLAC PV1651 User manual

SOLAC
SOLAC OPTIMA START 2200 CERAMIC User manual

SOLAC
SOLAC PC1500 User manual

SOLAC
SOLAC Great Lakes User manual

SOLAC
SOLAC Optima 2.0 User manual

SOLAC
SOLAC PV2005 User manual

SOLAC
SOLAC OPTIMA PLUS 3000 User manual

SOLAC
SOLAC PV2000-1800 User manual

SOLAC
SOLAC Optima Extrem User manual

SOLAC
SOLAC CPB6100 User manual

SOLAC
SOLAC CVG970 1 User manual

SOLAC
SOLAC CVG9610 User manual

SOLAC
SOLAC CVG9611 User manual

SOLAC
SOLAC PV2014 User manual

SOLAC
SOLAC CVG9506 User manual