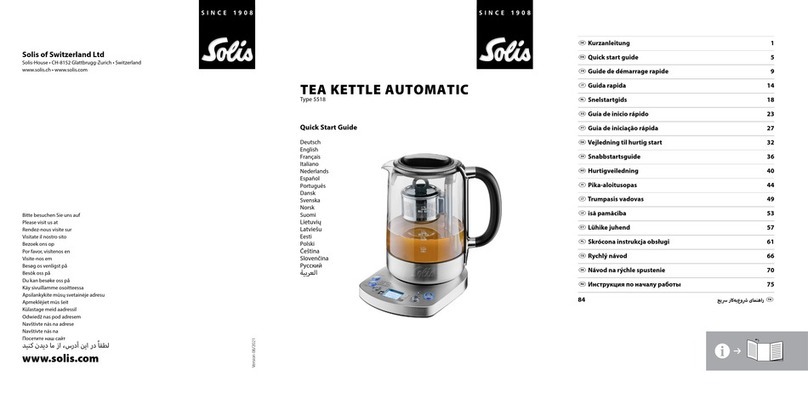
SOLIS 5518 User manual

TEA KETTLE AUTOMATIC
Type 5518
User manual

2
INTENDED USE 3
IMPORTANT SAFETY PRECAUTIONS 3
CONTENTS 6
APPLIANCE DESCRIPTION 6
CONTROL BUTTONS 8
INSTALLATION 8
BEFORE FIRST USE 9
BOILING WATER 9
BREWING TEA 9
AUTO START 10
TEA STRENGTHS 11
CLEANING AND CARE 11
REMOVE LIMESCALE 11
STORAGE 12
TECHNICAL SPECIFICATIONS 12
TROUBLESHOOTING 12
DISPOSAL 13
2 YEAR GUARANTEE 14
SOLIS CUSTOMER SERVICE 14
VCONTENTS

3
VINTENDED USE
• The appliance is exclusively intended to boil water and brew tea.
• Only use the appliance as described in this manual.
• This appliance is intended to be used in household and similar applications such as:
– sta kitchen areas in shops, oces and other working environments;
– farm houses;
– by clients in hotels, motels and other residential type environments;
– bed and breakfast type environments.
• This appliance is intended for indoor use only.
• This appliance is not intended for use by persons (including children) with reduced
physical, sensory or mental capabilities or lack of experience and knowledge unless
they have been given supervision or instruction concerning use of the appliance by
a person responsible for their safety.
• This appliance is not calibrated for commercial or scientic use. Temperatures may
uctuate, however these are within the range for optimal boiling of water for all
types of tea.
• Any use of the appliance other than described in this manual is regarded as misuse
and may cause injury, damage to the appliance and void warranty.
VIMPORTANT SAFETY PRECAUTIONS
GENERAL SAFETY INSTRUCTIONS
6WARNING
•Ensure you have fully read and understood the instructions
in this document before you install or use the appliance.
Keep this document for future reference.
•Do not use the appliance if a part is damaged or defective.
Replace a damaged or defective appliance immediately or
contact Solis or a Solis authorized service center.
•If the power cable is damaged, it must be replaced by
the manufacturer, the service agent or similar qualied
personnel in order to avoid a hazard.
•Do not use the appliance if the surface is cracked.
4
SAFETY INSTRUCTIONS REGARDING INSTALLATION
6WARNING
•Do not drop the appliance and avoid bumping.
•Place the appliance on a stable and at surface.
•Only use the appliance with the provided stand.
•Do not place the appliance on or near a hot gas or electric
burner or in a heated oven.
•Before using the appliance, check that the voltage stated
on the type plate of your appliance matches your mains
voltage. We do not recommend operating the appliance
with a multiway plug adapter.
•Never use the appliance with an external timer switch or
remote control.
•Do not leave the power cable hanging over table edges
to prevent the appliance from being pulled down. Make
sure that neither the appliance nor the power cord or plug
comes into contact with hot surfaces, such as hotplates or a
radiator, or that they come into contact with the appliance
itself.
SAFETY INSTRUCTIONS REGARDING USE
6WARNING
•Children must be supervised to ensure that they not play
with the appliance.
•Disconnect the appliance from the power source before
approaching parts that move in use.
•Do not use the appliance when it is empty. Always ll the
kettle between the minimum and maximum indicator. Do

5
not switch on the appliance when it is empty or the kettle is
lled less than the minimum. This can damage the appliance.
•Do not ll the appliance with more than 1.7 litres of water.
Boiling water can overow out of the appliance when the
appliance is too full.
•Do not operate the appliance with wet hands.
•Do not remove the lid while the water in the appliance is
boiling.
•Be careful when opening the lid, hot steam may escape.
•Do not move the complete appliance when:
–it contains hot water. Only move the kettle.
–when the water is still boiling.
•Be careful when moving the kettle with hot water. Avoid
spillage.
•Be careful when pouring out hot water. Do not tilt the kettle
too fast.
•Avoid spillage on the power connector.
•Be careful when relling the kettle shortly after use. The
kettle may still be hot. Cold water could damage the
product.
•When the kettle is not cooled down, only touch the handle.
SAFETY INSTRUCTIONS REGARDING MAINTENANCE
6WARNING
•Switch o and disconnect the appliance from the power
source before service and when replacing parts. However,
this will delete the time settings you have programmed.

6
•Let the appliance cool down before cleaning.
•Never immerse the appliance in water or place it in a
dishwasher.
•Do not use abrasive chemical cleaning agents such as
ammonia, acid or acetone when cleaning the appliance. This
can damage the appliance.
VCONTENTS
Please check the contents of the package:
1x Tea kettle
1x Power base
1x Tea infuser
1x User manual
VAPPLIANCE DESCRIPTION
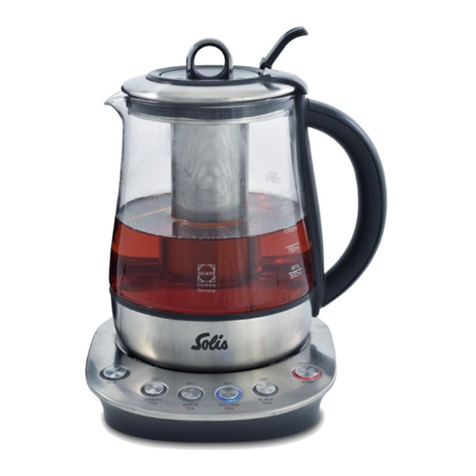
The TEA KETTLE AUTOMATIC is a tea kettle that heats water to a set temperature. It can
also automatically infuse the water with tea. The appliance has dierent temperature
and strength settings to brew your perfect tea. With the auto start function you can set
the TEA KETTLE AUTOMATIC up in the evening and enjoy a warm cup of tea the next
morning. The limescale lter keeps any possible limescale or tea residue in the kettle.

7
q
9
1
2
3
4
5
6
7
8
A
1Lid
2Spout
3Limescale lter with retaining ring
4Tea infuser
5Kettle
6Power base
7Display
8Handle
9Power cable recess
qPower cable

8
VCONTROL BUTTONS
w
poi sa
r t ue y
°C
BREW TEMP BREW TIME
B
wAuto start button
eTea type indicator
rBrew temperature
tBrew time
yTea strength indicator
uPower button
iKeep warm button
oTea button
pTemperature setting buttons
aTime setting buttons
sCustom button
VINSTALLATION
To install the TEA KETTLE AUTOMATIC:
1. Uncoil the power cable q.
2. Place the power base 6on a at and moisture resistant surface. Make sure the
power cable qruns through the power cable recess 9.
3. Place the kettle 5onto the power base 6.
4. Plug the power cable qinto a power outlet.
5. Press any button to switch on the appliance. The display 7lights up.
The appliance is now ready for use.

9
VBEFORE FIRST USE
Clean the appliance before rst use:
1. Boil two full kettles of water (chapter boiling water).
2. Discard the boiled water.
VBOILING WATER
To boil water:
1. Fill the kettle 5with 0.5 - 1.7 liter of water.
2. Close the lid 1.
3. Place the kettle 5onto the power base 6.
4. Use the temperature setting buttons pto set the desired water temperature.
5. Keep the brew time t0:00.
4You can press the keep warm button ito keep the water warm after the process.
The keep warm button ilights up blue when the function is selected.
4Go to chapter Auto start to set a timer.
6. Press the power button uto start boiling water.
– The power button ulights up blue.
– The display 7shows the current water temperature.
The appliance beeps when the process is nished. The power button udims and the
display 7switches o after 15 seconds. When the keep warm function is activated, the
power button and display remains on after use.
7. Disconnect the appliance from the power source after use. However this will delete
the time settings you have programmed.
VBREWING TEA
To brew a kettle of tea:
1. Fill the tea infuser 4with tea.
2. Fill the kettle 5with 0.5 - 1 liter of water.
3. Close the lid 1.
4. Place the kettle 5onto the power base 6.
5. Press the tea button orepeatedly to select the desired tea type. The
tea type indicator eshows the selected tea type.

10
6. Press the custom button srepeatedly to select the desired tea strength.
– The tea strength indicator yshows the selected strength.
– The display 7shows the corresponding brewing time and temperature.
4When the desired tea type is not included, press the custom button sonce and
choose the desired brewing time with the time setting buttons a. Choose the
desired tea temperature with the temperature setting buttons p.
4You can press the keep warm button ito keep the tea warm after the process.
The keep warm button ilights up blue when the function is selected.
4Go to chapter Auto start to set a timer.
7. Press the power button uto start brewing tea.
– The power button ulights up blue.
– The display 7shows the current water temperature.
After the water is boiled, the tea infuser 4goes into the water. The display 7shows
the left brewing time.
The appliance beeps when the process is nished. The power button udims and the
display 7switches o after 15 seconds. When the keep warm function is activated, the
power button and display remains on after use.
8. Disconnect the appliance from the power source after use. However this will delete
the time settings you have programmed.
VAUTO START
To set a timer:
1. Press and hold the auto start button wfor 3 seconds.
2. Set the current time with the temperature setting buttons p. The display 7
shows the set time.
3. Choose the time when the appliance should start the process with the
time setting buttons a. The display 7shows the set time.
4The auto start function works on a 24 hour cycle. You cannot set a timer for more
than 24 hours. (AM = 00:00 - 11:59 / PM = 12:00 - 23:59)
4. Press the power button uto start the auto start function. The display 7shows
the current time and the auto start time. When the current time meets the auto start
time, the appliance starts the process.

11
VTEA STRENGTHS
Dierent teas require dierent infusion times to get the same strength. Consult the table
below to see the brewing time per tea.
Mild Medium Strong
Green 2 3 4
Black 2 2 3
White 2 3 4
Herbal 3 4 5
Oolong 2 3 4
The water temperatures and brewing times specied here are guidelines and may vary
depending on the tea type, the amount of tea and personal taste. You can also choose
a custom brewing time between 0 - 10 minutes. When the brewing time is set to 0, the
water boils without moving the tea basket.
VCLEANING AND CARE
We recommend cleaning the appliance once a week. To clean the appliance:
1. Switch o and disconnect the appliance from the power source. However this will
delete the time settings you have programmed.
2. Clean the appliance with a light damp cloth.
3. Clean the limescale lter with retaining ring 3with water and a soft brush.
Rinse the tea infuser 4with water and clean with a damp cloth.
VREMOVE LIMESCALE
1. Fill the kettle 5with three cups of white vinegar.
2. Add water until the bottom of the kettle is covered.
3. Leave the solution in the kettle overnight.
4. Empty the kettle.
5. Boil two full kettles of water to remove the remaining vinegar from the kettle
(chapter Boiling water).
6. Discard the boiled water.

12
VSTORAGE
Store the appliance in a dry and enclosed space.
VTECHNICAL SPECIFICATIONS
Model-No. KECS8003TH-GS, Type 5518
Voltage 220 - 240 V
Output 1850 - 2200 W
Dimensions (W x D x H) 17 x 22 x 29 cm
Weight 1.8 kg
Technical changes reserved.
VTROUBLESHOOTING
Problem Cause Solution
The appliance does not
function.
The appliance is damaged. Make sure the power cable
is connected to a working
power source. Press any
button. If the appliance
doesn't switch on, the
appliance is damaged.
Contact Solis or a Solis
authorized service center.
The appliance switched o
while the boiling process is
not nished.
The boil-dry protection
switched o the appliance
because it ran without
water.
Allow the appliance to
cool down before next use.

13
VDISPOSAL
EU 2012/19/EU
Information for correct disposal of the product in accordance with the European
Directive EU 2012/19/EU.
At the end of its working life this equipment must not be disposed of as an household
waste. It must be taken to special local community waste collection centres or to a
dealer providing this service. Disposing of electrical and electronic equipment separately
avoids possible negative eects on the environment and human health deriving from
an inappropriate disposal and enables its components to be recovered and recycled
to obtain signicant savings in energy and resources. In order to underline the duty to
dispose of this equipment separately, the product is marked with a crossed-out dustbin.
Solis of Switzerland Ltd reserves the right to carry out technical and visual changes and
modications to improve the product at any time.
SOLIS HELPLINE
This item stands out due to its long-life cycle and reliability. Despite this though, if a
malfunction ever occurs, simply give us a call. Often a breakdown can be easily and
quickly remedied with the right tip or technique without having to straight away
send o the device for repair. We will give you all the advice and practical support you
require. The contact addresses can be found at the end of this manual.
Keep the original packaging in a safe place so that you may use it in the event that
transportation or shipping of the product becomes necessary.

14
V2 YEAR GUARANTEE
4Only valid with a till receipt.
We provide a guarantee for this appliance, if the defect has demonstrably arisen as a
result of faults in the material or construction, and has arisen despite proper handling
and care. Glass breakage is not covered by the guarantee. The guarantee starts from the
date of sale, as noted on the sales receipt, which must be enclosed with the appliance.
For commercial use, the guarantee lasts for 12 months. The detailed guarantee
conditions are available at www.solis.com.
VSOLIS CUSTOMER SERVICE
It is always worth calling us before sending in the appliance, as malfunctions can often
be easily solved by the appropriate tip or trick from our experts. Please visit us at www.
solis.com for countryspecic contact details. Naturally, we would also be pleased to
provide you with information over the phone. Please contact us via the following
telephone numbers:
For Switzerland: +41 91 802 90 10
For Germany: 0800 724 0702
For Austria: 0800 22 03 92
For the Netherlands: +31 85 4010 722
For Belgium: +32 2 808 35 82
For the other countries: +41 44 874 64 84

15
CH
Schweiz / Suisse / Svizzera
Solis Produzione SA
Centro Solis
Via Penate 4
CH – 6850 Mendrisio
Adresse für Warenretouren abweichend – siehe:
Adresse diérente pour les retours de produit – voir:
Indirizzo dierente per resi di merce - vedi:
www.solis.com
091 – 802 90 10
www.solis.ch
D
Deutschland
Solis Deutschland GmbH
Marienstrasse 10
D – 78054 Villingen-
Schwenningen
Adresse für Warenretouren abweichend – siehe:
www.solis.com
0800 – 724 07 02
@ info[email protected]
www.solis.de
AT
Österreich
Solis Austria
Austrasse 30
A – 6832 Sulz
Adresse für Warenretouren abweichend – siehe:
www.solis.com
0800 – 22 03 92
@ info[email protected]
www.solis.at
NL
Nederland
Solis Benelux BV
Stadskade 318
NL – 7311 XX Apeldoorn
Afwijkend adres voor productretouren – zie:
www.solis.com
085 – 4010 722
@ info[email protected]
www.solisonline.nl
BLU
België / Belgique
Belgien / Luxembourg
Solis Benelux BV
Stadskade 318
NL – 7311 XX Apeldoorn
Address for return shipment of goods diers – please
refer to:
Afwijkend adres voor productretouren – zie:
Adresse diérente pour les retours de produit – voir:
www.solis.com
+32 – (0)2 – 808 35 82
@ info[email protected]
www.solis.be
INT
International
Solis Produzione SA
Centro Solis
Via Penate 4
CH – 6850 Mendrisio
Switzerland
Address for return shipment of goods diers – please
refer to www.solis.com
+41 – 91 – 802 90 10
www.solis.com

Please visit us at
Version 02/2021
Solis of Switzerland Ltd
Solis-House • CH-8152 Glattbrugg-Zurich • Switzerland
www.solis.ch • www.solis.com
www.solis.com
Other manuals for 5518
1
Table of contents
Other SOLIS Kettle manuals

SOLIS
SOLIS BKE 700 User manual

SOLIS
SOLIS VARIO 5516 User manual

SOLIS
SOLIS 5511 User manual

SOLIS
SOLIS Vario Temp Kettle User manual

SOLIS
SOLIS CRISTALLO 1.0 User manual

SOLIS
SOLIS Prestige 556 User manual

SOLIS
SOLIS 5515 User manual

SOLIS
SOLIS 586 User manual

SOLIS
SOLIS TEA KETTLE CLASSIC User manual

SOLIS
SOLIS 5518 User manual
Popular Kettle manuals by other brands

Bosch
Bosch TWK3P424 instruction manual

KENT
KENT VOGUE instruction manual

Swan Products
Swan Products SWU8P quick start guide

Blodgett
Blodgett 40ES-KLT Series Installation operation & maintenance

Tower Hobbies
Tower Hobbies T10027 Safety and instruction manual

ELEGANCE
ELEGANCE TOASTESS TSK-23 Instruction booklet