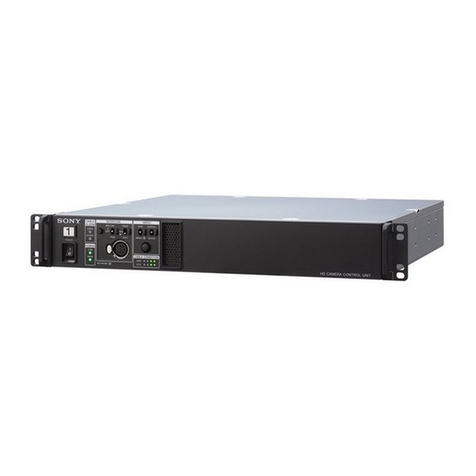
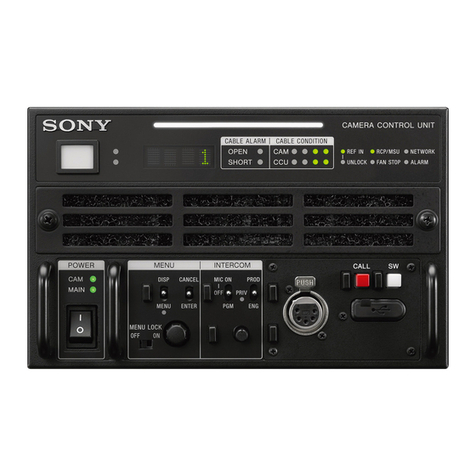
Sony CCB-WD1 Reference guide

Help Guide
Camera Control Box
CCB-WD1
This “Help Guide” explains how to operate the product or a camera connected to the product from a web browser on
your computer.
When the product is connected to a camera, you can turn the camera on/off or shoot images with the camera through
operations in the web browser. Connecting multiple cameras to multiple camera control boxes allows you to shoot
images simultaneously with multiple cameras or apply camera settings to multiple cameras at once.
Refer to the instruction manual for how to connect the product to a camera or a computer.
4-735-434-11(1) Copyright 2018 Sony Corporation
Operating the camera from the computer
Screen layout
Camera information area
Control area
Trademarks
1

Help Guide
Camera Control Box
CCB-WD1
Operating the camera from the computer
You can operate the camera from a web browser on the computer by connecting the product to the camera and the
computer.
Recommended computer environment
OS:
Windows 7/Windows 8.1/Windows 10
Mac OS X 10.11/macOS 10.12 - 10.13
Web browser:
Google Chrome/Internet Explorer*/Safari
4-735-434-11(1) Copyright 2018 Sony Corporation
Version 11.0 or later (as of December 2017)
*
Launch a web browser on the computer, and then enter the following URL into the address bar.
URL:
http://169.254.200.200/
The URL can also be found on the bottom of the product.
The screen for operating the camera will appear on the web browser.
1
Turn the camera on.
Make sure that the battery inside the camera is sufficiently charged.
You can also turn the camera on from the web browser.
2
2

Help Guide
Camera Control Box
CCB-WD1
Screen layout
This section explains the screen layout of the web browser when operating the product or camera.
Explanation of the screen
(A): Camera information area
The live views and shooting information for each connected camera are displayed here.
Select target cameras in this area before controlling them from the control area.
(B): Control area
In the “Camera” tab, you can perform operations on the cameras selected in the camera information area, such as
shooting images or changing the settings.
In the “Box” tab, you can set the synchronization signals for the products or initialize the products.
Hint
If a camera is turned on and connected to the product, but no live view or information for that camera is displayed on the screen,
refresh the web browser by pressing the F5 key on the keyboard.
Note
Do not use the “Back/Forward” buttons on the web browser.
Do not click the “Close” button on the web browser, except when you are done operating the cameras or the camera control
boxes.
Do not perform operations using multiple web browsers. The products may not work properly.
Related Topic
Camera information area
3

Help Guide
Camera Control Box
CCB-WD1
Camera information area
The live views and shooting information for each connected camera are displayed.
Camera information
(A): Camera control box information
A temporarily assigned number indicating the product’s position in the series, a checkbox to select the camera, the
camera label for the connected camera, and the software version of the product are displayed.
Checkbox
You can switch the selection status by clicking the checkbox.
Connected cameras are unselected initially. Make sure that the checkboxes for the target cameras are checked before
you operate or set up the cameras.
5

Camera label
You can edit the camera label by clicking it.
The camera’s model name and camera ID are displayed as the camera label initially.
(B): Live view
The live view for the camera is displayed.
Live-view frame rate
You can switch between “Low” and “Standard” as the live-view frame rate by double-clicking the live view. The current
frame rate of the live view is displayed below the live view.
Focus button
If you move the cursor over the live view, the “Focus” button will appear.
You can adjust the focus by clicking the “Focus” button (only in the manual focus mode).
Adjust the focus using .
(C): Shooting information
The shooting information for the camera is displayed.
Toolbar
You can use the toolbar to display grid lines over the live view or rotate the live view.
(Rotate/Reset Rotation)
Rotates the live view of the selected cameras. The rotation can be reset by clicking .
(Grid Line)
Displays grid lines over the live view. The type of grid lines changes each time you click this button.
(Select All/Cancel All)
Selects all the cameras. / Unselects all the cameras.
(Ascending Sort/Descending Sort)
Sorts the camera information by camera label in ascending order ( ) or in descending order ( ).
(Zoom Out/Zoom In)
Increases or decreases the magnification of the live view.
(Index Display/Main Information Display/Details Display)
Switches the method in which the camera information is displayed.
Hint
You can change the ordering of the camera information by dragging and dropping.
6

Note
When you change the combination of a camera control box and camera, any edited camera label is deleted. The model name
and camera ID of the connected camera are displayed as the camera label.
Setting the frame rate of the live view to “Standard” for multiple cameras may slow down the computer.
Related Topic
Control area
4-735-434-11(1) Copyright 2018 Sony Corporation
7

Shooting buttons
AF/AE ON
Performs auto-focusing and locks the exposure.
During execution of “AF/AE ON,” the message “Executing AF/AE...” appears in the shooting information field (camera
information area). You cannot change the settings for the camera while this message is displayed.
AF/AE OFF
Cancels auto-focusing and exposure locking.
AEL ON
Locks the exposure.
AEL OFF
Cancels exposure locking.
Shoots a still image.
This button works only when the camera is set to the still-image shooting mode.
Continuous shooting cannot be performed even if you press and hold this button. Use the “Cont. Shooting” buttons to
perform continuous shooting.
9

Starts movie recording.
This button works only when the camera is set to the movie recording mode.
Stops movie recording.
Cont. Shooting (Continuous shooting)
These buttons work only when the camera is set to the still-image shooting mode and the drive mode is set to the
continuous shooting mode.
Start
Starts continuous shooting.
During continuous shooting, the message “Executing Cont. Shooting...” appears in the shooting information field
(camera information area). You cannot change the settings for the camera while this message is displayed.
Stop
Stops continuous shooting.
HFR (High-Frame-Rate shooting)
These buttons work only when the camera is set to the HFR mode.
Standby
Switches the camera to the shooting standby screen.
Setting
Switches the camera to the shooting setting screen.
REC
Starts HFR shooting.
If the timing of recording is set to the start-trigger mode in the camera’s HFR shooting settings, capturing (shooting) will
start.
If the timing of recording is set to the end-trigger mode, capturing will end and the camera will start recording the movie
to the memory card.
Stop
If the timing of recording is set to the start-trigger mode in the camera’s HFR shooting settings, the camera will stop any
HFR shooting in progress.
Cancel
Cancels recording to the memory card.
(Power)
10

On
Turns the cameras on.
Standby
Turns the cameras off.
Memory Card (Memory card)
Import
Displays the screen for file transfers.
To import files to the computer
Hint
You can specify the file names for the imported files using the pull-down menu at the bottom of the file import screen.
Add the Camera Label:
Select the camera.
You can select a camera by its camera label using the pull-down menu at the top of the file import screen.
The images shot by the camera that corresponds to the selected camera label will be listed.
1.
Select the desired images using the checkboxes on the file import screen.2.
Click the “Start Import” button.
The selected images will be imported to the computer.
3.
11

Imports files with the camera label prefixed to the original file names of the selected images.
Keep Original Name:
Imports files with the original file names of the selected images.
Note
If the images on the memory card inserted into the camera do not transfer, check the security level settings of the computer.
If you try to transfer images from a camera connected to a camera control box with the MASTER/CLIENT (Master/Client) switch
set to CLIENT, a confirmation screen may not be displayed in the web browser after the data is prepared. In this case, downloads
from a domain other than the one displayed may be restricted in the computer’s OS settings. Check the settings on the computer.
You cannot transfer a file whose size exceeds 4 GB. The estimated lengths of movies equivalent to 4 GB are given below:
XAVC S HD 60p/50p 50M: approximately 11 minutes
MP4 1920×1080 60p/50p 28M: approximately 23 minutes
Format
Formats the memory card inserted into the camera.
Date/Time (Date and time setting)
You can apply the date, time, and area settings on the computer to the date, time, and area settings on the camera by
clicking “Link.”
Settings (Copying and applying shooting settings)
Copy
Copies the shooting settings of the selected camera and displays them in the control area. Only one camera can be
selected.
Reflect
Applies the shooting settings currently displayed in the control area to the selected cameras. Multiple cameras can be
selected.
Exit
Exits the function for copying shooting settings.
Shooting settings
12

You can change the shooting settings for the cameras. Select the desired setting from the pull-down menu for each
setting item.
Click next to a setting title to collapse the items. Click next to a setting title to expand it.
“Box” tab
You can set the synchronization signal, update the software, or initialize all of the connected camera control boxes using
the “Box” tab.
Video Sync Signal Setting (Settings for the video synchronization signal)
You can set the video synchronization signal for synchronizing the connected cameras. Select a frame rate according to
the movie recording settings on the cameras.
“Video Sync” appears in the shooting information field (camera information area) during exposure synchronization.
“TC Sync” appears in the shooting information field (camera information area) during time-code synchronization.
Select MENU → (Setup) → [TC/UB Settings] → [TC Run] → [Free Run] on each camera when you perform
time-code synchronization.
If you add a camera control box to the network after the date has changed, the time code for the added camera
control box will be desynchronized even if you have already performed time-code synchronization. In this case,
restart the camera control box whose MASTER/CLIENT (Master/Client) switch is set to MASTER.
If the selected synchronization signal is different from the recording setting on the camera, synchronization will not be
performed.
When you use the HDMI output function, set the frame rate in the HDMI output settings according to the recording
settings on the camera.
Set the recording setting for HFR shooting to 24p when you are using the cameras in the NTSC mode and want to
synchronize them in the HFR shooting mode.
You cannot perform time-code synchronization when the recording format is set to MP4, or in the HFR shooting
mode.
Firmware update (Software update)
You can update the software of the camera control box. All of the camera control boxes in the same network can be
updated at once.
Download the update file from the designated website in advance.
Do not disconnect the cables or shut down the power source while updating. This may cause the product to
malfunction.
For the latest information on software updates, refer to the product website.
13

Licensing Information (Licensing information)
You can view the licensing information for the software included in the product.
Initialize (Initialization)
You can initialize the settings, etc. for the camera control boxes.
Do not shut down the power source during initialization. This may cause the products to malfunction.
Related Topic
Camera information area
4-735-434-11(1) Copyright 2018 Sony Corporation
14

Help Guide
Camera Control Box
CCB-WD1
Trademarks
Microsoft, Windows and Internet Explorer are registered trademarks or trademarks of Microsoft Corporation in the
United States and/or other countries.
Mac and Safari are registered trademarks or trademarks of Apple Inc., registered in the U.S. and other countries.
Google Chrome is a trademark or registered trademark of Google Inc.
In addition, system and product names used in this manual are, in general, trademarks or registered trademarks of their
respective developers or manufacturers. However, the ™ or ® marks may not be used in all cases in this manual.
4-735-434-11(1) Copyright 2018 Sony Corporation
15
Other manuals for CCB-WD1
1
Table of contents
Other Sony Control Unit manuals
Popular Control Unit manuals by other brands

WindowMaster
WindowMaster CompactSmoke WSC 104 Installation instruction

WindowMaster
WindowMaster WCC 106BT MotorController Installation instruction

UNIONCOMMUNITY
UNIONCOMMUNITY MCP-040 installation guide

Care Fusion
Care Fusion Alaris 8600 Technical & service manual

BIG TREE TECH
BIG TREE TECH Relay V1.2 user manual

IR-Tec
IR-Tec OS-NET Programming guide

System air
System air BOR-S Series Installation, maintenance and operation instructions

Glowworm
Glowworm Smart Wiring Center 2 Installation and servicing

SIGMA TEK
SIGMA TEK TO 161 operating manual

TV One
TV One 1RK-SPDR-PWR user guide

Blue Technix
Blue Technix Sentis3D-M530 Hardware user manual

FeiYu Tech
FeiYu Tech FYitm instructions