Sony UPA-PC105 User manual

3-207-304-13 (1)
Digital Photo
System
© 2002 Sony Corporation
UPA-PC105
Operating Instructions ___________________________________GB
Mode d’emploi _________________________________________FR
Bedienungsanleitung ____________________________________DE
UPA-PC105

()
UPA-PC105
2 GB
Owner’s Record
The model and serial numbers are located in the rear.
Record these numbers in the spaces provided below.
Refer to them whenever you call upon your Sony dealer
regarding this product.
Model No. ____________________
Serial No. ____________________
To prevent fire or shock hazard, do not expose
the unit to rain or moisture.
To avoid electrical shock, do not open the
cabinet. Refer servicing to qualified personnel
only.
THIS APPARATUS MUST BE EARTHED.
This unit has no power switch.
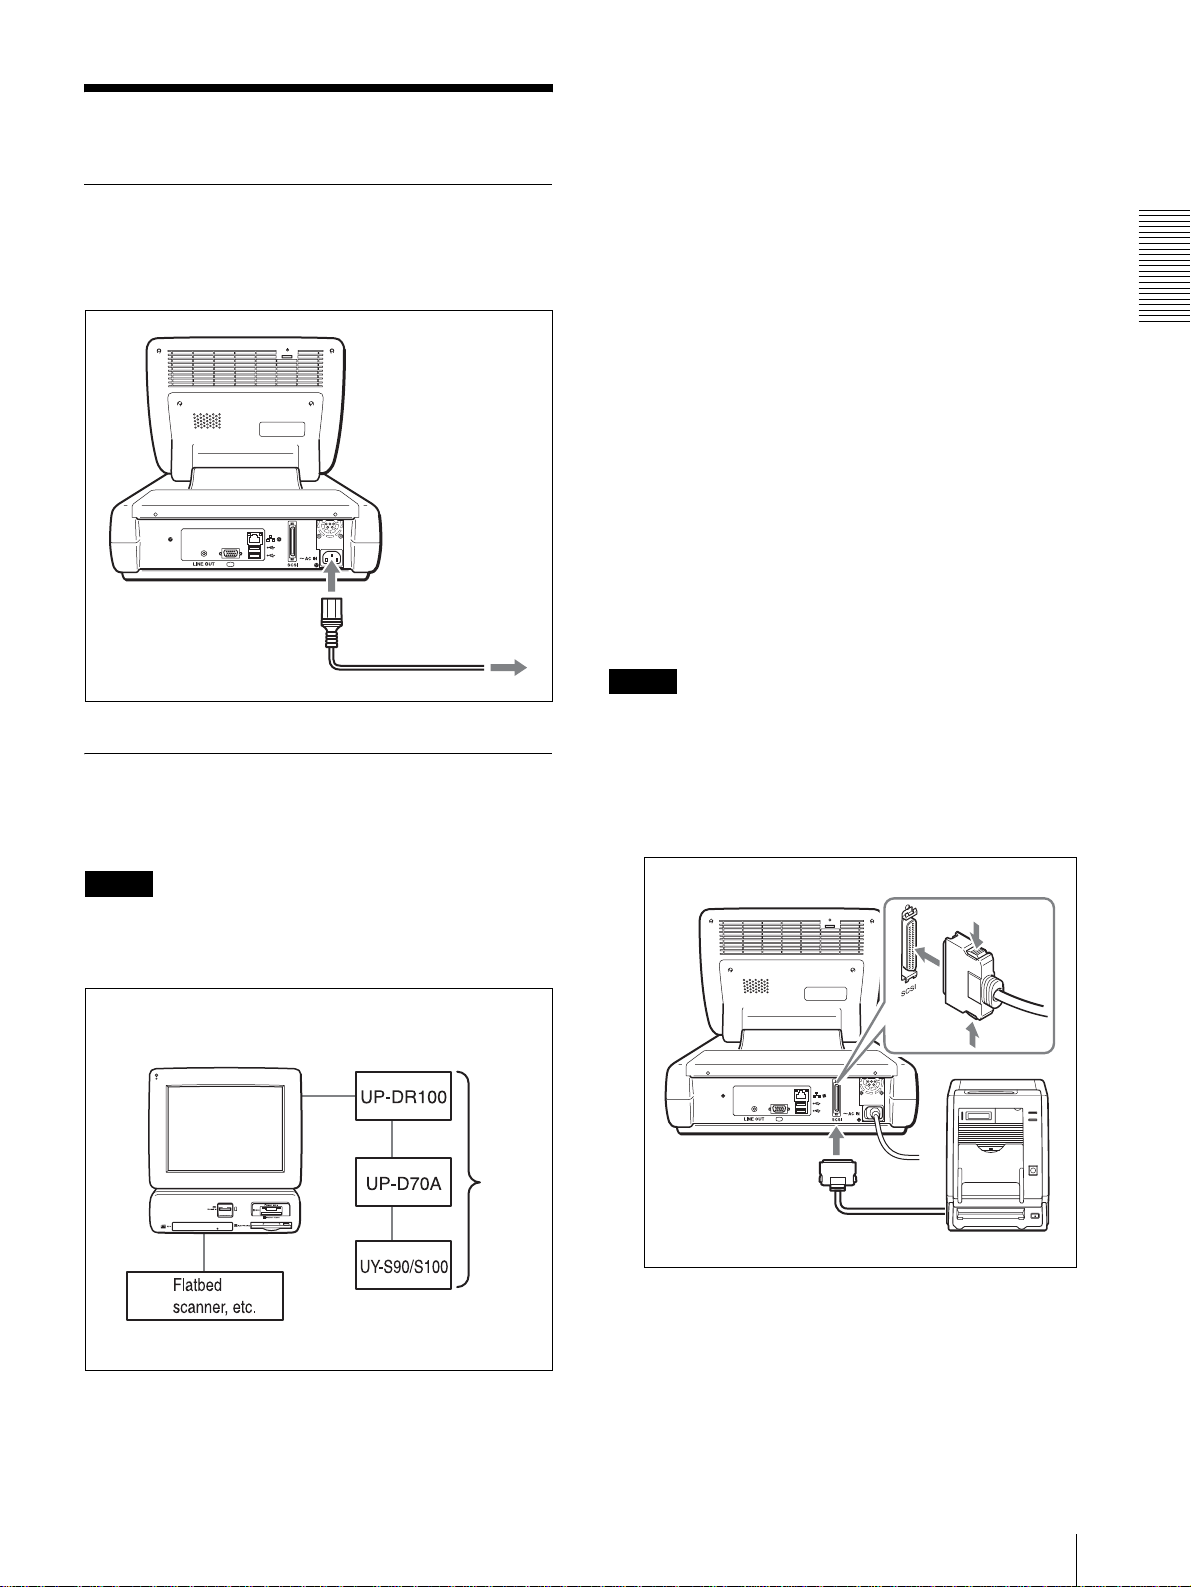
When installing the unit, incorporate a readily
accessible disconnect device in the fixed wiring, or
connect the power cord to asocket-outlet which must be
provided near the unit and easily accessible.
If a fault should occur during operation of the unit,
operate the disconnect device to turn off the power
supply, or disconnect the power cord.
For customers in the U.S.A.
This equipment has been tested and found to comply
with the limits for a Class A digital device, pursuant to
Part 15 of the FCC Rules. These limits are designed to
provide reasonable protection against harmful
interference when the equipment is operated in a
commercial environment. This equipment generates,
uses, and can radiate radio frequency energy and, if not
installed and used in accordance with the instruction
manual, may cause harmful interference to radio
communications. Operation of this equipment in a
residential area is likely to cause harmful interference in
which case the user will be required to correct the
interference at his own expense.
You are cautioned that any changes or modifications not
expressly approved in this manual could void your
authority to operate this equipment.
The shielded interface cable recommended in this
manual must be used with this equipment in order to
comply with the limits for a digital device pursuant to
Subpart B of Part 15 of FCC Rules.
• Do not use this unit near water, for example, near a
bathtub, wash basin, kitchen sink, or laundry tub, in a
wet basement or near a swimming pool.
• Avoid using this unit during an electrical storm. There
may be a remote risk of electric shock.
• Do not use this unit in the vicinity of a gas leak. Report
the leak.
CAUTION
Use of controls or adjustments or performance of
procedures other than those specified herein may result
in hazardous radiation exposure.
For customers in Europe
Laser diode properties
Material: GaA1As
Wavelength: 780 nm
Emission duration: continuous
Laser output power: less than 44.6 µW
Laserdiode data
Materiale: GaA1As
Bølgelængde: 780 nm
Strålingsvarighed: Kontinuerlig
Laser utgangseffekt: mindre end 44,6 µW
Laserdiodens egenskaper
Material: GaA1As
Våglängd: 780 nm
Strålningstid: utan avbrott
Laseruteffkt: mindre enn 44,6 µW
Laserdiodens egenskaper
Materiale: GaA1As
Bølgelengde: 780 nm
Emisjonslengde: Kontinuerlig
Laser utgangseffekt: mindre än 44,6 µW
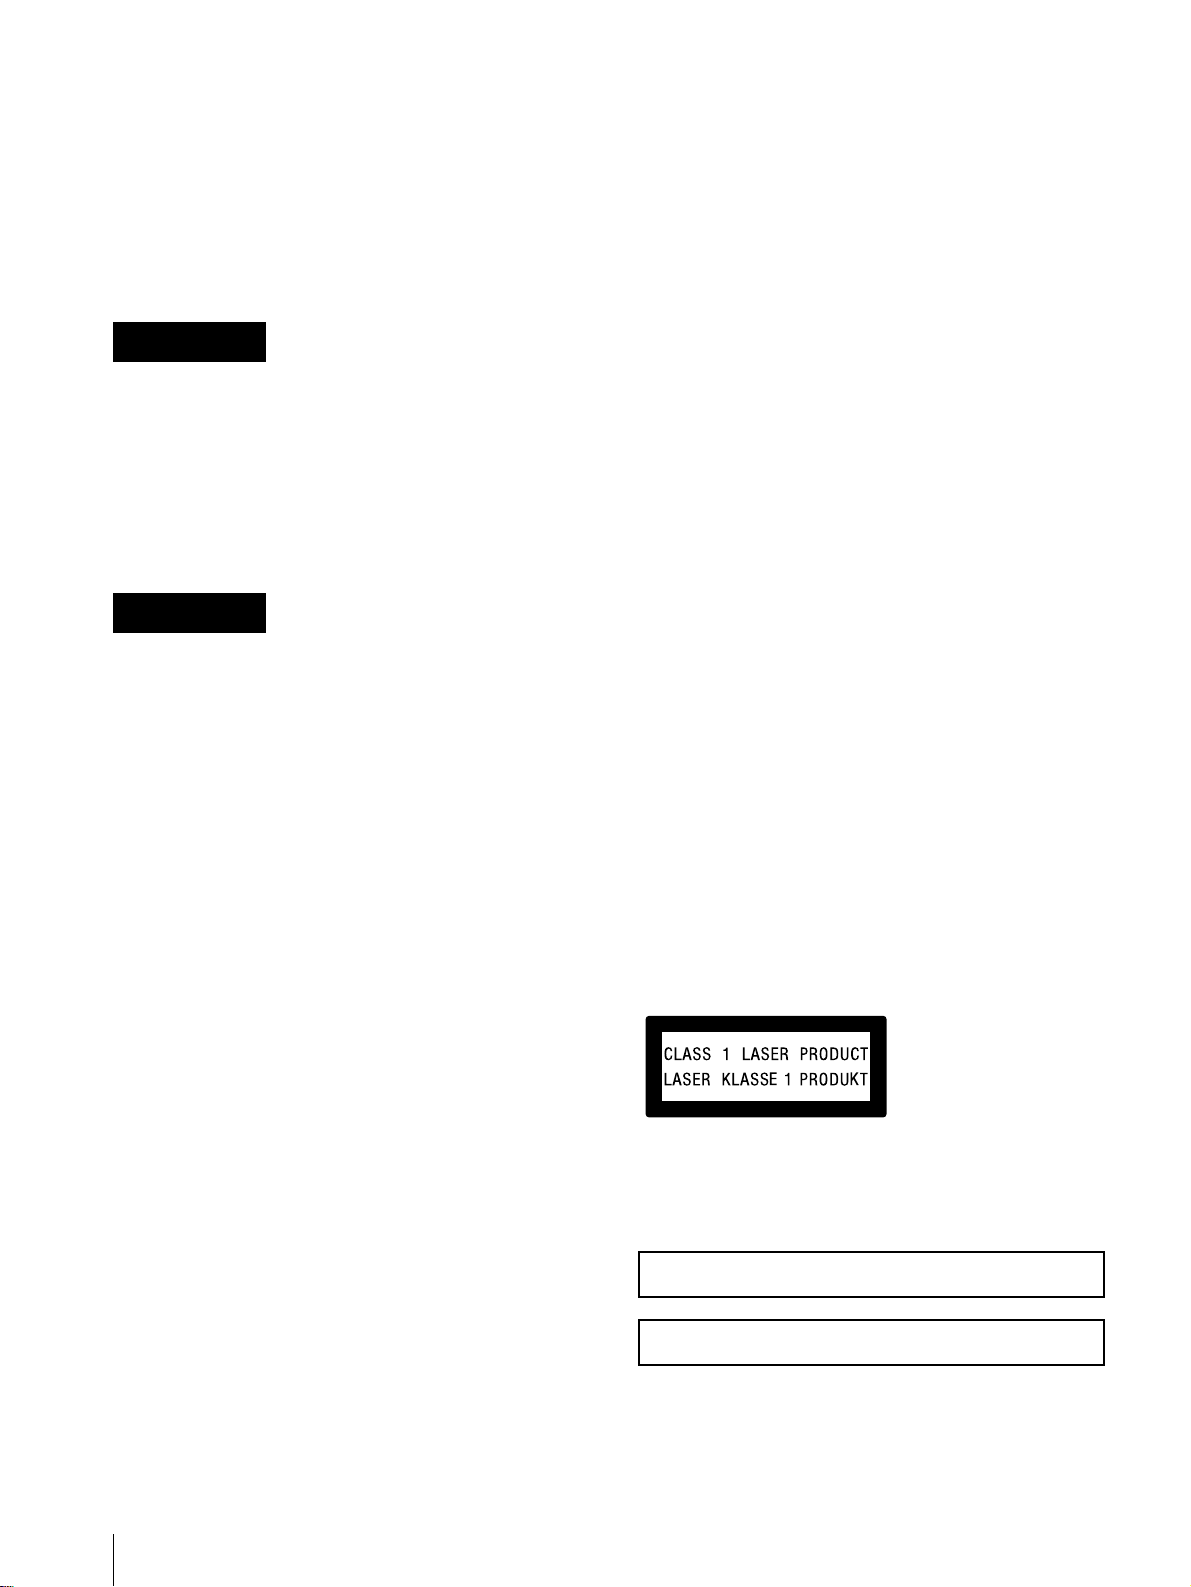
This DPF SYSTEM CONTROLLER is classified as a
CLASS 1 LASER PRODUCT.
The CLASS 1 LASER PRODUCT label is located on
the rear panel of the display.
WARNING
WARNING
LUOKAN 1 LASERLAITE
KLASS 1 LASER APPARAT

()
3 GB
UPA-PC105
Voor de klanten in Nederland
• Dit apparaat bevat een vast ingebouwde batterij die
niet vervangen hoeft te worden tijdens de levensduur
van het apparaat.
• Raadpleeg uw leverancier indien de batterij toch
vervangen moet worden.
De batterij mag alleen vervangen worden door
vakbekwaam sevicepersoneel.
• Gooi de batterij niet weg maar lever deze in als klein
chemisch afval (KCA).
• Lever het apparaat aan het einde van de levensduur in
voor recycling, de batterij zal dan op correcte wijze
verwekt worden.

()
UPA-PC105
4 GB
Table of Contents
Overview
Important Features ............................................... 5
Operating Instructions .......................................... 5
Preparation
Accessory Check List ............................................ 6
Parts and Controls .................................................7
Front View .......................................................... 7
Back View........................................................... 8
Connections ............................................................ 9
Connecting the Power Cord ...............................9
Connecting Peripheral Devices .......................... 9
Connecting a Peripheral Device to the USB
Interface ......................................................... 10
Operation
Starting Up and Shutting Down .........................11
Starting Up ....................................................... 11
Shutting Down ................................................. 12
Setting Media ....................................................... 13
Using a “Memory Stick” .................................. 13
Using a CompactFlash Card ............................ 14
Using a SmartMedia Card ................................ 15
Using a SD Card/MultiMediaCard .................. 16
Using a Floppy Disk ......................................... 17
Using a CD-ROM or CD-R .............................. 17
Appendix
Precautions ...........................................................19
Troubleshooting ...................................................22
Specifications ....................................................... 26

()
UPA-PC105
Overview
Important Features / Operating Instructions 5GB
Overview
Thank you for purchasing this product. Before you
begin,we wouldliketodescribe themain featuresofthis
product and give an overview of these Operating
Instructions.
Important Features
Touch-panel Display
The touch-panel display allows you to touch the display
directly for easy operation.
Variety of Media Supported
Image data can be read from a variety of media,
including those primarily used with digital cameras:
“Memory Stick”, CompactFlash, SmartMedia, SD
cards, and MultiMediaCards. Digital images can also be
read from storage media commonly used with
computers: floppy disks and CD-ROMs.
Built-in CD-R Drive
The built-in CD-R drive reads CD-ROM data at 24×
speed and writes to CD-Rs at 24×speed, allowing you to
write image data to CD-Rs aswell as read from standard
CD-ROMs.
Note
Use a new CD-R. You cannot write to a CD-R that has
been written to, or to a CD-RW.
Multiple Interface Options
The unit is equipped with SCSI and USB interfaces, as
well as RGB out, LINE OUT, and LAN connectors,
allowing it to be incorporated into a wide variety of
system environments.
Operating Instructions
This document consists of the following sections:
• Parts Names and Their Functions
• Connections
• Starting Up and Shutting Down
• Setting Media
• Troubleshooting
For more details about how to use the software made for
use with this system, please refer to the User’s Guide.
The following storage media names are trademarks of
their respective owners.
• “Memory Stick”, “MagicGate Memory Stick”,
“Memory Stick Duo”, and “Memory Stick PRO” are
trademarks of Sony Corporation.
• CompactFlash is a trademark of SanDisk Corporation.
• SmartMedia is a registered trademark of Toshiba
Corporation.
• MultiMediaCard is a trademark of Infineon
Technologies AG.
GB

()
UPA-PC105
Preparation
Accessory Check List
6 GB
Preparation
Accessory Check List
Make sure that you have everything.
• Power cord (1)
• SCSI cable (1)
• Operating Instructions (1, this document)
• User’s Guide (1)
• CD eject pin (1)
Note
Save the box and packing material. Do not discard these
items. You may need them again to pack the
UPA-PC105 for moving or shipping to another location.

()
UPA-PC105
Preparation
Parts and Controls 7 GB
Parts and Controls
Front View
APower lamp
Lights green when the unit is turned on.
BDisplay
Displays the user interface panel. The screen is a
touch-panel so the user can touch the display
directly to perform selections. The angle of the
display can also be adjusted from 0 (horizontal) to
65 degrees. Hold the top of the display and then
gently adjust the angle.
Note
When you adjust the angle, be careful to avoid
touching the power switch (page 8) on the back of
the display.
CSmartMedia slot
Holds a SmartMedia card with stored image data.
DSD card/MultiMediaCard slot
Holds an SD card or MultiMediaCard with stored
image data.
ECompactFlash card slot
Holds a CompactFlash card with stored image data.
Note
To avoid loss of image data or damage to the main
unit, never attempt to insert a “Memory Stick”,
SmartMedia card, or SD card into a CompactFlash
type adapter set in the CompactFlash slot.
CD
DPF SYSTEM CONTROLLER
FLOPPY DISK
COMPACT FLASH
SMART MEDIA
SD/MMC
91 2
87 6 5
34
Operation
panel
User interface
panel
65o
0o
(level)

()
UPA-PC105
Preparation
Parts and Controls
8 GB
FFloppy disk drive
Insert a floppy disk with stored image data into this
drive.
G“Memory Stick” slot
Holds a “Memory Stick” with stored image data.
HCD-R drive
Holds a CD-R to read image data stored on a
CD-ROM, or record data on a CD-R.
ISpeaker
A sound is emitted when you touch the display.
Back View
A(AC power) connector
Connects the supplied AC power cord.
BSCSI connector (Half-pitch 50-pin)
Connects to a UP-DR100 or UP-D70A printer, or
UY-S90 or UY-S100 film scanner.
C(USB) connector
Connects to a flatbed scanner, etc.
DRGB connector
Connects to an auxiliary monitor. The auxiliary
monitor displays what is currently on the display of
the unit.
ELINE OUT connector
Connectstospeakers. When youuse this connector,
sounds are not output from the unit’s speaker.
F(LAN) connector (RJ-45 type)
Connects to a LAN cable. Currently not used but
supplied for expanded applications in the future.
Note
When using a LAN cable: for safety, do not connect
to the connector for peripheral device wiring that
may have excessive voltage.
G(power) switch
Press this switch to start the unit.
SCSI
LINE OUT AC IN
76
543 2 1

()
UPA-PC105
Preparation
Connections 9 GB
Connections
Connecting the Power Cord
Connect the supplied power cord to the AC power
connector on the back of the unit, and then connect the
plug to a power outlet.
Connecting Peripheral Devices
Theperipheraldevicesshownbelowcanbeconnectedto
the unit.
Note
To prevent causing a fire or damage to the system, never
attempt to connect any peripheral device other than
those specified.
SCSI Devices
The devices listed below can be connected to the SCSI
connector. For details about connection, refer
“Connecting a Peripheral Device to the SCSI Interface”.
• UP-DR100 (printer)
* Up to three units can be connected.
•UP-D70A(8×10 size compatible printer)
• UY-S90/S100 Film Scanner
Connecting USB Devices
Connect the unit’s USB connector to a flatbed scanner.
For details about how to connect a USB device, see
“Connecting a Peripheral Device to the USB Interface”.
It is also possible to connect a receipt printer, card
reader, etc. Consult your retailer for details about the
types of peripherals compatible with the unit.
Connecting a Peripheral Device to the
SCSI Interface
This section describes how to connect a peripheral
device to the SCSI connector.
For details about the SCSIID and terminator, refer tothe
instructions that you received with the device.
Notes
• Before connecting the device to the unit, make sure
that the device and the unit are switched off.
• Connect the power cord last.
1
Follow the procedure below to connect a peripheral
device equipped with an SCSI interface to the unit.
Power cord
(supplied)
Power outlet
SCSI
devices
USB
USB devices
SCSI
To the SCSI
connector
SCSI cable (supplied) SCSI device

()
UPA-PC105
Preparation
Connections
10 GB
Notes
• Make sure that the connector of the SCSI cable is
inserted completely into the back of the unit.
• The length of the SCSI cable should not exceed 3
meters (9.8 ft.).
• If you are connecting only one SCSI device, use
a standard SCSI cable no longer than 1 meter (3.3
ft.).
• Set the SCSI IDs for peripheral devices as
follows.
- UP-DR100 (first): 1
- UP-DR100 (second): 2
- UP-DR100 (third): 3
-UP-D70A:4
- UY-S90/S100: 5
• Make sure that you activate the terminator of the
last device in the daisy chain connected to the
SCSI connector of the unit.
2
Connect the power cord to the SCSI device.
Note
Turn on the peripheral devices first, then switch on
the main unit. For details about how to power on the
main unit, see “Starting Up” on page 11.
Connecting a Peripheral Device to
the USB Interface
This section describes how to connect a peripheral
device to the USB connector.
For details about specific connection procedures, refer
to the relevant user’s guides.
Note
Before connecting the device to the unit, make sure that
the device is on.
1
Follow the procedure below to connect a peripheral
device equipped with a USB interface to the unit.
Notes
• Connectthe peripheraldevicedirectly totheUSB
connector of the unit. Operation through USB
hubs is not guaranteed.
• If a message prompting you to install drivers
appears when you connect compatible peripheral
devices to the unit, contact your dealer.
To the USB
connector
USB cable
(sold separately)
Flatbed
scanner, etc.
USB devices

()
UPA-PC105
Operation
Starting Up and Shutting Down 11 GB
Operation
StartingUpandShutting
Down
Starting Up
1
Make sure that the peripheral devices are on, that
there are no media in any of the unit’s slots, and
then press the power switch on the back of the
display.
The power lamp on the operation panel lights, and
the unit starts.
2
When the following screen is displayed, touch the
screen once.
Display
The following screen is displayed.
This completes startup. For details about
operations, refer to the User’s Guide.
Display

()
UPA-PC105
Operation
Starting Up and Shutting Down
12 GB
Shutting Down
You must shut down the system through the
Administration screen.
Note
You must know the administrator or sales clerk
password before you can shut down the system. The
defaultadministratorpasswordis“7669”andthedefault
sales clerk password is “0000”. For details about
passwords, refer to the user’s guide.
1
Touch the following screen twice as indicated
below.
Note
If you have set up the system to use a screensaver
and it is running, you must first touch the screen
once to stop the screensaver, and then proceed as
outlined in step 1.
2
Touch the numberbuttonstoentertheadministrator
or sales clerk password.
To correct the entry, clear it by touching the [Clear]
button, and then reenter the password.
Note
The default administrator password is “7669” and
the default sales clerk password is “0000”.
3
Touch the [Enter] button.
If you entered the administrator password, the
following screen appears.
If you entered the sales clerk password, the
following screen appears.
4
Touch the [Shutdown] button.
A message prompts you to confirm whether you
want to shut down the system.
Touch here twice

()
UPA-PC105
Operation
Setting Media 13 GB
5
Touch the [OK] button.
If you touch the [Cancel] button, the message
closes.
The system shuts down.
6
Turn off peripheral devices.
Setting Media
A variety of media, listed below, can be set in the drives
and slots on the user interface panel to read image data
stored on these media.
•“MemoryStick”
• CompactFlash cards
• SmartMedia cards
•SDcards
• MultiMediaCards
• Floppy disks
•CD-ROMs
Notes
• Be sure to back up all image data stored on media
before using it with this unit.
• To avoid loss of image data or damage to the main
unit, never attempt to insert a “Memory Stick”,
SmartMedia card, SD card, or MultiMediaCard into a
CompactFlash type adapter set in the CompactFlash
slot.
Using a “Memory Stick”
Inserting the “Memory Stick”
Note
Depending on when you insert your media into the unit,
the screen above may not always appear.

()
UPA-PC105
Operation
Setting Media
14 GB
With the vmark on the “Memory Stick” facing up and
forward, completely insert the “Memory Stick” into the
slot.
When you insert the “Memory Stick” into the unit, it is
automatically detected.
Removing the “Memory Stick”
When you see a message that prompts you to remove the
“Memory Stick”, first push the “Memory Stick” until
you hear a click 1, then pull it out 2.
Note
Depending on when you remove your media from the
unit, the screen above may not always appear.
Note
To prevent losing valuable data or damaging the
“Memory Stick”, never remove the “Memory Stick”
from the slot until the message prompts you to remove it.
Using a CompactFlash Card
Inserting the CompactFlash Card
Note
Depending on when you insert your media into the unit,
the screen above may not always appear.
vmark
2
1

()
UPA-PC105
Operation
Setting Media 15 GB
With the vmark on the CompactFlash card facing up
and forward, completely insert the Compact Flash card
into the slot.
When you insert the CompactFlash card into the unit, it
is automatically detected.
Note
Before inserting the CompactFlash card, make sure that
it is oriented correctly. Inserting the card in the wrong
direction may damage the internal contacts, which can
lead to malfunctions.
Removing the CompactFlash Card
When you see a message that prompts you to remove the
CompactFlash card, pull the it straight out.
Notes
• Depending on when you remove your media from the
unit, the screen above may not always appear.
• To prevent losing valuable data or damaging the
CompactFlash card, never remove the CompactFlash
card from the slot until the message prompts you to
remove it.
Using a SmartMedia Card
Inserting the SmartMedia Card
Note
Depending on when you insert your media into the unit,
the screen above may not always appear.
With the terminals on the SmartMedia card facing up,
completely insert the card into the lower part of the slot.
When you insert the SmartMedia card into the unit, it is
automatically detected.
vmark
CompactFlash card slot
Terminals
SmartMedia slot

()
UPA-PC105
Operation
Setting Media
16 GB
Removing the SmartMedia Card
When you see a message that prompts you to remove the
SmartMedia card, pull it straight out.
Notes
• Depending on when you remove your media from the
unit, the screen above may not always appear.
• To prevent losing valuable data or damaging the
SmartMedia card, never remove the SmartMedia card
from the slot until the message prompts you to remove
it.
Using a SD Card/MultiMediaCard
Inserting the SD Card or MultiMediaCard
Note
Depending on when you insert your media into the unit,
the screen above may not always appear.
With the notch on the SD card or MultiMediaCard away
from you and to the right, completely insert the card into
the middle part of the slot.
When you insert the SD card or MultiMediaCard into
the unit, it is automatically detected.
Removing the SD Card or MultiMediaCard
When you see a message that prompts you to remove the
SD card or MultiMediaCard, pull it straight out.
Notes
• Depending on when you remove your media from the
unit, the screen above may not always appear.
• To prevent losing valuable data or damaging the SD
card or MultiMediaCard, never remove the card from
the slot until the message prompts you to remove it.
vmark
SD card/MultiMediaCard slot

()
UPA-PC105
Operation
Setting Media 17 GB
Using a Floppy Disk
Inserting the Floppy Disk
Note
Depending on when you insert your media into the unit,
the screen above may not always appear.
Completely insert the floppy disk into the floppy disk
drive.
When you insert the floppy disk into the unit, it is
automatically detected.
Removing the Floppy Disk
When the message prompts you to remove the media,
press the eject button 1, and then pull the floppy disk
from the drive 2.
Note
Depending on when you remove your media from the
unit, the screen above may not always appear.
Note
To prevent losing valuable data or damaging the floppy
disk, never remove the floppy disk from the slot untilthe
message prompts you to remove it.
Using a CD-ROM or CD-R
When the unit is ready to read image data from a
CD-ROM, or write image data to a CD-R, a message
prompts you to insert the media, and then the CD-R
drive tray opens automatically.
2
1
Eject button

()
UPA-PC105
Operation
Setting Media
18 GB
Inserting the CD-ROM or CD-R
1
Pull the tray out.
2
While supporting the bottom of the tray with your
hand, center and set the disc on the tray and then
press down gently until you hear it click and lock in
place.
Notes
• Never touch the lens.
• Never apply force to the tray.
3
Gently push the tray into the unit until it locks in
place.
When you insert the CD-ROM into the unit, it is
automatically detected.
Removing the CD-ROM or CD-R
When CD-R access is completed , the CD-R drive tray
opens automatically.
1
Pull the tray out.
2
With one finger pressing down gently on the spool
of the tray, lift the disc off the tray.
3
Gently push the tray into the unit until it locks in
place.
Press here
Disc

()
UPA-PC105
Appendix
Precautions 19 GB
Appendix
Precautions
On safety
• Operate the unit on 100 to 240 V AC, 50/60 Hz only.
• Be careful not to set or drop any heavy objects on the
power cord, or to damage the power cord in any way.
Never operate this unit with a damaged power cord.
• Should any solid object or liquid fall into the cabinet,
unplug the unit and have it checked by qualified
personnel before operating it any further.
• Never disassemble the unit.
• To disconnect the power cord, pull it out by the plug.
Never pull the power cord itself.
• When the unit is not going to be used for an extended
period of time, disconnect the power cord from the
wall outlet.
• Do not handle the unit roughly.
• To reduce the risk of electrical shock, always unplug
the unit from the electrical outlet before cleaning and
servicing the unit.
• Take care not to scratch or damage your unit’s LCD
screen.
• Your unit’s screen is made of glass. Do not drop or
submit your unit to external shock.
Installation
• Install the unit on a level surface. Do not install the
unit on a slant or on its side. Doing so could damage
the unit.
• Do not jar or drop the unit.
• Do not install the unit in any location that is subjectto:
– instability
– excessive dust
– extremely high or low temperatures
– vibration
– high humidity
– direct sunlight
• Do not block the ventilation holes on the unit. Doing
so could result in damage.
Condensation
If the unit is brought directly from a cold location to a
warm one or is placed in an extremely warm or humid
room, water droplets may form inside the unit. (This is
called “condensation.”) Using this unit in this condition
could cause it to operate incorrectly or even damage the
unit. If you think that condensation may have formed
inside the unit, allow time for it to evaporate before
using the unit.
Transporting the unit
Before transporting the unit, remove all media from the
slots and drives, then pack the unit carefully in the
original packing material and carton. If you do not have
the original packing material, pack the unit carefully so
that it will be able to withstand shocks and impacts that
may occur while it is being transported.
Cleaning
• Before cleaning the main unit, always switch off the
power and disconnect the power cord from the power
outlet.
• If the cabinet is extremely dirty, soak a clean cloth in
water, or a solution of water and a neutral detergent,
wring out the cloth, and then wipe the surface of the
cabinet. Next, wipe clean with a clean, dry cloth.
• To avoid damaging the surfaces of the unit, never use
thinner, benzene, alcohol, or any other type of organic
solvent to clean the unit.
• If the surface of the display is dirty, soak a clean cloth
in a solution of water and weak detergent, wring the
cloth thoroughly, then wipe clean the surface of the
display. Then use another clean, dry cloth to wipe the
screen dry.
Notes
• Never apply detergent or other liquid cleanser directly
to the surface of the display.
• Never touch or strike the surface of the display with a
hard object.
Restrictions on duplication
Pay special attention to the following when using this
unit to copy or duplicate material:
• Duplication of banknotes, coins, or securities is
prohibited and is subject to penalty.
• Duplication of blank certificates, licenses, passports,
private securities, unused postal stamps, etc., is
prohibited and is subject to penalty.
• Use of copyrighted pictures, photographs, writings,
and other material for any purpose other than your
personal enjoyment without the permission of the
copyright holder is not permitted.
“Memory Stick”, CompactFlash,
SmartMedia, and MultiMediaCards
This unit supports “Memory Stick”, CompactFlash,
SmartMedia, SD cards, and MultiMediaCards. We
recommend that you make a backup of image data
stored in any of these media before using it with this
unit.
Note
Sony bears no responsibility for damage to your media
or data while using this unit.

()
UPA-PC105
Appendix
Precautions
20 GB
“Memory Stick” types
“Memory Stick” is a removable, compact data storage
card that can be used with digital still cameras and
personal computers. Still images stored in a “Memory
Stick” can be easily displayed, overwritten or deleted.
“Memory Stick” comes in two types: general purpose
“Memory Stick” and “Memory Stick” using the
MagicGate encryption technology to protect
copyrighted material, referred to as “MagicGate
Memory Stick”. This unit supports both types of
“Memory Stick”. However, because this unit does not
support the MagicGate standard, material recorded with
this unit is not protected by MagicGate.
In addition, you can also use “Memory Stick Duo” or
“Memory Stick PRO” with your unit.
Write-protecting “Memory Stick” data
In order to protect important data from accidental
erasure, the “Memory Stick” has a write-protect switch.
When the switch is in the left-hand position, data can be
written to or deleted from the “Memory Stick”, and the
“Memory Stick” can be initialized. When the switch is
in the right-hand position, data in the “Memory Stick”
can be read, but cannot be written. When inserting a
“Memory Stick” into this unit in order to read data, slide
the write-protect switch to the protected state.
Note
The write-protect switch position and shape varies
depending on your type of “Memory Stick”.
Reinitializing (formatting) “Memory Stick”
Before using your “Memory Stick” for the first time,
make sure that you use your digital camera to format it.
Formatting the “Memory Stick” with a deviceother than
your digital camera may make data on the “Memory
Stick” unreadable for the system.
Notes on using “Memory Stick”
• To use a “Memory Stick” insert it directly into the
“Memory Stick” slot of the system. Do not insert the
“Memory Stick” into a CompactFlash slot adapter, as
this may accidentally delete the data on the “Memory
Stick”.
• Do not remove the “Memory Stick” while reading or
writing data.
• Data may be corrupted in the following cases.
– When the “Memory Stick” is removed or the system
is turned off during read or write operation
– When the “Memory Stick” is used in locations
subject to static electricity or electrical noise
• Do not strike, bend, or drop the “Memory Stick”.
• Donotattempt todisassembleormodifythe “Memory
Stick”.
• Do not get the “Memory Stick” wet.
• Avoid storing or using the “Memory Stick” under the
following conditions:
– In a hot location, such as inside a car or outside on a
very hot day.
– In direct sunlight.
– In a humid location or where corrosion occurs
easily.
• Do not touch the “Memory Stick” contacts with
anything, including your finger and metallic objects.
• Do not affix anything other than the supplied label to
the “Memory Stick” labeling position.
• Affix the supplied label so that it does not stick out
beyond the labeling position.
• Carry and store the “Memory Stick” in its case.
Notes on using “Memory Stick Duo” (not
supplied)
• Use a sharp object such as a ballpoint pen to move the
“Memory Stick Duo” write-protect switch.
• Some “Memory Stick Duo” are not equipped with a
write-protect switch. When using a “Memory Stick
Duo” without a write-protect switch, be careful not to
edit or erase data by mistake.
Notes on using “Memory Stick PRO”
This system does not support the access control security
function.
LOCK LOCK
Contacts Write-protect switch
Not write-
protected Write-
protected
Label area
Other manuals for UPA-PC105
1
Table of contents
Languages:
Other Sony Printer manuals

Sony
Sony UP-DR150 User manual

Sony
Sony PICTURE STATION DPP-FP90 User manual

Sony
Sony UP-D21MD User manual

Sony
Sony DPP-SV55 User manual

Sony
Sony UP-897MD User manual

Sony
Sony UP-897MD User manual

Sony
Sony DPP-FP95 User manual

Sony
Sony UP-CR10L User manual

Sony
Sony DPP-SV88 User manual

Sony
Sony DPP-EX5 User manual