A
En
Table
of
Contents
Getting
Started
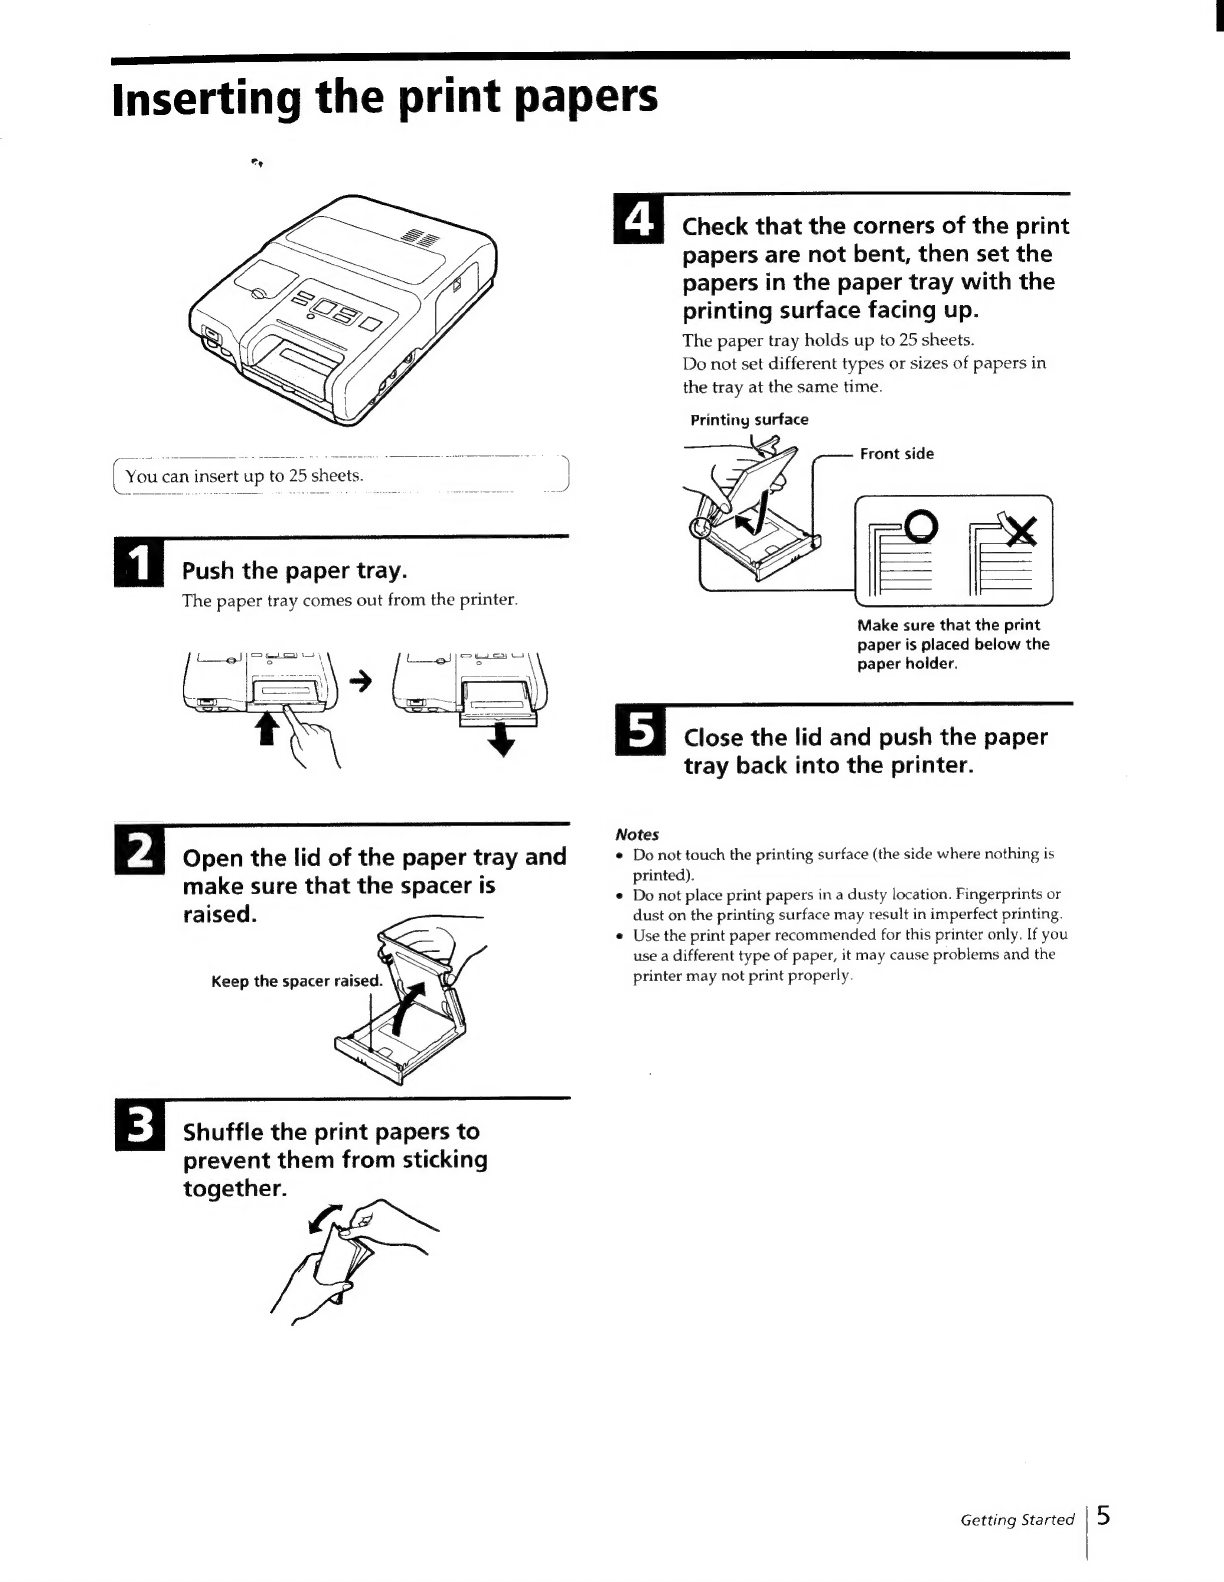
Inserting
the
ink
(print
Cartridge)
.......
eee
eee
sees
eeeseesseneescensesseeesesseeseeeaeeeneeseaeatensecneaeaees
4
Inserting
the
print
Paper
oo...
eee
cece
cceeceseeereeeneeceaeeenaneeeaesceseeeeseeeeeeeeeeeseaeteeeeneeaee
5
TOOK
EMG
UP
secece
22
ecesbicn
sesh
ev
stededgac
sabe
dessins
te
dgodtcecozeg
sata
tuvendedancedusbocnehdiact
coutonscdesaieeeraanedeapees
6
Connecting
to
a
CAMCOTED
.....eeecceceseseseeteseeeenesesesseseseseesessseeceneseseseeneseseseenstseseeees
6
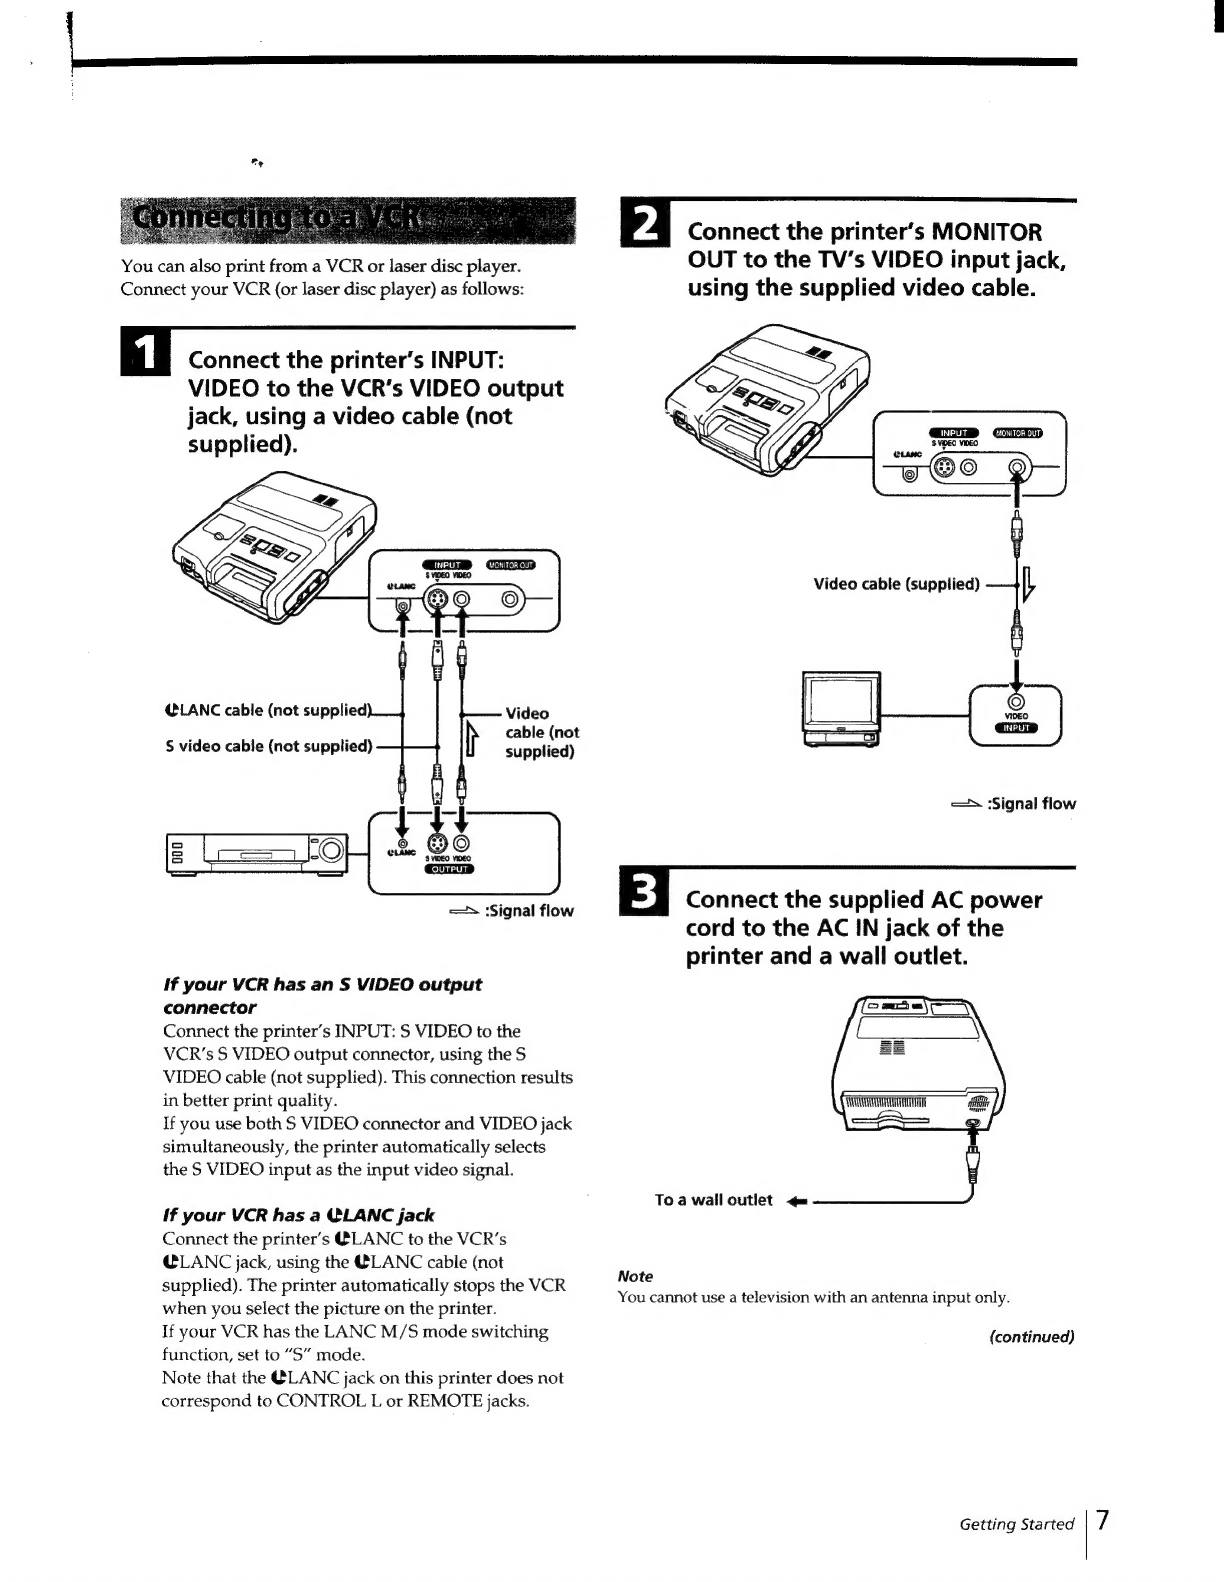
Connecting
to'a
VER
visscictsctesiienseestsniedovaadesstaselbsaseciatnadelatatasedigeseaaigtadataqasedertatetatoee
7
Checkitig
the
CONNECTIONS
s...s.esec-
dsc.
cececd
ccs
sealisacaesetvebedegeodbivabeneaseeatabaseesdSiveote
Genetviengdtedbese
8
Printing
Printinig:
a
Fullsize
PiCtUte
esc
sesse
cs
ccssken
Sesgetee
ccs
ee
neceecet
deeculeseeestestenvenebiveaon
caer
svaes
deaeeniteceugiae
9
Printing
Walf-size
Pictures...
2cccc.cssccceecciescessasbeececcepeaceutensenessdessecebeteosteouaqsbsteeddbeuaveaadavas’
11
Printing
1/4-
Or
1/16-SiIZ@
PICtULES
ooo.
ee
eee
eect
eeeeeeeeeeeeceeee
senses
eesssessanecseseeeeseeeerenseeenees
12
Making:multiple
prints.
:ccccc
sc.
setcctesiescclzeas
sel
even
ere
cdieeneteccnsvts
andes
decensereeecateseatssasinss
13
Other
Print
Options
Printing:
With
a,
Caled
aticoecscccescessszents
sh
egseess
deen
stevie
dance
va
sioca
dvaaaen
gh
evigual
aiasestoetet
eatetazs
14
Printing
On
sticker
Papers:
<....c.ccécceececkedhessabeceesiecevaveseeevdecosesieegnoedevedevacadecsoretsdenteaneests
15
Creating
a
video
cassette
label
oo...
ceeceeeseeeecceeneeeeeereceteneeeneesenereneesesaesseusesesseesseseseegs
16
CROPPIN
Ga
ICTUT
Soc
oosccssc
cs
eee
hse
vta
chee
Lalsevcaeetiagecesdacestsennnteaa
thn
cnuaaeceuubsvacdugasugecasiaseanaaaies
17
Combining
several
pictures
........
ce
eecescceeeeeeeeeeeeeeeeeseeereeecseesesaseseeassessesensasseeasenteenaneeeaes
18
Adjusting
the
picture
.siscciccccccctscecestetectseoasasteesctsaeadsssceatnnaenceapeanucisvetstascavedeasesousteci
cteate
19
Adjusting
the
picture
quality
Of
Prints
ce.cs.rcsissncteorteieasdosrnesnionsp
pi
eeaeeaee
19
Adjusting
the
source
picture
quality
........cccsccscescesseeseeseeteeseseecenenesescscansnenes
19
For
Your
Information
PrOGAULIONS
weviecaseccwnscs
tte
cceteceas
Paces
cot
austecateaizesagencedscoteuads
soos
eeesdesstetedeneg
vide
lan
snbadedendananscuaioa
20
TROUDIESHOOLIN
GH:
0sccecsecscdseshtdeicechdtecdacdzs
sheshe
sh
cbdveen
dabeancueea
ti
dencaedes
anenneniaaainee
suds
teedioradtasvess
21
If
these
error
MESSAGES
APPCAL
......
ee
ceceecseeeseseseeseesesteteeteeeaeseseseseaeseseseseseenenene
22
If
the
print
paper
jaM
..........ccccessssssersssesssssnesesssnssesecccnsseneesssessateaseseseeesnanansseneess
22
SPeCiTICATIONS:.
o:sccccisatetesceseccees
ie
Meetacmadeccduatpecvvesstbadadia
densbsbatcedveauaseaue
nachasoviMagvaseeaneaaeense
23
lndex
to:partsand
CONtrOls:cscsdessscdiesecccezicescelevetceteesosesiiee
ania
i
casans
cesdeecebscqestdendstacans
24
Maan
Unit
ssiecds
jade
cisasssetinccecdsatacgen
Sethensdbiuavedecestezeccetacessthducnyceebune
hunisceesesneetbveresaceds
Ss
24
Remote:
ComMANGED
f0..iscis
teases
sevateigebiands
aves
ebeteastesetisea
cieds
Sesaededoutdescetoaeg
avenues
26
MINK
ies
cotta
terran
a
iasioes
ean
aN
bated
eso
Back
cover
Table
of
Contents
3