manuals.online logo
Brands
  1. Home
  2. •
  3. Brands
  4. •
  5. SSV Works
  6. •
  7. Automobile Accessories
  8. •
  9. SSV Works WP3-RG34O4 User manual

SSV Works WP3-RG34O4 User manual

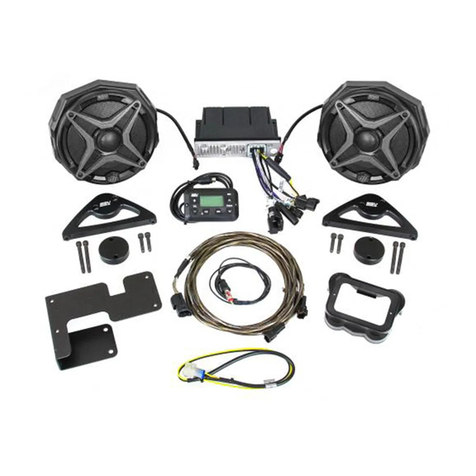
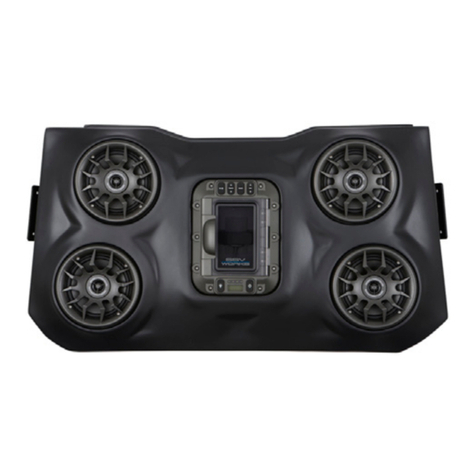
WP3-RG34O4
Polaris Ranger XP900 & XP1000
Overhead 4-Speaker Stereo System
SSV WORKS, 201 N. Rice Ave Unit A, Oxnard, CA 93030
www.SSVworks.com | Phone: 818-991-1778 | Fax: 866-293-6751
!
Please read and understand these
instructions completely before
installation to avoid possible injury, or
damage to the accessory or vehicle.
WARRANTY INFORMATION:
All SSV Works enclosures are covered by a limited lifetime warranty against defects in
material or workmanship. All SSV Works Electronics are covered by a limited 1 year warranty
against defects in material or workmanship. All SSV Works Speakers are covered by a
limited 1 year warranty against defects in material or workmanship. Labor for replacement of
defective components is not covered. Contact SSV Works for further warranty information.
TOOLS FOR INSTALLATION
PARTS LIST IMAGES
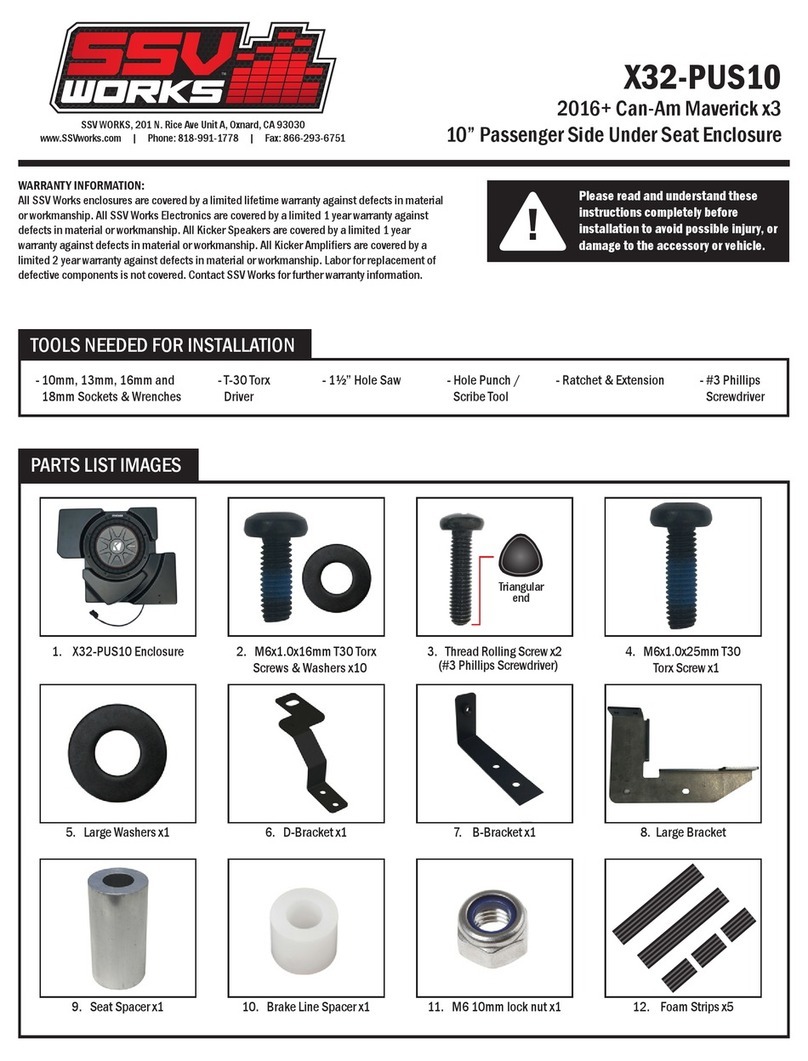
1. WP3-RG34O4 Stereo 2. Mounting Brackets
- Panel removal tool
4. M10x1.5x35mm Bolt,
Washer and Nut (4)
3. Support Bracket & Hardware (for factory plastic roof)
6. Fuse Holder & Ring Terminal 7. BH1752 - Bus Bar Harness 8. 10” Zip Ties (5)
- Cut-off Wheel - 7mm, 10mm, 15mm & 17mm Deep Socket & Wrenches
- Ratchet
A
A. Fasten the driver and passenger brackets to the driver and passenger
side of the unit with (4) M6 screws & washers using a T30 Torx per side.
Passenger side shown.
- #2 & #3 Phillips Screwdriver - Wire Cutters & Crimpers
5. M6 x 1.0 Screws
and Washer (1)
B
B. If the ranger is equipped with a roof, it must be removed prior to
installing the overhead stereo. The stereo is compatible with both
POLARIS Factory plastic and metal roofs. The factory plastic roof
requires minor modication. Follow steps C-K for plastic roof
modication. Skip to step L if equiped with metal roof or without a roof.
- T27. T30, T40 Torx
Always disconnect the battery when installing electronic devices.
WP3-RG34O4
C
C. When installing with the factory plastic roof, to allow clearance of the overhead stereo the 3 front lock tabs must be removed (circled in pink).
NO MODIFICATIONS NEEDED FOR THE REAR LOCKING TABS - DO NOT CUT
If your roof was not installed with speed nuts at these (2) points (circled in yellow), replacements are in your kit. Slide a M6 speed clip onto each clip
location. When reinstalling the roof, fasten the provided T30 torx M6 screws through the ROP visor and into the speed clips.
D E
D. To remove the front lock tabs we recommend using a cut off wheel
or grinder. Cut off the tabs at the bend. They do not need to be cut
ush to the roof
E. Your cuts should resemble the image above.
WP3-RG34O4
G
H
JJ
I
K
G. Set the roof onto the machine with the rear of the roof propped up.
H. Slide the support bracket over the ROP visor tab.
Place the (2) M4 machine screws through the visor tab and support
bracket. From the backside of the support bracket, thread on the
provided washer and M4 lock-nut. Using a 7mm wrench and #2
phillips screwdriver, fasten the support bracket to the visor tab.
I. Using a #3 phillips screwdriver secure the roof to the support bracket
with the (2) coarse-thread screws.
J. Once the Roof support bracket is secured to the visor tab and roof, pull down
the rear of the roof to engage the rear locking tabs.
K. Re-fasten all hardware to secure the roof to the vehicle.
F
F. Replace the Factory ROP visor bolts with the kit provided
M10x1.5x35MM bolts. Do NOT remove all the bolts at once. In order
to maintain alignment and structural integrity, there should be at
least (3) bolts in the ROP visor at all times. Reuse the factory locknut
to fasten the new bolts to the ROP system.
WP3-RG34O4
N1 N2
M
O
N. To safely install the overhead, it is necessary to have a second person to help lift the enclosure into place.
(N1) Lift the overhead into place guiding the mounting brackets over the ROP visor hardware. Once in place, fasten the
overhead to the machine with the provided M10 washers and locknuts. Evenly torque the locknuts with a 17mm socket.
NOTE: (N2) When lifting the WP3-RG34O4 into position, if the mounting brackets do not align over the ROP visor
hardware, the base brackets position need to be adjusted. Lower the unit, use a T30 torx driver to loosen the base
bracket fasteners. Adjust the position of the base brackets inward or outward and tighten the hardware.
M. Guide the harness over the top of the enclosure and out the driver
side.
O. Secure the wiring down the “A” pillar with zip-ties.
L
L. Replace the Factory ROP visor bolts with the kit provided
M10x1.5x35MM bolts. Do NOT remove all the bolts at once. In order to
maintain alignment and structural integrity, there should be at least (3)
bolts in the ROP visor at all times. Reuse the factory locknut to fasten
the new bolts to the ROP system. If used, re-install factory metal roof
at this time.
Q
SSS
R
Q. Secure the overhead wiring with zip-ties to the factory harnesses in
the dash cavity.
S. For select Ranger models with a Polaris pulse busbar, crimp the (fused) power and ground to the provided B-H1752 harness. Red for key on, yellow for
constant power. Once crimped, remove port guard and connect to the busbar.
R. Cut power and ground to desired length in the hood compartment.
Strip and crimp power wire to the provided fuse holder.
P. Route the power/ground and Sub output into the dash cavity (P1). Once in the dash cavity, pull the power/ground and sub output across the dash cavity
along the factory harnesses and out through the rewall grommet (P2). The overhead wiring will then be in the exterior hood compartment (P3).
P1 P2 P3
WP3-RG34O4
U
U. This concludes the installation process. Reassemble all factory
panels.
NOTE
Some Ranger models come with the ground “GND” terminal not
connected as shown. For models equipped with 3-post terminal
busbar, remove the 10mm nut, connect the RED (fused) power
wire to post (1) for key-on power or post (3) for constant power.
Connect the BLACK ground wire to post (2).
T
© 2020 SSV Works, Oxnard, CA 93030 WP3-RG34O4 Rev. B 6-26-20

Other SSV Works Automobile Accessories manuals

SSV Works TXF-OSP65 User manual

SSV Works

SSV Works TXF-OSP65 User manual

SSV Works WC-FKP65 User manual

SSV Works

SSV Works WC-FKP65 User manual

SSV Works X32-DUS10 User manual

SSV Works

SSV Works X32-DUS10 User manual

SSV Works DF-2A User manual

SSV Works

SSV Works DF-2A User manual

SSV Works PHASE 5 X3-5K User manual

SSV Works

SSV Works PHASE 5 X3-5K User manual

SSV Works JJL-DS10 User manual

SSV Works

SSV Works JJL-DS10 User manual

SSV Works SS-BS10 User manual

SSV Works

SSV Works SS-BS10 User manual

SSV Works X32-PUS10 User manual

SSV Works

SSV Works X32-PUS10 User manual

SSV Works DF-F65 User manual

SSV Works

SSV Works DF-F65 User manual

SSV Works CM-FKP65 User manual

SSV Works

SSV Works CM-FKP65 User manual

SSV Works RG4-DM3 User manual

SSV Works

SSV Works RG4-DM3 User manual

SSV Works CM2-UD10 User manual

SSV Works

SSV Works CM2-UD10 User manual

SSV Works MT-2A User manual

SSV Works

SSV Works MT-2A User manual

SSV Works SS-DM3 User manual

SSV Works

SSV Works SS-DM3 User manual

SSV Works RG4-US10 User manual

SSV Works

SSV Works RG4-US10 User manual

SSV Works F3-2A User manual

SSV Works

SSV Works F3-2A User manual

SSV Works WP-RZ304 User manual

SSV Works

SSV Works WP-RZ304 User manual

Popular Automobile Accessories manuals by other brands

Crux SWRHN-62L quick guide

Crux

Crux SWRHN-62L quick guide

Dynojet Power Vision manual

Dynojet

Dynojet Power Vision manual

SVC GROUP VTZ 001-404 Fitting instructions

SVC GROUP

SVC GROUP VTZ 001-404 Fitting instructions

Whelen Engineering Company SAK34 installation guide

Whelen Engineering Company

Whelen Engineering Company SAK34 installation guide

ARB AIRLOCKER RD145 installation guide

ARB

ARB AIRLOCKER RD145 installation guide

injen SES9300AB installation instructions

injen

injen SES9300AB installation instructions

APEXi Super AFC 401-A007 instruction manual

APEXi

APEXi Super AFC 401-A007 instruction manual

Honeywell Thor VM3 manual

Honeywell

Honeywell Thor VM3 manual

EFILive CM2350B user guide

EFILive

EFILive CM2350B user guide

VBG Onspot Mounting instructions

VBG

VBG Onspot Mounting instructions

ATD Tools SPI-77100 user manual

ATD Tools

ATD Tools SPI-77100 user manual

Curt Manufacturing 13333 installation manual

Curt Manufacturing

Curt Manufacturing 13333 installation manual

Webasto Black Forest ThrowBack Top installation instructions

Webasto

Webasto Black Forest ThrowBack Top installation instructions

Memphis CX23 manual

Memphis

Memphis CX23 manual

Echomaster MRC-LP01CP user manual

Echomaster

Echomaster MRC-LP01CP user manual

Carax HUD CRX-3001 quick start guide

Carax

Carax HUD CRX-3001 quick start guide

Westin 59-82045 installation instructions

Westin

Westin 59-82045 installation instructions

Airlocker RD159 installation guide

Airlocker

Airlocker RD159 installation guide

manuals.online logo
manuals.online logoBrands
  • About & Mission
  • Contact us
  • Privacy Policy
  • Terms and Conditions

Copyright 2025 Manuals.Online. All Rights Reserved.