manuals.online logo
Brands
  1. Home
  2. •
  3. Brands
  4. •
  5. Steinberg Systems
  6. •
  7. Measuring Instrument
  8. •
  9. Steinberg Systems SBS-SM-135C User manual

Steinberg Systems SBS-SM-135C User manual

SBS-SM-135C
BEDIENUNGSANLEITUNG
SCHALLPEGELMESSGERÄT
USER MANUAL
SOUND METER
INSTRUKCJA OBSŁUGI
MIERNIK DŹWIĘKU
NÁVOD K POUŽITÍ
SONOMETR
MANUEL D´UTILISATION
SONOMÈTRE
ISTRUZIONI PER L’USO
FONOMETRO
MANUAL DE INSTRUCCIONES
SONÓMETRO
DE | EN | PL | CZ | FR | IT | ES
2 3
Rev. 26.02.2019
Rev. 26.02.2019
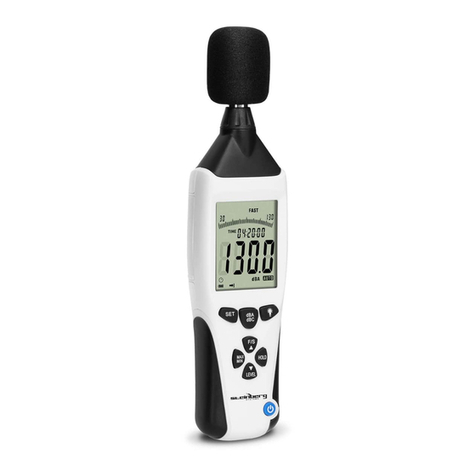
Das Gerät dient zur Messung der Lautstärke.
GERÄTEBESCHREIBUNG
1. Mikrofonabdeckung
2. Anzeige
3. Funktionstaste „HOLD“ (Stoppen des aktuellen
Datenlesevorgangs auf dem Display)
4. ON/OFF-Taste (Ein/Aus)
5. Funktionstaste „MAX/MIN“ (MAX – maximaler Messwert/MIN
– minimaler Messwert)
6. Wahltaste Zeitkonstante/„^“ (F – schnelle Probennahme (1 pro
125 Millisekunden), S – freie Probennahme (1 Mal pro Sekunde))
7. Batteriefachdeckel
BESCHREIBUNG DER ANZEIGE
A. Symbol „HOLD“
B. Symbol „Automatisches Herunterfahren des Geräts“
C. Lesen der Temperaturmessung
D. Lesen der Lautstärkemessung
E. Symbol „Ausgewählte Zeitkonstante“ – F/S
F. Symbole „Alarm“ – Ergebnisse außerhalb des Limits: „Hi”
﹥100dB, „LO”﹤100dB
G. Symbol „Frequenzwägung“ A
H. Symbol „Temperaturmesseinheit“ – ºC/ºF
I. Batteriestandsymbol – Wenn der Batteriestand Null ist (leere
Batteriekontur), ersetzen Sie die Batterie durch eine neue
J. Symbol „MAX/MIN“
GERÄTEBETRIEB
• Um das Lesen der aktuellen Daten auf dem Bildschirm zu
stoppen, drücken Sie die „HOLD-Taste”. Das Symbol „HOLD“
erscheint auf dem Display. Um den angehaltenen Lesevorgang
wieder fortzusetzen, drücken Sie erneut die Taste „HOLD“.
• Um die maximalen Messwerte anzuzeigen, drücken Sie im
Messmodus „MIN/MAX“. Das Symbol „MAX“ erscheint auf
dem Display. Nach erneutem Drücken der Taste „MAX/MIN“.
Auf dem Display erscheint das Symbol „MIN“ – die minimalen
Messwerte werden angezeigt. Rückkehr in den normalen
Messmodus – Halten Sie die Taste „MIN/MAX“ einige Sekunden
lang gedrückt.
• Um die Maßeinheit (ºF/ºC) der Messung zu ändern, halten Sie
die Taste „HOLD“ gedrückt, während das Gerät ausgeschaltet ist.
Drücken Sie anschließend die Taste „ON/OFF“ (Grundeinheit ºC).
• Um die automatische Ausschaltoption zu deaktivieren,
halten Sie die Taste „MIN/MAX“ gedrückt, während das Gerät
ausgeschaltet ist. Drücken Sie anschließend die „ON/OFF“ –
Taste, um das Gerät einzuschalten.
ACHTUNG: Das Symbol für die automatische Ausschaltoption
auf dem Bildschirm bedeutet, dass sich das Gerät nach etwa 15
Minuten Inaktivität automatisch ausschaltet.
1
2
6
4
3
5
7
E
D
C
B
A
F
G
H
I
J
Messbereich
Measurement range
Zakres pomiaru
Rozsah měření
Plage de mesure
Intervallo di Misurazione
Área de medición [dB/Hz]
35~135 (±2,0)/31,5 - 8 000
Messbereich
Measurement range
Zakres pomiaru
Rozsah měření
Plage de mesure
Intervallo di Misurazione
Área de medición [ºC]/[ºF]
-20~70/-4~158 (±1,5/±2,7)
Messgenauigkeit
Measurement accuracy
Dokładność pomiaru
Přesnost měření
Précision de mesure
Precisione della misurazione
Precisión de lectura [dB]
±1.4
Arbeitsbedingungen
Operating conditions
Warunki pracy
Pracovní podmínky
Conditions de fonctionnement
Condizioni di lavoro
Condiciones de trabajo [ºC/%RH]
-20~60/10~90
Zeitkonstanten / Time constant / Stałe czasowe / Časové konstanty
Constantes de temps / Costanti di tempo / Constante de tiempo (F/S) 125ms/1s
Frequenzwägung / Frequency weighing / Ważenie częstotliwościowe / Frekvenční vážení
Pondération de fréquence / Ponderazione di frequenza / Ponderación de frecuencia A
Auösung / Resolution / Podziałka / Rozlišení / Résolution / Risoluzione / Resolución [dB] 0,1
Batterietyp / Battery type / Typ baterii / Typ baterie / Type de pile / Tipo di batteria / Tipo de la batería 3x1.5V “AAA
TECHNISCHE DATEN / TECHNICAL DATA / DANE TECHNICZNE / TECHNICKÉ ÚDAJE / DÉTAILS TECHNIQUES / DETTAGLI TECNICI / DATOS TÉCNICOS
PRODUKTZEICHNUNGEN / PRODUCT’S VIEW / RYSUNKI PRODUKTU / NÁKRESY PRODUKTU / SCHÉMAS DU PRODUIT
LE ILLUSTRAZIONI DI PRODOTTO / LAS ILUSTRACIONES DE PRODUCTO
BEDIENUNGSANLEITUNG
Das Produkt erfüllt die geltenden Sicherheitsnormen.
Recycling-Produkt.
DE
Urządzenie służy do pomiaru poziomu natężenia dźwięku
OPIS URZĄDZENIA
1. Osłona mikrofonu
2. Wyświetlacz
3. Przycisk „HOLD” (zatrzymanie bieżącego odczytu danych na
wyświetlaczu)
4. Przycisk ON/OFF (włączanie / wyłączanie urządzenia)
5. Przycisk „MAX/MIN” (MAX – maksymalna wartość pomiaru/
MIN – minimalna wartość pomiaru)
6. Przycisk wyboru stałej czasowej/„^” (F – szybki pomiar
próbkowania(1 na 125 milisekund), S – wolny pomiar
próbkowania (1 raz na sekundę))
7. Pokrywa baterii
OPIS WYŚWIETLACZA
A. Ikona „HOLD”
B. Ikona automatycznego wyłączania urządzenia
C. Odczyt pomiaru temperatury
D. Odczyt pomiaru natężenia dźwięku
USER MANUAL
EN
The product satises the relevant safety standards.
The product must be recycled.
The device is used to measure the sound intensity level.
DEVICE DESCRIPTION
1. Microphone cover
2. Display
3. „HOLD“ button (stops the current data reading on the display)
4. ON / OFF button (switches the device on/o)
5. „MAX / MIN“ button (MAX – maximum measurement value/
MIN – minimum measurement value)
6. Time constant/„^“ selection button, F – fast sample rate
(1 per 125 milliseconds), S – slow sample rate (1 per second)
7. Battery cover
DISPLAY DESCRIPTION
A. „HOLD“ icon
B. Automatic device shutdown Icon
C. Temperature measurement reading
D. Volume measurement reading
E. Selected time constant icon – F / S
F. Alarm icons – results outside the limit: „Hi“﹥ 100dB, „LO“
﹤100dB
G. Frequency weighing icon A
H. Temperature measurement unit icon: ºC/ºF
I. Battery level icon – if the battery level is zero (empty battery
outline), replace the battery
J. MAX / MIN icon
DEVICE OPERATION
• To stop the current data reading on the screen, press the
„HOLD“ button. The „HOLD“ icon will appear on the display. To
release the stopped reading, press the „HOLD“ button again.
• To display the maximum readings, press „MIN / MAX“ in the
measuring mode. The „MAX“ icon will appear on the display.
After pressing the „MAX / MIN“ button again, the „MIN“ icon
will appear on the display and the minimum readings will be
displayed. To return to the normal measuring mode, press and
hold the „MIN / MAX“ button for a few seconds.
• To change the measurement unit (ºF/ºC), press and hold the
„HOLD“ button when the device is turned o, then press the
„ON / OFF“ button (basic unit ºC).
• To disable the device‘s AUTO POWER OFF option, press and
hold the „MIN / MAX“ button when the device is turned o,
then press the „ON / OFF“ button to switch the device on.
NOTE: The AUTO POWER OFF icon displayed on the screen
means that the device will automatically turn o after about 15
minutes of inactivity.
INSTRUKCJA OBŁSUGI
PL
Produkt spełnia wymagania odpowiednich norm
bezpieczeństwa.
Produkt podlegający recyklingowi.
4 5
Rev. 26.02.2019
Rev. 26.02.2019
MANUEL D‘UTILISATION
FR
Le produit est conforme aux normes de sécurité en
vigueur.
Collecte séparée.
ISTRUZIONI PER L’USO
IT
Il prodotto soddisfa le attuali norme di sicurezza.
Prodotto riciclabile.
NÁVOD K OBSLUZE
CZ
Výrobek splňuje požadavky příslušných bezpečnostních
norem.
Recyklovatelný výrobek.
El dispositivo se utiliza para medir el nivel de presión sonora.
DESCRIPCIÓN DEL DISPOSITIVO
1. Cubierta del micrófono
2. Pantalla
3. Botón “HOLD” (detener la lectura de datos actual en la pantalla)
4. Botón ON/OFF (encender/apagar el dispositivo)
5. Botón “MAX/MIN” (MAX – valor máximo de medición/MIN
– valor mínimo de medición)
6. Botón de selección de constante de tiempo/ “^” (F – medición
rápida (1 cada 125 milisegundos), S – medición lenta
(1 por segundo))
7. Tapa de la batería
DESCRIPCIÓN DE LA PANTALLA
A. Icono “HOLD”
B. Icono de apagado automático del dispositivo
C. Lectura de medida de temperatura
D. Lectura de medida de la intensidad del sonido
E. Icono de la constante de tiempo seleccionada – F/ S
F. Icono de alarma – resultados fuera del límite: “Hi” ﹥100dB,
“LO” ﹤100dB
G. Icono de ponderación de frecuencia A
H. Icono de unidad de medida de temperatura – ºC/ºF
I. Icono de nivel de carga de batería – si el nivel de batería es
cero (contorno de batería sin relleno) debe cambiar la batería
por una nueva.
J. Icono MAX/MIN
FUNCIONAMIENTO DEL DISPOSITIVO
• Para detener la lectura de datos actual en la pantalla debe
apretar el botón “HOLD”. En la pantalla aparecerá el icono
“HOLD”. Para desbloquear la lectura retenida en la pantalla,
pulse de nuevo el botón “HOLD”.
• Para mostrar las lecturas máximas, estando en el modo de
medición, pulse el botón „MIN/MAX“. En la pantalla aparecerá
el icono „MAX“. Al presionar de nuevo el botón „MAX/MIN”,
en la pantalla aparecerá el icono „MIN“ – se mostrarán las
lecturas mínimas. Vuelta al modo normal de medición – pulsar
y mantener presionado durante unos segundo el botón „MIN/
MAX“.
• Para cambiar de unidad de medición (°F/°C), debe presionar
y mantener pulsado el botón „HOLD” mientras el dispositivo
esté apagado. A continuación, pulse el botón „ON/OFF“ (unidad
básica °C).
• Para desactivar la opción de apagado automático, pulse
y mantenga presionado el botón „MIN/MAX” mientras el
dispositivo esté apagado. A continuación, pulse el botón „ON/
OFF“ para encender el dispositivo.
ATENCIÓN: El icono de apagado automático en la pantalla
indica que el dispositivo se apagará automáticamente después
de unos 15 minutos sin actividad.
Zařízení je určeno k měření úrovně intenzity zvuku.
POPIS ZAŘÍZENÍ
1. Kryt mikrofonu
2. Displej
3. Tlačítko „HOLD“ (pozastavení zobrazování aktuálních dat na
displeji)
4. Tlačítko ON/OFF (zapnutí/vypnutí přístroje)
5. Tlačítko „MAX/MIN“ (MAX – maximální hodnota měření, MIN
– minimální hodnota měření)
6. Tlačítko volby časové konstanty/„^“ (F – měření za využití
rychlého vzorkování (1 za 125 milisekund), S – měření za využití
pomalého vzorkování (1 za sekundu))
7. Kryt baterie
POPIS DISPLEJE
A. Ikona „HOLD“
B. Ikona automatického vypínání zařízení
C. Zobrazení naměřené teploty
D. Zobrazení naměřené intenzity zvuku
E. Ikona zvolené časové konstanty – F/S
F. Ikony alarmů – výsledky mimo limit: „Hi“ ﹥ 100 dB, „Lo“<100 dB
G. Ikona vážení frekvence A
H. Ikona jednotky měření teploty – ºC/ºF
I. Ikona stavu baterie – pokud je stav baterie nulový (prázdný
obrys baterie), vyměňte baterii za novou
J. Ikona MAX/MIN
MANUAL DE INSTRUCCIONES
ES
El producto cumple con las normas de seguridad vigentes.
Producto reciclable.
E. Ikona wybranej stałej czasowej – F/ S
F. Ikony alarmu – wyniki poza limitem: „Hi”﹥100dB, „LO”﹤100dB
G. Ikona ważenia częstotliwościowego A
H. Ikona jednostki pomiaru temperatury – ºC/ºF
I. Ikona poziomu naładowania baterii – jeśli poziom baterii będzie
zerowy (pusty obrys baterii) należy wymienić baterię na nową
J. Ikona MAX/ MIN
OBSŁUGA URZĄDZENIA
• Aby zatrzymać bieżący odczyt danych na ekranie należy
nacisnąć przycisk „ HOLD”. Na wyświetlaczu pojawi się ikona
„HOLD”. Aby zwolnić wstrzymany odczyt, ponownie nacisnąć
przycisk „HOLD”.
• Aby wyświetlić maksymalne odczyty należy w trybie pomiaru
nacisnąć „MIN/MAX“. Na wyświetlaczu pojawi się ikona
„MAX“. Po ponownym naciśnięciu przycisku „MAX/MIN”. Na
wyświetlaczu pojawi się ikona „MIN“ – zostaną wyświetlone
minimalne odczyty. Powrót do normalnego trybu pomiarowego
– nacisnąć i przytrzymać przez kilka sekund przycisk „MIN/
MAX“.
• Aby zmienić jednostkę (ºF/ºC) pomiaru należy nacisnąć
i przytrzymać przycisk „HOLD” podczas gdy urządzenie jest
wyłączone. Następnie nacisnąć przycisk „ON/OFF“ (podstawowa
jednostka ºC).
• Aby dezaktywować opcję automatycznego wyłączania
urządzenia należy nacisnąć i przytrzymać przycisk „MIN/MAX”
podczas gdy urządzenie jest wyłączone. Następnie nacisnąć
przycisk „ON/OFF“, aby włączyć urządzenie.
UWAGA: Ikona automatycznego wyłączania urządzenia
wyświetlana na ekranie oznacza, że urządzenie wyłączy się
automatycznie po około 15 minutach bezczynności.
OBSLUHA ZAŘÍZENÍ
• Chcete-li pozastavit zobrazování aktuálních dat na displeji,
stiskněte tlačítko „HOLD“. Na displeji se zobrazí ikona „HOLD“.
Chcete-li zrušit pozastavení zobrazování dat, znovu stiskněte
tlačítko „HOLD“.
• Chcete-li zobrazit maximální hodnoty, v režimu měření stiskněte
tlačítko „MIN/MAX“. Na displeji se zobrazí ikona „MAX“. Po
opětovném stisknutí tlačítka „MAX/MIN“ se na displeji objeví
ikona „MIN“ – zobrazí se minimální hodnoty. Pro návrat do
normálního měřicího režimu stiskněte a držte několik sekund
tlačítko „MIN/MAX“.
• Chcete-li změnit jednotku měření (°F/°C), podržte stisknuté
tlačítko „HOLD“ během doby, kdy je zařízení vypnuté. Poté
stiskněte tlačítko „ON/OFF“ (základní jednotka °C).
• Chcete-li deaktivovat funkci automatického vypnutí zařízení,
podržte stisknuté tlačítko „MIN/MAX“, během doby, kdy je
zařízení vypnuté. Poté zařízení zapněte stisknutím tlačítka „ON/
OFF“.
POZOR: Ikona automatického vypnutí zobrazená na obrazovce
znamená, že se přístroj po zhruba 15 minutách nečinnosti
automaticky vypne.
L‘appareil permet de mesurer le niveau d‘intensité acoustique.
DESCRIPTION DE L’APPAREIL
1. Bonnette microphone
2. Écran
3. Touche « HOLD » (arrêt de la lecture des donnée en cours
à l’écran)
4. Touche ON/OFF (marche/arrêt)
5. Touche « MAX/MIN » (MAX – – valeur maximale de mesure/
MIN – valeur minimale de mesure)
6. Touche de sélection de la constante de temps/ « ^ » (F – mesure
rapide (1 fois par 125 millisecondes), S – mesure lente (1 fois par
seconde)
7. Cache batterie
DESCRIPTION DE L’ÉCRAN
A. Icône « HOLD »
B. Icône d’arrêt automatique de l’appareil
C. Valeur de la température mesurée
D. Valeur de l’intensité acoustique mesurée
E. Icône de la constante de temps sélectionnée – F/S
F. Icône d’alarme – valeurs dépassant la limite: «Hi»﹥100 dB, «LO»
﹤100 dB
G. Icône de pondération de fréquence A
H. Icône de l’unité de température – ºC/ºF
I. Icône du niveau de charge de la batterie – si le niveau de charge
est à zéro (contours vides) remplacez la batterie
J. Icône MAX/MIN
UTILISATION DE L’APPAREIL
• Pour arrêter la lecture des données en cours à l‘écran, appuyez
sur la touche « HOLD ». L‘icône « HOLD » apparaît. Pour
reprendre la lecture, appuyez à nouveau sur la touche «HOLD».
• Pour acher les valeurs maximales, appuyez sur « MIN/MAX »
en mode mesure. L‘icône « MAX » apparaîtra à l‘écran. Si vous
appuyez à nouveau sur la touche « MIN/MAX ». L’écran ache
l‘icône « MIN » et les valeurs minimales. Pour retourner au
mode de mesure normal – appuyez sur la touche « MIN/MAX »
et maintenez-la enfoncée pendant quelques secondes.
• Pour changer l‘unité de mesure (°F/°C), appuyez sur la touche
« HOLD » et maintenez-la enfoncée pendant que l‘appareil est
éteint. Appuyez ensuite sur la touche « ON/OFF ». (unité de
base °C).
• Pour désactiver l‘arrêt automatique, maintenez la touche «MIN/
MAX» enfoncée pendant que l‘appareil est éteint. Ensuite
appuyez sur la touche « ON/OFF » pour le mettre en marche.
REMARQUE: Lorsque l‘icône d’arrêt automatique apparaît
à l‘écran, cela signie que l’appareil s’éteint automatiquement
après environ 15 minutes d‘inactivité.
Il dispositivo serve per misurare il livello di pressione acustica.
DESCRIZIONE DEL DISPOSITIVO
1. Copertura del microfono
2. Display
3. Pulsante „HOLD” (arresto della lettura dei dati attuale sul
display)
4. Pulsante ON/OFF (accensione/spegnimento del dispositivo)
5. Pulsante „MAX/MIN” (MAX – valore di misurazione massimo/
MIN – valore di misurazione minimo)
6. Pulsante di scelta della costante di tempo/„^”
(F – campionamento rapido (1 per 125 millisecondi),
S – campionamento libero (1 volta al secondo))
7. Copertura della batteria
DESCRIZIONE DEL DISPLAY
A. Icona „HOLD”
B. Icona „spegnimento automatico del dispositivo”
C. Lettura della misurazione della temperatura
D. Lettura della misurazione di pressione acustica
E. Icona „costante di tempo selezionata” – F/ S
F. Icone „allarme” – risultati oltre il limite: „Hi”﹥100dB, „LO”
﹤100dB
G. Icona „ponderazione di frequenza” A
H. Icona dell’unità di misurazione della temperatura – ºC/ºF
I. Icona del livello di caricamento batteria – se il livello della
batteria è a zero (contorno batteria vuoto), occorre sostituirla
con una una nuova
J. Icona MAX/ MIN
USO DEL DISPOSITIVO
• Per fermare la lettura dei dati attuale sullo schermo premere
il pulsante „ HOLD”. Sul display apparirà l’icona „HOLD”.
Per proseguire con la lettura fermata, ripremere il pulsante
„HOLD”.
• Per mostrare i valori massimi occorre premere „MIN/MAX“
nella modalità di misurazione. Sul display apparirà l’icona
„MAX“. Dopo aver ripremuto il pulsante „MAX/MIN”, sul
display apparirà l’icona „MIN“ – saranno mostrate le letture
minime. Ritorno alla modalità di misurazione normale
– premere e antenere premuto per alcuni secondi il pulsante
„MIN/MAX“.
• Per cambiare l’unità (°F/°C) di misurazione occorre premere
e mantenere premuto il pulsante „HOLD” quando il dispositivo
è spento. Poi premere il pulsante „ON/OFF“ (unità di base °C).
• Per disattivare l’opzione di spegnimento automatico del
dispositivo occorre tenere premuto il tasto „MIN/MAX”
quando il dispositivo è spento. Poi premere il pulsante „ON/
OFF“ per accendere il dispositivo.
NOTA: L’icona di spegnimento automatico del dispositivo sullo
schermo indica che il dispositivo si spegnerà automaticamente
dopo circa 15 minuti di inattività.
expondo.de
Hersteller an Verbraucher
Sehr geehrte Damen und Herren,
gebrauchte Elektro – und Elektronikgeräte dürfen gemäß europäischer Vorgaben [1] nicht zum unsortierten Siedlungsabfall
gegeben werden, sondern müssen getrennt erfasst werden. Das Symbol der Abfalltonne auf Rädern weist auf die Notwendigkeit
der getrennten Sammlung hin. Helfen auch Sie mit beim Umweltschutz. Sorgen Sie dafür, dieses Gerät, wenn Sie es nicht mehr
weiter nutzen wollen, in die hierfür vorgesehenen Systeme der Getrenntsammlung zu geben.
In Deutschland sind Sie gesetzlich [2] verpichtet, ein Altgerät einer vom unsortierten Siedlungsabfall getrennten Erfassung zu-
zuführen. Die öffentlich – rechtlichen Entsorgungsträger (Kommunen) haben hierzu Sammelstellen eingerichtet, an denen Altge-
räte aus privaten Haushalten ihres Gebietes für Sie kostenfrei entgegengenommen werden. Möglicherweise holen die rechtlichen
Entsorgungsträger die Altgeräte auch bei den privaten Haushalten ab.
Bitte informieren Sie sich über Ihren lokalen Abfallkalender oder bei Ihrer Stadt – oder Gemeindeverwaltung über die in Ihrem
Gebiet zur Verfügung stehenden Möglichkeiten der Rückgabe oder Sammlung von Altgeräten.
[1] RICHTLINIE 2002/96/EG DES EUROPÄISCHEN PARLAMENTS UND DES RATES
ÜBER ELEKTRO – UND ELEKTRONIK – ALTGERÄTE
[2] Gesetz über das Inverkehrbringen, die Rücknahme und die umweltverträgliche Entsorgung
von Elektro – und Elektronikgeräten (Elektro – und Elektronikgerätegesetz – ElektroG).
Umwelt – und Entsorgungshinweise
Utylizacja produktu
Produkty elektryczne i elektroniczne po zakończeniu okresu eksploatacji wymagają segregacji i oddania ich do wyznaczo-
nego punktu odbioru. Nie wolno wyrzucać produktów elektrycznych razem z odpadami gospodarstwa domowego. Zgodnie
z dyrektywą WEEE 2012/19/UE obowiązującą w Unii Europejskiej, urządzenia elektryczne i elektroniczne wymagają segre-
gacji i utylizacji w wyznaczonych miejscach. Dbając o prawidłową utylizację, przyczyniasz się do ochrony zasobów naturalnych
i zmniejszasz negatywny wpływ oddziaływania na środowisko, człowieka i otoczenie. Zgodnie z krajowym prawodawstwem,
nieprawidłowe usuwanie odpadów elektrycznych i elektronicznych może być karane!
For the disposal of the device please consider and act according to the national and local rules and regulations.
CONTACT
expondo Polska sp. z o.o. sp. k.
ul. Nowy Kisielin-Innowacyjna 7
66-002 Zielona Góra | Poland, EU
e-mail: info@expondo.de

This manual suits for next models

1

Other Steinberg Systems Measuring Instrument manuals

Steinberg Systems SBS-THE-600 User manual

Steinberg Systems

Steinberg Systems SBS-THE-600 User manual

Steinberg Systems SBS-TW-50C User manual

Steinberg Systems

Steinberg Systems SBS-TW-50C User manual

Steinberg Systems SBS-DLM-60 User manual

Steinberg Systems

Steinberg Systems SBS-DLM-60 User manual

Steinberg Systems SBS-MM-100 User manual

Steinberg Systems

Steinberg Systems SBS-MM-100 User manual

Steinberg Systems SBS-LDM-60 User manual

Steinberg Systems

Steinberg Systems SBS-LDM-60 User manual

Steinberg Systems SBS-DM-1000TR User manual

Steinberg Systems

Steinberg Systems SBS-DM-1000TR User manual

Steinberg Systems SBS-LL-350 User manual

Steinberg Systems

Steinberg Systems SBS-LL-350 User manual

Steinberg Systems SBS-CT-123 User manual

Steinberg Systems

Steinberg Systems SBS-CT-123 User manual

Steinberg Systems SBS-SM-130C User manual

Steinberg Systems

Steinberg Systems SBS-SM-130C User manual

Steinberg Systems SBS-CM-1000 User manual

Steinberg Systems

Steinberg Systems SBS-CM-1000 User manual

Steinberg Systems SBS-LM-400C User manual

Steinberg Systems

Steinberg Systems SBS-LM-400C User manual

Steinberg Systems SBS-RL-500R User manual

Steinberg Systems

Steinberg Systems SBS-RL-500R User manual

Steinberg Systems SBS-TPG-100 User manual

Steinberg Systems

Steinberg Systems SBS-TPG-100 User manual

Steinberg Systems SBS-PH-100 User manual

Steinberg Systems

Steinberg Systems SBS-PH-100 User manual

Steinberg Systems SBS-GFM-230 User manual

Steinberg Systems

Steinberg Systems SBS-GFM-230 User manual

Steinberg Systems SBS-SF-300 User manual

Steinberg Systems

Steinberg Systems SBS-SF-300 User manual

Steinberg Systems SBS-TG-2000 User manual

Steinberg Systems

Steinberg Systems SBS-TG-2000 User manual

Steinberg Systems SBS-MT-100 User manual

Steinberg Systems

Steinberg Systems SBS-MT-100 User manual

Steinberg Systems SBS-CO-100 User manual

Steinberg Systems

Steinberg Systems SBS-CO-100 User manual

Steinberg Systems SBS-MT-100 User manual

Steinberg Systems

Steinberg Systems SBS-MT-100 User manual

Steinberg Systems SBS-RL-1000 User manual

Steinberg Systems

Steinberg Systems SBS-RL-1000 User manual

Steinberg Systems SBS-SF-5000 User manual

Steinberg Systems

Steinberg Systems SBS-SF-5000 User manual

Steinberg Systems SBS-MM-200 User manual

Steinberg Systems

Steinberg Systems SBS-MM-200 User manual

Steinberg Systems SBS-AM-30C User manual

Steinberg Systems

Steinberg Systems SBS-AM-30C User manual

Popular Measuring Instrument manuals by other brands

Oval EX DELTA, EX DELTA-DIA manual

Oval

Oval EX DELTA, EX DELTA-DIA manual

Simpson 897 Operator's manual

Simpson

Simpson 897 Operator's manual

GE Wiring Devices & Specialty Products GE5805WS6 user manual

GE Wiring Devices & Specialty Products

GE Wiring Devices & Specialty Products GE5805WS6 user manual

National SG -990A Service manual

National

National SG -990A Service manual

Emerson Rosemount 9295 quick start guide

Emerson

Emerson Rosemount 9295 quick start guide

ELMACRON 1005RE instructions

ELMACRON

ELMACRON 1005RE instructions

GE CheckPoint Quick setup guide

GE

GE CheckPoint Quick setup guide

MRC INE-DZB-712 instruction manual

MRC

MRC INE-DZB-712 instruction manual

PCE Instruments PCE-RT 10 manual

PCE Instruments

PCE Instruments PCE-RT 10 manual

Alti-2 D-90114 user manual

Alti-2

Alti-2 D-90114 user manual

Elster ALPHA A1800 Technical manual

Elster

Elster ALPHA A1800 Technical manual

Simex SRT-94-XA user manual

Simex

Simex SRT-94-XA user manual

Major tech MT91 instruction manual

Major tech

Major tech MT91 instruction manual

Exotek Instruments BDD mini user manual

Exotek Instruments

Exotek Instruments BDD mini user manual

NeurOptics NPi-300 quick start guide

NeurOptics

NeurOptics NPi-300 quick start guide

Topkodas GTalarm2 Installation & programming manual

Topkodas

Topkodas GTalarm2 Installation & programming manual

Omega FMA 4000 user guide

Omega

Omega FMA 4000 user guide

Laser Atlanta SpeedLaser user manual

Laser Atlanta

Laser Atlanta SpeedLaser user manual

manuals.online logo
manuals.online logoBrands
  • About & Mission
  • Contact us
  • Privacy Policy
  • Terms and Conditions

Copyright 2025 Manuals.Online. All Rights Reserved.