Steren AMP-040AR User manual


ENGLISH
ENGLISH-02
IMPORTANT
Before using your new Audio amplier, please read the following
recommendations.
Verify Line Voltage Before Use
Connecting the amplier to a line voltage other than that for which it
is intended can create a safety and re hazard, and may damage the
amplier.
If you have any questions about the voltage requirements for your
specic model, or about the line voltage in your area, contact your
selling dealer before plugging the unit into a wall outlet.
Do Not Use Extension Cords
To avoid safety hazards, use only the power cord supplied with your
unit. If a replacement cord is used, make certain that it is of a similar
gauge. We do not recommend using extension cords with this product.
As with all electrical devices, do not run power cords under rugs or
carpets or place heavy objects on power cords.
Damaged power cords should be replaced immediately with cords
meeting factory specications.
Handle the AC Power Cord Gently
When disconnecting the power cord from an AC outlet, always pull the
plug; never pull the cord. If you do not intend to use the amplier for a
considerable length of time, disconnect the plug from the AC outlet.

ENGLISH
ENGLISH-03
Do Not Open the Cabinet
There are no user-serviceable components inside this product.
Opening the cabinet may present a shock hazard, and any modication
to the product will void your guarantee. If water enters the unit, or any
metal object such as paper clip, wire or staple accidentally falls inside
the cabinet, disconnect the unit from the AC power source immediately
and consult an authorized warranty station.
Installation Location
- To ensure proper operation and to avoid the potential for safety
hazards, place the unit on a rm and level surface. When placing the
unit on a shelf, be certain that the shelf and any mounting hardware can
support the amplier’s weight.
- Make certain that the proper space is provided both above and below
the unit for ventilation. If the amplier will be installed in a cabinet or
other enclosed area, make certain that there is sufcient air movement
within the cabinet. Consult with your dealer or installer for more
information.
- Do not place the unit directly on a carpeted surface.
- Avoid installation in extremely hot or cold locations, in an area that is
exposed to direct sunlight or near heating equipment.
- Avoid moist or humid locations. This may produce malfuction or elec-
tric shock.
- Do not obstruct the ventilation slots on the top of the unit or place
objects directly over them. Remember, power ampliers generate heat,
and the heatsink ns and ventilation slots that form part of the cabinet
are specially designed to remove this heat.
ENGLISH
ENGLISH-04
Placing other electronic equipment near these heat dissipation systems
may possibly affect the long-term reliability of both your amplier and
the objects placed above it. The carton and shipping materials used in
protecting your new amplier were specially designed to cushion it from
the shocks and vibration of shipping. We suggest that you save the
carton and packing materials for use in shipping if you move or if the
unit ever needs repair.
Cleaning
When the unit gets dirty, wipe it with a clean, soft and dry cloth. If
necessary, rst wipe the surface with a soft cloth slightly dampened
with mild soapy water, followed by a fresh cloth with clean water. Wipe
immediately with a dry cloth. Never use benzene, thinner, alcohol or any
other volatile cleaning agent.
Do not use abrasive cleaners, as they may damage the nish of metal
parts. Avoid spraying insecticide near the unit.
Moving the Unit
Before moving the unit, be certain to disconnect any interconnection
cords with other components, and make certain that you disconnect the
unit from the AC outlet.

ENGLISH
ENGLISH-05
FEATURES
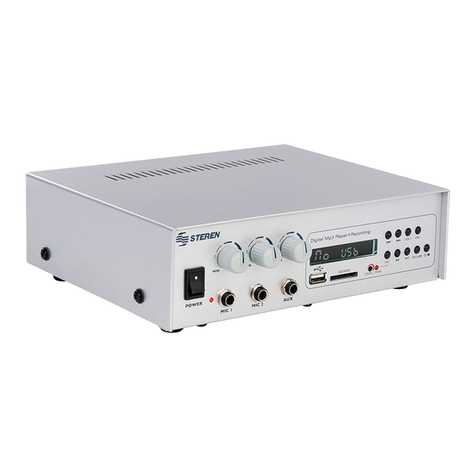
Your new audio amplier has two microphone inputs and one auxiliary
input to connect an external audio system. This amplier counts with an
Auto Reverse tape player and it counts with a built-in siren. The power
output is 45W and you can connect speakers with an impedance of 4, 8
and 16 . Also it has a short-circuit protector.
• 2 microphone inputs
• 1 auxiliary input
• 1 tape player with auto stop
• 2 microphone volume knobs
• 1 auxiliary volume knob
• 1 use indicator
• 1 siren switch
• 1 On / Off switch

ENGLISH
ENGLISH-06
CONTROLS
1.- On / Off
Turn on / Turn off the equipment
2.- Microphone 1 input
3.- Microphone 2 input
4.- Auxiliary input
Connect an external audio system
5.- Use indicator
Lights on when the equipment is in use
6.- Siren
Activates / deactivates the built-in siren

ENGLISH
ENGLISH-07
7.- Tape player
8.- Auxiliary volume knob
9.- Microphone 2 volume knob
10.- Microphone 1 volume knob
11.- Stop / Eject buttons
12.- Backward / Forward buttons
INSTALLATION
Low impedance speaker output: 4ohms
4ohms end has been designed for connections with a few speakers in a
range of less than 50 meters.
The total impedance from the speaker must be the same as in the
amplier output, for a better current distribution.
Make sure that the total impedance from the speakers are higher than 4
ohms.
Do not increase the output power from the amplier more than
allowable by the speakers. Otherwise, may cause damages on the
speakers.

ENGLISH
ENGLISH-08

ENGLISH
ENGLISH-09
SPECIFICATIONS
Input: 127V~ 60Hz 12V
Current: 520mA 2.15A
Output: 15W rms 40W max
Microphone input: 45dB 10kohms / 50kohms
Output: 40W max. 15W RMS
Frequency response: 150Hz to 15kHz 3dB
Total distortion: Less than 3%
Impedance: 4, 8 & 16ohms
Line out: 70V
Dimensions: 245 x 220 x78mm
Weight: 7,4lb
Product design and specications are subject to change, without
notice.

WARRANTY
This Steren product is warranted under normal usage against defects in workmanship and
materials to the original purchaser for one year from the date of purchase.
CONDITIONS
1.- This warranty card with all the required information, invoice or purchase ticket, product
box or package, and product, must be presented when warranty service is required.
2.- If the product stills on the warranty time, the company will repair it free of charge.
3.- The repairing time will not exceed 30 natural days, from the day the claim was received.
4.- Steren sell parts, components, consumables and accessories to customer, as well as
warranty service, at any of the addresses mentioned later.
THIS WARRANTY IS VOID IN THE NEXT CASES:
If the product has been damaged by an accident, acts of God, mishandling, leaky batteries,
failure to follow enclosed instructions, improper repair by unauthorized personnel, improper
safe keeping, among others.
a) The consumer can also claim the warranty service in the purchase establishment.
b) If you lose the warranty card, we can reissue it, if you show the invoice or purchase ticket.
Product: Audio amplier
Part number: AMP-040AR
Brand: Steren

RETAILER INFORMATION
Name of the retailer
Address
Product
Brand
Part number
Serial number
Date of delivery
In case your product fails or have questions, please contact your nearest dealer. If
you are in Mexico, please give a call to our Call Center.
Call Center
01 800 500 9000


IMPORTANTE
Antes de utilizar su nuevo Amplicador de audio, por favor lea las
siguientes recomendaciones
Verique la línea de voltaje antes de utilizar el equipo
Conectar el amplicador a una línea de voltaje diferente a la que utiliza
puede provocar fuego y dañar el equipo.
Si tiene alguna pregunta acerca de los requerimientos de voltaje, o
acerca del voltaje que se utiliza en su área, contacte a un distribuidor
cercano antes de conectar el equipo al tomacorriente.
No utilice extensiones
Para evitar daños al equipo, utilice únicamente el cable de corriente
suministrado con la unidad. Si utiliza un cable de reemplazo, asegúrese
de que cuenta con la mismas características que el original. No se
recomienda utilizar ninguna extensión con este producto. Como todo
equipo eléctrico, no coloque el cable de energía por debajo de
alfombras o tapetes ni coloque objetos pesados encima de los cables.
Si el cable de energía se encuentra dañado debe ser reemplazado
inmediatamente con cables que cuenten con las mismas
especicaciones de fábrica.
Maneje el cable de energía con cuidado
Cuando desconecte el cable de energía del tomacorriente nunca jale
del cable.
ESPAÑOL-02
ESPAÑOL
Antes de utilizar su nuevo Kit C

Si no piensa utilizar el amplicador por un tiempo considerable,
desconecte el cable del tomacorriente.
No abra el gabinete
Dentro del producto no existen componentes que puedan ser utilizados
por el usuario. El abrir el gabinete puede causar un choque eléctrico, y
cualquier modicación al producto anulará la garantía.
Si entra agua en la unidad, o cualquier objeto metálico como grapas,
clips o alambres caen accidentalmente dentro del gabinete, desconecte
la unidad de la corriente eléctrica inmediatamente y consulte a
distribuidor autorizado.
instalación
Para asegurar la correcta operación y evitar posibles daños al equipo,
coloque la unidad en una supercie rme y plana. Cuando coloque la
unidad en un estante, asegúrese de que el estante y cualquier equipo
para montar puede soportar el peso del amplicador.
Asegúrese de que el equipo cuenta con la suciente ventilación, tanto
en la parte superior como inferior. Si el amplicador será instalado en
un gabinete u otra área cerrada, asegúrese de que existe la suciente
rotación de aire dentro del gabinete.
No coloque la unidad directamente sobre una supercie tipo alfombra.
Evite la colocación en lugares demasiado calientes o fríos, o en lugares
donde esté expuesto a la luz del sol de forma directa así como de
equipos que generen calor.
ESPAÑOL-03
ESPAÑOL

No use ni almacene este equipo en lugares donde existan goteras o
salpicaduras de agua. Puede causar un mal funcionamiento o un
choque eléctrico.
No obstruya las ranuras de ventilación ni coloque objetos directamente
sobre ellas. Recuerde, los amplicadores de poder generan calor, y los
disipadores de calor y las ranuras de ventilación que forman parte del
gabinete están especialmente diseñados para remover ese calor.
Colocar otros equipos electrónicos cerca de esos sistemas de
disipación de calor podrían afectar el rendimiento del amplicador y los
otros objetos colocados encima de él. El material de empaque utilizado
en la protección del ampli cador han sido diseñados especialmente
para amortiguar las vibraciones y los golpes durante la entrega. Le
sugerimos guardar el material de empaque en caso de que necesite
moverlo o llevarlo a reparación.
Limpieza
Cuando la unidad se encuentra sucia, límpiela con un paño suave y
seco. Si es necesario, limpie primero la supercie con un paño
ligeramente humedecido en agua jabonosa, seguido por un paso seco.
Nunca utilice benceno, thinner, alcohol u otro agente de limpieza volátil.
No utilice limpiadores abrasivos, pueden dañar el acabo de las partes
metálicas. Evite rociar insecticida cerca de la unidad.
Moviendo la unidad
Antes de mover la unidad, asegúrese de desconectar cualquier
conexión con otros componentes, y asegúrese de desconectar el
equipo de la corriente eléctrica.
ESPAÑOL-04
ESPAÑOL

CARACTERISTICAS
Su nuevo amplicador de audio cuenta con 2 entradas para micrófono y
una entrada auxiliar para conectar un equipo de audio externo. La
casetera es auto reversible y tiene una sirena incorporada. La potencia
de salida es de 45W y puede conectar bocinas de 4, 8 y 16 . Cuenta
con un protector de corto circuito.
• 2 entradas de micrófono
• 1 entrada auxiliar
• 1 casetera con autostop
• 2 controles de volumen de micrófono
• 1 control de volumen de auxiliar
• 1 indicador de uso
• 1 interruptor de sirena
• 1 interruptor de encendido
ESPAÑOL-05
ESPAÑOL

CONTROLES
1.- Encendido / Apagado
2.- Entrada de micrófono 1
3.- Entrada de micrófono 2
4.- Entrada de auxiliar
Conecte un equipo de audio externo
5.- Indicador de uso
Enciende cuando el equipo esta en uso
6.- Sirena
Activa / desactiva la sirena incorporada
ESPAÑOL-06
ESPAÑOL

7.- Casetera
8.- Control de volumen auxiliar
9.- Control de volumen micrófono 2
10.- Control de volumen micrófono 1
11.- Paro / expulsión
12.- Retroceso / avance rápido
INSTALACIÓN
Salida de bocina de baja impedancia: 4 ohms
La terminal de 4 ohms esta diseñada para conexiones de pocas
bocinas a menos de 50 metros.
Se requiere que la carga total de impedancia en la bocina sea la misma
que la impedancia de salida del amplicador, para una mejor
distribución de corriente.
Asegúrese de que la impedancia total de las bocinas esté arriba de los
4 ohms.
De cualquier forma no aumente el poder de salida del
amplicador más allá del permitido de entrada de las bocinas. De ser
así, las bocinas podrían resultar dañadas.
ESPAÑOL-07
ESPAÑOL

ESPAÑOL-08
ESPAÑOL

ESPAÑOL-09
ESPAÑOL
ESPECIFICACIONES
Entrada: 127V~ 60Hz 12V
Consumo: 520mA 2,15A
Salida: 15W rms 40W máx
Entrada Micrófono: 45dB 10kohms / 50kohms
Salida: 40W max. 15W RMS
Respuesta de frecuencia: 150Hz a 15kHz 3dB
Distorsión total: Menor de 3%
Impedancia: 4, 8 y 16ohms
Salida de línea: 70V
Dimensiones: 245 x 220 x78mm
Peso: 3,4kg
El diseño del producto y las especicaciones pueden cambiar sin
previo aviso.
Antes de utilizar su nuevo Kit C
Table of contents
Languages:
Other Steren Amplifier manuals

Steren
Steren AMP-040SD User manual

Steren
Steren AMP-020 User manual

Steren
Steren AMP-012 User manual

Steren
Steren AMP-020/GTR User manual

Steren
Steren AMP-009 User manual

Steren
Steren AMP-005 User manual

Steren
Steren AMP-160 User manual

Steren
Steren AMP-020 User manual

Steren
Steren AMP-045CD User manual

Steren
Steren AMP-014 User manual

Steren
Steren AMP-025 User manual

Steren
Steren AMP-040SD User manual

Steren
Steren AMP-210SD User manual

Steren
Steren BAF-1595 User manual

Steren
Steren AMP-160 User manual

Steren
Steren AMP-210CD User manual

Steren
Steren AMP-120 User manual

Steren
Steren AMP-010 User manual

Steren
Steren BAF-1280 User manual

Steren
Steren AMP-600 User manual