Steren AMP-012 User manual
Manual de instrucciones S6-B
V0411a
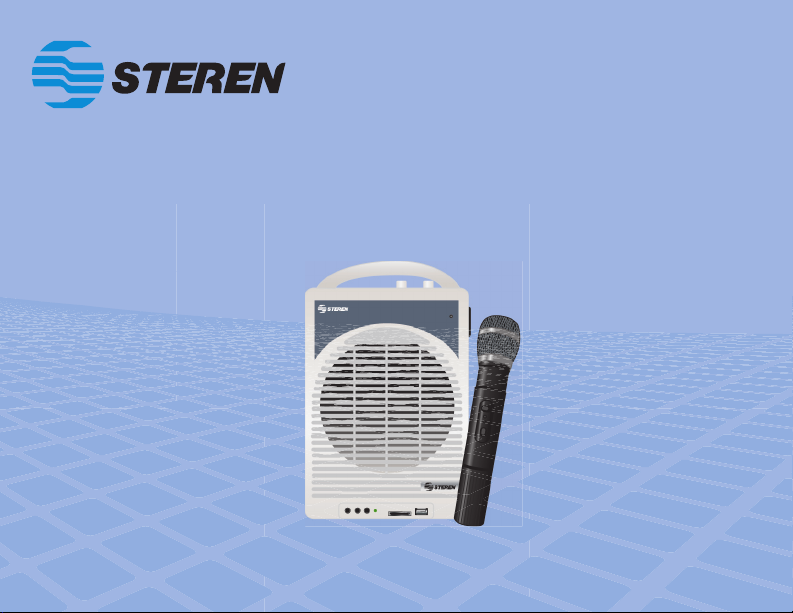
AMP-012
Amplificador portátil con micrófono
inalámbrico y lector SD / memoria USB

2
Gracias
por la compra de este producto Steren.
Este manual contiene todas las funciones de operación y solución de problemas
necesarias para instalar y operar su nuevo Amplicador portátil inalámbrico y lector SD /
memoria USB Steren.
Por favor revise este manual completamente para estar seguro de instalar
y poder operar apropiadamente este producto.
Para apoyo, compras y todo lo nuevo que tiene Steren, visite nuestro sitio Web en:
www.steren.com
AMP-012
AMPLIFICADOR PORTÁTIL CON
MICRÓFONO INALÁMBRICO Y
LECTOR SD / MEMORIA USB
3
No golpee el micrófono, no lo deje caer.
No use el micrófono inalámbrico cuando esté sujeto a:
• Calor excesivo o fuentes de radiación de calor.
• Humedad excesiva o polvo.
• Vibraciones mecánicas.
Aleje el amplicador de cualquier objeto que contenga líquidos, si algún objeto o líquido cae
dentro del equipo, desconéctelo de la energía y llévelo a revisar por personal calicado antes de
volver a operar.
IMPORTANTE
• Reproductor MP3 incorporado.
• Soporta memorias SD.
• Soporta memorias USB.
• 100% portátil.
• 50W máximo.
• Batería de respaldo.
• Receptor de micrófono integrado.
• Micrófono inalámbrico VHF.
• Entrada auxiliar o micrófono.
CARACTERÍSTICAS

4
CONOCIMIENTOS BÁSICOS ACERCA DEL MICRÓFONO
Posición del micrófono
El equipo es ideal para situaciones de voz cercana y puede sostenerse en la mano o montado
en una base para micrófono. Recuerde que la técnica de uso de un micrófono depende mucho
de los gustos personales, y no existe una posición “correcta” para colocarlo.
Efecto de proximidad
Cuando la fuente de sonido se encuentra a una distancia de 1 centímetro o menos del micrófono,
el micrófono incrementará las frecuencias de graves ( de 6 a 10dB a 100Hz) creando un sonido
más cálido.
Retroalimentación
La retroalimentación ocurre cuando el sonido amplicado de cualquier bocina entra de nuevo
al sistema de sonido a través de cualquier micrófono abierto por lo que es repetidamente
amplicado.
Comúnmente, éstas condiciones son las que causan la retroalimentación:
• Colocar las bocinas muy cerca del micrófono.
• Tener demasiados micrófonos abiertos.
• Ajustar los controles de tonos indiscriminadamente (principalmente los tonos agudos).
• Utilizar el equipo en áreas con alta proporción de supercies reejantes como vidrio,
mármol, y madera.
¿Qué hacer en caso de que una retroalimentación ocurra?
• Haga que el orador hable más fuerte hacia el micrófono.
• Reduzca la distancia entre el usuario y el micrófono.
• Reduzca el número de micrófonos abiertos.
• Mueva la bocina lejos del micrófono.
• Mueva la bocina más cerca del oyente.
• Ecualizar el canal de la fuente de sonido.

5
CONTROLES
AMPLIFICADOR PORTÁTIL
1.- MP3 VOL: Control de volumen del reproductor MP3 (tarjeta SD).
Hacia MAX aumenta el volumen y hacia MIN disminuye el volumen.
2.- MIC: Entrada auxiliar o entrada para micrófono alámbrico.
3.- MIC VOL: Control de volumen del micrófono alámbrico. Hacia
MAX aumenta el volumen y hacia MIN disminuye el volumen.
4.- LOW BAT: LED indicador de batería de respaldo baja.
5.- Power: LED indicador de encendido.
6.- Wireless VOL: Control de volumen del micrófono inalámbrico.
Hacia MAX aumenta el volumen y hacia MIN disminuye el volumen
7.- RF: LED indicador de señal de radio frecuencia.
8.- Antena
9.- Charge LED: LED indicador de carga, enciende cuando la
batería de respaldo está siendo cargada y se apaga cuando la
batería se encuentra cargada completamente.
10.- Echo: Utilice este control para aplicar un efecto de eco
mientras se utiliza un micrófono. Hacia MAX aumenta el efecto y
hacia MIN lo disminuye.
11.- Tone: Control de tono. High: Si mueve el control hacia esta
posición el TONO aumenta y se escuchará más agudo. Low: Si
mueve el control hacia esta posición el TONO disminuye y se
escuchará más grave.
12.- Asa para sujetar el equipo.
13.- Ranuras para jar el amplicador en la pared si así lo requiere.
1 2 3 4 5 6
89
1011
VISTA FRONTAL
VISTA SUPERIOR
VISTA TRASERA
6
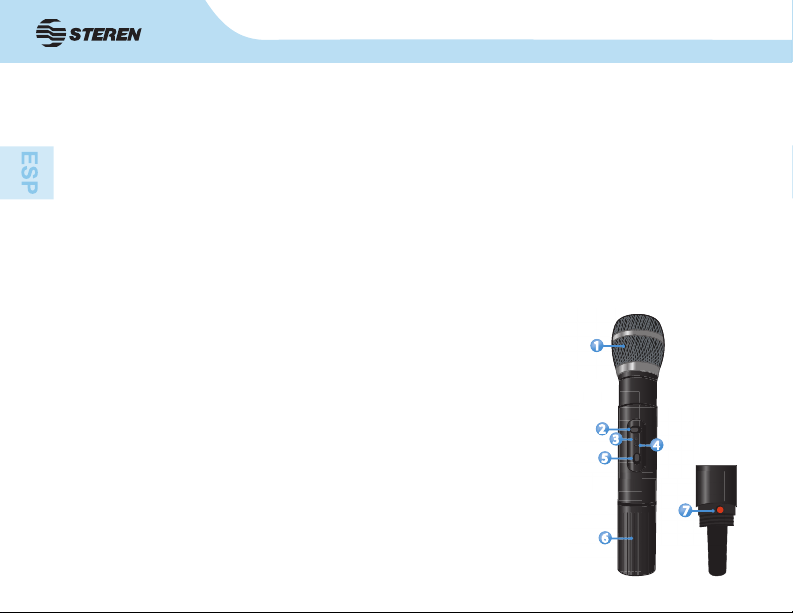
MICRÓFONO
1.- Rejilla: Protege la pastilla del micrófono y ayuda a reducir los
ruidos provocados por el viento o el aliento.
2.- Interruptor de encendido / apagado.
3.- LED indicador de encendido del micrófono.
4.- LED indicador de batería baja.
5.- Mute: Permite activar o desactivar el modo de silencio. Utilice
está opción para dejar el micrófono encendido pero sin emitir
ninguna señal.
6.- Compartimiento de la batería.
7.- Control de ajuste de ganancia del micrófono: Mueva hacia
la derecha para aumentar o hacia la izquierda para disminuir la
ganancia.
14.- Interruptor ON/OFF/Charge: Interruptor de 3 posiciones: ON: Enciende el amplificador.
OFF: Apaga el amplicador. CHARGE: En esta posición la batería de respaldo está en proceso
de carga, siempre y cuando el amplicador esté conectado a un contacto eléctrico. El LED
indicador de carga se encenderá y se apagará cuando termine la carga de la batería.
15.- Ranura para tarjeta SD: Permite introducir una tarjeta SD con archivos en formato MP3.
16.- Ranura para memoria USB: Permite introducir una memoria USB con archivos en formato MP3.
17.- Indicador de uso: Parpadea cuando una tarjeta SD / memoria USB está reproduciendo
archivos de música. Se mantiene jo cuando se encuentra en pausa.
18.- Reproducir: Presione para comenzar la reproducción de archivos MP3.
19.- Adelantar: Presione para cambiar a la siguiente canción.
20.- Regresar: Presione para regresar a la canción anterior.
7
1
2
5
6
34

7
1.- Antes de encender el amplicador, gire al mínimo todas las perillas. Posteriormente podrá
ajustarlas de acuerdo a sus necesidades.
2.- Si desea conectar un segundo micrófono utilice la entrada MIC.
3.- Saque la antena del amplicador.
4.- Inserte el cable de corriente del amplicador y conéctelo en un contacto eléctrico cercano.
5.- Encienda el amplicador.
6.- Encienda el micrófono inalámbrico y comience a hablar a través del micrófono, gradualmente
ajuste el nivel de volumen de acuerdo a sus necesidades.
7.- Una vez que ya no requiera utilizar el equipo, apágue el amplicador y el micrófono. Quite la
batería del micrófono y desconecte el amplicador.
INSTALACIÓN DE LA BATERÍA
1.- Abra la tapa del compartimiento.
2.- Coloque una batería de 9V - - -
poniendo atención a la polaridad.
INSTRUCCIONES
En caso de utilizar el amplicador de forma portátil, asegúrese de que la batería de respaldo este
‘ ‘ cargada completamente, para ello conecte el amplicador a un contacto eléctrico y mueva el interruptor
de encendido en posición Charge, el LED “Charge” se encenderá y se apagará cuando la batería esté cargada
completamente. Cuando la batería este baja, el LED indicador “BATT LOW” se encenderá, en ese momento es
necesario cargar la batería de respaldo.
8
El diseño del producto y las especicaciones pueden cambiar sin previo aviso.
ESPECIFICACIONES
Entrada: 110-240V~ 50/60Hz 50W
Batería: 12V - - - 1,2Ah
Potencia: 35WRMS
Respuesta en frecuencia: 50-12000Hz
Frecuencia de portadora: 160-270 MHz
Sensibilidad: 10dBµV
Micrófono
Entrada: 9V - - - (batería cuadrada)
Respuesta en frecuencia: 40Hz a 16kHz
Distorsión armónica (THD): <0,5%
Consumo nominal: 432 Wh/día
Consumo en espera: 240 Wh/día
USO DEL REPRODUCTOR MP3
Su nuevo amplicador cuenta con una ranura para tarjeta SD y una ranura para memoria USB,
a través de ellas podrá reproducir archivos en formato MP3.
1.- Compruebe que el amplicador se encuentra apagado.
2.- Coloque una tarjeta SD / memoria USB en el puerto correspondiente.
3.- Encienda el amplicador.
4.- Presione el botón de reproducir para comenzar la reproducción de archivos MP3, el LED
indicador comenzará a parpadear.
5.- Cuando ya no requiera utilizar la tarjeta / memoria, apague el amplicador y retire la tarjeta / memoria.
9
PÓLIZA DE GARANTÍA
Esta póliza garantiza el producto por el término de un año en todas sus partes y mano de obra, contra cualquier defecto
de fabricación y funcionamiento, a partir de la fecha de entrega.
CONDICIONES
1.- Para hacer efectiva la garantía, presente ésta póliza y el producto, en donde fue adquirido o en Electrónica Steren
S.A. de C.V.
2.- Electrónica Steren S.A de C.V. se compromete a reparar el producto en caso de estar defectuoso sin ningún cargo al
consumidor. Los gastos de transportación serán cubiertos por el proveedor.
3.- El tiempo de reparación en ningún caso será mayor a 30 días, contados a partir de la recepción del producto en
cualquiera de los sitios donde pueda hacerse efectiva la garantía.
4.- El lugar donde puede adquirir partes, componentes, consumibles y accesorios, así como hacer válida esta garantía es
en cualquiera de las direcciones mencionadas posteriormente.
ESTA PÓLIZA NO SE HARA EFECTIVA EN LOS SIGUIENTES CASOS:
1.- Cuando el producto ha sido utilizado en condiciones distintas a las normales.
2.- Cuando el producto no ha sido operado de acuerdo con el instructivo de uso.
3.- Cuando el producto ha sido alterado o reparado por personal no autorizado por Electrónica Steren S.A. de C.V.
El consumidor podrá solicitar que se haga efectiva la garantía ante la propia casa comercial donde adquirió el producto.
Si la presente garantía se extraviara, el consumidor puede recurrir a su proveedor para que le expida otra póliza de
garantía, previa presentación de la nota de compra o factura respectiva.
DATOS DEL DISTRIBUIDOR
Nombre del Distribuidor
Número de serie
Fecha de entrega
Producto: Amplicador portátil con micrófono inalámbrico y lector SD / memoria USB
Modelo: AMP-012
Marca: Steren
ELECTRONICA STEREN S.A. DE C.V.
Camarones 112, Obrero Popular, 02840, México, D.F.
RFC: EST850628-K51
STEREN PRODUCTO EMPACADO S.A. DE C.V.
Biólogo MaximIno Martínez No. 3408 Int. 3 y 4, San
Salvador Xochimanca, México, D.F. 02870,
RFC: SPE941215H43
ELECTRONICA STEREN DEL CENTRO, S.A. DE C.V.
Rep. del Salvador 20 A y B, Centro, 06000, México.
D.F. RFC: ESC9610259N4
ELECTRONICA STEREN DE GUADALAJARA, S.A.
López Cotilla No. 51, Centro, 44100, Guadalajara, Jal.
RFC: ESG810511HT6
ELECTRONICA STEREN DE MONTERREY, S.A.
Colón 130 Pte., Centro, 64000, Monterrey, N.L. RFC:
ESM830202MF8
ELECTRONICA STEREN DE TIJUANA, S.A. de C.V.
Calle 2a, Juárez 7636, Centro, 22000, Tijuana, B.C.N.
RFC: EST980909NU5
En caso de que su producto presente alguna falla, acuda al centro de distribución más
cercano a su domicilio y en caso de tener alguna duda o pregunta por favor llame a
nuestro Centro de Atención a Clientes, en donde con gusto le atenderemos en todo lo
relacionado con su producto Steren.
Centro de Atención a Clientes
01 800 500 9000

10
Instruction Manual S6-B
V0411a
AMP-012
Wireless microphone amplifier
system with SD card / USB reader
Table of contents
Languages:
Other Steren Amplifier manuals

Steren
Steren AMP-005 User manual

Steren
Steren EP-128 User manual

Steren
Steren AMP-020/GTR User manual

Steren
Steren AMP-210SD User manual

Steren
Steren AMP-040SD User manual

Steren
Steren AMP-010 User manual

Steren
Steren 208-100 User manual

Steren
Steren AMP-025 User manual

Steren
Steren AMP-020 User manual

Steren
Steren AMP-600 User manual

Steren
Steren PWS-250D User manual

Steren
Steren AMP-013 User manual

Steren
Steren AMP-160 User manual

Steren
Steren AMP-009 User manual

Steren
Steren 300-138 User manual

Steren
Steren AMP-016 User manual

Steren
Steren AMP-045CD User manual

Steren
Steren AMP-210SD User manual

Steren
Steren AMP-014 User manual

Steren
Steren AMP-160 User manual


