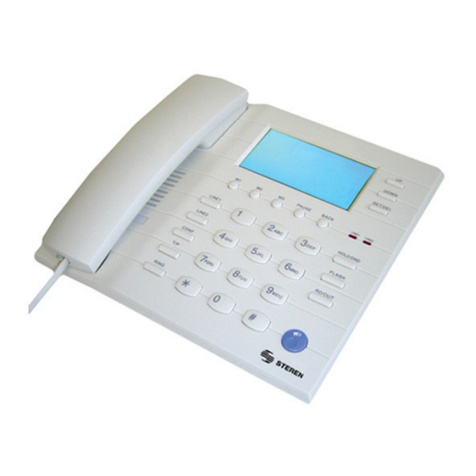
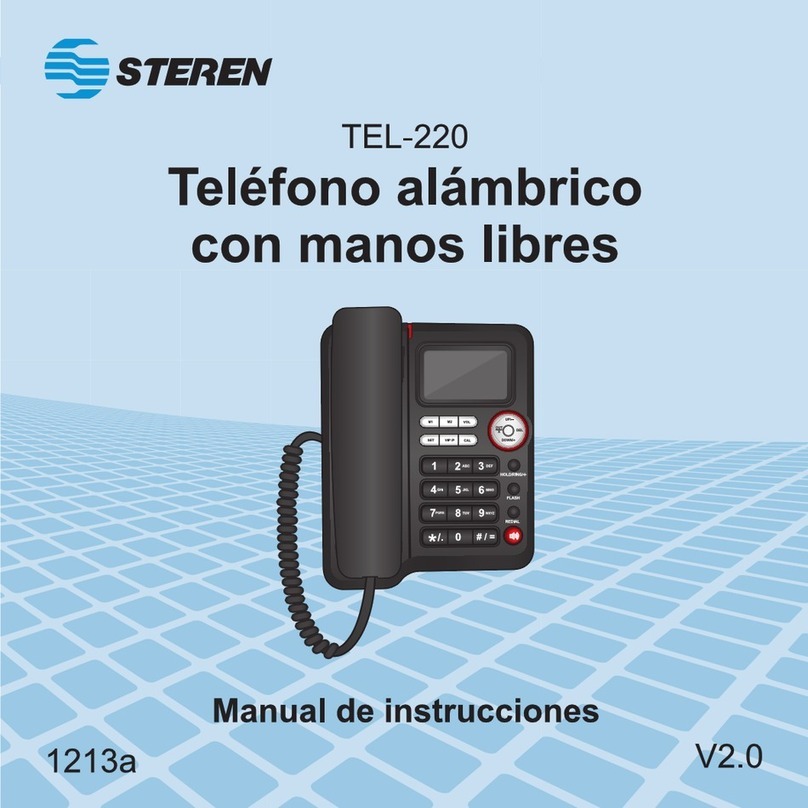
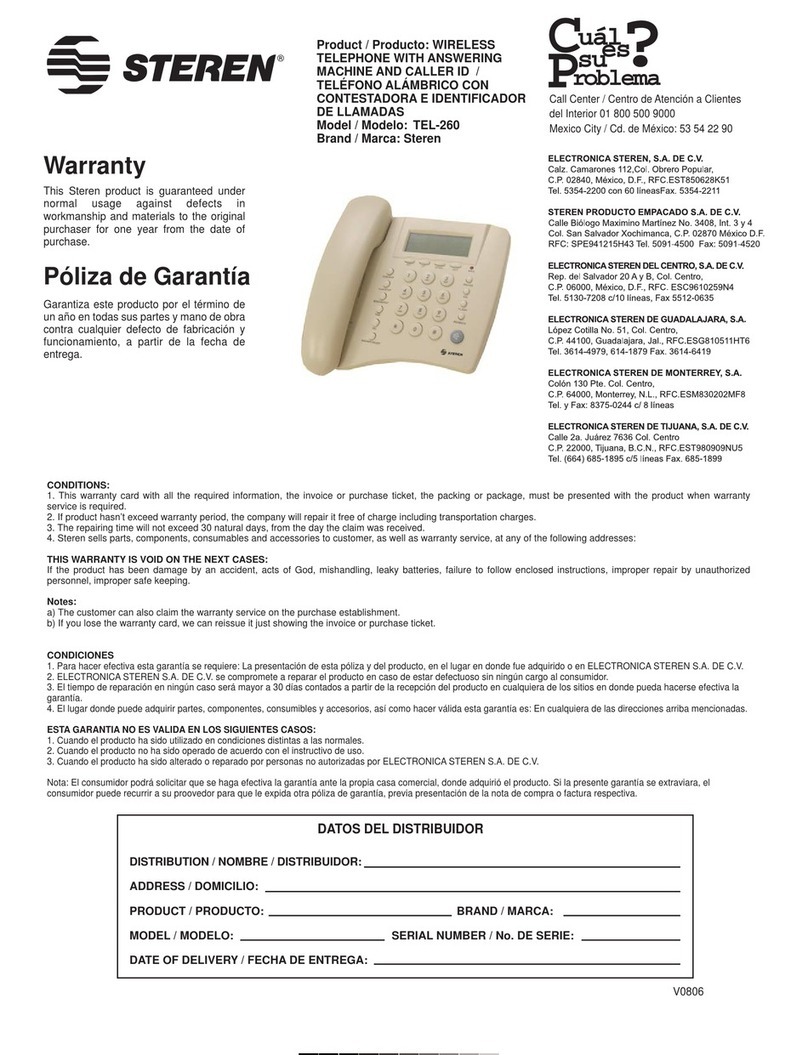
Steren TEL-220 User manual


Before using your new Phone Set, please read this
instruction manual to prevent any damage. Put it away in a
safe place for future references.
IMPORTANT
Before using your new Phone Set, assure to install 3 type AA
batteries, otherwise Ocean Blue Light will not light on and ID
caller probably don’t works (Battery compartment is located
at bottom of device).
Phone must be placed in a cool dry and ventilated place.
Caller ID function only works if you have subscribed for the
service with your local telecom company.
Do not expose LCD screen to sunlight.
Clean only with a soft, dry cloth. Do not use solvents.
CONTROLS
•
•
•
•
•
ENGLISH
ENGLISH-2
Before usin
g
y
our new Phone Set, please read this
i
nstruction manual to prevent an
y
dama
g
e. Put it awa
y
in a
s
afe
p
lace for future references
.

1.- Handset
2.- Up / -
Diverse functions / Subtract sign
3.- Down / +
Diverse functions / Addition sign
4.- Delete (Del)
Diverse functions
5.- Out / x
Dial number review / Multiplication sign
6.- LCD screen
7.- In Use indicator
Light on when the phone is in use
8.- Calculator
Enter to calculator mode
9.- Volume (Vol)
Set the ringer and speaker volume level
10.- Set
Press this button to set the hour, date, day and alarm
11.- Hold / Ring / ÷
Press this button to hold a call, choose a ringer and use the divi-
sion sign
12.- Numerical keys
13.- Decimal point
Enter a decimal point during calculator mode
14.- Equal
Press = to do the calculation
ENGLISH
ENGLISH-3

ENGLISH
ENGLISH-4
15.- Pause / VIP
Make a pause when you use extensions numbers / Enter to VIP
mode
16.- Flash
Press this button to transfer between two different calls on Call
Waiting Mode
17.- Rd / Back
Redial last number / call back function
18.- Speaker key
Activate the speaker
19.- Speaker
20.- Mechanical Lock
Outgoing calls lock
CHARACTERISTICS
* Caller ID
* Tri-way conference call
38 incoming calls memory
5 outgoing calls memory
Ocean Blue Back Lit with 12-digit capacity
Mechanical lock for outgoing calls
Checking, erasing and call back for incoming / outgoing calls
Display of real time during conversations
Basic calculator
8 ring tones
Pre-dialing function
Special ring for VIP numbers
3 programmable alarms
2-way speaker with volume control
Music on Hold
Programmable tone / pulse mode
Pause function
Ringer volume control
* This services must be previously subscribed with your
local telecom company.
•
•
•
•
•
•
•
•
•
•
•
•
•
•
•
•
•
•
*
This services must be previousl
y
subscribed with
y
ou
r
l
oca
l
te
l
ecom compan
y.

INITIAL SETTINGS
Before using your new Phone Set, follow these steps for a
correct use of the equipment:
1.-With the handset on the base, press Set (10). The message
Set 1 Date, starts to blink on the screen.
2.- Press Set again, the year starts to blink. Use Up / Down
buttons (2/3) to set the current year. Press Set once again.
3.- Repeat last step to set month, day, hour and minutes. Press
Set to store the changes.
4.- The message Set 2 Code appears on screen.
5.- Please enter the local area code. Use Up / Down buttons
(2/3) to type the code. Press Set to store the changes.
6.- On screen appears the message Auto IP flashing. Press Set
once again and select the pre-established option (Off). Press Set
to store the changes.
7.- The message Set 4 p-t will be displayed on LCD screen,
press Set to modify the options. Use Up / Down buttons to
choose the desired option.
8.- The message Anti-Line tapping alarm (Set 5 ALA ) appears
on screen.
Press Set once again. Use Up / Down buttons to choose an
option. When the alarm is set as ON in your telephone, and if
you have connected a parallel phone set in the same line, and
some one pick the handset up during a call, an alarm sound is
heard in your telephone, indicating that somebody pick up the
other handset. Press Set to store the changes.
9.- Now on screen appears the alarm menu. You can configure
up to 3 different alarms on the telephone. Press Set once to
adjust the alarms, use Up / Down buttons to configure the alarm
time and if you want to activate or deactivate an alarm. Press Set
to store the changes.
10.- Now your phone set is ready to use. If you want to modify
any parameter, follow the last steps.
ENGLISH
ENGLISH-5

MAKING A CALL
Using handset
1.- Pick the handset up. The In Use indicator (7) lights on.
2.- After hearing dial tone, enter the desired number to call.
3.- After finishing the conversation, place the handset on the
base.
Using speaker
1.- Press speaker key (18). You can hear the dial tone. The In
Use indicator (7) lights on.
2.- Enter the desired number to call.
3.- After finishing the conversation, press selected Line key or
press speaker key (18).
REDIAL AND PRE-DIAL
RE-DIAL
Pick the handset up and after hearing dial tone, press Rd / Back
(17). Last dialed number appears on LCD screen, automatically
dialing.
PRE-DIAL
1.- With the handset on the base, enter the desired number to
call.
2.- Press Rd / Back button. Will be start to auto dial.
3.- Pick the handset up or press the speaker key to start the
conversation.
4.- After finishing the conversation, place the handset on the
base or press the speaker key.
If during dialing, you made a mistake, you can correct it
pressing Del button (4).
ANSWERING INCOMING CALLS
When you receive an incoming call, phone start to ring. If you
have caller ID service, then you receive the incoming number,
too.
Using handset:
1.- When the phone rings, pick the handset up and begin the
conversation.
2.- When finishing the conversation, place the handset on the
base.
ENGLISH
ENGLISH-6

Using speaker:
1.- When the phone rings, press speaker key (18) and begin the
conversation.
2.- When finishing the conversation, press speaker key (18) once
again.
To receive the caller ID data correctly, please answer the
phone after twice rings.
There should be a 6 seconds gap (minimal) between two
calls. Otherwise you cannot receive the caller ID data
correctly.
RINGTONE
Your phone set has up to 8 different types of ring tones, to
choose one of them, follow these steps:
1.- Press Hold / Ring (11). You can hear the current ring tone.
2.- Use Up / Down (2/3) buttons to move over the ring tone list.
MUSIC ON HOLD
If you need to do something during a conversation, and you don’t
want to cut the current call, press Hold / Ring (11) and place the
handset on the base. Making this you don’t cut the call and the
other person will hear a background music. When you need to
resume the call, just pick the handset up or press speaker key
(18).
REVIEWING OUTGOING CALLS
1.- Press Out (5). Dialed numbers appears on LCD screen.
2- Press Out (5) once again, to visualize all dialed numbers
stored on memory.
3.- If you reached the end of the list or there are not any stored
dialed number, the message End appears on LCD screen.
Erasing dialed numbers:
1.- Press Out (5). Dialed numbers appears on LCD screen.
2- Press Out (5) until you visualize the desired dialed number
that you want to erase.
3.- Press Del (4), The number (s) will be deleted from memory.
If you press Del (4) for more than 3 seconds, all dialed
number stored in memory will be erased.
ENGLISH
ENGLISH-7
T
o rece
i
ve t
h
e ca
ll
er
ID
d
ata correct
ly
, p
l
ease answer t
h
e
p
hone after twice rin
g
s
.
T
here should be a 6 seconds
g
ap
(
minimal
)
between two
c
alls. Otherwise
y
ou cannot receive the caller ID data
c
orrectl
y.
I
f
y
ou press Del
(
4
)
for more than 3 seconds, all dialed
number stored in memor
y
will be erased
.

FORWARD CALL FROM DIALED NUMBERS
1.- Press Out (5). On screen appears last dialed number and the
conversation time.
2.- Press Out (5) until you visualize the number that you want to
forward call.
3.- Press Back (17) and automatically redial.
PAUSE
We recommend you press Pause (15) when enter a long
distance area code or when you dial an extension number. This
function enters a 3,6 seconds delay.
SETTING VIP NUMBER
Your phone set allow you to store up to 38 VIP numbers, and
they have a different ring tone.
1.- Use Up / Down buttons to locate the number that you want to
store as VIP number.
2.- Once you have found the desired number, press Pause / VIP
(15) button. The selected number will be stored as VIP number.
3.- Press Pause / VIP (15) once again to switch the VIP number
into Ordinary number.
When you receive a VIP incoming call, the first ring tone will
be the same as set by you, after that the ring tone will be
different, indicating to you that the incoming call is from a
VIP number.
The number set as VIP can not be deleted by pressing Del
key. To delete a VIP number, you must to convert it to
Ordinary number and then press Del button.
When a number is set as VIP number, a lock icon appears on
LCD screen beside of the phone number.
LOCK
If you want to block the outgoing calls, use the mechanical lock
located on the back of the phone set. You can still receive incom-
ing calls.
1.- Use the key (included) to turn the lock (20), to the green
point. You cannot dial any telephone number that begins with
digit “0” (long distance calls). LOC appears on LCD screen.
ENGLISH
ENGLISH-8
When
y
ou receive a VIP incomin
g
call, the first rin
g
tone will
be the same as set b
y
y
ou, after that the rin
g
tone will be
d
ifferent, indicatin
g
to
y
ou that the incomin
g
call is from a
V
IP number
.
Th
e num
b
er set as
VIP
can not
b
e
d
e
l
ete
d
by
press
i
n
g
D
e
l
k
e
y
.
T
o
d
e
l
ete a
VIP
num
b
er,
y
ou must to convert
i
t to
Ordinar
y
number and then press Del button
.
Wh
en a num
b
er
i
s set as
VIP
num
b
er, a
l
oc
k
i
con a
pp
ears on
L
CD screen beside of the
p
hone number
.

2,. If you want to block all outgoing calls, turn the lock to the
yellow point.
3.- If you don’t want to lock any call, turn the lock to the red point.
CALLER ID
INCOMING CALLS
To review incoming calls, press Up / Down (2 / 3). Incoming
numbers, date and time appears on LCD screen. To visualize
more telephone numbers, press Up / Down (2 / 3).
When you reach the end of the list or when there are no more
stored telephone numbers in memory, the message End appears
on screen.
The phone set can store up to 38 telephone numbers on
memory. When there are repeated numbers, the message
REP appears on LCD screen.
When incoming a private telephone number call, the
message P appears on LCD screen.
If the incoming call is from another country or an area
without caller ID service, the message 0 appears on screen.
CALCULATOR
Your phone allow you to make basic mathematical operations.
1.- With the headset on the base, press Calculator Key (Cal) (8).
On screen appears the number 0.
2.- Use the numerical keys to enter the quantities.
3.- Hold / Ring / ÷ allow one to enter division sign.
4.- Out / x allow one to enter multiplication sign.
5.- Up / - button allow one to make subtract operation.
6.- Down / + button allow one to make additions.
7.- */. button enter a decimal point into the mathematical
operations.
8.- #/= shows the result of an operation.
ENGLISH
ENGLISH-9
T
he
p
hone set can store u
p
to 38 tele
p
hone numbers on
m
emor
y
. When there are repeated numbers, the messa
g
e
REP a
pp
ears on LCD screen
.
Wh
en
i
ncom
i
n
g
a pr
i
vate te
l
ep
h
one num
b
er ca
ll
, t
h
e
m
essa
g
e P appears on LCD screen
.
I
f the incomin
g
call is from another countr
y
or an area
without caller ID service, the messa
g
e 0 appears on screen
.

EXAMPLE OF MATHEMATICAL OPERATIONS
TROUBLESHOOTING
SPECIFICATIONS
Screen
Input: 4,5 V (3xAA)
Phone Set:
Input: -48 V
Dimensions: 8,1 x 5,31 x 1,96in
Weight: 1,15lb
Product design and specifications are subject to change,
without notice.
ENGLISH
ENGLISH-10
O
p
eration Ke
y
s Result on screen
(10+26) / 2 CAL 0
10 Down + 26
Hold / Rin
g
/ 2 # / = 18
0.5 x 0.6 - 1 CAL 0
0 */. 5 Out / x 0 */. 6 -0.7
U
p
/ - 1
Trouble Solution
Verif
y
the line cord is correctl
y
installed
Verif
y
the telecom service is correct
Verif
y
the line cord is correctl
y
installed
Assure the handset is correctly placed on the
base
Verif
y
if
y
ou are not in the Privac
y
Mode
Verif
y
batteries are correctl
y
installed
Review the batteries char
g
e
Assure that you have subscribed to the service
on
y
our telecom com
p
an
y
Probably you answered the phone before two
rin
g
s
Make sure that you have installed new babtteries
on the tele
p
hone
Re
p
lace with new one.
No dial tone
No rings on incoming calls
Caller ID doesn't work / appears
uncompleted data
Ocean Blue Light doesn't work
P
roduct desi
g
n and specifications are sub
j
ect to chan
g
e,
w
i
t
h
out not
i
ce
.


Antes de utilizar su nuevo Teléfono Alámbrico lea este
instructivo para evitar cualquier mal funcionamiento.
Guárdelo para futuras referencias.
IMPORTANTE
Antes de comenzar a utilizar su nuevo teléfono asegúrese
de instalar 3 baterías tipo AA, de otra forma la pantalla azul
no se encenderá y el identificador de llamadas no
funcionará (El compartimiento de baterías se localiza en la
parte inferior del equipo).
El equipo se debe colocar en un lugar ventilado y seco.
El identificador de llamadas sólo funciona si Usted tiene
contratado el servicio con una compañía de telefonía local.
No exponga la pantalla de LCD directamente a la luz del sol.
Limpie con un paño seco. No utilice solventes.
CONTROLES
•
•
•
•
•
ESPAÑOL
ESPAÑOL-2
Antes de utilizar su nuevo Teléfono Alámbrico lea este
i
nstructivo
p
ara evitar cual
q
uier mal funcionamiento.
Guárdelo
p
ara futuras referencias
.

1.- Auricular
2.- Arriba / menos
Diversas funciones / Signo de resta
3.- Abajo / más
Diversas funciones / Signo de suma
4.- Borrar
Diversas funciones
5.- Salida / multiplicar
Muestra los números marcados / Signo de multiplicación
6.- Pantalla de LCD
7.- Indicador de uso
Enciende cuando realiza una llamada
8.- Calculadora
Entra al modo de calculadora
9.- Volumen
Ajusta el volumen de la bocina y del timbre
10.- Ajuste
Ajusta hora, fecha y día así como alarma
11.-Retención / timbre / ÷
Retiene la llamada / selecciona el timbre deseado / signo de
división
12.- Teclas numéricas
13.- Punto decimal
Introduce un punto decimal en el modo de calculadora
14.- Igual
Muestra el resultado de una operación en el modo de
calculadora
ESPAÑOL
ESPAÑOL-3

15.- Pausa / VIP
Hace una pausa en el marcado de números / Entra al modo de
números importantes
16.- Flash
Transferencia entre dos llamadas en el modo de Llamada en
Espera
17.- Remarcado / Regresar
Remarca el último número / regresa la (Rd / Back) llamada del
último número recibido
18.- Altavoz
Activa el altavoz
19.- Bocina
20.- Cerradura (Lock)
Permite o bloquea las llamadas salientes
CARACTERÍSTICAS
* Identificador de llamadas
* Conferencia tripartita
Memoria para guardar 38 números telefónicos de llamadas
entrantes
Memoria para guardar 5 números telefónicos de llamadas
salientes
Pantalla de LCD con fondo azul y capacidad para 12 dígitos
Cerradura mecánica para bloquear llamadas salientes
Regreso de llamada, revisión y borrado de llamadas
entrantes y salientes
Exhibición del tiempo de uso durante conversaciones
Calculadora básica
8 tonos de timbre
Función de pre-marcado
Tono de timbre especial para números telefónicos
importantes
3 alarmas programables
Altavoz de dos vías con control de volumen
Música de espera
Selección de tonos o pulsos
•
•
•
•
•
•
•
•
•
•
•
•
•
•
•
ESPAÑOL
ESPAÑOL-4

Función de pausa
Control de volumen del timbre
* Estos servicios deben ser previamente contratados con su
compañía de telefonía local.
AJUSTES PRELIMINARES
Antes de comenzar a utilizar su teléfono, siga estas
instrucciones para un correcto funcionamiento de su equipo:
1.- Sin descolgar el auricular, presione la tecla de Ajuste (Set)
(10). Set 1 Date aparece parpadeando en la pantalla.
2.- Presione nuevamente Set, el año comenzará a parpadear.
Utilice los botones de Arriba / abajo (Up /Down) (2/3) para
ajustar el año actual. Presione nuevamente el botón Set.
3.- Repita el paso anterior para ajustar el mes, el día, la hora y
los minutos. Presione Set para guardar los cambios.
4.- Aparece parpadeando Set 2 Code.
5.- Introduzca la clave de área local. Utilice los botones de Arriba
/ Abajo (2/3) para introducir la clave. Presione Set para guardar
los cambios.
6.- En pantalla aparece el mensaje Auto IP parpadeando.
Presione Set una vez más y deje la opción preestablecida en
Off. Presione Set para guardar los cambios.
7.- Aparece el menú de ajuste de tono o pulso, presione Set
para modificar las opciones. Utilice los botones de Arriba / Abajo
(Up / Down) para seleccionar la opción deseada.
8.- En pantalla aparece parpadeando el menú de protección de
línea. Presione Set una vez más. Utilice los botones de Arriba
/ Abajo para seleccionar la opción. Si selecciona On y cuenta
con un teléfono adicional conectado a la misma línea, cuando
se encuentre en una llamada y el teléfono adicional quiera ser
utilizado, una señal de advertencia le indicará que alguien ha
descolgado el otro teléfono. Presione Set para guardar los
cambios.
9.- Ahora aparece en pantalla el menú de ajuste de alarma. Su
teléfono puede configurar hasta 3 alarmas diferentes. Presione
Set una vez más para entrar al menú de ajuste, utilice los
botones de Arriba / Abajo (Up / Down) para configurar la hora
de la alarma así como la activación o desactivación de esta.
Presione Set para guardar los cambios.
•
•
ESPAÑOL
ESPAÑOL-5
*
Estos servicios deben ser
p
reviamente contratados con su
c
ompañía de telefonía local
.

10.- Su equipo está listo para utilizarse. Si desea alguna vez
modificar algún parámetro, siga las instrucciones mencionadas
anteriormente.
COMO REALIZAR UNA LLAMADA
Usando el auricular
1.- Descuelgue el auricular. El indicador de uso (7) se enciende.
2.- Después de escuchar el tono de marcado, teclee el número
al que desea llamar.
3.- Una vez que haya terminado su conversación, coloque el
auricular en la base del teléfono.
Usando el altavoz
1.- Presione el botón de altavoz (18). Escuchará el tono de
marcado y el indicador de uso (7) se encenderá.
2.- Marque el número al que desee llamar.
3.- Una vez que haya terminado su conversación, presione el
botón el botón de altavoz (18).
REMARCADO (REDIAL) Y PREMARCADO
REMARCADO
Levante el auricular y después de escuchar el tono de marcado,
presione la tecla de Remarcado (Rd / Back) (17). El último
número marcado aparecerá en pantalla y comenzará a llamar.
PRE-MARCADO
1.- Sin descolgar el auricular, digite el número al que desea
llamar.
2.- Presione el botón de Remarcado (Rd / Back). Comenzará el
automarcado.
3.- Descuelgue el auricular o presione el botón de Altavoz para
comenzar la conversación.
4.- Después de terminada su conversación, coloque el auricular
en la base del teléfono o presione el botón de altavoz.
Si durante la marcación cometió algún error, puede
corregirlo presionando la tecla de Borrar (Del) (4).
ESPAÑOL
ESPAÑOL-6
Si durante la marcación cometió al
g
ún error, puede
c
orre
g
irlo presionando la tecla de Borrar
(
Del
)
(
4
).

CÓMO CONTESTAR UNA LLAMADA
Cuando entre una llamada, el teléfono comenzará a sonar. Si
cuenta con el servicio de Identificador de Llamadas, aparecerá
el número de la persona que está llamando.
Si usa el auricular:
1.- Cuando el teléfono comience a timbrar, levante el auricular y
comience a hablar.
2.- Cuando termine la conversación, coloque el auricular en la
base del teléfono.
Si usa el altavoz:
1-. Cuando el teléfono comience a timbrar, presione el botón de
altavoz (18) y comience a hablar.
2.- Cuando termine la conversación, presione el botón de
altavoz (18) una vez más.
Para recibir correctamente la información del identificador
de llamadas, conteste el teléfono después de que haya
timbrado 2 veces.
Si recibe una llamada antes de 6 segundos de haber
finalizado la llamada anterior podría no recibirse la
información del identificador de llamadas.
TIMBRE
Su teléfono cuenta con 8 diferentes tipos de timbre, para
seleccionar uno de ellos, siga estos pasos:
1.- Presione el botón de timbre (Hold / Ring) (11). Comenzará a
escuchar el timbre actual.
2.- Utilice las teclas de arriba / abajo (Up / Down) (2 / 3) para
desplazarse en la lista de timbres.
MÚSICA DE ESPERA
Si durante una conversación necesita hacer algo y tiene que
dejar en espera la llamada, presione la tecla de Retención (Hold
/ Ring ) (11) y coloque el auricular en la base del teléfono, de
esta forma no se cortará la llamada y la otra persona escuchará
la música de fondo. Cuando requiera
continuar con la llamada, simplemente descuelgue el auricular o
presione la tecla de altavoz.
ESPAÑOL
ESPAÑOL-7
P
ara recibir correctamente la información del identificado
r
d
e llamadas, conteste el teléfono después de que ha
y
a
t
imbrado 2 veces
.
Si recibe una llamada antes de 6 se
g
undos de habe
r
fi
nalizado la llamada anterior
p
odría no recibirse la
i
nformación del identificador de llamadas
.

REVISAR LAS LLAMADAS REALIZADAS
1.- Presione la tecla de salida (Out) (5). Se muestran en pantalla
los números marcados.
2.- Presione nuevamente la tecla de salida (Out) (5) para
visualizar todos los números almacenados en memoria.
3.- Si no existe ningún número marcado o llega al final de la lista
aparecerá el mensaje End.
Si desea borrar los números marcados:
1.- Presione la tecla de salida (Out) (5). Se muestran en pantalla
los números marcados.
2.- Presione nuevamente la tecla de salida (Out) (5) hasta
visualizar el número que desee borrar.
3.- Presione la tecla de Borrar (Del) (4). El o los números
seleccionados serán borrados.
Si presiona la tecla de Borrar (Del) (4) por más de 3
segundos, se borrarán todos los números marcados de la
memoria.
REGRESAR LA LLAMADA DE LOS NUMEROS
MARCADOS ANTERIORMENTE
1.- Presione la tecla de salida (Out) (5). Se muestra en pantalla
el último número marcado y el tiempo de conversación.
2.- Presione la tecla de salida (Out) (5) una vez más para
visualizar el número al que desea regresar la llamada.
3.- Presione la tecla de Regreso (Back) (17) y el número se
marcará automáticamente.
PAUSA
Se recomienda presionar la tecla de Pausa (Pause) (15)
cuando introduce un código de larga distancia o cuando marca
un número con extensión. Esta función ingresa un retraso de 3,6
segundos cuando es presionada.
AGREGAR UN NÚMERO IMPORTANTE (VIP)
Su equipo telefónico le permite agregar hasta 38 números
importantes, los cuales contarán con un timbre diferente.
1.- Utilice los botones Arriba / Abajo (Up / Down) para localizar el
número que desee agregar como Importante.
ESPAÑOL
ESPAÑOL-8
Si presiona la tecla de Borrar
(
Del
)
(
4
)
por más de 3
se
g
undos, se borrarán todos los números marcados de la
m
emoria
.

2.- Una vez que haya encontrado el número deseado, presione
el botón de Pause / VIP (15). El número será considerado como
Importante.
3.- Presione el botón de Pause / VIP (15) una vez más para
convertir ese número en Ordinario.
Cuando recibe una llamada de un número importante,
escuchará el primer timbre normal, posteriormente
cambiará el tono del timbre, indicando que el número es
importante.
Los números Importantes no pueden ser borrados de la
lista de llamadas entrantes presionando el botón de
Borrado (Del). Para borrar un número importante, es
necesario convertirlo primero a Ordinario y posteriormente
presionar el botón de Borrado (Del).
Cuando un número es ajustado al modo de Importante, un
ícono de candado aparecerá en pantalla junto al número
telefónico.
CERRADURA MECÁNICA
Si Ud. desea bloquear las llamadas salientes, utilice la cerradura
que se encuentra ubicada en la parte trasera del teléfono. Ud.
podrá seguir recibiendo llamadas.
1.- Utilice la llave (incluida) para girar la cerradura (20) hacia
donde se ubica el punto verde, de esta forma Ud. podrá marcar
cualquier tipo de número telefónico, excepto los que comiencen
con “0” (llamadas de larga distancia). Cuando digite un número
que empiece con “0”, aparecerá el mensaje - LOC - en pantalla.
2.- Si desea bloquear todas las llamadas salientes, ubique el
punto amarillo de la cerradura y gire la llave a ese punto.
3.- Si no desea bloquear ninguna llamada, gire la cerradura
hacia el punto rojo.
IDENTIFICADOR DE LLAMADAS
LLAMADAS ENTRANTES
Para revisar los números telefónicos de las llamadas que
recibió, presione la tecla Arriba / Abajo (Up / Down) (2 / 3). En la
pantalla se muestran los números telefónicos así como la fecha
y la hora en que se recibieron.
Para poder visualizar más números telefónicos presione la tecla
Arriba / Abajo (Up / Down) (2 / 3).
ESPAÑOL
ESPAÑOL-9
Cuando recibe una llamada de un número im
p
ortante,
e
scuchará el
p
rimer timbre normal,
p
osteriormente
c
ambiará el tono del timbre, indicando
q
ue el número es
i
m
p
ortante
.
L
os números Im
p
ortantes no
p
ueden ser borrados de la
l
ista de llamadas entrantes
p
resionando el botón de
Borrado
(
Del
)
. Para borrar un número importante, es
necesario convertirlo primero a Ordinario
y
posteriormente
p
resionar el botón de Borrado
(
Del
).
Cuando un número es a
j
ustado al modo de Importante, un
ícono de candado aparecerá en pantalla
j
unto al número
t
elefónico
.

Cuando llega al final de la lista o cuando no existen números
telefónicos en memoria aparece el mensaje - End -.
El teléfono puede guardar hasta 38 números telefónicos en
memoria.
Cuando se encuentran repetidos, aparece el mensaje
- REP -.
Cuando entra una llamada con un número telefónico
privado aparece el mensaje - P -.
Si el número entrante proviene de otro país o de áreas sin el
servicio de identificador de llamadas, aparece en
pantalla - 0 -.
CALCULADORA
Su equipo le permite realizar operaciones matemáticas básicas.
1.- Con el auricular colocado en la base, presione el botón de
calculadora (8). En pantalla aparece el número 0.
2.- Utilice las teclas numéricas para introducir las cantidades.
3.- El botón Hold / Ring / ÷ permite la función de división.
4.- El botón Out / x introduce el signo de multiplicación.
5.- El botón Up / - realiza la operación de resta.
6.- El botón Down / + permite realizar sumas.
7.- El botón */. introduce un punto decimal en las operaciones.
8.- El botón #/= muestra el resultado de la operación.
EJEMPLOS DE OPERACIONES
ESPAÑOL
ESPAÑOL-10
O
p
eración Teclas Resultado en
p
antalla
(10+26) / 2 CAL 0
10 Down + 26
Hold / Rin
g
/ 2 # / = 18
0.5 x 0.6 - 1 CAL 0
0 */. 5 Out / x 0 */. 6 -0.7
U
p
/ - 1
E
l teléfono puede
g
uardar hasta 38 números telefónicos en
m
emoria
.
Cuando se encuentran repetidos, aparece el mensa
j
e
- REP
-
.
Cuando entra una llamada con un número telefónico
p
rivado aparece el mensa
j
e - P -
.
Si el número entrante
p
roviene de otro
p
aís o de áreas sin el
servicio de identificador de llamadas, a
p
arece en
p
antalla - 0 -
.
Other manuals for TEL-220
1
Table of contents
Languages:
Other Steren Telephone manuals

Steren
Steren TEL-2490 User manual

Steren
Steren TEL-007 User manual

Steren
Steren TEL-2470 User manual

Steren
Steren AUT-520 User manual

Steren
Steren MG-255 User manual

Steren
Steren TEL-2410 User manual

Steren
Steren TEL-008BL User manual

Steren
Steren COM-240 User manual

Steren
Steren RAD-500 User manual

Steren
Steren TEL-260 User manual

Steren
Steren TEL-250 User manual

Steren
Steren CEL-100 User manual

Steren
Steren TEL-2414 User manual

Steren
Steren TEL-008BL User manual

Steren
Steren TEL-225 User manual

Steren
Steren TEL-009 User manual

Steren
Steren TEL-250 User manual

Steren
Steren TEL-260 User manual

Steren
Steren TEL-015BL User manual

Steren
Steren TEL-300 User manual