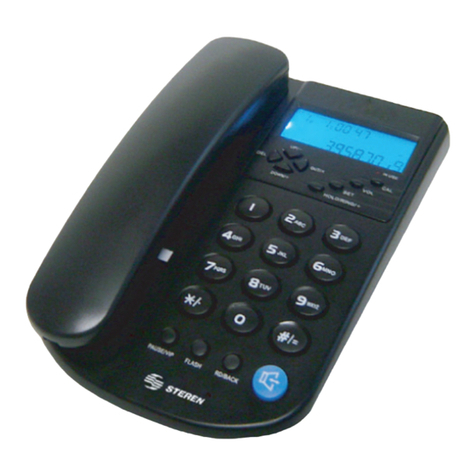
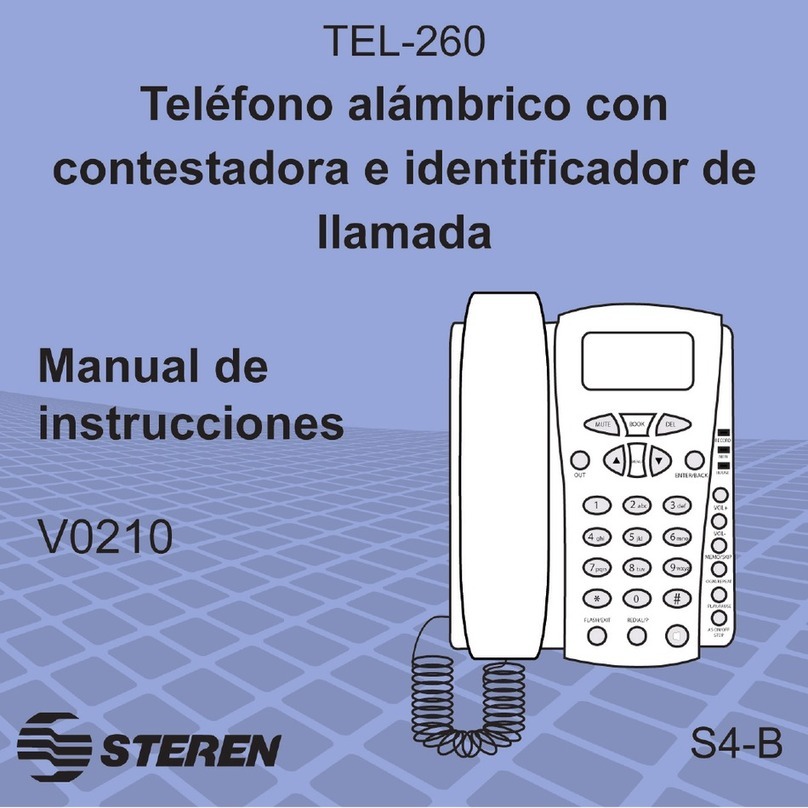
Steren TEL-260 User manual

Product / Producto: WIRELESS
TELEPHONE WITH ANSWERING
MACHINE AND CALLER ID /
TELÉFONO ALÁMBRICO CON
CONTESTADORA E IDENTIFICADOR
DE LLAMADAS
Model / Modelo: TEL-260
Brand / Marca: Steren
CONDICIONES
1. Para hacer efectiva esta garantía se requiere: La presentación de esta póliza y del producto, en el lugar en donde fue adquirido o en ELECTRONICA STEREN S.A. DE C.V.
2. ELECTRONICA STEREN S.A. DE C.V. se compromete a reparar el producto en caso de estar defectuoso sin ningún cargo al consumidor.
3. El tiempo de reparación en ningún caso será mayor a 30 días contados a partir de la recepción del producto en cualquiera de los sitios en donde pueda hacerse efectiva la
garantía.
4. El lugar donde puede adquirir partes, componentes, consumibles y accesorios, así como hacer válida esta garantía es: En cualquiera de las direcciones arriba mencionadas.
ESTA GARANTIA NO ES VALIDA EN LOS SIGUIENTES CASOS:
1. Cuando el producto ha sido utilizado en condiciones distintas a las normales.
2. Cuando el producto no ha sido operado de acuerdo con el instructivo de uso.
3. Cuando el producto ha sido alterado o reparado por personas no autorizadas por ELECTRONICA STEREN S.A. DE C.V.
Nota: El consumidor podrá solicitar que se haga efectiva la garantía ante la propia casa comercial, donde adquirió el producto. Si la presente garantía se extraviara, el
consumidor puede recurrir a su proovedor para que le expida otra póliza de garantía, previa presentación de la nota de compra o factura respectiva.
DATOS DEL DISTRIBUIDOR
DISTRIBUTION / NOMBRE / DISTRIBUIDOR:
ADDRESS / DOMICILIO:
PRODUCT / PRODUCTO: BRAND / MARCA:
MODEL / MODELO: SERIAL NUMBER / No. DE SERIE:
DATE OF DELIVERY / FECHA DE ENTREGA:
Call Center / Centro de Atención a Clientes
del Interior 01 800 500 9000
Mexico City / Cd. de México: 53 54 22 90
Warranty
CONDITIONS:
1. This warranty card with all the required information, the invoice or purchase ticket, the packing or package, must be presented with the product when warranty
service is required.
2. If product hasn’t exceed warranty period, the company will repair it free of charge including transportation charges.
3. The repairing time will not exceed 30 natural days, from the day the claim was received.
4. Steren sells parts, components, consumables and accessories to customer, as well as warranty service, at any of the following addresses:
THIS WARRANTY IS VOID ON THE NEXT CASES:
If the product has been damage by an accident, acts of God, mishandling, leaky batteries, failure to follow enclosed instructions, improper repair by unauthorized
personnel, improper safe keeping.
Notes:
a) The customer can also claim the warranty service on the purchase establishment.
b) If you lose the warranty card, we can reissue it just showing the invoice or purchase ticket.
Póliza de Garantía
This Steren product is guaranteed under
normal usage against defects in
workmanship and materials to the original
purchaser for one year from the date of
purchase.
Garantiza este producto por el término de
un año en todas sus partes y mano de obra
contra cualquier defecto de fabricación y
funcionamiento, a partir de la fecha de
entrega.
V0806

INSTRUCTIVO DE USO DE TELÉFONO ALÁMBRICO CON
CONTESTADORA E IDENTIFICADOR DE LLAMADAS
Modelo: TEL-260
Marca: Steren
Antes de utilizar su nuevo Teléfono Alámbrico con contestadora lea
este instructivo para evitar cualquier mal funcionamiento. Guárdelo
para futuras referencias.
IMPORTANTE
Antes de comenzar a utilizar su nuevo teléfono asegúrese de instalar 1
batería de 9V, de otra forma la pantalla verde no se encenderá.
El equipo se debe colocar en un lugar ventilado y seco.
El identificador de llamadas sólo funciona si Usted tiene contratado el
servicio con su compañía de telefonía local.
La contestadora sólo funciona si tiene conectado un adaptador de
corriente de 9Vcc (adaptador opcional).
No exponga la pantalla de LCD directamente a la luz del sol.
Limpie con un paño seco. No utilice solventes.
CONTROLES
1.- Memoria / Repetir (Memo / Repeat) ........... Permite grabar un
mensaje en la
contestadora / Repite el
mensaje escuchado
2.- Reproducir / Detener (Play / Stop) .............. Comienza / detiene la
reproducción de un
mensaje
3.- OGM / Saltar (OGM / Skip) ......................... Permite la grabación de
mensajes de voz
4.- Auricular
5.- Ajustes (Set) ………………………………… Permite realizar los
ajustes a la
configuración inicial
6.- Arriba (Up) ………………………………….. Varias funciones
7.- Abajo (Down) ……………………………….. Varias funciones
8.- Salir (Out) ………………………………….. Muestra las llamadas
realizadas
9.- Indicador de mensajes (MSG) ................. Enciende cuando hay
mensajes nuevos en la
contestadora / está
activada la
contestadora
10.- Pausa (Pause) ......................................... Hace una pausa en el
marcado de números /
genera pausas
mientras se utiliza con
un conmutador
telefónico
11.- Volumen (Vol) ……………………………... Aumenta o disminuye
el nivel de volumen
12.- Flash ……………………………………….. Transferencia entre dos
llamadas durante el
modo de Llamada en
Espera
13.- Remarcar / Regresar (Rd / Back) ............ Presione para remarcar
el último número al que
llamó
14.- Altavoz ..................................................... Presione este botón
para utilizar la base
como un altavoz
durante una
conversación
15.- Teclas numéricas
16.- Pantalla de LCD ....................................... Muestra diversa
información
17.- Entrada de línea ....................................... Permite conectar la
línea telefónica al
identificador de
llamadas al teléfono
INSTRUCTION MANUAL FOR WIRELESS TELEPHONE WITH
ANSWERING MACHINE AND CALLER ID
Model: TEL-260
Brand: Steren
Before using your new Wireless Telephone With Answering Machine
And Caller ID, please read this instruction manual to prevent any
damage. Put it away in a safe place for future references.
IMPORTANT
Before using your phone for the first time, make sure to install 1 9V battery,
otherwise the green screen will not power on.
This device must be placed in a dry ventilated area.
The caller ID function will only work when you have the service contracted
from your local phone company.
The answering machine will only function if the 9 V AC adaptor is
connected (optional accesory).
Do not expose the LCD screen to direct sunlight.
Clean with a clean, dry rag. Do not use solvents.
CONTROLS
1.- Memory / Repeat …………………………. Allows you to record a
message on the
answering machine /
repeats the message
being listened to.
2.- Play / Stop …………………………………. Starts / Stops the
playback of a recorded
message
3.- OGM / Skip ………………………………… Allows for the recording
of a voice message
4.- Handset
5.- Set …………………………………………… Allows you to change
the default
configuration
6.- Up …………………………………………… Several
functions
7.- Down ………………………………………… Several
functions
8.- Out …………………………………………… Shows the dialed
calls
9.- Message indicator (MSG) ………………… This indicator light
illuminates when there
are new messages on
the answering
machine or when the
answering machine is
activated.
10.- Pause ……………………………………… Pause the dialing of
numbers / generates
pauses when using a
telephone commuter.
11.- Volume (VOL) …………………………….. Increases or decreases
the volume level
12.- Flash ……………………………………….. Transfers between two
calls when in call
waiting
13.- Redial / Back ………………………………. Press this button in
order to redial the last
dialed number.
14.- Speakerphone …………………………….. Press this button in
order to use the base
as a speakerphone
during your
conversation.
15.- Number buttons
16.- LCD screen ……………………………….. Shows all
information
17.- Line in ……………………………………… Allows you to connect
the phone line

18.- Salida de línea ......................................... Permite conectar el
identificador de
llamadas
19.- Cerradura ................................................. Permite o bloquea las
llamadas salientes
20.- Adaptador de corriente ............................. Permite conectar un
adaptador de corriente
(no suministrado) para
iluminar la pantalla de
LCD
21.- Contestar (Answer On / Off) ……………… Activa o desactiva la
función de
contestadora. Cuando
está activado se
enciende el LED de
MSG
22.- Borrar (Del) …………………………………. Borra los mensajes de
la contestadora / sale
de menús
23.- Hora (Time) .............................................. Permite ajustar la hora
y fecha de la
contestadora
18.- Line out ……………………………………. Allows you to connect
the Caller ID to base
phone
19.- Block ………………………………………. Allows or blocks
outgoing calls
20.- AC adaptor ………………………………… Allows you to connect
an AC adaptor in order
to illuminate the LCD
screen
21.- Answer On / Off …………………………… Activates or deactivates
the answering machine
function. When this
function is activated,
the MSG indicator light
illuminates.
22.- Delete (DEL) ………………………………. Deletes the saved
messages from the
answering machine /
exits from menus.
23.- Time ………………………………………. Allows you to adjust the
date and time on the
answering machine.
17 18 19 20
1
2
3
4
5678
9
10
11
12
13
14
15
16
21
22
23

INSTALACIÓN
1.- Elija el lugar donde desea colocar el equipo.
2.- Inserte una batería de 9V en el teléfono. Asegúrese de colocarla con la
polaridad correcta (Fig. 1 y 2).
3.- Conecte el cable de la línea telefónica como muestra la figura (Fig. 3).
4.- Inserte el adaptador de corriente en la entrada correspondiente, el
equipo realizará una revisión del sistema por 15 segundos, el LED de
MSG comenzará a parpadear. Después de este tiempo, escuchará un
tono largo, indicando que el equipo está listo para su uso.
AJUSTES PRELIMINARES
Antes de comenzar a utilizar su teléfono, siga estas instrucciones para un
correcto funcionamiento de su equipo:
1.- Sin descolgar el auricular, presione la tecla de Ajustes (Set) una vez.
En pantalla comenzará a parpadear el mensaje Set Date 1, presione una
vez más el botón de Ajustes.
2.- El año comenzará a parpadear. Utilice los botones de Arriba (Up) /
Abajo (Down) para configurar el año correcto. Presione Set para guardar
los cambios.
3.- Acontinuación parpadea el mes, utilice los botones de Arriba (Up) /
Abajo (Down) para actualizar el mes. Presione una vez más, el botón de
Set.
4.- Acontinuación deberá configurar el día la hora y los minutos, siguiendo
el mismo proceso que en los pasos 2 y 3. Presione Set cada vez que
haga un cambio para guardarlos en memoria.
5.- Una vez que termine con la hora, y presione Set, comenzará a
parpadear el mensaje Set 2 Code.
6.- Se le pedirá introducir el código de área de la ciudad o del estado
donde Ud. se encuentra, por ejemplo, si se encuentra en la Ciudad de
México, introduzca el número 55, si se encuentra en la ciudad de
Guadalajara introduzca el número 33. Utilice los botones de Arriba (Up) /
Abajo (Down), en caso de que desee dejar espacios en blanco,
simplemente presione el botón de Set para avanzar los espacios.
7.- Cuando termine de introducir el código, presione Set para guardar los
cambios. En pantalla se mostrará el mensaje Set 3 Auto IP, presione Set
una vez más para dejar está opción sin cambio alguno.
8.- El mensaje Set 4 Alar parpadea en pantalla. Presione Set para entrar
al modo de activación de alarma. Utilice los botones de Arriba (Up) /Abajo
(Down) para activar (on) o desactivar (off) la alarma. Presione Set para
guardar los cambios.
9.- Set 5 Alert parpadea en pantalla. Presione Set una vez más para
comenzar a configurar la alarma. Utilice los botones de Arriba (Up) /Abajo
(Down) para seleccionar una de las 3 alarmas disponibles. Posteriormente
deberá introducir la hora de inicio y la activación o desactivación de la
alarma. Presione Set para guardar los cambios.
Notas:
Si desea salir de un menú de configuración, presione el botón de Borrar
(Del) una vez.
Posteriormente podrá acceder directamente a un menú en específico,
presionando el botón de Set y utilizando los botones de Arriba /Abajo para
seleccionar un menú.
INSTALLATION
1.- Choose the place where you wish to locate the device.
2.- Insert a 9V battery in the telephone. Make sure to install it correctly
and respecting the signaled polarity (Fig. 1 and 2).
3.- Connect the phone line into the phone. See the illustration (Fig. 3).
4.- Connect the AC adaptor in the corresponding jack. The device will now
do a 15 second system check. The MSG indicator light will begin to blink.
After the system check you will hear a long tone, this indicates that this
device is ready to be used.
PRELIMINARY SETTINGS
Before beginning the use of your new STEREN phone, follow these
instructions in order to assure proper use of your device:
1.- Without unhooking your handset, press the Set button once. The LCD
screen will display the message “Set Date 1” blinking. Press the set
button one more time.
2.- The year will begin to blink. Use the UP / DOWN buttons in order to set
the correct year. Press the set button in order to save the changes.
3.- The month will now begin to blink. Use the UP / DOWN buttons in
order to set the correct month. Press the set button in order to save the
changes.
4.- You will now set the day, hour, and minute. Follow the same procedure
as in steps 2 and 3.
5.- Once you have finished setting the day and time and pressed set, the
LCD screen will display the message “Set 2 Code” blinking.
6.- The device is now asking you to set the area code or city code where
the phone is being used. For example, if you are in San Diego, you will
enter either 619, 858, or 760. You can use the UP / DOWN buttons in
order to leave an empty space. Simply press the set button to advance to
the next space.
7.- Once you have finished entering the code, press the set button in order
to save the changes made. The LCD screen will display the message “Set
3 Auto IP” blinking. Press the set button in order to leave this option
without changing.
8.- The LCD screen will display the message “Set 4Alar” blinking. Press
the set button in order to enter the alarm activation mode. Press the UP /
DOWN buttons in order to activate or deactivate the alarm. Press the set
button in order to save the changes.
9.- The LCD screen will now display the message “Set 5Alert” blinking.
Press the set button once in order to begin configuration of the alarm.
Press the UP / DOWN buttons in order to choose between the three
different types of alarms. Afterwards you must enter the start time and
activation or deactivation of the alarm. Press the set button in order to
save the changes.
Notes:
If you wish to exit from a setup menu, press the Del button once.
Afterwards you will be able to enter any setup menu directly by pressing
the set button and using the UP / DOWN buttons in order to select the
desired menu.
Fig. 1 Fig. 2 Fig. 3

COMO REALIZAR UNA LLAMADA
Usando el auricular
1.- Descuelgue el auricular.
2.- Después de escuchar el tono de marcado, marque el número al que
desea llamar.
3.- Una vez que haya terminado su conversación, coloque el auricular en
la base del teléfono.
Usando el altavoz
1.- Presione el botón de altavoz. La pantalla de LCD se encenderá.
2.- Después de escuchar el tono de marcado, marque el número al que
desee llamar. En el altavoz podrá escuchar el tono de llamada. Cuando
contesten la llamada, hable de forma normal.
3.- Una vez que haya terminado su conversación, presione el botón de
altavoz una vez más.
REMARCADO (REDIAL) Y PREMARCADO
REMARCADO
Levante el auricular y después de escuchar el tono de marcado, presione
la tecla de Remarcado (RD/Back). El último número marcado aparecerá
en pantalla y comenzará a llamar.
PREMARCADO
1.- Sin descolgar el auricular, digite el número al que desea llamar.
2.- Presione el botón de Remarcado (Rd/Back). El número
automáticamente se marcará. Cuando la otra persona conteste, levante el
auricular o utilice el altavoz para comenzar la conversación.
3.- Después de terminada su conversación, coloque el auricular en la
base del teléfono.
CÓMO CONTESTAR UNA LLAMADA
Cuando entre una llamada, el teléfono comenzará a sonar. Si cuenta con
el servicio de Identificador de Llamadas, aparecerá el número de la
persona que está llamando.
Si usa el auricular:
1.- Cuando el teléfono comience a timbrar, levante el auricular y comience
a hablar.
2.- Cuando termine la conversación, coloque el auricular en la base del
teléfono.
Si usa el altavoz:
1-. Cuando el teléfono comience a timbrar, presione el botón de altavoz y
comience a hablar.
2.- Cuando termine la conversación, presione el botón de altavoz una vez
más.
Notas:
Para recibir correctamente la información del identificador de llamadas,
conteste el teléfono después de que haya timbrado 3 veces.
Si recibe una llamada antes de 6 segundos de haber finalizado la llamada
anterior podría no recibirse la información del identificador de llamadas.
REVISAR LAS LLAMADAS REALIZADAS
1.- Presione la tecla de Salir (Out). Se muestran en pantalla los números
marcados.
2.- Presione nuevamente la tecla de Salir (Out) para visualizar cada uno
de los números almacenados en memoria.
3.- Si no existe ningún número marcado o llega al final de la lista
aparecerá el mensaje End.
HOW TO MAKE A CALL
Using the handset:
1.- Unhook the handset
2.- After you have heard a dial tone, dial the desired number.
3.- Once you have finished your conversation, hook the handset back on
the telephone base.
Using the speakerphone:
1.- Press the speakerphone button. The LCD screen will illuminate.
2.- After hearing a dial tone, dial the desired number. On the
speakerphone you will be able to hear the dial tone. Speak normally once
the other line has answered your phone call.
3.- Once you have finished your phone call, press the speakerphone
button again in order to finish your call.
REDIAL AND PRE-DIAL
REDIAL
Unhook the handset. After you have heard a dial tone, press the RD/Back
button. The last number dialed will appear on the LCD screen and the
phone call will begin.
PRE-DIAL
1.- Without unhooking the handset, dial the number you wish to call.
2.- Press the Rd/Back button. The number will automatically dial. Once
the other line answers their phone, pick up the handset or use the
speakerphone in order to continue your call.
3.- Once you have finished your conversation, hook the handset back on
the telephone base.
HOW TO ANSWER AN INCOMING CALL
When there is an incoming call, the phone will begin to ring. If you have
caller ID service from your local phone company, the number of the person
calling will appear on the LCD screen.
If using the handset:
1.- When the phone is ringing, unhook the handset and begin
talking.
2.- Once you have finished your conversation, hook the handset back on
the telephone base.
If using the speakerphone:
1.- When the phone is ringing, press the speakerphone button and begin
talking.
2.- Once you have finished your phone call, press the speakerphone
button again in order to finish your call.
Notes:
In order to receive the correct caller ID information, don’t answer the
phone until it has rung 3 times.
If you receive a phone call less than 6 seconds after hanging up the
previous phone call, you might not receive caller ID information.
CHECKING DIALED CALLS
1.- Press the Out button. The LCD screen will display the dialed
numbers.
2.- Press the Out button again in order to see each dialed number stored
within the phone’s memory.
3.- If there are no stored numbers or you have reached the end of the list,
the LCD screen will display “End”.

Si desea borrar los números marcados:
1.- Presione la tecla de Salir (Out). Se muestran en pantalla los números
marcados.
2.- Presione nuevamente la tecla de Salir (Out) hasta visualizar el número
que desee borrar.
3.- Presione la tecla de Borrar (Del), el número marcado se borrará de la
memoria.
Nota:
Si presiona la tecla de Borrar (Del) por más de 3 segundos, se borrarán
todos los números marcados de la memoria.
REGRESAR LA LLAMADA DE LOS NUMEROS MARCADOS
ANTERIORMENTE
1.- Presione la tecla de Salir (Out). Se muestra en pantalla el último
número marcado y el tiempo de conversación.
2.- Presione la tecla de salida (Out) una vez más para visualizar el número
al que desea regresar la llamada.
3.- Presione la tecla de Regresar (Back) y el número se marcará
automáticamente.
PAUSA
Se recomienda presionar la tecla de Pausa (Pause) cuando introduce un
código de larga distancia o cuando marca un número con extensión. Esta
función ingresa un retraso de 2,2 segundos cuando es presionada.
CERRADURA MECÁNICA
Si Ud. desea bloquear las llamadas salientes, utilice la cerradura que se
encuentra ubicada en la parte trasera del teléfono. Ud. podrá seguir
recibiendo llamadas.
1.- Utilice la llave (incluida) para girar la cerradura hacia donde se ubica el
punto verde, de esta forma Ud. podrá marcar cualquier tipo de número
telefónico, excepto los que comiencen con “0” (llamadas de larga
distancia). Cuando digite un número que empiece con “0”, aparecerá el
mensaje - LOC – en pantalla.
2.- Si desea bloquear todas las llamadas salientes, ubique el punto
amarillo de la cerradura y gire la llave a ese punto.
3.- Si no desea bloquear ninguna llamada, gire la cerradura hacia el punto
rojo.
IDENTIFICADOR DE LLAMADAS
LLAMADAS ENTRANTES
Para revisar los números telefónicos de las llamadas que recibió, presione
la tecla Arriba / Abajo (Up / Down). En la pantalla se muestran los
números telefónicos así como la fecha y la hora en que se recibieron.
Para poder visualizar más números telefónicos presione la tecla Arriba /
Abajo (Up / Down).
Notas:
Cuando entra una llamada con un número telefónico privado aparece el
mensaje – P -.
Si el número entrante proviene de otro país o de áreas sin el servicio de
identificador de llamadas, aparece en pantalla – 0 -.
CONTESTADORA
AJUSTE DE LA HORA Y FECHA ACTUAL
1.- Presione el botón de Time por dos segundos, escuchará el mensaje
SET DAY, suelte botón después de escucharlo. También escuchará el día
actualmente configurado.
2.- Presione el botón de OGM / Skip o Memoria / Repetir (Memo / Repeat)
para seleccionar el día de la semana actual. Los días de la semana está
en inglés: Sunday= Domingo, Monday= Lunes, Tuesday= Martes,
Wednesday= Miércoles, Thursday= Jueves, Friday= Viernes, Saturday=
Sábado.
3.- Una vez que haya ajustado el día correcto, presione el botón de Time
una vez más, escuchará el mensaje SET HOUR, presione los botones de
OGM o Memo para introducir la hora correcta, presione una vez más el
botón de Time para guardar los cambios. El mismo proceso se repite para
los minutos.
If you wish to delete stored dialed numbers:
1.- Press the out button once. The stored dialed numbers will appear on
the LCD screen.
2.- Press the out button again until you reach the number on the list you
wish to delete.
3.- Press the Del button. The stored dialed number you have selected will
be deleted from the memory.
Note:
If you press the Del button and hold it for more than 3 seconds, all the
numbers saved in the phone’s memory will be deleted.
DIALING A NUMBER FROM THE DIALED NUMBERS LIST
1.- Press the Out button. The LCD screen will display the last number
dialed and the time of conversation.
2.- Press the Out button once in order to see the number you wish to
dial.
3.- Press the Back button in order to dial the number automatically.
PAUSE
It is recommended to press the Pause button when entering a long
distance code or when dialing a number with an extension. This function
gives a 2.2 second delay when it is pressed.
MECHANICAL BLOCK
If you wish to block outgoing calls, use the block that is located on the
back part of the telephone. You will still be able to receive phone
calls.
1.- Use the included key in order to turn the block to the green point. This
way you will be able to dial any phone number except those starting with
“0” (long distance calls). When you dial a number beginning with “0”, the
LCD screen will display the message “-LOC-“.
2.- If you wish to block all outgoing calls, find the yellow point and turn the
included key to this point.
3.- If you don’t want to block any calls, find the red point and turn the
included key to this point.
CALLER ID
INCOMING CALLS
In order to check the phone numbers of calls that have been received,
press the UP / DOWN buttons. The LCD screen will display the phone
numbers along with the time and date of the received phone calls. In
order to view more phone numbers, use the UP / DOWN buttons.
Notes:
When a phone call is received from a blocked number (no caller ID), the
LCD screen will display “-P-“
If the incoming phone call comes from another country or from an area
without caller ID service, the LCD screen will display “-0-“
ANSWERING MACHINE
SETTING CURRENT TIME AND DATE
1.-Press the Time button and hold it for 2 seconds. You will hear the
message “SET DAY”. After hearing this message let go of the Time
button. You will also hear the day that is currently set.
2.- Press the OGM / Skip button in order to select the day of the week.
3.- Once you have adjusted the correct day, press the Time button one
more time. You will now hear the “SET HOUR” message. Press the OGM
/ Skip button in order to set the correct time. Press the Time button one
more time in order to save the changes. The same process is used to set
the minutes.

4.- Después de configurar los minutos, la hora correcta se escuchará y
saldrá del modo de configuración de hora.
Nota:
En modo de configuración de hora, si no presiona ningún botón en un
lapso de 8 segundos, saldrá de este modo y tendrá que comenzar
nuevamente el proceso.
GRABACIÓN DE MENSAJE
1.- Presione el botón OGM / Skip por 2 segundos hasta que escuche un
tono largo.
2.- Suelte el botón para comenzar a grabar el mensaje de la contestadora.
3.- Presione el botón de Reproducir / Detener para detener la grabación y
reproducirla de forma automática.
4.- Presione OGM / Skip para reproducir el mensaje.
Notas:
Sólo puede grabar un mensaje de hasta 1 minuto de duración.
En caso de grabar un mensaje de bienvenida, se reproducirá el mensaje
predeterminado “Hello! Please leave a message after the tone”.
GRABACIÓN DE UNA CONVERSACIÓN Y MEMOS
Memos
1.- Presione el botón de Memoria / Repetir por 2 segundos hasta que
escuche un bip. Suelte el botón y comience la grabación del Memo.
2.- Presione Reproducir / Detener para detener la grabación.
Conversación
1.- Antes o durante una conversación, presione el botón de Memoria /
Repetir (Memo / Repeat) por 4 segundos. El equipo comenzará a grabar
la conversación.
2.- Para concluir la grabación, presione el botón de Reproducir / Detener.
Así mismo, la grabación terminará cuando haya silencio o tono de
ocupado.
3.- Presione el botón de Memoria / Repetir (Memo / Repeat) una vez para
reproducir el memo o la grabación. Si desea repetir un memo, presione el
botón de Memoria / Repetir. Para reproducir el siguiente mensaje,
presione el botón OGM / Skip.
BORRAR Y GUARDAR TODOS LOS MENSAJES
1.- Cuando esté reproduciendo un mensaje, presione el botón de Borrar
(Del) para borrar el mensaje actual.
2.- Presione el botón de Borrar (Del) 2 segundos hasta que escuche un
tono largo. Todos los mensajes –a excepción del mensaje de Bienvenida-
serán borrados. Si no hay mensajes, escuchará dos bips.
3.- Presione el botón de Borrar (Del) 2 segundos más hasta que escuche
un tono largo, los mensajes borrados serán almacenados.
MENSAJE ENTRANTE
Si recibe una llamada cuando la contestadora esté activada, el teléfono
reproducirá el mensaje de Bienvenida y comenzará la grabación.
Para saltar el mensaje, la persona que llama puede presionar el botón *
(asterisco), escuchará el tono de grabación y podrá dejar su mensaje.
Notas:
Si durante la grabación de un mensaje se detecta un silencio de 8
segundos o tono de ocupado por 5 segundos, automáticamente se
detendrá.
Si la memoria excede de 59 mensajes, podrá escuchar un mensaje
advirtiéndole que la memoria está llena y que tendrá que llamar más tarde
(Memory full, please call again later, thank you)..
Si la contestadora está activada y hay mensajes nuevos, la grabación
comenzará después de 2 timbrados. Si no existen mensajes nuevo, la
grabación comenzará después de 4 timbrados.
Si la contestadora no está activada, después de 10 timbrados comenzará
la grabación.
Puede detener la grabación levantando el auricular o presionando el botón
de Reproducir / Detener.
4.- After setting the minutes, you will hear the correct time and you will exit
the time settings mode.
Note:
In time and date setting mode, if you do not press any buttons for 8
seconds, you will be exited from this mode and you will have to start the
process again.
RECORDING THE OUTGOING MESSAGE
1.- Press the OGM / Skip button for 2 seconds until you hear a long
tone.
2.- Release the button and begin recording your outgoing message.
3.- Press the Play / Stop button in order to stop the recording and play it
back automatically.
4.- Press the OGM / Skip button in order to play the outgoing message.
Notes:
Your outgoing message can be a maximum one minute long If you do not
record an outgoing message, the answering machine will answer with the
default message: “Hello! Please leave a message after the tone.”
RECORDING A CONVERSATION OR MEMOS
Memos
1.- Press the Memory / Repeat button for 2 seconds until you hear a beep.
2.- Release the button and begin recording your memo.
3.- Press the Play / Stop button in order to stop the recording.
Conversation
1.- Before or during a conversation, press the Memory / Repeat button for
4 seconds. The device will begin to record the conversation.
2.- In order to stop the recording, press the Play / Stop button. The
recording will also stop if there is a long period of silence or a busy tone.
3.- Press the Memory / Repeat button once in order to play the recorded
conversation or memo. If you wish to hear a memo again, press the
Memory / Repeat button. If you wish to hear the following recording, press
the OGM / Skip button.
DELETING AND SAVING ALL MESSAGES
1.- When playing a message, press the Del button in order to delete the
current message.
2.- Press and hold the Del button for 2 seconds until you hear a long
tone. All of the messages (except the outgoing message) will be deleted.
If there are no stored messages you will hear 2 beeps.
3.- Press Del button for 2 seconds until you hear a long tone, the erased
messages will be stored.
INCOMING MESSAGE
If you receive a call when the answering machine is activated, the phone
will answer and play the outgoing message and begin recording.
In order to skip the outgoing message, you can press the “*” button. You
will hear a tone and you can begin recording.
Notes:
If during the recording of a message the answering machine detects 8 or
more seconds of silence, or a busy tone for 5 or more seconds, the
answering machine will automatically stop recording.
If the answering machine’s memory exceeds 59 messages, you will hear a
message warning you that the memory is full and to call back later
(“Memory full, please call again later, thank you.”)
If the answering machine is activated and there are new messages
recorded, the answering machine will only wait 2 rings before it answers.
If there are no new messages recorded on your answering machine, it will
wait 4 rings before answering.
If the answering machine is not activated, it will wait 10 rings before
answering and beginning recording.
You can stop the recording by unhooking the handset or pressing the Play
/ Stop button.

CONFIGURACIÓN DEL CÓDIGO DE SEGURIDAD DE OPERACIÓN
REMOTA
El código inicial de fábrica es 000.
1.- Llame de una línea externa, y después de escuchar el mensaje de
Bienvenida y el tono de grabación, introduzca el código de seguridad de
fábrica 000.
2.- Presione el botón * (asterisco) y el número 3 para introducir el nuevo
código,
3.- Introduzca un nuevo código de seguridad (3 dígitos). Una vez que está
configurado correctamente, escuchará el mensaje “ security code XXX”
(donde XXX es el nuevo código de seguridad) y escuchará un bip.
4.- Cuelgue el teléfono.
OPERACIÓN REMOTA
Cuando llama de una línea externa y desea escuchar sus mensajes
grabados de forma remota, siga estos pasos:
1.- Cuando escuche el mensaje de Bienvenida, presione el botón *
(asterisco) para saltarlo, escuchará el tono de grabación.
2.- Introduzca el código de seguridad utilizando el teclado numérico del
teléfono.
3.- Seleccione una de las funciones deseadas (ver Tabla de Funciones).
4.- Para repetir mensajes presione el número 3.
5.- Para saltar un mensaje presione 5.
6.- Para borrar un mensaje presione el 6.
7.- Para salir del menú, presione 7.
FUNCIONES
SETTING THE REMOTE ACCESS SECURITY CODE
The default code is 000.
1.- Call from an external phone line and after hearing the outgoing
message and the recording tone, enter the security code. (000)
2.- Press the “*” button on the phone and “3” in order to introduce a new
security code.
3.- Dial the new security code (3 digits). Once this has been done
correctly, you will hear the following message: “security code XXX” (XXX
being the new security code.) You will now hear a beep.
4.- Hang up the phone.
REMOTE OPERATION
When you call your phone from an external phone line and you wish to
listen to your messages, follow these steps:
1.- When you hear the outgoing message press the “*” button in order to
skip it and hear the record tone.
2.- Dial the security code using the number keys on the telephone.
3.- Select one of the desired functions (See Functions table)
4.- In order to repeat a message, press 3.
5.- In order to skip a message, press 5.
6.- In order to delete a message, press 6.
7.- In order to exit the menu, press 7.
FUNCTIONS
Botones / Keys Función / Function
2 Reproduce el mensaje de Bienvenida
Plays outgoing message
3 Realiza un monitoreo general del sistema
Monitors the system
4 Reproduce o repite memos
Plays or repeats memos
5 Reproduce o adelanta mensajes nuevos
Plays new messages or skips to the next message
6 Borra un mensaje
Deletes a message
7 Guarda todos los mensajes
Saves all messages
9 Entra al modo de reproducción
Enters playback mode
*1 Graba un mensaje de Bienvenida
Records an outgoing message
*2 Graba un memo
Records a memo
*3 Cambia el código de seguridad
Changes the security code
*4 Borrar todos los mensajes
Deletes all messages
*5 Activa / Desactiva la contestadora
Activates or deactivates the answering machine
# Sale del modo remoto
Exits remote operation

AJUSTE DE EXTENSIONES
Si alguien conecta una extensión a la unidad, mientras se hace una
llamada desde la unidad principal, la unidad transmitirá sonidos de
interferencia a la extensión, hasta que se cuelgue.
1.- Presione el botón de Ajustes (Set), en pantalla se mostrará el mensaje
Set 1 Date.
2.- Presione el botón de Arriba (Up) tres veces, en pantalla se muestra Set
4 Alar.
3.- Presione Ajustes (Set) para entrar al modo de configuración, el
mensaje Alar Off se despliega en pantalla.
4.- Utilice los botones de Arriba (Up) / Abajo (Down) para activar (On) o
desactivar (Off) esta función.
5.- Una vez que seleccionó una opción, presione Ajustes (Set) para
guardar los cambios.
6.- Presione Borrar (Del) para salir del menú.
Nota:
Seleccione Alar OFF si el equipo está conectado a una línea menor a 24V,
de otra forma no funcionará.
ESPECIFICACIONES
Entrada: 9 Vcc (1 x 9V)
9V (con convertidor)
-48V (línea telefónica)
Convertidor
Entrada: 120V~ 60Hz
Salida: 9V
Dimensiones: 195 x 185 x 80mm
Peso: 1100g
Nota:
El diseño del producto y las especificaciones pueden cambiar sin previo
aviso.
EXTENSIONS SETUP
If someone connects an extension to the unit, while making a call from the
main device, the device will transmit interference noise until you hang up.
1.- Press the Set button. The LCD screen will display “Set 1 Date”
2.- Press the Up button 3 times. The LCD screen will display “Set 4Alar”
3.- Press the set button in order to enter setup mode. The message “Alal
Off” will be displayed on your LCD screen.
4.- Use the Up / Down buttons in order to activate or deactivate this
function.
5.- Press set in order to save the changes.
6.- Press the Del button in order to exit this menu.
Note:
Select Alar off if the equipment is connected to less than 24 V line.
Otherwise this function will not work.
SPECIFICATIONS
Input: 9V (1 x 9V)
9V (with AC adaptor)
- 48 V (Phone line)
AC Adaptor
Input: 120 V~ 60 Hz
Output: 9V
Dimensions: 195 x 185 x 80 mm
Weight: 1100 g
Note:
Product design and specifications are subject to change without previous
notice.
Other manuals for TEL-260
1
Table of contents
Other Steren Telephone manuals

Steren
Steren TEL-300 User manual

Steren
Steren TEL-235 User manual

Steren
Steren TEL-260 User manual

Steren
Steren TEL-007 User manual

Steren
Steren TEL-2414 User manual

Steren
Steren TEL-250 User manual

Steren
Steren TEL-009 User manual

Steren
Steren MG-255 User manual

Steren
Steren AUT-520 User manual

Steren
Steren TEL-2410 User manual

Steren
Steren TEL-225 User manual

Steren
Steren TEL-220 User manual

Steren
Steren TEL-008BL User manual

Steren
Steren CEL-100 User manual

Steren
Steren TEL-2470 User manual

Steren
Steren TEL-250 User manual

Steren
Steren TEL-220 User manual

Steren
Steren TEL-015BL User manual

Steren
Steren TEL-008BL User manual

Steren
Steren COM-240 User manual