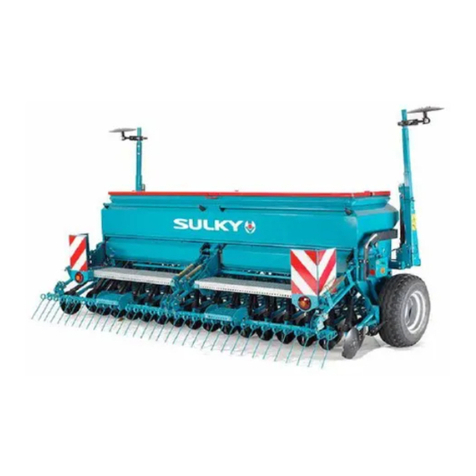
Sulky Semoir Progress P20 User manual

Réf: 401 167-03 FR-EN-DE
BUREL SOLUTIONS
P.A. de la Gaultière
35220 CHATEAUBOURG - France
Tél :(33)02 99 00 84 84
Web : www.sulky-burel.com
Semoir Progress P20-50-100
Semoir pneumatique intégré
Notice originale
Original Instructions
Originalbetriebsanleitung
27/06/2022
A LIRE ATTENTIVEMENT AVANT D’UTILISER LA MACHINE
PLEASE READ CAREFULLY BEFORE USING THE MACHINE
VOR INBETRIEBNAHME SORGFÄLTIG LESEN!


Cher utilisateur / Dear Customer / Geehrter Kunde
EN DE
Dear Customer,
Thank you for trusting our equipment and
choosing the Progress P20-50-100 Seed drill.
To ensure correct operation, and to get the
most out of your Progress P20-50-100 Seed
drill, we recommend that you read these
instructions carefully.
Please do not hesitate to give us your sugges-
tions and comments based on your expe-
rience. They are always useful for improving
our products.
We hope your Progress P20-50-100 Seed drill
will provide long and trouble-free service.
Yours sincerely.
J.BUREL
Chairman
Geehrter Kunde,
Sie haben sich für unseren Drillmaschine
Progress P20-50-100 entschieden.
Wir danken Ihnen für das Vertrauen, das
Sie unseren Geräten entgegenbringen.
Bitte lesen Sie die Anleitung sorgfältig durch,
damit Sie ihren Drillmaschine Progress P20-
50-100 richtig benutzen
und alle seine Möglichkeiten voll nutzen
können.
Zögern Sie nicht, uns Ihre eigenen Beobach-
tungen und Erfahrungen mitzuteilen, die für
die Verbesserung unserer Produkte immer
nützlich sein können.
Wir wünschen Ihnen viel Erfolg mit Ihrem
Drillmaschine Progress P20-50-100 und
verbleiben
mit freundlichen Grüßen
J.BUREL
Präsident
Cher Client,
Vous avez choisi notre Semoir Progress P20-50-100, et
nous vous remercions de votre conance pour notre
matériel.
Pour une bonne utilisation, et pour tirer prot de toutes
les capacités de votre Semoir Progress P20-50-100, nous
vous recommandons de lire attentivement cette notice.
De par votre expérience, n’hésitez pas à nous faire part
de vos observations et suggestions, toujours utiles pour
l’amélioration de nos produits.
En vous souhaitant bon usage de votre Semoir Progress
P20-50-100,
Veuillez agréer, Cher Client, l’assurance de nos meilleurs
sentiments.
J. BUREL
Président

S EMOIR PNEUMATIQUE INTÉGRÉ
I NTEGRATED PNEUMATIC SEED DRILL
P NEUMATISCHE AUFBAUDRILLMASCHINE
F AIT ÀCHÂTEAUBOURG : 4/1/2021
C HÂTEAUBOURG: 4/1/2021
A USGESTELLT IN CHÂTEAUBOURG 4/1/2021
D IE MASCHINE ENTSPRICHT ALLEN
EINSCHLÄGIGEN BESTIMMUNGEN DER
MASCHINENRICHTLINIE 2006/42/EG
Julien BUREL
PA DE LA GAULTIÈRE
35220 CHATEAUBOURG FRANCE
Selon annexe 2, partie 1, point A de la directive « machines » 2006/42/CE.
In accordance with Appendix 2, Section 1, Point A of the European Machinery Directive 2006/42/EC.
Gemäß Anhang II, Teil 1, Abschnitt A der Maschinenrichtlinie 2006/42/EG.
SIGNÉ
SIGNED:
UNTERZEICHNET:
J. BUREL
P RÉSIDENT
C HAIRMAN
P RÄSIDENT
EN DE
N OM DU FABRICANT ET ADRESSE
M ANUFACTURER’SNAME AND ADDRESS:
N AME UND ADRESSE DES HERSTELLERS:
N OM DE LA PERSONNE AUTORISÉE ACONSTITUER LE DOSSIER
TECHNIQUE ET ADRESSE :
N AME AND ADDRESS OF THE PERSON AUTHORISED TO COMPILE THE
TECHNICAL SPECIFICATIONS:
N AME UND ADRESSE DES FÜR DIE ZUSAMMENSTELLUNG DER
TECHNISCHEN UNTERLAGEN BEVOLLMÄCHTIGTEN:
D ESCRIPTION DE LA MACHINE
M ACHINE DESCRIPTION :
B ESCHREIBUNG DER MASCHINE:
T YPE
T YPE :
T YP:
N UMÉRO DE SÉRIE
A CCESSOIRES
A CCESSORIES:
Z USATZAUSRÜSTUNGEN:
S ERIAL NUMBER:
S ERIENNUMMER:
Déclaration de conformité
Declaration of Conformity
Konformitätserklärung
FR
T HE MACHINE CONFORMS TO THE RELEVANT
TERMS OF THE EUROPEAN MAC HINERY
DIRECTIVE 2006/42/EC
THE MACHINE CONFORMS TO THE RELEVANT
TERMS OF «THE SUPPLY OF MACHINERY
(SAFETY) REGULATION 2008»
L AMACHINE EST CONFORME AUX DISPOSITIONS
PERTINENTES DE LA DIRECTIVE MACHINES 2006-
42 CE
Semoir Progress P20-50-100
Progress P20-50-100 Seed drill
Drillmaschine Progress P20-50-100
BUREL PRODUCTION
PA DE LA GAULTIERE
35220 CHATEAUBOURG - FRANCE

PRESCRIPTIONS GÉNÉRALES DE SÉCURITÉ
Avant chaque utilisation et mise en service de
l’ensemble tracteur-machine, s’assurer de sa
conformité avec la réglementation en matière de
sécurité du travail et avec les dispositions du Code
de la Route.
GÉNÉRALITÉS
1 - Respecter, en plus des instructions contenues dans
cette notice, la législation relative aux prescriptions
de sécurité et de prévention des accidents.
2 - Les avertissements apposés sur la machine
fournissent des indications sur les mesures de
sécurité à observer et contribuent à éviter les
accidents.
3 - Lors de la circulation sur la voie publique, respecter
les prescriptions du Code de la Route.
4 - Avant de commencer le travail, l’utilisateur devra
se familiariser obligatoirement avec les organes de
commande et de manœuvre de la machine et leurs
fonctions respectives. En cours de travail, il sera trop
tard pour le faire.
5 - L’utilisateur doit éviter de porter des vêtements
ottants qui risqueraient d’être happés par des
éléments en mouvement.
6 - Il est recommandé d’utiliser un tracteur équipé
d’une cabine ou d’un arceau de sécurité, aux normes
en vigueur.
7 - Avant la mise en route de la machine et le
démarrage des travaux, contrôler les abords
immédiats (enfant !). Veiller à avoir une visibilité
susante ! Eloigner toute personne ou animal de la
zone de danger de la machine (projections !).
8 - Le transport de personnes ou d’animaux sur la
machine lors du travail ou lors des déplacements est
strictement interdit.
9 - L’accouplementdelamachineautracteurnedoitse
faire que sur les points d’attelage prévus à cet eet
conformément aux normes de sécurité en vigueur.
10 - La prudence est de rigueur lors de l’attelage de la
machine au tracteur et lors de son désaccouplement!
11 - Avant d’atteler la machine, il conviendra de
s’assurer que le lestage de l’essieu avant du tracteur
est susant. La mise en place des masses de lestage
doit se faire sur les supports prévus à cet eet
conformément aux prescriptions du constructeur du
tracteur.
12 - Respecter la charge à l’essieu maximum et le
poids total roulant autorisé en charge.
13 - Respecter le gabarit maximum sur la voie
publique.
14 - Avant de s’engager sur la voie publique, veiller
à la mise en place et au bon fonctionnement des
protecteurs et dispositifs de signalisation (lumineux,
rééchissants…) exigés par la loi. Remplacer
les ampoules grillées par des types et couleurs
identiques.
15 - Toutes les commandes à distance (corde,
câble, tringle, exible…) doivent être positionnées
de telle sorte qu’elles ne puissent déclencher
accidentellement une manœuvre génératrice de
risque d’accident ou de dégâts.
16 - Avant de s’engager sur la voie publique, placer
la machine en position de transport, conformément
aux indications du constructeur.
17 - Ne jamais quitter le poste de conduite lorsque le
tracteur est en marche.
18 - Lavitesse et le modede conduite doivent toujours
être adaptés aux terrains, routes et chemins. En toute
circonstance, éviter les brusques changements de
direction.
19 - La précision de la direction, l’adhérence du
tracteur, la tenue de route et l’ecacité des dispositifs
de freinage sont inuencées par des facteurs tels
que : poids et nature de la machine attelée, lestage
de l’essieu avant, état du terrain ou de la chaussée. Il
est donc impératif de veiller au respect des règles de
prudence dictées par chaque situation.
20 - Redoubler de prudence dans les virages en
tenant compte du porte-à-faux, de la longueur, de la
hauteur et du poids de la machine ou de la remorque
attelée.
21 - Avant toute utilisation de la machine, s’assurer
que tous les dispositifs de protection sont en place
et en bon état. Les protecteurs endommagés doivent
être immédiatement remplacés.
22 - Avant chaque utilisation de la machine,
contrôler le serrage des vis et des écrous, en
particulier de ceux qui xent les outils (disques,
palettes, déecteurs…). Resserrer si nécessaire.
23 - Nepasstationnerdanslazonedemanœuvredela
machine.
24 - Attention ! Des zones d’écrasement et de
cisaillement peuvent exister sur les organes
commandés à distance, notamment ceux asservis
hydrauliquement.
25 - Avant de descendre du tracteur, ou
préalablement à toute intervention sur la machine,
couper le moteur, retirer la clé de contact et attendre
l’arrêt complet de toutes les pièces en mouvement.
26 - Ne pas stationner entre le tracteur et la machine
sans avoir préalablement serré le frein de parcage et/
ou avoir placé des cales sous les roues.
27 - Avant toute intervention sur la machine,
s’assurer que celle-ci ne puisse être mise en route
accidentellement.
28 - Ne pas utiliser l’anneau de levage pour lever la
machine lorsqu’elle est remplie.
29 - La hauteur de votre machine, ainsi que
sa composition métallique vous impose des
précautions an d’éviter tous risques électriques :
1- Vérier que la hauteur de votre machine soit
inférieure à la hauteur des lignes électriques sous
lesquelles la machine doit évoluer
a. Jusqu’à 1kV : 1 m
b. De 1 à 110 kV : 2 m
c. De 110 à 220 kV : 3 m
d. De 220 à 380 kV : 4 m
e. Plus de 380 kV : Consulter les consignes
spéciques
2- An d’éviter tout risque avec la foudre, s’informer
sur les conditions météorologiques et éviter de
travailler lorsque les conditions sont dangereuses,
éviter les points hauts, s’éloigner et ne pas toucher
les structures métalliques (pylônes, grilles, poteaux,
clôtures, etc.).
30 - Les pneumatiques de votre matériel étant
sous pression, ils constituent un réel risque pour
l’utilisateur. Leur manutention, réparation ou
leur montage ne doit être eectué que par des
techniciens formés à ces opérations. Pour le
gonage, se référer au chapitre et à la section
appropriée.
31 - Pour toute intervention sur la machine
(chargement, réglage, lavage, …) il est impératif de
poser la machine au sol.
32 - Si votre machine est équipée d’un essieu routier
freiné, alors toujours s’assurer que la source de
freinage disponible sur le tracteur soit bien adaptée
au type de freinage nécessaire sur votre machine
(hydraulique / pneumatique).
UTILISATION CONFORME DE LA MACHINE
1 - En toutes situations, la machine ne doit être
utilisée que par une seule personne.
2 - La machine ne doit être utilisée que pour les
travaux pour lesquels elle a été conçue. En cas de
dommage lié à l’utilisation de la machine hors du
cadre des applications spéciées par le constructeur,
la responsabilité de celui-ci sera entièrement
dégagée.
3 - Touteextrapolationdeladestinationd’originedela
machine se fera aux risques et périls de l’utilisateur.
4 - L’utilisation conforme de la machine implique
également :
- le respect des prescriptions d’utilisation, d’entretien
et de maintenance édictées par le constructeur,
- l’utilisation exclusive de pièces de rechange,
d’équipements et d’accessoires d’origine ou
préconisés par le constructeur.
5 - La machine ne doit être utilisée, entretenue et
réparée que par des personnes compétentes,
familiarisées avec les caractéristiques et modes
d’utilisation de la machine. Ces personnes doivent
aussi être informées des dangers auxquels elles
pourraient être exposées.
6 - L’utilisateur est tenu au respect scrupuleux de la
réglementation en vigueur en matière de :
- prévention contre les accidents,
- sécurité du travail (Code du Travail),
- circulation sur la voie publique (Code de la Route).
- Il lui est fait obligation d’observer strictement les
avertissements apposés sur la machine.
7 - Toute modication de la machine eectuée par
l’utilisateur lui-même ou toute autre personne, sans
l’accord écrit préalable du constructeur, engagera la
responsabilité du propriétaire du matériel modié.
8 - La valeur d’émission de bruit mesurée au poste de
conduite cabine fermée.
(Niveau de pression acoustique) est de 75 dB(A)
Appareil de mesure : SL 401
Position du microphone positionné selon le
paragraphe B.2.6 de l’annexe B de la NF EN ISO
4254-1.
Ce niveau de pression acoustique dépend, pour
l’essentiel, du tracteur utilisé.
Prescriptions de sécurité
ГCes symboles sont utilisés dans cette notice chaque fois que des recommandations concernent votre sécurité, celle d’autrui ou
le bon fonctionnement de la machine.
ГTransmettez impérativement ces recommandations à tout utilisateur de la machine.
FR
Faciliter le travailRisque d’accident
Risque
d’endommager la
machine

ATTELAGE
1 - Pendant les phases d’attelage et de dételage
et si votre machine est équipée de béquille, veiller
à ce que l’axe de verrouillage de la béquille soit
correctement verrouillé.
2 - Lors de l’attelage de la machine au tracteur ou de
sa dépose, placer le levier de commande du relevage
hydraulique dans une position telle que toute entrée
en action du relevage ne puisse intervenir de façon
inopinée.
3 - Lors de l’attelage de la machine au relevage 3
points du tracteur, veiller à ce que les diamètres
des broches ou tourillons correspondent bien aux
diamètres des rotules du tracteur.
4 - Attention ! Dans la zone de relevage 3 points, il
existe des risques d’écrasement et de cisaillement!
5 - Ne pas se tenir entre le tracteur et la machine lors
de la manœuvre du levier de commande extérieur
du relevage.
6 - Au transport la machine doit être stabilisée par
les tirants de rigidication du relevage pour éviter
tout ottement et débattement latéral.
7 - Lors du transport de la machine en position
relevée, verrouiller le levier de commande du
relevage.
8 - Ne jamais dételer la machine lorsque la trémie
est remplie.
ORGANES D’ANIMATION
(Prises de force et arbres de transmission à cardans)
1 - N’utiliser que les arbres de transmission à
cardans fournis avec la machine ou préconisés par
le constructeur.
2 - Les protecteurs des prises de force et des arbres
de transmission à cardans doivent toujours être en
place et en bon état.
3 - Veiller au recouvrement correct des tubes des
arbres de transmission à cardans, aussi bien en
position de travail qu’en position de transport.
4 - Avant de connecter ou de déconnecter un arbre
de transmission à cardans, débrayer la prise de force,
couper le moteur et retirer la clé de contact.
5 - Si l’arbre de transmission à cardans primaire est
équipé d’un limiteur de couple ou d’une roue libre,
ceux-ci doivent impérativement être montés sur la
prise de force de la machine.
6 - Veiller toujours au montage et au verrouillage
corrects des arbres de transmission à cardans.
7 - Veiller toujours à ce que les protecteurs des arbres
de transmission à cardans soient immobilisés en
rotation à l’aide des chaînettes prévues à cet eet.
8 - Avant d’embrayer la prise de force, s’assurer que
le régime choisi et le sens de rotation de la prise
de force sont conformes aux prescriptions du
constructeur.
9 - Avant d’embrayer la prise de force, s’assurer
qu’aucune personne ou animal ne se trouve à
proximité de la machine.
10 - Débrayer la prise de force lorsque les limites
de l’angle de l’arbre de transmission à cardans
prescrites par le constructeur risquent d’être
dépassées.
11 - Attention!Aprèsledébrayagede laprisedeforce,
les éléments en mouvement peuvent continuer
à tourner quelques instants encore. Ne pas s’en
approcher avant immobilisation totale.
12 - Lors de la dépose de la machine, faire reposer les
arbres de transmission à cardans sur les supports
prévus à cet eet.
13 - Après avoir déconnecté l’arbre de transmission
à cardans de la prise de force du tracteur, celle-ci
doit être recouverte de son capuchon protecteur.
14 - Les protecteurs de prise de force et d’arbres de
transmission à cardans endommagés doivent être
remplacés immédiatement.
CIRCUIT HYDRAULIQUE
1 - Attention ! Le circuit hydraulique est sous pression.
2 - Lors du montage de vérins ou de moteurs
hydrauliques, veiller attentivement au branchement
correct des circuits, conformément aux directives du
constructeur.
3 - Avantdebrancherunexibleaucircuithydraulique
du tracteur, s’assurer que les circuits côté tracteur et
côté machine ne sont pas sous pression.
4 - Il est vivement recommandé à l’utilisateur de la
machine de suivre les repères d’identication sur les
raccords hydrauliques entre le tracteur et la machine
an d’éviter des erreurs de branchement. Attention !
Il y a risque d’interversion des fonctions (parexemple :
relever/abaisser).
5 - Contrôlerunefoisparanlesexibleshydrauliques:
. Blessure de la couche extérieure
. Porosité de la couche extérieure
. Déformation sans pression et sous pression
. Etat des raccords et des joints
La durée d’utilisation maximum des exibles est de
6 ans. Lors de leur remplacement, veiller à n’utiliser
que des exibles de caractéristiques et de qualité
prescrits par le constructeur de la machine.
6 - Lors de la localisation d’une fuite, il conviendra
de prendre toute précaution visant à éviter les
accidents.
7 - Tout liquide sous pression, notamment l’huile
du circuit hydraulique, peut perforer la peau et
occasionner de graves blessures ! En cas de blessure,
consulter de suite un médecin ! Il y a danger
d’infection !
8 - Avant toute intervention sur le circuit
hydraulique, abaisser la machine, mettre le circuit
hors pression, couper le moteur et retirer la clé de
contact.
ENTRETIEN
1 - Avant tous travaux de maintenance, d’entretien
ou de réparation, ainsi que lors de la recherche
de l’origine d’une panne ou d’un incident de
fonctionnement, il faut impérativement que la prise
de force soit débrayée, que le moteur soit coupé et la
clé de contact retirée.
2 - Contrôler régulièrement le serrage des vis et des
écrous. Resserrer si nécessaire !
3 - Avantdeprocéderàdestravauxd’entretiensurune
machine en position relevée, étayer celle-ci à l’aide
d’un moyen approprié.
4 - Lors du remplacement d’une pièce travaillante,
(pale pour les distributeurs ou socs pour les semoirs),
mettre des gants de protection et n’utiliser qu’un
outillage approprié.
5 - Pourlaprotectiondel’environnement,ilestinterdit
de jeter ou de déverser les huiles, graisses et ltres en
tout genre. Les coner à des entreprises spécialisées
dans leur récupération.
6 - Avant toute intervention sur le circuit électrique,
déconnecter la source d’énergie.
7 - Les dispositifs de protection susceptibles d’être
exposés à une usure doivent être contrôlés
régulièrement. Les remplacer immédiatement s’ils
sont endommagés.
8 - Les pièces de rechange doivent répondre
aux normes et caractéristiques dénies par le
constructeur. N’utiliser que des pièces de rechange
Sulky !
9 - Avant d’entreprendre des travaux de soudure
électrique sur le tracteur ou la machine attelée,
débrancher les câbles de l’alternateur et de la
batterie.
10 - Les réparations aectant les organes sous
tension ou pression (ressorts, accumulateurs de
pression...) impliquent une qualication susante et
font appel à un outillage spécique ; aussi ne doivent-
elles être eectuées que par un personnel qualié.
11 - Tous les composants ainsi que les dispositifs de
protection, présentant un état de corrosion avancé,
doivent être immédiatement remplacés.
12 - Lors des travaux d’entretien ou de réparation,
l’opérateur devra travailler en toute sécurité et si
nécessaire utiliser des solutions adaptées et en
phase avec la législation du travail, notamment
pour le travail en hauteur.
PROTECTION DE L’UTILISATEUR
1 - Ne marchez pas sur les capots ni sur aucun autre
endroit de la machine, à l’exception des zones
(échelles, plate-forme, moyens d’accès au poste de
travail ou de réglage)
2 - Avant toute intervention sur la machine,
s’assurer que celle-ci ne peut être mise en route
accidentellement.
3 - Il est conseillé d’avoir à proximité de la main une
trousse de premier secours.
4 - Eviter tout contact avec la peau, les yeux, et la
bouche de produits tels que des lubriants, solvants,
antigels, produits de nettoyages et produits
phytopharmaceutiques.
5 - En cas d’incident, consulter immédiatement un
médecin.
6 - Respecterscrupuleusementlesindicationsportées
sur les étiquettes de sécurité des récipients des
produits utilisés.
7 - Le uide hydraulique sous pression qui s’échappe
peut avoir une force susante pour pénétrer la
peau et provoquer de graves blessures. Dans ce cas
consulter immédiatement un médecin.
8 - Lors du chargement, du réglage, de l’utilisation, de
l’entretien et du lavage de la machine, l’utilisateur
doit porter les éléments de protection individuels
adaptés aux produits utilisés avec la machine .
L’utilisateur doit être protégé par le port d’une
combinaison, des gants, des lunettes, des chaussures
de sécurité et un masque. Ces éléments de
protection doivent assurer un niveau de protection
adapté aux produits utilisés avec la machine, il faut
se référer aux prescriptions de sécurité des produits
utilisés.
PROTECTION DE L’ENVIRONNEMENT
1 - Veiller à ne pas répandre sur le sol et à ne pas jeter
dans les égouts les graisses usagées et les substances
telles que les huiles, les graisses, ou les reliquats de
produits après usage.
2 - Il est interdit de stocker, d’abandonner, de
déposer dans un milieu naturel ou de brûler les
pneumatiques. Rapportez-les à un distributeur ou à
un collecteur agréé.
3 - Intervenir lorsque les conditions météorologiques
sont favorables à l’ecacité maximale du produit
phytosanitaire utilisé en limitant au maximum
l’impact de ce dit produit sur l’environnement.
FR

GENERAL SAFETY REGULATIONS
Every time the tractor/machine assembly is to be
started up and used, you should ensure beforehand
that it complies with current legislation on safety at
work and Road Trac regulations.
GENERAL
1 - In addition to the instructions contained in this
manual, legislation relating to safety instructions
and accident prevention should be complied with.
2 - Warnings axed to the machine give indications
regarding safety measures to be observed and help
to avoid accidents.
3 - When travelling on public roads, abide by the
provisions of the Highway Code.
4 - Before starting work, it is essential that the user
familiarizes himself with the control and operating
elements of the machine and their respective
functions. When the machine is running, it may be
too late.
5 - The user should avoid wearing loose clothing
which may be caught up in the moving parts.
6 - We recommend using a tractor with a safety cab
or roll bar conforming to standards in force.
7 - Before starting up the machine and beginning
work, check the immediate surroundings,
particularly for children. Make sure that visibility is
adequate. Clear any persons or animals out of the
danger zone.
8 - It is strictly forbidden to transport any persons
or animals on board the machine whether it is in
operation or not.
9 - The machine should only be coupled up to the
tractor at the specially provided towing points and in
accordance with applicable safety standards.
10 - Extreme care must be taken when coupling or
uncoupling the machine from the tractor.
11 - Before hitching up the machine, ensure that
the front axle of the tractor is suciently weighted.
Ballast weights should be tted to the special
supports in accordance with the instructions of the
tractor manufacturer.
12 - Do not exceed the maximum axle weight or the
gross vehicle weight rating.
13 - Do not exceed the maximum authorized
dimensions for using public roads.
14 - Before entering a public road, ensure that the
protective and signalling devices (lights, reectors,
etc.) required by law are tted and working properly.
Replace burnt out bulbs with the same types and
colours.
15 - All remote controls (cords, cables, rods, hoses,
etc.) must be positioned so that they cannot
accidentally set o any manoeuvre which may cause
an accident or damage.
16 - Before entering a public road, place the machine
in the transport position, in accordance with the
manufacturer’s instructions.
17 - Never leave the driver’s position whilst the
tractor is running.
18 - The speed and the method of operation must
always be adapted to the land, roads and paths.
Avoid sudden changes of direction under all
circumstances.
19 - Precision of the steering, tractor adhesion, road
holding and eectiveness of the braking mechanism
are inuenced by factors such as the weight and nature
of the machine being towed, the front axle stage and the
state of the land or path. It is essential, therefore, that
the appropriate care is taken for each situation.
20 - Take extra care when cornering, taking account
of the overhang, length, height and weight of the
machine or trailer being towed.
21 - Before using the machine, ensure that
all protective devices are tted and in good
condition. Damaged protectors should be replaced
immediately.
22 - Before using the machine, check that nuts and
screws are tight, particularly those for attaching
tools (discs, ickers, deectors, etc.). Tighten if
necessary.
23 - Do not stand in the operating area of the
machine.
24 - Caution! Be aware of any crushing and shearing
zones on remote-controlled and particularly
hydraulically-controlled parts.
25 - Before climbing down from the tractor, or before
any operation on the machine, turn o the engine,
remove the key from the ignition and wait until all
moving parts have come to a standstill.
26 - Do not stand between the tractor and the
machine until the handbrake has been applied and/
or the wheels have been wedged.
27 - Before any operation on the machine, ensure
that it cannot be started up accidentally.
28 - Do not use the lifting ring to lift the machine
when it is loaded.
29 - The height of your machine and its metal
construction mean that you must take precautions
to avoid any electrical risks:
1- Check that the height of your machine is lower
than the height of the electrical lines under which
the machine must pass
a. Up to 1kV : 1 m
b. From 1 to 110 kV : 2 m
c. From110 to 220 kV : 3 m
d. From 220 to 380 kV : 4 m
e. Over 380 kV : See the specic
instructions
2- To avoid any lightning risks, check the weather
forecast and avoid working when the conditions
are dangerous, avoid high points and move away
from and do not touch metal structures (pylons,
grilles, posts, fences, etc.).
30 - As your equipment’s tyres are pressurised, they
constitute a real risk to the user. They must only be
handled, repaired or tted by technicians who are
trained in these operations. For ination, refer to the
appropriate chapter and section.
31 - The machine must be placed on the ground
when carrying out an interventions on it (loading,
adjustment, lifting, etc.).
32 - If your machine is equipped with a braked road
axle, then always make sure that the braking source
available on the tractor is fully adapted to the type
of braking necessary on your machine (hydraulic/
pneumatic).
PROPER USE OF THE MACHINE
1 - In all situations, the machine must only be used
by one person.
2 - The machine must only be used for tasks for
which it has been designed. The manufacturer will
not be liable for any damage caused by using the
machine for applications other than those specied
by the manufacturer.
3 - Using the machine for purposes other than those
originally intended will be done so entirely at the
user’s risk.
4 - Proper use of the machine also implies:
- complying with instructions on use, care and
maintenance provided by the manufacturer;
- using only original or manufacturer recommended
spare parts, equipment and accessories.
5 - The machine must only be operated, maintained
and repaired by competent persons, familiar with
the specications and methods of operation of the
machine. These persons must also be informed of
the dangers to which they may be exposed.
6 - The user must strictly abide by current legislation
regarding:
- accident prevention;
- safety at work (Health and Safety Regulations);
- transport on public roads (Road Trac
Regulations).
Strict compliance with warnings axed to the
machine is obligatory.
7 - The owner of the equipment shall become liable
for any damage resulting from alterations made to
the machine by the user or any other person, without
the prior written consent of the manufacturer.
8 - The noise emission value measured at the driving
position with the cab closed (level of acoustic
pressure) is 75 dB(A).
Measuring device: SL 401
Position of the microphone placed in accordance
with Paragraph B 2.6 of Appendix B of NF EN ISO
4254-1.
This level of acoustic pressure essentially depends on
the tractor used.
HITCHING
1 - During hitching and unhitching phases and if
your machine is equipped with a stand, ensure that
the stand locking pin is properly locked.
2 - When hitching or unhitching the machine from
the tractor, place the control lever of the hydraulic lift
in such a position that the lifting mechanism cannot
be activated accidentally.
3 - When hitching the machine to the three-point
lifting mechanism of the tractor, ensure that the
diameters of the pins or gudgeons correspond to the
diameter of the tractor ball joints.
4 - Caution! In the three-point lifting zone, there may
be a danger of crushing and shearing.
5 - Do not stand between the tractor and the
machine whilst operating the external lift control
lever.
6 - When in transport, lifting mechanism stabilizer
bars must be tted to the machine to avoid oating
and side movement.
7 - When transporting the machine in the raised
position, lock the lift control lever.
Safety regulations
ГThese symbols are used in these instructions every time recommendations are provided concerning your safety, the safety of
others or the correct operation of the machine.
ГThese recommendations must be given to all users of the machine.
EN
Operating tipRisk of accident
Risk of damage
to the machine

8 - Never unhitch the machine when the hopper is
lled.
DRIVE EQUIPMENT
(Power take-o and universal drive shafts)
1 - Only use universal drive shafts supplied with the
machine or recommended by the manufacturer.
2 - Power take-o and universal drive shaft guards
must always be tted and in good condition.
3 - Ensure that the tubes of the universal drive shafts
are properly guarded, both in the working position
and in the transport position.
4 - Before connecting or disconnecting a universal
drive shaft, disengage the power take-o, turn o
the engine and re-move the key from the ignition.
5 - If the primary universal drive shaft is tted with
a torque limiter or a free wheel, these must be
mounted on the machine power take-o.
6 - Always ensure that universal drive shafts are
tted and locked correctly.
7 - Always ensure that universal drive shaft guards
are immobilized in rotation using the specially
provided chains.
8 - Before engaging power take-o, ensure that
the speed selected and the direction of rotation of
the power take-o comply with the manufacturer’s
instructions.
9 - Before engaging power take-o, ensure that no
persons or animals are close to the machine.
10 - Disengage power take-o when the
universal drive shaft angle limits laid down by the
manufacturer are in danger of being exceeded.
11 - Caution! When power take-o has been
disengaged, moving parts may continue to rotate
for a few moments. Do not approach until they
have reached a complete standstill.
12 - On removal from the machine, rest the universal
drive shafts on the specially provided supports.
13 - After disconnecting the universal drive shafts
from the power take-o, the protective cap should
be tted to the power take-o.
14 - Damaged power take-o and universal drive
shaft guards must be replaced immediately.
HYDRAULIC CIRCUIT
1 - Caution! The hydraulic circuit is pressurized.
2 - When tting hydraulic motors or cylinders,
ensure that the circuits are connected correctly in
accordance with the manufacturer’s guidelines.
3 - Before tting a hose to the tractor’s hydraulic
circuit, ensure that the tractor-side and machine-
side circuits are not pressurized.
4 - The user of the machine is strongly
recommended to identify the hydraulic couplings
between the tractor and the machine in order to
avoid wrong connection. Caution! There is a danger
of reversing the functions (for example: raise/lower).
5 - Check hydraulic hoses once a year:
. Damage to the outer surface
. Porosity of the outer surface
. Deformation with and without pressure
. State of the ttings and seals
The maximum working life for hoses is 6 years.
When replacing them, ensure that only hoses with
the specications and grade recommended by the
machine manufacturer are used.
6 - When a leak is found, all necessary precautions
should be taken to avoid accidents.
7 - Pressurized liquid, particularly hydraulic circuit
oil, may cause serious injury if it comes into contact
with the skin. If the case of injury, consult a doctor
immediately. There is a risk of infection.
8 - Before any operation on the hydraulic circuit,
lower the machine, release the pressure from the
circuit, turn o the engine and remove the key from
the ignition.
MAINTENANCE
1 - Before commencing any maintenance, servicing
or repair work, or before attempting to locate the
source of a breakdown or fault, it is essential that the
power take-o is disengaged, the engine turned o
and the key removed from the ignition.
2 - Check regularly that nuts and screws are not
loose. Tighten if necessary.
3 - Before carrying out maintenance work on a
raised machine, prop it up using appropriate means
of support.
4 - When replacing a working part (fertilizer
spreader blade or seed drill coulter), wear protective
gloves and only use appropriate tools.
5 - To protect the environment, it is forbidden to
throw away oil, grease or lters of any kind. Give
them to specialist recycling rms.
6 - Before operating on the electric circuit,
disconnect the power source.
7 - Protective devices likely to be exposed to wear
and tear should be checked regularly. Replace them
immediately if they are damaged.
8 - Spare parts should comply with the standards
and specications laid down by the manufacturer.
Only use the manufacturer’s spare parts.
9 - Before commencing any electric welding work
on the tractor or the towed machine, disconnect the
alternator and battery cables.
10 - Repairs aecting parts under stress or pressure
(springs, pressure accumulators, etc.) should be
carried out by suitably qualied engineers with
special tools.
11 - All components and protection mechanisms
that show signs of severe corrosion must be replaced
immediately.
12 - During servicing or repair work, the operator is
required to work safely and, where necessary, use
suitable solutions in line with applicable labour
laws, especially as regards work at heights.
USER PROTECTION
1 - Do not walk on the covers or on any other part
of the machine except for zones (ladders, platforms
other resources) to access or adjust the workstation
2 - Before carrying out any work on the machine,
make sure it cannot be started up accidentally.
3 - We recommend keeping a rst aid kit nearby.
4 - Prevent any products such as lubricants,
solvents, anti-freeze, cleaning products and phyto-
pharmaceutical products from coming into contact
with the skin, eyes or mouth.
5 - Contact a doctor immediately if an incident
occurs.
6 - Follow to the letter the indications on the safety
labels of the products used.
7 - Escaping pressurised hydraulic uid may have
enough force to penetrate the skin and cause serious
injury. Contact a doctor immediately if this happens.
8 - Users must wear personal protective equipment
adapted to the products used with the machine
when loading, adjusting, servicing and washing the
machine. Users must protect themselves by wearing
overalls, gloves, glasses, safety shoes and a mask.
These protective elements must provide a suitable
level of protection for the products used with the
machine; refer to the safety instructions of the
products used.
ENVIRONMENTAL PROTECTION
1 - Make sure that you do not spill onto the ground
or discard into the sewers any used grease and
substances such as oil, grease or product remaining
after use.
2 - It is prohibit to store, abandon, dump in the
natural environment or burn tyres. Take them to a
distributor or an approved collector.
3 - Work when the weather conditions favour
maximum eectiveness of the phytosanitary
product used, limiting the impact of this product on
the environment as much as possible.
EN

EALLGEMEINE SICHERHEITSVORSCHRIFTEN
Vor jeder Benutzung und Inbetriebsetzung der
Schlepper-Maschine-Einheit kontrollieren, ob sie
den Sicherheitsvorschriften und den Vorschriften der
Straßenverkehrsordnung entsprechen.
ALLGEMEINES
1 - Zusätzlich zu den in diesem
Handbuch enthaltenen Anweisungen die
Gesetzgebung bezüglich der Sicherheits- und
Unfallverhütungvorschriften einhalten.
2 - Die auf der Maschine angebrachten
Warnungen informieren über die einzuhaltenden
Sicherheitsmaßnahmen und tragen zur
Unfallverhütung bei.
3 - Im Straßenverkehr die Straßenverkehrsordnung
einhalten.
4 - Vor Arbeitsbeginn muß sich der
Benutzer unbedingt mit den Antriebs- und
Bedienungsorganen der Maschine und ihren
jeweiligen Funktionen vertraut machen. Während
der Arbeit ist es dafür zu spät.
5 - Weite Kleidungsstücke, die in sich bewegende
Teile geraten könnten, vermeiden.
6 - Es empehlt sich, gemäß den gültigen
Normen einen Schlepper mit Kabine oder
Sicherheitsverstärkung zu verwenden.
7 - Vor Inbetriebsetzung und Arbeitsbeginn die
direkte Umgebung kontrollieren (Kind!). Für
ausreichende Sicht sorgen! Personen oder Tiere
aus dem Maschinengefahrenbereich entfernen
(Schutzvorrichtungen!).
8 - Der Transport von Personen oder Tieren auf der
Maschine ist während der Arbeit oder beim Fahren
streng verboten.
9 - Die Maschine darf gemäß den geltenden
Sicherheitsnormen nur an den dafür vorgesehenen
Kupplungspunkten angehängt werden.
10 - Besondere Vorsicht ist beim An- und Abbau der
Maschine am Schlepper geboten.
11 - Vor Anhängen der Maschine kontrollieren,
ob der Ballast des Schleppers genügt. Die
Ballastelemente müssen gemäß den Vorschriften
des Schlepperherstellers auf den dafür vorgesehenen
Haltern angebracht werden.
12 - Die maximale Achslast und das zulässige
Gesamtgewicht einhalten.
13 - Das für den Straßenverkehr maximal zulässige
Außenmaß einhalten.
14 - Vor Straßenbenutzung die Schutzvorrichtungen
und Signalisierungsvorrichtungen (Licht- und
Rückstrahlelemente) anbringen und ihre Funktion
prüfen. Die defekten Glühbirnen durch Modelle
identischer Art und Farbe ersetzen.
15 - Alle Fernsteuerungen (Seil, Kabel, Stange,
Schlauch) müssen so positioniert sein, daß sie nicht
ungewollt betätigt werden und dadurch Unfälle oder
Schäden hervorrufen können.
16 - Vor Benutzung der Straße die Maschine gemäß
Herstelleranweisungen in Transportstellung bringen.
17 - Fahrersitz nie bei laufender Maschine verlassen.
18 - Fahrgeschwindigkeit und -weise müssen immer
dem Gelände, den Straßen und Wegen angepaßt
sein. Auf alle Fälle plötzliche Richtungsänderungen
vermeiden.
19 - Die Präzision der Lenkung, die Bodenhaftung
des Schleppers, die Straßenlage und die Wirksamkeit
der Bremsvorrichtungen werden beeinußt von
Faktoren wie: Gewicht und Art der angebauten
Maschine, Belastung der Vorderachse, Zustand des
Geländes oder der Fahrbahn. Die den Bedingungen
entsprechenden Vorsichtsmaßnahmen einhalten.
20 - Besondere Vorsicht ist in Kurven geboten.
Schwerpunktlage, Länge, Höhe und Gewicht der
Maschine oder des Anhängers berücksichtigen.
21 - Vor jeder Benutzung der Maschine kontrollieren,
ob alle Schutzvorrichtungen angebracht und in
gutem Zustand sind. Bei Beschädigung sofort
austauschen.
22 - Vor jeder Benutzung kontrollieren, ob alle
Schrauben und Muttern fest angezogen sind,
insbesondere die, mit denen die Geräte befestigt sind
(Scheiben, Paletten, Schirme...). Notfalls anziehen.
23 - Sich nicht im Manövrierbereich der Maschine
aufhalten.
24 - Vorsicht! Auf den Fernsteuerungsorganen,
insbesondere auf denen mit hydraulischem
Regelkreis, kann es Stauch- und Abscherzonen
geben.
25 - Vor Verlassen des Schleppers oder vor jedem
Eingri auf der Maschine Motor abschalten,
Zündschlüssel abziehen und völligen Stillstand aller
bewegten Teile abwarten.
26 - Sich nicht zwischen Schlepper und Maschine
aufhalten, ohne zuvor die Parkbremse angezogen
und/oder Keile unter die Räder gelegt zu haben.
27 - Vor jedem Eingri an der Maschine
kontrollieren, ob diese nicht ungewollt in Betrieb
gesetzt werden kann.
28 - Die Aufhängöse nicht zum Heben der gefüllten
Maschine benutzen.
29 - Aufgrund der Höhe Ihrer Maschine sowie ihrer
metallischen Zusammensetzung sind bestimmte
Vorsichtsmaßnahmen geboten, um alle elektrischen
Risiken auszuschließen:
1- Stellen Sie sicher, dass die Höhe Ihrer Maschine
niedriger ist als die Höhe der elektrischen
Freileitungen, unter denen die Maschine eingesetzt
werden soll. Dabei gelten folgende Regeln:
a. bis zu 1kV Spannung : 1 m
b. von 1 bis 110 kV Spannung : 2 m
c. von 110 bis 220 kV Spannung : 3 m
d. von 220 bis 380 kV Spannung : 4 m
e. über 380 kV Spannung : Beachten Sie die
spezischen Anweisungen
2- Um jegliches Risiko durch Blitzschlag zu
vermeiden, achten Sie auf die Wetterbedingungen
und vermeiden Sie Arbeiten bei gefährlichen
Bedingungen, meiden Sie hohe Punkte, halten Sie
Abstand und berühren Sie keine Metallstrukturen
(Masten, Tore, Pfosten, Zäune usw.)
30 - Die Reifen Ihres Geräts stehen unter Druck und
stellen eine echte Gefahr für den Benutzer dar. Die
Handhabung, Reparatur oder Montage von Reifen
sollte nur von geschulten Technikern durchgeführt
werden. Wie Sie die Reifen mit Luft befüllen,
können Sie im entsprechenden Kapitel unter dem
zugehörigen Abschnitt nachlesen.
31 - Die Maschine muss vor jeglichen Arbeiten
(Beladen, Einstellen, Reinigen, …) unbedingt auf den
Boden abgestellt werden.
32 - Ist Ihre Maschine mit einer gebremsten
Straßenachse ausgestattet, dann muss
gewährleistet sein, dass die am Traktor vorhandene
Bremsvorrichtung für die an Ihrer Maschine
erforderliche Bremsart (hydraulisch / pneumatisch)
geeignet ist.
BESTIMMUNGSGEMÄSSE VERWENDUNG DER
MASCHINE
1 - Die Maschine darf nur von einer Person bedient
werden. Dies gilt für alle Einsatzsituationen.
2 - Die Maschine darf nur für die Arbeiten eingesetzt
werden, für die sie geplant ist. Bei Beschädigung
der Maschine infolge einer nicht vom Hersteller
spezizierten Benutzung ist dieser nicht haftbar.
3 - Jede nicht der ursprünglichen Bestimmung der
Maschine entsprechende Benutzung erfolgt auf
Rechnung und Gefahr des Benutzers.
4 - Die bestimmungsgemäße Verwendung der
Maschine setzt ebenfalls voraus:
- die Einhaltung der vom Hersteller
verordneten Benutzungs-, Wartungs- und
Instandsetzungsvorschriften,
- die ausschließliche Verwendung von
Originalersatzteilen, Originalausrüstungen und
Originalzubehör oder von Teilen, die vom Hersteller
empfohlen sind.
5 - Die Maschine darf nur von kompetenten, mit den
technischen Daten und Benutzungsanweisungen
der Maschine vertrauten Personen benutzt, gewartet
und repariert werden, die über die Risiken informiert
sind, denen sie ausgesetzt sein könnten.
6 - Streng die gültige Reglementierung einhalten
bezüglich:
- der Unfallverhütung,
- der Arbeitssicherheit (Arbeitsgesetzbuch)
- des Straßenverkehrs (Straßenverkehrsordnung).
Die auf der Maschine angebrachten Warnungen
berücksichtigen.
7 - Der Hersteller haftet nicht für Schäden, die durch
Abänderungen entstehen, die vom Benutzer selbst
oder von Dritten ohne schriftliche Genehmigung an
der Maschine vorgenommen wurden.
8 - Der am Fahrersitz bei geschlossener
Kabine gemessene Geräuschemissionswert
(Schalldruckpegel) beträgt 75 dB(A).
Messgerät: SL 401
Position Mikrofons nach Absatz B.2.6 Anhang B der
Norm EN ISO 4254-1.
Dieser Schalldruckpegel ist im Wesentlichen vom
verwendeten Schleppertyp abhängig.
ANHÄNGUNG
1 - Wenn Ihre Maschine mit einer Abstellstütze
ausgerüstet ist, achten Sie beim An- und Abbau
darauf, dass der Verriegelungsbolzen der
Abstellstütze ordnungsgemäß verriegelt ist.
2 - Beim An- und Abkuppeln der Maschine am
Schlepper, den Steuerhebel des Hydraulikkrafthebers
so stellen, daß der Hub-vorgang nicht unerwartet
ausgelöst werden kann.
3 - Beim Anhängen der Maschine am
Dreipunktkraftheber des Schleppers darauf
achten, daß die Spindel- oder Zapfendurchmesser
dem Durchmesser der Schlepperkugelgelenke
entsprechen.
4 - Vorsicht! Im Dreipunkt-Hubbereich bestehen
Stauch- und Abscherrisiken!
Sicherheitsvorschriften
ГIn der Anweisung werden diese Zeichen in Verbindung mit Empfehlungen für Ihre Sicherheit und der anderer sowie die gute Funktion der Maschine
verwendet.
ГJeder Benutzer dieser Maschine muß diese Vorschriften genau kennen
DE
Hinweis zur
Erleichterung der
Arbeit
Verletzungsgefahr
Gefahr der
Beschädigung
der Maschine

5 - Sich bei Betätigung des äußeren Kraftheber-
Steuerhebels nicht zwischen Schlepper und
Maschine aufhalten.
6 - Beim Transport muß die Maschine durch die
Versteifungsstreben des Krafthebers zur Vermeidung
von Unwucht und seitlicher Pendelung stabilisiert
werden.
7 - Beim Transport der Maschine in angehobener
Stellung den Kraftheber-Steuerhebel blockieren.
8 - Maschine niemals bei gefülltem Tank abkuppeln.
ANTRIEBSORGANE
(Zapfwelle und Gelenkwellen-Antrieb)
1 - Nur die mit der Maschine gelieferte oder vom
Konstrukteur empfohlene Gelenkwelle verwenden.
2 - Die Schutzvorrichtungen der Zapfwellen und
Gelenkwellen müssen immer angebracht und in
gutem Zustand sein.
3 - Auf die richtige Überlappung der
Gelenkwellenrohre sowohl in Arbeits- als auch in
Transportstellung achten.
4 - Vor Anschließen oder Abziehen einer Gelenkwelle
die Zapfwelle auskuppeln, den Motor abschalten
und den Zündschlüssel abziehen.
5 - Ist die Primärkardanwelle mit einem
Drehmomentbegrenzer oder einer Freilaufkupplung
ausgestattet, müssen diese unbedingt auf der
Zapfwelle der Maschine montiert sein.
6 - Immer auf die korrekte Montage und
Verriegelung der Kardanantriebe achten.
7 - Immer darauf achten, daß die
Schutzvorrichtungen der Gelenkwellen mit den
dafür vorgesehenen Ketten gegen Verdrehen
gesichert sind.
8 - Vor Kuppeln der Zapfwelle prüfen, ob die
gewählte Drehzahl und die Drehrichtung der
Zapfwelle den Vorschriften des Herstellers
entsprechen.
9 - Vor Kuppeln der Zapfwelle kontrollieren, ob sich
keine Personen oder Tiere in Nähe der Maschine
benden.
10 - Die Zapfwelle auskuppeln, wenn Gefahr
besteht, daß die vom Hersteller vorgeschriebenen
Grenzen des Gelenkwellenwinkels überschritten
werden.
11 - Vorsicht! Nach Auskuppeln der Zapfwelle
können Teile der Maschine noch einige Zeit
nachlaufen. Sich ihnen nie vor völligem Stillstand
nähern.
12 - Bei Abbau der Maschine die Gelenkwellen auf
den dafür vorgesehenen Haltern ablegen.
13 - Nach Abziehen der Gelenkwelle von
der Schlepperzapfwelle muß diese mit ihrer
Schutzkappe bedeckt werden.
14 - Schadhafte Schutzvorrichtungen der Zapfwelle
und der Gelenkwellemüssen sofort ausgewechselt
werden.
HYDRAULIKLEITUNG
1 - Vorsicht! Die Hydraulikleitung steht unter Druck.
2 - Bei Montage von Zylindern oder
Hydraulikmotoren auf den korrekten Anschluß
gemäß Anweisungen des Herstellers achten.
3 - Vor Anschluß eines Schlauches an der
Hydraulikleitung des Schleppers dafür sorgen, daß
die schlepper- und maschinenseitigen Leitungen
nicht unter Druck stehen.
4 - Dem Benutzer der Maschine wird zur Vermeidung
falscher Anschlüsse dringend geraten, die
Kennzeichnungen auf den Hydraulikanschlüssen
zwischen Schlepper und Maschine zu beachten, da
sonst die Gefahr einer Funktionsumkehrung besteht.
(z.B.: Heben/Senken).
5 - Einmal im Jahr die Hydraulikschläuche
kontrollieren auf:
. Beschädigung der Außenschicht
. Porosität der Außenschicht
. Verformung ohne Druck und unter Druck
. Zustand der Verbindungen und Dichtungen.
Die maximale Benutzungsdauer der Schläuche
ist 6 Jahre. Beim Auswechseln darauf achten,
daß nur Schläuche verwendet werden, deren
Eigenschaften und Qualität den Vorschriften des
Maschinenkonstrukteurs entsprechen.
6 - Bei Feststellung einer undichten Stelle alle
Vorsichtsmaßnahmen zur Unfallverhütung treen.
7 - Eine unter Druck stehende Flüssigkeit,
insbesondere das Öl der Hydraulikleitung, kann
die Haut durchdringen und schwere Verletzungen
verursachen! Bei Verletzungen sofort Arzt
Konsultieren; Infektionsgefahr!
8 - Vor jedem Eingri in die Hydraulikanlage
Maschine ablassen, Anlage drucklos schalten, Motor
abstellen und Zündschlüssel abziehen.
WARTUNG
1 - Vor Instandsetzungs-, Wartungs- oder
Reparaturarbeiten sowie bei Ermitteln einer Pannen-
oder Betriebsstörungsquelle muß die Zapfwelle
ausgekuppelt, der Motor abgeschaltet und der
Zündschlüssel abgezogen sein.
2 - Regelmäßig kontrollieren, ob Schrauben und
Muttern fest angezogen sind. Notfalls anziehen.
3 - Vor Wartung einer Maschine in angehobener
Stellung diese mit einem geeigneten Mittel
abstützen.
4 - Beim Austausch eines Funktionsteiles (Schaufel
bei Streuern oder Schare bei Drillmaschinen)
Schutzhand-
schuhe tragen und nur geeignete Werkzeuge
benutzen.
5 - Zum Schutz der Umwelt ist es verboten, Öl, Fett
und Filter jeder Art wegzuwerfen oder auszugießen.
Sie sind von darauf spezialisierten Unternehmen zu
entsorgen.
6 - Vor Eingri an der elektrischen Leitung die
Stromzufuhr unterbrechen.
7 - Verschleiß ausgesetzte Schutzvorrichtungen
müssen regelmäßig kontrolliert werden. Sie sofort
austauschen, wenn schadhaft.
8 - Ersatzteile müssen den vom Konstrukteur
festgelegten Normen und Kennwerten entsprechen.
Nur Ersatzteile des Herstellers verwenden!
9 - Vor Elektroschweißarbeiten am Schlepper
oder der angehängten Maschine die Kabel des
Wechselstromgenerators und der Batterie abziehen.
10 - Reparaturen an Organen, die unter Spannung
oder Druck stehen (Federn, Druckspeicher, usw...)
setzen eine ausreichende Qualikation voraus und
erfordern Werkzeuge; sie dürfen daher nur von
qualiziertem Personal durchgeführt werden.
11 - Alle Komponenten sowie Schutzvorrichtungen,
die sich in einem Zustand fortgeschrittener
Korrosion benden, müssen unverzüglich
ausgetauscht werden.
12 - Bei Wartungs- oder Reparaturarbeiten muss
der Bediener in völliger Sicherheit arbeiten und
gegebenenfalls auf geeignete Arbeitsmittel
zurückgreifen, die den arbeitsrechtlichen
Vorschriften entsprechen. Dies gilt insbesondere für
Arbeiten in der Höhe.
SCHUTZ DES BENUTZERS
1 - Die Abdeckungen oder andere Bereiche der
Maschine nicht betreten, mit Ausnahme der Zonen
(Leitern, Plattform, Zugangswege zum Arbeits- oder
Einstellungsplatz)
2 - Vor jedem Eingri an der Maschine sicherstellen,
dass sie nicht versehentlich eingeschaltet werden
kann.
3 - Es wird empfohlen, einen Erste-Hilfe-Kasten zur
Hand zu haben.
4 - Jeden Kontakt von Produkten wie Schmiermittel,
Lösungsmittel, Frostschutzmittel, Reinigungsmittel
und Panzenschutzmittel mit Haut, Augen und
Mund vermeiden.
5 - Falls es zu einem Kontakt kommt, sofort einen
Arzt aufsuchen.
6 - Die Anweisungen auf den Sicherheitsetiketten
der Behälter der verwendeten Produkte sind streng
einzuhalten.
7 - Die unter Druck stehende Hydrauliküssigkeit
kann mit so viel Kraft austreten, dass sie durch
die Haut dringen und schwere Verletzungen
verursachen kann. In diesem Fall sofort einen Arzt
aufsuchen.
8 - Beim Laden, Einstellen, Verwenden,
Instandhalten und Waschen der Maschine
muss der Benutzer für die mit der Maschine
verwendeten Produkte geeignete persönliche
Schutzausrüstungselemente tragen. Der Benutzer
muss durch einen Overall, Handschuhe, Brille,
Sicherheitsschuhe und Maske geschützt sein. Diese
Schutzelemente müssen einen ausreichenden
Schutz für die mit der Maschine verwendeten
Produkte sicherstellen. Die Sicherheitsvorschriften
der verwendeten Produkte sind zu beachten.
UMWELTSCHUTZ
1 - Darauf achten, Altfette und Stoe wie Öl, Fett
oder Produktreste nach der Verwendung nicht auf
den Boden oder in die Kanalisation zu schütten.
2 - Es ist verboten, Reifen in der Natur zu lagern, zu
entsorgen oder abzustellen oder sie zu verbrennen.
Sie müssen bei einem zugelassenen Händler oder
einer Sammelstelle abgegeben werden.
3 - Das Panzenschutzmittel nur bei günstigen
Wetterbedingungen für eine maximale Wirksamkeit
anwenden, um die Auswirkung dieses Produkts auf
die Umwelt so gering wie möglich zu halten
DE

LIVRAISON P ages
• A Préconisation d’utilisation 1417
• B Livraison 1819
• C Manutention 1819
MISE EN ROUTE P ages
• A Attelage à l’outil de travail du sol 2021
• B Montage du capteur d’arrêt doseur 2223
• C Branchement Hydraulique 2425
• D Branchement Isobus 2627
• E Contrôle tracteur 2829
• F Déplacement routier 3435
DÉCOUVERTE DU LOGICIEL DE LA MACHINE WISO Pages
• A Présentation du logiciel 3637
• B Menu «HOME» 3845
• C Menu «JOB SETTINGS» 4647
• D Menu «INFORMATION» 4849
• E Menu «ADVANCED SETTINGS» 5051
PARAMÉTRAGE ADVANCED SETTINGS DU LOGICIEL WISO Pages
• A Réglages machine - Conguration des trémies 5253
• B Réglages machine - Conguration distribution 5455
• C Réglages machine - Fonctions bout de champs 5657
• D Réglages machine - Fonction agriculture de précision 5859
• E Réglages machine - Réglages alarmes 6061
• F Maintenance - Simulation système 6263
UTILISATION ET RÉGLAGES DE LA MACHINE Pages
• A Réglage du capteur d’arrêt doseur 6465
• B Remplissage de la trémie 6667
• C Capteur de n de trémie 6869
• D Réglage de la dose 7079
• E Turbine 8081
• F Réglages de la ligne de semis Unisoc (20Kg) 8283
• G Réglages de la ligne de semis Twindisc (50Kg) 8493
• H Réglages de la ligne de semis Cultidisc (100Kg) 9497
• I Réglage de la herse de recouvrement 9899
• J Jalonnage 100105
• K Semis matriciel 106107
• L Utilisation d’engrais 108111
• M Contrôleur de semis (option) 112113
ENTRETIEN P ages
• A Vérications 118119
• B Vidange 120121
• C Nettoyage 122123
• D Nettoyage de l’injecteur 124125
• E Démontage - Remontage du doseur 126127
• F Graissage 128129
• G Remisage 128129
• H Contrôle d’usure des disques 130131
• I Remplacement des pièces d’usure 132133
• J Fusibles et système de protection 134135
EQUIPEMENTS P ages
• A Traceurs 136137
• B Relevage hydraulique 138139
• C Jalonneurs de prélevée 138139
• D Ouverture électrique de la trémie 140141
• E Actionneur de tête de distribution 142143
• F Kit de propreté et de protection de l’utilisateur 144145
• G Eclairage de trémie et phares de travail 144145
• H Pilotage de la profondeur de semis depuis la cabine (Twindisc) 144145
• I Décrottoir de roue plombeuse 146147
• J Racleur de disque carbure 146147
• K Contrôleur de semis 148149
• L Bouchons de tête 154155
CARACTÉRISTIQUES P ages
• A Positions Autocollants 156157
• B Caractéristiques techniques 158159
DIAGNOSTIC P ages
• A Alarmes 164165
Lire attentivement la notice avant l’utilisation. En français suivre le symbole FR
Français SOMMAIRE
1
2
3
4
5
6
7
8
9

DELIVERY P ages
• A Recommendations for use 1417
• B Delivery 1819
• C Handling 1819
STARTUP P ages
• A Hitching to the cultivator 2021
• B Doser stop sensor mounting 2223
• C Hydraulic Connection 2425
• D Isobus connection 2627
• E Tractor control 3031
• F Road transport 3435
WISO MACHINE SOFTWARE DISCOVERY Pages
• A Software presentation 3637
• B «HOME» Menu 3845
• C «JOB SETTINGS» Menu 4647
• D «INFORMATION» Menu 4849
• E «ADVANCED SETTINGS» Menu 5051
WISO MACHINE ADVANCED SETTINGS CONFIGURATION Pages
• A Machine settings - Hopper conguration 5253
• B Machine settings - Distribution conguration 5455
• C Machine settings - End of eld functions 5657
• D Machine settings - Precision agriculture function 5859
• E Machine settings - Alarm settings 6061
• F Maintenance - System simulation 6263
MACHINE USE AND SETTINGS Pages
• A Doser stop sensor adjustment 6465
• B Filling the hopper 6667
• C End of hopper sensor 6869
• D Dose setting 7879
• E Fan 8081
• F Unisoc seeding line settings (20Kg) 8283
• G Twindisc seeding line settings (50Kg) 8493
• H Cultidisc seeding line settings (100Kg) 9497
• I Adjusting the covering harrow 9899
• J Tramlining 100105
• K Matrix seeding 106107
• L Use of fertilisers 108111
• M Seeding controller (optional) 114115
MAINTENANCE P ages
• A Checks 118119
• B Emptying 120121
• C Cleaning 122123
• D Injector cleaning 124125
• E Removing-reinstalling the doser 126127
• F Lubrication 128129
• G Storage 128129
• H Disk wear check 130131
• I Wearing part replacement 132133
• J Fuses and protection system 134135
ACCESSORIES P ages
• A Markers 136137
• B Hydraulic lifting 138139
• C Sampling tramlines 138139
• D Electric hopper opening 140141
• E Distribution head actuator 142143
• F Cleanliness and user protection kit 144145
• G Hopper lighting and working lights 144145
• H Seed depth control from the cab (Twindisc) 144145
• I Depth wheel scraper 146147
• J Carbon disk scraper 146147
• K Seed controller 150151
• L Head plugs 154155
CHARACTERISTICS P ages
• A Sticker positions 156157
• B Technical specications 160161
DIAGNOSTIC P ages
• A Alarm 166167
Read the manual carefully before use. For English follow the symbol. EN
English CONTENTS
1
2
3
4
5
6
7
8
9

LIEFERUNG S eite
• A Bedienungsempfehlungen 1417
• B Lieferung 1819
• C Handhabung 1819
INBETRIEBSETZUNG S eite
• A Anbau an das Bodenbearbeitungsgerät 2021
• B Montage des Sensors für den Dosierstopp 2223
• C Hydraulischer Anschluss 2425
• D Isobus-Anschlüsse 2627
• E Schleppersteuerung 3233
• F Straßentransport 3435
ENTDECKUNG DER MASCHINENSOFTWARE WISO Seite
• A Beschreibung der Software 3637
• B Menü «HOME» 3845
• C Menü «JOB SETTINGS» 4647
• D Menü «INFORMATION» 4849
• E Menü «ADVANCED SETTINGS» 5051
PARAMETRIERUNG DER ADVANCED SETTINGS DER SOFTWARE WISO Seite
• A Einstellung der Maschine - Konguration der Behälter 5253
• B Einstellung der Maschine - Konguration der Verteilung 5455
• C Einstellung der Maschine - Funktionen für das Feldende 5657
• D Einstellung der Maschine - Funktion Präzisionslandwirtschaft 5859
• E Einstellung der Maschine - Einstellung der Alarme 6061
• F Wartung - Simulation des Systems 6263
BEDIENUNG UND EINSTELLUNG DER MASCHINE Seite
• A Einstellung des Sensors für den Dosierstopp 6465
• B Füllen des Tanks 6667
• C Füllstandsensor 6869
• D Einstellung der Dosiermenge 7079
• E Turbine 8081
• F Einstellung des Scharsystems Unisoc (20 kg) 8283
• G Einstellung des Scharsystems Twindisc (50 kg) 8493
• H Einstellung des Scharsystems Cultidisc (100 kg) 9497
• I Einstellung des Saatstriegels 9899
• J Fahrgassenmarkierung 100105
• K Matrix-Aussaat 106107
• L Verwendung von Dünger 108111
• M Saatüberwachung (Option) 116117
WARTUNG S eite
• A Überprüfungen 118119
• B Entleeren 120121
• C Reinigung 122123
• D Reinigung des Injektors 124125
• E Ausbau und Wiedereinbau des Dosierorgans 126127
• F Schmierung 128129
• G Abstellen 128129
• H Scheibenabnutzung kontrollieren 130131
• I Austausch der Verschleißteile 132133
• J Sicherungen und Abschirmsysteme 134135
AUSRÜSTUNGEN S eite
• A Spurreißer 136137
• B Hydraulikkraftheber 138139
• C Vorauaufmarkierer 138139
• D Elektrische Önung des Behälters 140141
• E Aktuatoren am Verteilerkopf 142143
• F Schutzkleidung des Bedieners 144145
• G Behälterbeleuchtung und Arbeitsscheinwerfer 144145
• H Steuerung der Sätiefe von der Kabine aus (Twindisc) 144145
• I Radabstreifer für die Andruckrollen 146147
• J Karbidverstärkter Scheibenabstreifer 146147
• K Saatkontrolleinrichtung 152153
• L Verteilerkopfstopfen 154155
TECHNISCHE DATEN S eite
• A Sicherheitsaufkleber 156157
• B Technische Daten 162163
DIAGNOSE S eite
• A Alarm 168169
Anweisung vor Benutzung sorgfältig durchlesen. Die deutsche Fassung ist mit
gekennzeichnet. DE
Deutsch VERZEICHNIS
1
2
3
4
5
6
7
8
9

A
Livraison / Delivery / Lieferung
14

APRÉCONISATION D’UTILISATION
Le semoir est conçu et construit pour semer toutes les semences
courantes dans des situations très diérentes.
Toutefois, il est indispensable de respecter les recommandations
du constructeur et de travailler avec prudence et bon sens.
Il doit être utilisé exclusivement par du personnel qualié et
formé.
Lors de son utilisation, il est possible de rencontrer des situations
où les sols sont trop humides ou au contraire trop secs pour
pouvoir faire fonctionner correctement votre semoir.
Certaines de ces situations diciles peuvent conduire à des
dommages pour votre semoir ainsi qu’à votre sol.
Le constructeur ne peut pas être tenu pour responsable des
dommages occasionnés lors d’une utilisation inappropriée.
Toute modication de la machine opérée sans l’accord du
constructeur annule automatiquement toute garantie du
constructeur.
Les semis sur préparations simpliées doivent être pratiqués sur
un sol nivelé et fermement rappuyé avec des résidus de récolte
correctement répartis au préalable.
La présence de cailloux, rochers, souches ou autres obstacles doit
absolument être prise en compte et la conduite du semoir doit
être adaptée.
Le semis sur préparation simpliée n’est pas possible avec
toutes les lignes de semis.
Ligne de semis SEMIS SUR PRÉPARATION SIMPLIFIÉE
Unisoc Inadapté
Twindisc Possible avec prudence
Cultidisc Parfaitement adapté
ABEDIENUNGSEMPFEHLUNGEN
Die Drillmaschine ist darauf ausgelegt, alle gängigen Saatarten
unter sehr verschiedenen Voraussetzungen säen zu können.
Dazu ist es jedoch erforderlich, die Herstellerempfehlungen zu
beachten und mit Vorsicht und Vernunft vorzugehen.
Die Drillmaschine darf nur von qualiziertem Personal bedient
werden.
Beim Säen können zu feuchte bzw. zu trockene
Bodenverhältnisse auftreten, unter denen die Drillmaschine
nicht korrekt funktionieren kann.
Einige dieser heiklen Situationen können zu Beschädigungen an
der Drillmaschine oder am Boden führen.
Der Hersteller kann für Schäden durch unrichtige Verwendung
nicht verantwortlich gemacht werden.
Jede vom Hersteller nicht genehmigte Änderung des Gerätes
führt automatisch zur Annullierung der Garantie.
Die Aussaat bei vereinfachter Bodenvorbereitung muss auf
planiertem und gut angedrücktem Boden erfolgen, wobei die
verbleibenden Panzenreste vorher gut verteilt werden müssen.
Steine, Felsen, Baumstümpfen oder andere Hindernisse sind
unbedingt zu berücksichtigen. Die Führung der Drillmaschine ist
an diese Hindernisse anzupassen.
Vereinfachte Aussaatverfahren sind nicht mit allen
Scharsystemen möglich.
Saatreihe VEREINFACHTES AUSSAATVERFAHREN
Unisoc Nicht geeignet
Twindisc Mit Vorsicht möglich
Cultidisc Perfekt geeignet
ARECOMMENDATIONS FOR USE
The seed drill has been designed and constructed for drilling all
kinds of commonly used seeds in a variety of dierent situations.
Nevertheless, it is essential to follow the manufacturer’s
recommendations and to work carefully and sensibly.
It must be used only by skilled and trained operators.
It is possible that there will be occasions where the ground is
either too wet or too dry to use the drill properly.
In some of these dicult conditions, using your drill may result in
damage to the machinery or to the soil.
The manufacturer shall not be liable for any damage caused by
improper use.
Any modication to the machine that is made without the
approval of the manufacturer will automatically void the
warranty provided by the manufacturer.
Minimum tillage drilling must be carried out on level, rmly
consolidated ground where the harvest residues have been
properly incorporated beforehand.
The presence of stones, rocks, stumps or other obstacles must be
taken into account. The drill must be driven appropriately.
Seeding on simplied preparation possible with all the seed
rows.
Drilling toolbar SEEDING IN SIMPLIFIED PREPARATION
Unisoc Unsuitable
Twindisc Possible with caution
Cultidisc Perfectly suited
1
Livraison / Delivery / Lieferung
FR
EN
DE
15

A
Livraison / Delivery / Lieferung
16

La vitesse d’avancement doit être adaptée à l’état de préparation
du sol ainsi qu’à l’élément semeur qui équipe le semoir.
Unisoc = 9 Km/h Maxi
Twindisc = 12 Km/h Maxi
Cultidisc = 16 Km/h Maxi
Cependant, il est obligatoire d’adapter sa vitesse en fonction
de l’outil de travail du sol, dans ce cas consulter la notice
d’utilisation de l’outil de travail du sol. La vitesse la moins élevée
servira alors de référence.
Des variations dans les résultats des semis et leurs levées ne
peuvent être totalement exclues malgré le soin apporté par le
constructeur dans la conception et la fabrication de ce semoir,
même lors d’une utilisation conforme.
Les facteurs pouvant intervenir dans le succès des semis sont :
- Qualité des semences (enrobages, traitements, densité,
vigueur, taux de germinabilité etc.)
- Problème de structure ou d’hétérogénéité des sols, présence de
ravageurs (limaces, mulots).
- Conditions climatiques inadéquates au semis
Les réglages de votre machine doivent être contrôlés tous les Ha.
A
Die Fahrgeschwindigkeit muss an den Zustand der
Bodenbearbeitung sowie an das Säelement angepasst werden,
mit dem die Drillmaschine ausgerüstet ist.
Unisoc = max. 9 km/h
Twindisc = max. 12 km/h
Cultidisc = max. 16 km/h
Jedoch muß die Geschwindigkeit entsprechend der
Bodenbearbeitungsgeräte angepaßt werden. Dann sehen Sie
nach der Bedienungsanleitung des Bodenbearbeitungsgerät. Die
niedrigste Geschwindigkeit wird als Maßstab dienen.
Selbst bei bestimmungsgemäßer Verwendung können
Unterschiede in den Ergebnissen der Saatausbringung und des
Panzenaufgangs trotz Sorgfalt des Herstellers bei der Fertigung
dieser Sämaschine nicht völlig ausgeschlossen werden.
Die für die Aussaatqualität bei Direkteinsaat und bei
vereinfachter Bodenvorbereitung verantwortlichen Faktoren
sind sehr unterschiedlich:
- Saatqualität (Pillieren, Behandlung, Dichte, Lebenskraft,
Keimfähigkeit in Prozent usw.)
- Problem der Struktur oder der Heterogenität der Böden,
Vorkommen von Schädlingen (Schnecken, Feldmäuse).
- Die klimatischen Bedingungen für die Aussaat sind ungünstig.
Die Einstellungen Ihrer Maschine müssen nach jedem Hektar
überprüft werden.
A
The forward movement speed must be adapted to the ground
preparation condition and the seeding element with which the
seed drill is equipped.
Unisoc = 9 Km/h Maxi
Twindisc = 12 Km/h Maxi
Cultidisc = 16 Km/h Maxi
However, it’s compulsory to adapt the speed according to the
soil cultivation tool, in this case, check in the user book and the
lowest speed will be the reference
Even with proper use, variations regarding the seeds growing
and their nal results cannot be totally ruled out, despite the care
the manufacturer has given in designing and manufacturing
this seed drill.
The factors that may have an impact on the success of drilling
are:
Seed quality (coatings, treatments, density, vigour, germination
rate, etc.)
- Problems with the structure or heterogeneity of the soil,
presence of pests (slugs, eld mice).
- Weather conditions unsuitable for seeding
Your machine’s settings must be checked every Ha.
A
1
Livraison / Delivery / Lieferung
FR
EN
DE
17

B
Livraison / Delivery / Lieferung
18

BLIVRAISON
Au moment de la livraison, vérier que le semoir soit complet.
Utiliser son bon de commande comme référentiel. Chaque
accessoire doit être présent.
Seules les réclamations formulées à réception de la machine
pourront être prises en considération.
- Faire constater d’éventuels dégâts par le transporteur.
En cas de doute ou de litige, adressez-vous à votre revendeur.
En plus des accessoires optionnels listés sur votre bon de
commande, certains accessoires doivent être présents sur toutes
les machines de série :
- Un peson pour réaliser l’essai de débit
- Les béquilles
- Le manuel d’utilisation
CMANUTENTION
Manipulation au palan ou à la grue
- Pour manipuler le semoir, utiliser uniquement les anneaux
soudés prévus à cet eet.
La manipulation du semoir (Grue ou Palan) doit
toujours être réalisée trémie vide.
A la n de la manoeuvre de manipulation, la machine
doit être déposée sur ses béquilles, sur un sol plat et
bétonné.
La manutention de la machine doit être réalisée par des
personnes formées et habilitées à réaliser cette tâche.
Ne jamais manipuler le combiné complet au crochet.
Les anneaux de levage sont conçus pour supporter le
semoir seul et trémie vide.
BLIEFERUNG
- Bei Lieferung prüfen, ob die Drillmaschine komplett ist.
Verwenden Sie Ihren Bestellschein als Referenz. Jede
Zusatzausrüstung muss vorhanden sein.
Nur bei Abnahme formulierte Reklamationen können
berücksichtigt werden.
- Eventuelle Schäden vom Spediteur feststellen lassen.
Im Zweifels- oder Streitfall Ihren Verkäufer informieren.
Zusätzlich zu den auf dem Bestellschein aufgeführten
Zusatzausrüstungen müssen an allen serienmäßigen Maschinen
folgende Ausrüstungen vorhanden sein:
- Eine Waage für die Durchführung der Abdrehprobe
- Die Abstellstützen
- Die Betriebsanleitung
CHANDHABUNG
Handhabung mit einem Hebezeug oder Kran
- Zur Handhabung der Drillmaschine ausschließlich die dazu
angeschweißten Ringe benutzen.
Die Handhabung der Drillmaschine (Kran oder
Hebezeug) muss stets mit leerem Behälter erfolgen.
Nach der Handhabung muss die Maschine auf ihren
Abstellstützen auf einer ebenen, betonierten Fläche
abgestellt werden.
Die Handhabung der Maschine muss von Personen durchgeführt
werden, die dafür ausgebildet und autorisiert sind.
Niemals die gesamte Saatkombination am Haken
aufhängen. Die Hebeösen sind dafür ausgelegt, die
Drillmaschine allein mit leerem Behälter anzuheben.
BDELIVERY
As soon as the drill has been delivered check that the seed drill is
complete.
Use its order form as reference. Each accessory must be present.
Only claims made on taking delivery of the machine will be
considered.
- Any damage should be reported to the delivery man.
If in doubt or in the event of any complaint, please contact your
dealer.
In addition to the optional accessories listed on your order
form, certain accessories must be present on all the standard
machines:
- A scale for the ow rate test
- The stands
- The operating manual
CHANDLING
Lifting with a hoist or crane
- Only the welded rings provided should be used to handle the
seed drill.
The seed drill must always be lifted (Crane or Hoist)
with the hopper empty.
When the lifting manoeuvre is complete, the machine
must be put back on its stands, on at, concrete
ground.
The machine must be lifted by people who are trained and
authorised to carry out this task.
Never lift the full combine with a hook. The lifting rinds
are designed to support the seed drill on its own and
with the hopper empty.
1
Livraison / Delivery / Lieferung
FR
EN
DE
19

2
2
1
1
2
2
3
3
3
3
A
Mise en route / Start-up / Inbetriebsetzung
20
This manual suits for next models
2
Table of contents
Other Sulky Farm Equipment manuals

Sulky
Sulky HR 190 User manual

Sulky
Sulky DX 20 User manual

Sulky
Sulky Xeos TF User manual

Sulky
Sulky DPX 24 User manual

Sulky
Sulky XEOS MD User manual

Sulky
Sulky Polyvrac XT 100 VISION User manual

Sulky
Sulky MAXIDRILL TRW User manual

Sulky
Sulky HR 160 User manual

Sulky
Sulky XEOS PRO User manual

Sulky
Sulky XT 100 User manual
Popular Farm Equipment manuals by other brands

APV
APV RH 600 M1 operating manual

Kongskilde
Kongskilde VENTUS 2400 instruction manual

Teyme
Teyme ASM1-200-24 instructions

Titan Attachments
Titan Attachments 72RBGRAP Operator's manual

Stocks AG
Stocks AG Turbo Jet 8 i-CON Operating manual and parts list

BLU-JET
BLU-JET COULTERPRO Series Assembly and operators manual