manuals.online logo
Brands
  1. Home
  2. •
  3. Brands
  4. •
  5. Sunjoy
  6. •
  7. Outdoor Furnishing
  8. •
  9. Sunjoy A106008511 Supplement

Sunjoy A106008511 Supplement

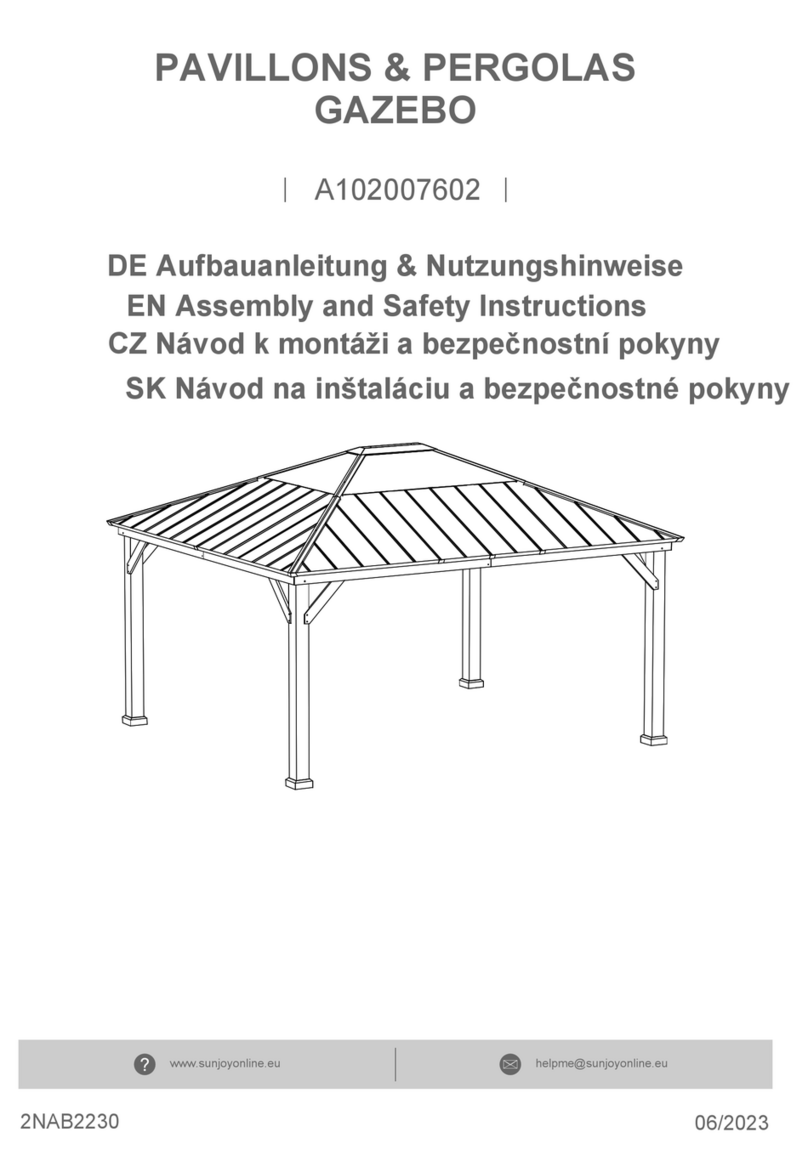
GB Assembly and Safety Instructions
A106008511
DE Aufbauanleitung & Nutzungshinweise
[email protected]www.sunjoyonline.eu
GAZEBO
PAVILLONS & PERGOLAS
2 | 33
DE BEDIENUNGS - UND SICHERHEITSHINWEISE
WICHTIG
Herzlichen Dank, dass Sie sich für unser Produkt entschieden haben. Bei Fragen, Problemen oder
Anreizen wenden Sie sich gerne jederzeit an unseren Kundenservice. Wir wünschen Ihnen viel Freude
an Ihrem neuen Produkt.
Um das Risiko von Verletzungen und Beschädigungen am Produkt zu vermeiden, bitten wir Sie die
nachfolgenden Sicherheits- und Pflegehinweise und die Aufbauanleitung zu beachten.
WARNHINWEISE
Es sollte immer ausreichend Abstand zu Schläuchen, Gas- oder Elektroleitungen gewahrt werden.
Informieren Sie sich im Vorfeld bei Ihren örtlichen Behörden um Schäden diesbezüglich zu vermieden.
Falls Sie geeignete Heizgeräte (Auskunft hierzu im Fachhandel) nutzen, halten Sie bitte einen Abstand
von mindestens 1,2 m zu Planenmaterial ein. Bitte nutzen sie KEIN offenes Feuer oder Heizgeräte mit
offener Flamme im Gazebo.
Sie sind beim Aufbau für die angemessene Verankerung und damit für die Sicherheit das Produkt
verantwortlich. Damit die Sicherheit des Produktes und anderer gewährleistet ist, prüfen Sie die
Verankerung bitte regelmäßig. Eine gute Verankerung kann die Lebensdauer der Einzelteile und des
Gazebos verlängern.
Damit Ihre eigene Sicherheit gewährleistet ist, tragen Sie beim Aufbau bitte einen Helm, Handschuhe und
stabile Schuhe. Das Metall kann scharfe Kanten aufweisen und durch die Rostschutzbehandlung ölig
sein.
Bei Schneefall, starken Regenfällen oder anderen Belastungen muss unbedingt darauf geachtet werden,
dass das Dach regelmäßig und zeitnah gesäubert und von den oben stehenden Dingen befreit wird.
Erstickungsgefahr - Plastiktüten und Ersatzteile bitte außer Reichweite von Säuglingen und Kindern
aufbewahren.
Bitte beachten Sie ALLE hier aufgelisteten Sicherheits- und Warnhinweise.
Entfernen Sie vor Gebrauch sämtliche Verpackungsmaterialien.
Vor der Montage prüfen Sie bitte die mitgelieferten Teile auf Vollständigkeit und Unversehrtheit.
Die Bedienungs- und Sicherheitshinweise sollten sorgfältig und in der Nähe des Produktes aufbewahrt
werden.
Diese Anweisungen sind Teil des Lieferumfangs.
Dieses Produkt ist ausschließlich für den Privatgebrauch geeignet und darf nicht für gewerbliche
Zwecke verwendet werden.
3 | 33
PFLEGE & AUFBEWAHRUNG
Für Schäden jeglicher Art die aufgrund von Naturgewalten auftreten wird keine Garantie übernommen.
Starker Wind kann unter Umständen Schäden am Produkt herbeiführen. Daher sollte das Produkt nicht
über längere Zeit unbeaufsichtigt bleiben.
Sehen Sie davon ab, das Metallgestänge zu verändern: weder durch das Anbauen und/oder
Anschweißen anderweitiger Materialien, noch durch Einkerbungen und/oder Verformungen des Materials.
AUFBAU & VERWENDUNG
Planen Sie beim ersten Aufbau etwas mehr Zeit ein. Anschließend wird es immer zügiger gehen. Das
Aufbauprinzip ist einfach. Beachten Sie dabei unsere Grafik der einzelnen Schritte.
Führen Sie die Verschraubung der Teile manuell mit einem Inbusschlüssel aus oder mit einem
Akkuschrauber auf niedriger Stufe. Bitte gehen Sie schonend mit dem Material um.
VORSICHT - Bitte achten Sie während der gesamten Montage, dass Sie sich oder andere nicht
verletzten, besonders beim Heben schwerer oder langer Teile.
Die Montage sollte ausschließlich von mindestens zwei Erwachsenen durchgeführt werden. Achten Sie
darauf, dass sich keine Kinder während des Aufbaus in der Nähe befinden.
Achten Sie darauf, dass Sie das Produkt auf einer geeigneten, ebenen und stabilen Oberfläche aufbauen.
Verwenden Sie nur die mitgelieferten Materialien.
Jedes Land hat Vorschriften für das Errichten von mobilen- Gazebos und immobilen Bauten. Erfragen Sie
bitte bei Ihrer örtlichen Behörde, ob Genehmigungen für Ihren Nutzungszweck erforderlich sind. In
manchen Ländern ist die Pavilliongröße entscheidend für eine eventuelle Genehmigung.
HOLZPFLEGERICHTLINIEN
Ausbleichen und Verwitterung: Holz ist ein Naturprodukt und wird sich voraussichtlich im Laufe der
Zeit verändern. Lange Sonneneinstrahlung kann zum Verblassen der Farbe führen. Wetterextreme,
Temperaturschwankungen und Feuchtigkeitshochs/-tiefs führen dazu, dass sich Holz ausdehnt und
zusammenzieht, was möglicherweise zu Verwerfungen und Rissen führt. Knoten und kleine
Oberflächenrisse sind natürlich vorkommend und beeinträchtigen die Festigkeit des Produkts nicht.
Holz benötigt im Laufe seiner Lebensdauer etwas Pflege und Aufmerksamkeit, um eine lang anhaltende
schöne Oberfläche zu gewährleisten. Durch die richtige Reinigung und Pflege bleiben Ihre Holzprodukte
lange schön. Bitte befolgen Sie diese Richtlinien, um Ihre Holzoberflächen zu pflegen
Trocken halten: Längere Nässe und hohe oder niedrige Luftfeuchtigkeit können für Holz schädlich sein.
Risse oder Splitter aufgrund von extremen Bedingungen außerhalb des normalen Feuchtigkeitsbereichs
von 35-65 % fallen nicht unter unsere Garantie. Es ist ratsam, eine längere Einwirkung von Feuchtigkeit
zu vermeiden.
GB ASSEMBLY AND SAFETY INSTRUCTIONS
Thank you for your purchase! If you have any questions, issues or recommendations please feel free to
reach out to us.
Please pay close attention to the following instructions in order to reduce the risk of injuries, accidents or
damage to the product by itself.
IMPORTANT
Please follow ALL safety instructions listed below.
Please remove the packaging material before assembling or using the product.
Please make sure that all listed parts are included in the package and that they are not damaged.
Please read these assembly and safety instructions carefully before usage of the product and keep it for
future reference.
This product should only be used in a non-commercial way.
4 | 33
UMWELT & NACHHALTIGKEIT
Tragen Sie zum Umweltschutz bei: Werfen Sie diese Produkt und/oder Teile davon nicht in den
Hausmüll. Bringen Sie es zum Recycling zu einer offiziellen Sammelstelle oder wenden Sie sich an den
Hersteller bzw. einen autorisierten Händler.
KUNDENSERVICE
Sollten Sie weitere Informationen benötigen oder Probleme auftreten:
Schreiben Sie bitte eine E-Mail an [email protected].
Reinigung: Häufige leichte Reinigung wird empfohlen. Regelmäßig mit einem leicht feuchten, weichen
Tuch abstauben und anschließend trocken wischen (in Richtung der Holzmaserung). Verwenden Sie für
Jährliche Versiegelung: Es empfiehlt sich, die Holzteile jährlich mit einer Versiegelung oder Outdoor-
Wachs/Öl zu pflegen, um die Holzoberflächen zu schützen und aufzuwerten. Tragen Sie zweimal jährlich
nach der Reinigung ein hochwertiges Holzpflegeöl oder eine wasserbasierte Versiegelung auf die Oberflächen
auf. Empfohlene Optionen sind Versiegelungsmittel auf Wasserbasis für den Außenbereich, Leinsamen,
Teak oder Tungöl. Beachten Sie die spezifischen Anwendungshinweise des Herstellers. Probieren Sie es
am besten auf einem kleinen Stück Holz aus. Wenn Sie mit dem Ergebnis zufrieden sind, setzen Sie die
Anwendung fort und achten Sie darauf, Metalloberflächen zu vermeiden.
eine gründlichere Reinigung ein weiches Tuch und eine sanfte Seifenlösung (verdünnen Sie ¼ Tasse
milde flüssige Geschirrspülseife mit einer Gallone warmem Wasser). Mit Wasser abspülen und die
Oberflächen sofort mit einem weichen Tuch trocknen. Verwenden Sie keine Bleichmittel, Säuren oder
andere Lösungsmittel auf Metallteilen oder -oberflächen. Kleinere Flecken oder Kratzer können mit
Stahlwolle Nr. 0000 leicht poliert werden, gefolgt von einem Auftragen eines hochwertigen Holzpflegeöls,
wobei in Richtung der Maserung gewischt wird.
5 | 33
When making use of suitable heaters, keep a minimum distance of 1.2 m to tarp material. Open fire or
heaters with open flames such as patio heaters, umbrella heaters, gas heaters etc. should NOT be used
inside this product in any case.
The person taking care of the construction of this product is responsible for adequately securing it to
ensure its safety. Please check the anchoring constantly to avoid damage. A stable anchoring can extend
the endurance of the product.
In order to ensure your own safety, please make sure to wear a helmet, gloves and solid shoes. The metal
parts could have sharp edges and could be oily because of rust prevention treatment.
Please make sure that there is no permanent snow load. It should be removed right away. The same
applies for rain and other forms of load.
Warning - please keep plastic and small spare parts out of children's reach. The thin film may cling
to nose and mouth and prevent breathing.
ASSEMBLY & USAGE
Please reserve some more time for your first installation of this product. The rules to be followed when
pitching this product are simple. Please use the illustrative instructions for each step of installation.
The screws joining the pipes with connectors must be tightened manually, using a hexagon key or an
automatic screw driver, set at a max. level 2, to avoid material wear.
CAUTION - Please make sure that no one is harmed during the assembly process, especially when lifting
heavy parts.
This product should only be assembled by at least two adults. Please keep children away from this
product while assembling it to protect them.
Please make sure to find a flat and even ground base that is suitable for the assembly of the product and
its intended usage.
Use only those materials provided with the product upon delivery.
Each country has varying regulations regarding movable structures (product) and unmovable structures.
Please ask your local authorities whether a permission must be obtained to pitch the product. In some
countries this depends on the size of the product.
SAFETY INFORMATION
Make sure to keep sufficient distance to houses as well as gas and power lines to avoid possible dama-
ge. Please check the area for power cables and gas lines. Ask your local authority for further information if
needed.
CARE & STORAGE INSTRUCTIONS
WOOD CARE GUIDELINES
Wood requires some care and attention over its lifetime to ensure a long-lasting beautiful finish. Proper
cleaning and maintenance will keep your wood products looking beautiful for a long time. Please follow
these guidelines to maintain your wood surfaces.
Fading and weathering: Wood is a natural product and is expected to change over time. Long periods of
sun exposure can naturally lead to color fading. Weather extremes, temperature fluctuations, and humidity
highs/lows cause wood to expand and contract, possibly leading to warping and cracking. Knots and small
surface cracks are naturally occurring and do not affect the strength of the product.
Keeping dry: Prolonged moisture and high or low humidity can be harmful for wood. Cracking or splitting
from extremes outside of the normal humidity range of 35-65% are not covered by our warranty.
Preventing prolonged exposure to moisture is advisable.
Cleaning: Frequent light cleaning is recommended. Dust regularly using a slightly damp soft cloth, and
then wipe dry (following the direction of the wood grain). For more thorough cleaning, use a soft cloth and
a gentle soap solution (dilute ¼ cup mild dishwashing liquid soap with 1 gallon of warm water). Rinse with
6 | 33
ENVIRONMENT & SUSTAINABILITY
Please help us take care of our planet by recycling this product after usage. Please do not dispose of the
product or any of its components with ordinary garbage, but recycle it. If in doubt, please contact us or an
authorized sales representative. We will be happy to help you recycle the product correctly, at the same
time preserving the environment.
CUSTOMER SERVICE
If you need any further assistance or information, please do not hesitate to get in touch with us via
email: helpme@[email protected]
.
water, and then immediately dry the surfaces using a soft cloth. Do not use bleach, acid, or other solvents
on any metal parts or surfaces. Minor stains or scratches can be lightly buffed with No.0000 steel wool,
followed by an application of good quality wood-care oil, wiping in the direction of the grain.
Annual sealing: It is advisable to annually maintain the wooden parts with a sealant or outdoor wax/oil to
protect and enhance the wood surfaces. Twice yearly, after cleaning, apply a good quality wood-care oil
or water-based sealant to the surfaces. Recommended options are outdoor water-based sealant, linseed,
teak, or tung oil. Refer to the manufacturer’s specific instructions for application. It is best to try on a small
section of wood, then if satisfied with the result, continue the application, taking care to avoid any metal
surfaces.
Strong winds may damage the product. Please do not leave this product unattended for an extensive
amount of time.
Strong or expensive rain may lead to the accumulation of water pockets on the roof. These pockets
need to be removed as soon as possible.
Do not make any modifications of the metal structure of the product, such as for example, connecting
and/or welding additional loads, making grooves and/or any deformations.

7 | 33
WERKZEUG / TOOLS
Benötigte Personen für Aufbau / People needed for installation work.
WICHTIG / IMPORTANT
8 | 33
TEILELISTE / PARTS LIST
Label Part Number Qty Part Image
01 P00020067001 1
02 P00020067101 1
03 P00020067201 1
04 P00020067301 1
05 P00020067401 2
06 P00610018501 16
07 P00040139001 1
08 P00040139101 1
29 P00040139301 1
30 P00040139201 1
11 P00040139601 1
12 P00040140001 1
13 P00040139401 1
14 P00040140101 1
15 P00500061701 1
16 P00500061801 1
17 P00040139801 2
18 P00040139901 2
9 | 33
19 P00060217101 24
20 P00060217201 24
21 P00630012401 2
22 P00630012501 2
23 P00630012601 1
24 P00500063801 2
25 P00500063901 2
26 P00210050701 2
A P00220035601 2
B P00010013501 4
C P00220039801 4
D P00220035101 1
Label Part Number Qty Part Image
E P00220035201 1
F P00220035301 2
G P00220035501 4
J P00220035401 8
K P00220040001 2
10 | 33
Label Part Number Qty Part Image
Label Part Number Description Qty Add Part Image
L P00220039901 2
M P00220040201 4
37 P00500067401 4
38 P00500067501 2
H1 H100010055 M8*35 20 1
H2 H100010135 M8*160 6 1
H3 H100010133 M8*190 2 1
H4 H030050008 ST 4.2*19 56 3
H5 H030050122 ST 4.2*40 64 4
H6 H030050128 ST 4.2*60 40 2
H7 H030050129 ST 4.2*70 72 4
H8 H030010129 ST8*40 16 1
H9 H030010124 ST8*80 8 1
H11 H050080007 M8 68 4
11 | 33
Label Part Number Description Qty Add Part Image
H12 H040050041 M8 44 3
H13 H100010140 M8*125 6 1
H14 H100010143 M8*5 36 2
HS H070010001 Φ8*180 16 0
HW1 H090030005 M8 1 0
HW2 H090010012 M8 2 0
12 | 33
1
2x 2x
1x
1x
8x 6x
2
13 | 33
2x 8x
8x 32x
3
14 | 33
2x
1x
1x
8x
8x 32x
4
15 | 33
2x 2x
1x
1x
1x
1x
8x 8x 8x
5
16 | 33
2x 2x
1x 1x
4x 4x8x
6
17 | 33
1x
1x
1x
1x
4x
7
18 | 33
4x 4x 4x8x
19 | 33
8
d1=d2
Rt∠90
1x 1x
8x 8x
9
20 | 33
2x
8x

Other Sunjoy Outdoor Furnishing manuals

Sunjoy A106008400 User manual

Sunjoy

Sunjoy A106008400 User manual

Sunjoy berkley jensen 185650 User manual

Sunjoy

Sunjoy berkley jensen 185650 User manual

Sunjoy A106005500 User manual

Sunjoy

Sunjoy A106005500 User manual

Sunjoy SummerCove A106007600 User manual

Sunjoy

Sunjoy SummerCove A106007600 User manual

Sunjoy L-DN1128SST-B User manual

Sunjoy

Sunjoy L-DN1128SST-B User manual

Sunjoy A101011400 User manual

Sunjoy

Sunjoy A101011400 User manual

Sunjoy A207000702 User manual

Sunjoy

Sunjoy A207000702 User manual

Sunjoy L-GZ660PST-D User manual

Sunjoy

Sunjoy L-GZ660PST-D User manual

Sunjoy D-GG001PST-F1 User manual

Sunjoy

Sunjoy D-GG001PST-F1 User manual

Sunjoy 810213850 User manual

Sunjoy

Sunjoy 810213850 User manual

Sunjoy A102007901 User manual

Sunjoy

Sunjoy A102007901 User manual

Sunjoy AUTOCOVE A110000400 User manual

Sunjoy

Sunjoy AUTOCOVE A110000400 User manual

Sunjoy D-GZ050PST-2 User manual

Sunjoy

Sunjoy D-GZ050PST-2 User manual

Sunjoy Rona 20095325 User manual

Sunjoy

Sunjoy Rona 20095325 User manual

Sunjoy L-GZ615PST-B-PK User manual

Sunjoy

Sunjoy L-GZ615PST-B-PK User manual

Sunjoy 187020 User manual

Sunjoy

Sunjoy 187020 User manual

Sunjoy L-GZ605PST-A1 User manual

Sunjoy

Sunjoy L-GZ605PST-A1 User manual

Sunjoy L-GZ071PST-3 User manual

Sunjoy

Sunjoy L-GZ071PST-3 User manual

Sunjoy G-GZ032PWI User manual

Sunjoy

Sunjoy G-GZ032PWI User manual

Sunjoy D-GZ846PCO-I User manual

Sunjoy

Sunjoy D-GZ846PCO-I User manual

Sunjoy L-GG032PST-C User manual

Sunjoy

Sunjoy L-GG032PST-C User manual

Sunjoy A106000904 User manual

Sunjoy

Sunjoy A106000904 User manual

Sunjoy 88-0424-4 User manual

Sunjoy

Sunjoy 88-0424-4 User manual

Sunjoy S-UM248PST-B User manual

Sunjoy

Sunjoy S-UM248PST-B User manual

Popular Outdoor Furnishing manuals by other brands

Lusso PALAOS Assembly instructions

Lusso

Lusso PALAOS Assembly instructions

Kettler A9773-02A4-1 Assembly instructions

Kettler

Kettler A9773-02A4-1 Assembly instructions

Dunkirk L-GZ326PST-2 instructions

Dunkirk

Dunkirk L-GZ326PST-2 instructions

Rutland County Garden Furniture The hobby bench Assembly instructions

Rutland County Garden Furniture

Rutland County Garden Furniture The hobby bench Assembly instructions

PREMIER POLYSTEEL 936-307 manual

PREMIER POLYSTEEL

PREMIER POLYSTEEL 936-307 manual

for Living Acadia Assembly instructions

for Living

for Living Acadia Assembly instructions

COVANA OASIS user manual

COVANA

COVANA OASIS user manual

Garden Treasures TA7004 Assembly instructions

Garden Treasures

Garden Treasures TA7004 Assembly instructions

Hanover TRADDN5PCG-RED manual

Hanover

Hanover TRADDN5PCG-RED manual

Costway HW68177 user manual

Costway

Costway HW68177 user manual

StyleWell AMBERVIEW FDS50285C-ST5 Use and care guide

StyleWell

StyleWell AMBERVIEW FDS50285C-ST5 Use and care guide

Mimosa BORDEAUX 0101667 Assembly instructions

Mimosa

Mimosa BORDEAUX 0101667 Assembly instructions

Corriveau lndia 8101202 Assembly instructions

Corriveau

Corriveau lndia 8101202 Assembly instructions

Patio Sense Arria Antique Bronze Cast Aluminum Bistro... quick start guide

Patio Sense

Patio Sense Arria Antique Bronze Cast Aluminum Bistro... quick start guide

Berlin Gardens PZTG4800 Assembly Directions

Berlin Gardens

Berlin Gardens PZTG4800 Assembly Directions

Frontgate CASSARA 20125A quick start guide

Frontgate

Frontgate CASSARA 20125A quick start guide

Palram Canopia Ledro 12x12 How to assemble

Palram

Palram Canopia Ledro 12x12 How to assemble

Oxford Garden SIG60 Assembly instructions

Oxford Garden

Oxford Garden SIG60 Assembly instructions

manuals.online logo
manuals.online logoBrands
  • About & Mission
  • Contact us
  • Privacy Policy
  • Terms and Conditions

Copyright 2025 Manuals.Online. All Rights Reserved.