manuals.online logo
Brands
  1. Home
  2. •
  3. Brands
  4. •
  5. Takara Belmont
  6. •
  7. Indoor Furnishing
  8. •
  9. Takara Belmont LANCER User manual

Takara Belmont LANCER User manual

4. Check that the chair operates normally.
3. Connect the power plug with the outlet.
Installation Procedures
1E04K4BE BOOK NO.
1
LANCER Installation Manual
Rubber ring
Base
Base
Foot switches
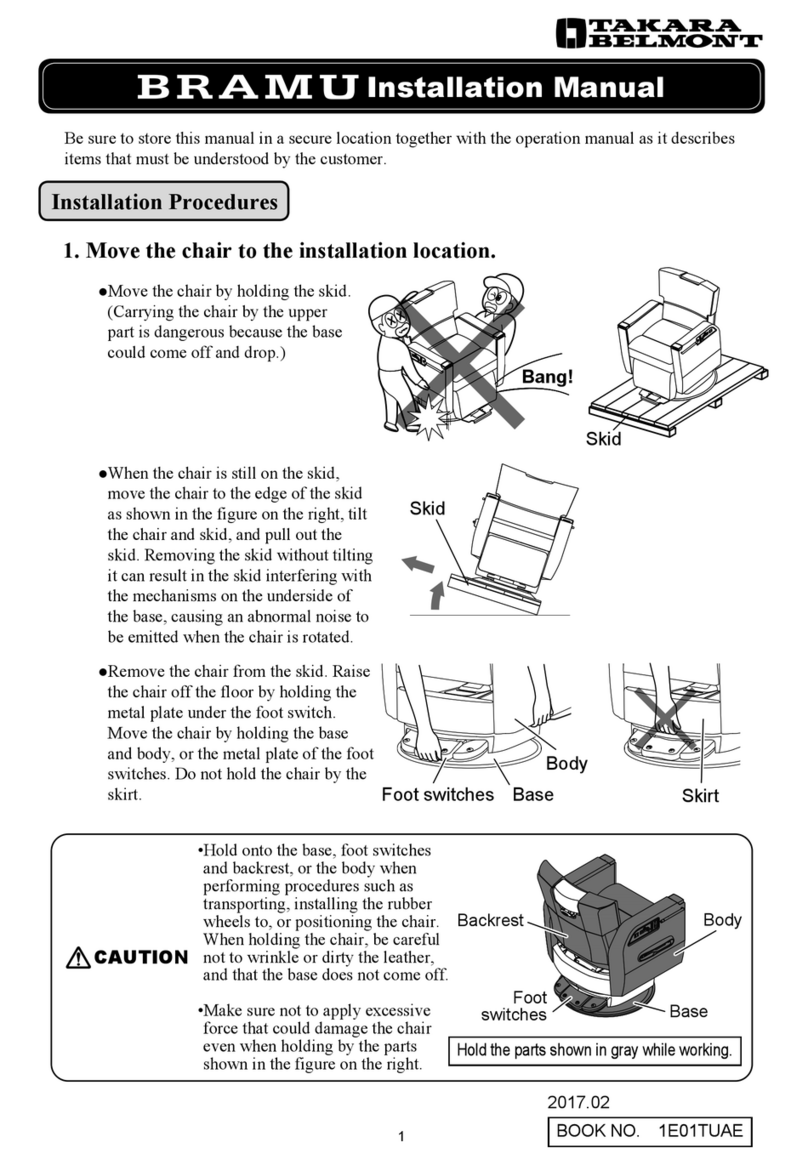
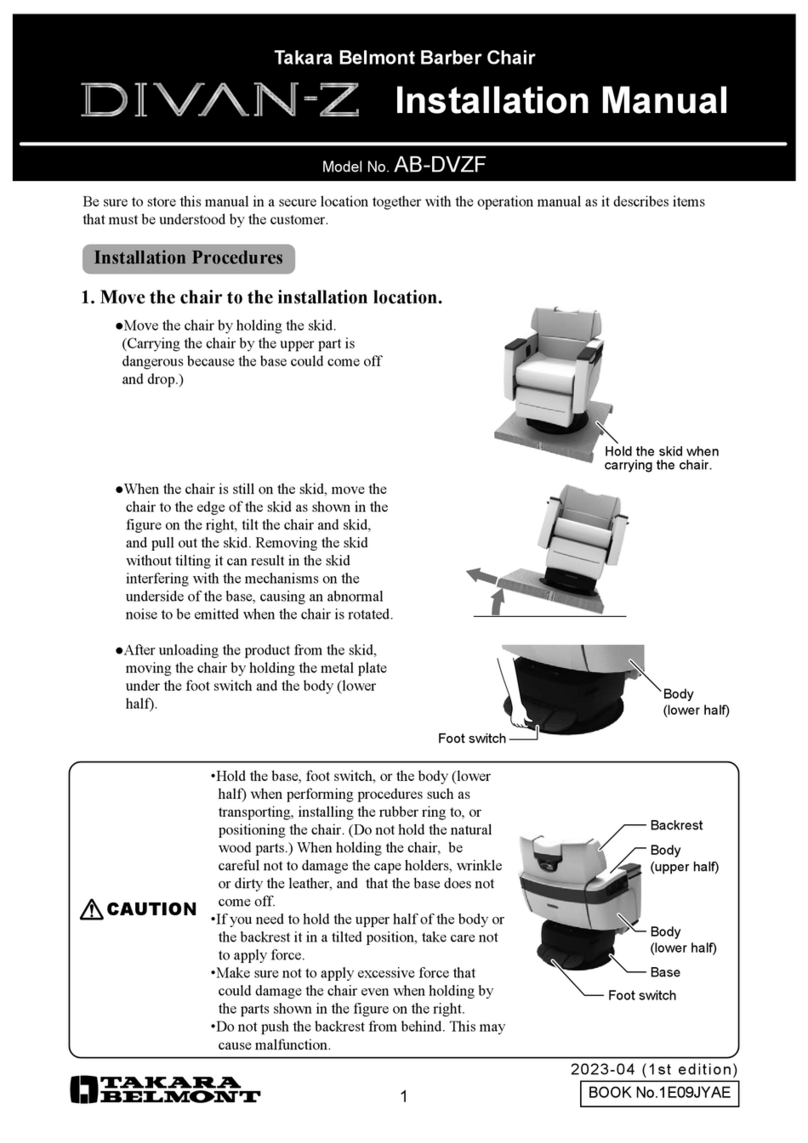
1. Move the chair to the installation location.
Be sure to ground the chair to prevent accident due to current leakage and to improve the noise-dampening
performance of the control circuit.
Takara Belmont has no responsibility for any current leakage that results if the above-indicated procedures are
not performed.
The chair must absolutely be grounded in order to prevent electric shock.
Be sure to store this manual in a secure location together with the operation manual as it describes
items that must be understood by the customer.
Move the chair by holding the skid.
(Carrying the chair by the upper part is dangerous
because the base could come off and drop.)
Remove the chair from the skid. Raise the
chair off the floor by holding the metal plate
under the foot switch. Move the chair by
holding the base.
2. Attach the rubber ring to the base.
Determine the installation location. Lift the base off the floor and attach the rubber ring to the rim of the base.
It is easier to attach the rubber ring by lifting up one side of the chair at a time. Hold the armrest and shoulder
part of the backrest to balance the force, and tilt the chair body to attach the rubber ring one side at a time.
Do not apply excessive force to the armrest or other parts, or strike it from above when tilting the chair body.
Prepare an available outlet * with an attached ground terminal.
* 110 V, 120V, 220 V, 230 V, 240 V (7 A or more)
Turn the power on and check that the chair raises/lowers normally, the backrest raises/reclines normally, the
legrest raises/lowers normally(AB-HPPN), and the rotation lock/release, preset feature, and auto-return features
operate normally.
Bang!
2. With the chair in that position, turn off the power
switch.
Although the settings positions of the preset switches are previously set when shipped from the
factory, you can change to the positions to match your customers.
Adjuster is on underside.
Extend Retract
Tighten
Loosen
plating Flange nut (M6)
Step mount
Step (underside)
plating Hexagonal nut (M10)
Adjuster
2
LANCER Installation Manual
Armrest control panel (left and right)
1
Power switch
1
ON
2
OFF
WARNING
CAUTION
5. Install the step.
Place the step on the step mount, align the three fixing holes with those of the step, and fix the step using the
provided plating flange nut (M6). Use a wrench (No. 10) to tighten the flange nut (M6).
⇒The adjuster, which prevents the chair from overturning, is located on the underside of the step. To adjust the
adjuster, loosen the plating hexagonal nut (M10) by using a wrench (No. 17) to adjust the height of the adjuster,
and then tighten the plating hexagonal nut (M10) by using a wrench (No. 17).
Be sure to securely tighten the plating flange nut (M6) to install the step. Failure to do so
could result in serious injury due to the chair tipping over.
Adjust the height of the adjuster so that the adjuster does not contact or catch on the power
cord, and be sure to tighten the plating hexagonal nut (M10). Using the chair without
tightening the nut can result in damage to the adjuster.
Installation has completed. Perform the following procedures to change the position of the preset feature and
legrest raising angle.
1. Turn on the power switch and move the chair to the desired position.
*Legrest moves for the PRIME
TYPE (AB-HPPN) only.
Adjusting Preset Positions
[For PRIME TYPE (AB-HPPN) only]
2. Use needle-nose pliers to remove
the inner snap pin only.
1. Raise the chair to the maximum height and fully raise the backrest.
The legrest adjustment pin is located underneath the chair.
Changing the Raising Angle of the Legrest
Legrest adjustment pin
3
LANCER Installation Manual
Armrest control panel (left and right)
Approx. 3 seconds
▼
Electronic beep is emitted.
3
ON
3
Preset switch P1
Preset switch P2
Pull out the inner snap pin.
Inner
Outer
3. Press and hold the preset switch that you want to set, and turn on the
power switch.
Press and hold the preset switch located on either the left or right side of the armrest control panel (P1 or P2), and
turn on the power switch. Keep pressing the preset switch for approximately three seconds.
Keep pressing
until you hear an
electronic beep.
4. Setting is completed when the electronic beep is emitted.
Return the chair to its original position by using the auto-return switch, and use the preset switch to check the set
position.
Although the legrest raising angle of this chair is set to the maximum angle at delivery, you can change the angle
based on your preference.
Legrest Rising Settings Angle
Setting (1)
Setting (2)
Keeping the legrest fixed
(not to rise)
Maximum Setting
(position at delivery)
Approx. -15° from
horizontal
Approx. -35° from
horizontal
Approx. -50° from
horizontal
Approx. -85° from
horizontal
4. Insert the legrest adjustment pin based on the desired setting.
Hole for Setting (2)Hole for Setting (1)Hole at delivery
Insert the snap pin.
4
LANCER Installation Manual
3. Pull out the legrest adjustment pin.
Pull out the legrest adjustment pin.
CAUTION
Legrest adjustment pin
1. To set the legrest rising angle to Setting (1), insert
the legrest adjustment pin into the Hole for Setting
(1).
2. To set the legrest rising angle to Setting (2), insert
the legrest adjustment pin into the Hole for Setting
(2).
3. Do not insert the legrest adjustment pin into any
holes if you want the legrest not to rise. (Carefully
store the legrest adjustment pin in order not to
lose it.)
Insert the legrest adjustment
pin into the desired hole.
5. Insert the snap pin into the legrest adjustment pin.
Be sure to securely insert the snap pin as
shown in the below-right figure to retain the
legrest adjustment pin.
6. When the adjustment is completed, recline the backrest of the chair to
check the raising angle of the legrest.

Other manuals for LANCER

4

Other Takara Belmont Indoor Furnishing manuals

Takara Belmont Salon Console User manual

Takara Belmont

Takara Belmont Salon Console User manual

Takara Belmont Manual Barber chairs User manual

Takara Belmont

Takara Belmont Manual Barber chairs User manual

Takara Belmont YUME ESPOIR User manual

Takara Belmont

Takara Belmont YUME ESPOIR User manual

Takara Belmont Compact Hilox SP-PBN User manual

Takara Belmont

Takara Belmont Compact Hilox SP-PBN User manual

Takara Belmont Yume DX User manual

Takara Belmont

Takara Belmont Yume DX User manual

Takara Belmont ZEN MIRROR User manual

Takara Belmont

Takara Belmont ZEN MIRROR User manual

Takara Belmont DIVAN-Z AB-DVZF User manual

Takara Belmont

Takara Belmont DIVAN-Z AB-DVZF User manual

Takara Belmont LEGEND User manual

Takara Belmont

Takara Belmont LEGEND User manual

Takara Belmont RS III PRIME User manual

Takara Belmont

Takara Belmont RS III PRIME User manual

Takara Belmont Square EPIPHANY User manual

Takara Belmont

Takara Belmont Square EPIPHANY User manual

Takara Belmont Epiphany Frame User manual

Takara Belmont

Takara Belmont Epiphany Frame User manual

Takara Belmont YUME ESPOIR User guide

Takara Belmont

Takara Belmont YUME ESPOIR User guide

Takara Belmont LEGEND AB-LGF User manual

Takara Belmont

Takara Belmont LEGEND AB-LGF User manual

Takara Belmont Legacy 91 User manual

Takara Belmont

Takara Belmont Legacy 91 User manual

Takara Belmont LANCER User manual

Takara Belmont

Takara Belmont LANCER User manual

Takara Belmont AUBREY with MAJOLICA PORTO User manual

Takara Belmont

Takara Belmont AUBREY with MAJOLICA PORTO User manual

Takara Belmont Salon Console User manual

Takara Belmont

Takara Belmont Salon Console User manual

Takara Belmont LANCER User manual

Takara Belmont

Takara Belmont LANCER User manual

Takara Belmont INOVA-EX User manual

Takara Belmont

Takara Belmont INOVA-EX User manual
Takara Belmont LANCER User manual

Takara Belmont

Takara Belmont LANCER User manual

Takara Belmont ALVIS TETRA User manual

Takara Belmont

Takara Belmont ALVIS TETRA User manual

Takara Belmont YUME NAGOMI User guide

Takara Belmont

Takara Belmont YUME NAGOMI User guide

Takara Belmont CLIPPER AY-CLIP User manual

Takara Belmont

Takara Belmont CLIPPER AY-CLIP User manual

Takara Belmont INOVA-EX User manual

Takara Belmont

Takara Belmont INOVA-EX User manual

Popular Indoor Furnishing manuals by other brands

Epic Office Furniture AXIS AXPBOX200 Assembly instruction

Epic Office Furniture

Epic Office Furniture AXIS AXPBOX200 Assembly instruction

Songmics VASAGLE LBS016 manual

Songmics

Songmics VASAGLE LBS016 manual

Kvik K15695 quick start guide

Kvik

Kvik K15695 quick start guide

Sauder Steel River 427549 manual

Sauder

Sauder Steel River 427549 manual

Instant Desks IDA-1009 Assembly instructions

Instant Desks

Instant Desks IDA-1009 Assembly instructions

burgbad Orell M1138 Fitting instructions

burgbad

burgbad Orell M1138 Fitting instructions

Cooper Lighting Fail-Safe DRX Specification sheet

Cooper Lighting

Cooper Lighting Fail-Safe DRX Specification sheet

BluDot Daily Task quick start guide

BluDot

BluDot Daily Task quick start guide

Coaster 109211 Assembly instruction

Coaster

Coaster 109211 Assembly instruction

Hausmann 6292 Installation & operation instructions

Hausmann

Hausmann 6292 Installation & operation instructions

DITALIA CD-1010 Assembly manual

DITALIA

DITALIA CD-1010 Assembly manual

Emmezeta YORK 636338 Assembling instructions

Emmezeta

Emmezeta YORK 636338 Assembling instructions

Kohler MING installation instructions

Kohler

Kohler MING installation instructions

Broyhill A412002000 Assembly instructions

Broyhill

Broyhill A412002000 Assembly instructions

Pedrali REVA D instructions

Pedrali

Pedrali REVA D instructions

Kenroy Home RAWLINS 47005 Use and care guide

Kenroy Home

Kenroy Home RAWLINS 47005 Use and care guide

modway Abeyance EEI -1182 manual

modway

modway Abeyance EEI -1182 manual

OVE WINSTON 60 installation manual

OVE

OVE WINSTON 60 installation manual

manuals.online logo
manuals.online logoBrands
  • About & Mission
  • Contact us
  • Privacy Policy
  • Terms and Conditions

Copyright 2025 Manuals.Online. All Rights Reserved.