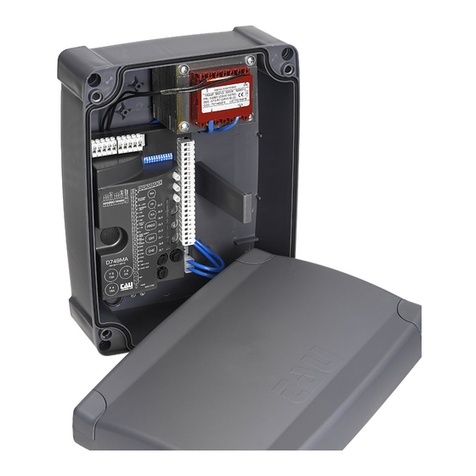
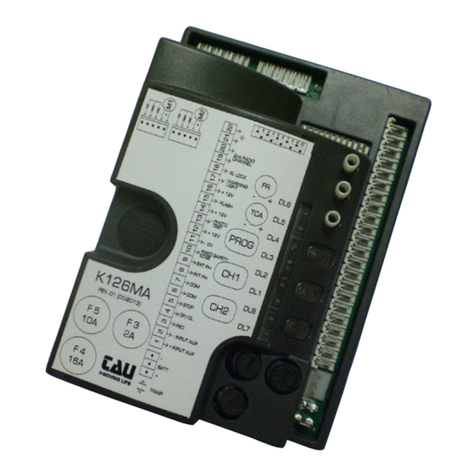
tau D770M Technical specifications

1
D770M
MANUALE D’USO E INSTALLAZIONE
USE AND INSTALLATION MANUAL
BENUTZUNGS- UND
INSTALLATIONSANLEITUNG
MANUEL D’EMPLOI ET INSTALLATION
MANUAL DE USO E INSTALACIÓN
D-MNL0D770M 11-02-2021 - Rev.03 Ver. Firmware 8.xx

2
SCHEMA CABLAGGIO D770M / D770M WIRING DIAGRAM / SCHALTPLAN DER D770M
O/C =Open/Close
Ped = Pedestrian
Cap = Capacitor
TX = Transmitter
RX = Receiver
E.L. = Electric lock
M = Motor
230 Vac-50 Hz
Power supply
Close
Common
Open
Close
Common
Open
Cap Cap
TX
1 2
RX
12345
Common
Sensitive edge
Internal photocell (N.C)
External photocell (N.C.)
Common
O/C
Ped
Stop
E.L.
12V 15W
2nd radio
channel
+
-
Gate open
warning light
max. 3W
Ext.
photoc.
Int.
photoc.
RX
12345
TX
1 2
11 12
D770M
F1
F2
123456789
29 30
1
3
2
4 5 6 7 8 9 10 11 12 13 14 15 16 17 18 19 2623 24 25 2827
20 21 22
29 30
TRA FR1 TCA
FR2
11
A/C
DL1
DL2 DL3 DL4 DL5 DL6
PED STP CF FI FE
10 12 13 14 15 16 17 18 25 26 27 28
22 23 24
19 20 21
P1 P2
DL8
DL7
J4
J3

3
SCHÉMA CÂBLAGE D770M / ESQUEMA DEL CABLEADO D770M / ESQUEMA ELÉCTRICO D770M
O/C =Open/Close
Ped = Pedestrian
Cap = Capacitor
TX = Transmitter
RX = Receiver
E.L. = Electric lock
M = Motor
230 Vac-50 Hz
Power supply
Close
Common
Open
Close
Common
Open
Cap Cap
TX
1 2
RX
12345
Common
Sensitive edge
Internal photocell (N.C)
External photocell (N.C.)
Common
O/C
Ped
Stop
E.L.
12V 15W
2nd radio
channel
+
-
Gate open
warning light
max. 3W
Ext.
photoc.
Int.
photoc.
RX
12345
TX
1 2
11 12
D770M
F1
F2
123456789
29 30
1
3
2
4 5 6 7 8 9 10 11 12 13 14 15 16 17 18 19 2623 24 25 2827
20 21 22
29 30
TRA FR1 TCA
FR2
11
A/C
DL1
DL2 DL3 DL4 DL5 DL6
PED STP CF FI FE
10 12 13 14 15 16 17 18 25 26 27 28
22 23 24
19 20 21
P1 P2
DL8
DL7
J4
J3

14
WARNINGS
This manual has been especially written for use by quali ed tters. No information given in this manual
can be considered as being of interest to end users. This manual is enclosed with control unit D770M and
may therefore not be used for dierent products!
Important information:
Disconnect the panel from the power supply before opening it.
The D770M control unit has been designed to control an electromechanical gear motor for automating
gates and doors of all kinds.
Any other use is considered improper and is consequently forbidden by current laws.
Please note that the automation system you are going to install is classi ed as “machine construction”
and therefore is included in the application of European directive 2006/42/EC (Machinery Directive).
This directive includes the following prescriptions:
- Only trained and qualied personnel should install the equipment;
- the installer must rst make a “risk analysis” of the machine;
- the equipment must be installed in a correct and workmanlike manner in compliance with all the
standards concerned;
- after installation, the machine owner must be given the “declaration of conformity”.
This product may only be installed and serviced by qualied personnel in compliance with current, laws,
regulations and directives.
When designing its products, TAU observes all applicable standards (please see the attached declaration
of conformity) but it is of paramount importance that installers strictly observe the same standards when
installing the system.
Unqualied personnel or those who are unaware of the standards applicable to the “automatic gates
and doors” category may not install systems under any circumstances.
Whoever ignores such standards shall be held responsible for any damage caused by the system!
Do not install the unit before you have read all the instructions.
INSTALLATION
Before proceeding, make sure the mechanical components work correctly. Also check that the gear
motor assembly has been installed according to the instructions. Then make sure that the power
consumption of the gear motor is not greater than 3A (otherwise the control panel may not work
properly).
THE EQUIPMENT MUST BE INSTALLED “EXPERTLY” BY QUALIFIED PERSONNEL AS REQUIRED BY LAW.
Note: it is compulsory to earth the system and to observe the safety regulations that are in force
in each country.
IF THESE ABOVE INSTRUCTIONS ARE NOT FOLLOWED IT COULD PREJUDICE THE PROPER WORKING ORDER
OF THE EQUIPMENT AND CREATE HAZARDOUS SITUATIONS FOR PEOPLE. FOR THIS REASON THE “MANU-
FACTURER” DECLINES ALL RESPONSIBILITY FOR ANY MALFUNCTIONING AND DAMAGES THUS RESULTING.
1. CONTROL CARD FOR TWO SINGLE-PHASE MOTORS 230V AC
The D770M panel features an electronic photocell control system which switches the external photo-
cell transmitter on and o thereby causing the control unit microprocessor to check whether the relay
switches correctly. If this does not happen, the control unit is automatically blocked.
• MICROPROCESSOR-CONTROLLED LOGIC
• SELF-DIAGNOSIS LED’s
• LINE INPUT FUSE
• BUILT-IN TORQUE LIMITING DEVICE
• ELECTRONIC CONTROL OF SAFETY DEVICES
• PEDESTRIAN ENTRY FUNCTION
• BUILT-IN LED FLASHING LIGHT CIRCUIT
•433.92 MHz 2 CHANNEL BUILT-IN RADIO RECEIVER (CH)
• “SLOW-DOWN” FUNCTION IN OPENING AND IN CLOSING PHASE
• DIAGNOSTICS OF MALFUNCTIONS SIGNALLED BY LED
ENGLISH

15
• COMPATIBILITY WITH OUR APPS: TAUOPEN AND TAUAPP
ATTENTION:
- do not use single cables (with one single wire), ex. telephone cables, in order to avoid break-
downs of the line and false contacts;
- do not re-use old pre-existing cables.
- In case of long sections of cables (> 20 m) for N.O./N.C. controls (e.g. OPEN / CLOSE, STOP,
PEDESTRIAN, etc.), in order to avoid gate malfunctions, it will be necessary to uncouple the
various controls using RELAYS or using our 750T-RELE device.
2. TESTING
When all connections have been made:
• All the green LED’s must be on (each corresponds to a Normally Closed input).
• They only turn o when the safeties they are associated with are active.
• All the red LED’s must be o (each corresponds to a Normally Open input) they only turn on when the com-
mands they are associated with are active.
•Led DL8 must ash green every 4 sec. (indicates the logic state of the control unit, see sect. “Diagnostics Led”)
3. TECHNICAL CHARACTERISTICS
Power input to board 230V AC - 50Hz
Max motors nominal power 600 W ca.
Primary input line rapid fuse (F1 - 5x20) F 3,15 A
Input voltage of motor circuits 230V AC
Input voltage of auxiliary circuits 24V AC
24Vac line rapid fuse (F2 - 5x20) F 500 mA
Logic circuit input voltage 5V DC
Working temperature -20°C ÷ + 55 °C
Box protected to IP43
* The control unit enclosure was created with IP65 protection rating but is declared IP43 as
it is expected to be drilled to be xed to the wall and to allow cable entry. Not knowing if the
holes will be provided with suitable cable glands or if they will be hermetically sealed, a de-
gree of protection equal to IP43 is prudently declared
4. TERMINAL BOARD CONNECTIONS
Key: N.C. = Normally Closed - N.O. = Normally Open
Terminals Function Description
1 - 2 - 3 POWER
SUPPLY POWER input 230 Vac, 50Hz (115 Vac 60 Hz);
1= PHASE, 2= EARTH, 3= NEUTRAL.
4 - 5 - 6 MOTOR M1 MOTOR M1 power output (opens the leaf tted with the electric
lock), 230 Vac, max. 300 W. 4=CLOSE, 5=COMMON, 6=OPEN.
Notice: connect the capacitor between terminals 4 and 6;
7 - 8 - 9 MOTOR M2 MOTOR M2 power output, 230 Vac, max. 300 W.
7=CLOSE, 8=COMMON., 9=OPEN.
Notice: connect the capacitor between terminals 7 and 9;
10 - 11 OPEN/CLOSE OPEN/CLOSE button input (contact normally open); for operating
information see dip-switches 2 and 4 functions. (COMMON=10);
WARNING: with dip 10 to ON the input switches OPEN: automation open as long as the
button is held down. On his release, the automation stops.
10 - 12 PEDESTRIAN PEDESTRIAN button contact input (contact normally open) – com-
mands total opening and closing of motor 1 – governed by dip-
switches 2 and 4. (COMMON=10);
ENGLISH

16
WARNING: with dip 10 to ON the input switches CLOSE: automation close as long as the
button is held down. On his release, the automation stops.
10 - 13 STOP STOP button input (normally closed contact); this stops the automatic
system. At the next command, the opposite operation to the previous
one is performed (COMMON=10). Bridge the connectors if not used;
14 - 17 SENSITIVE
EDGE
SENSITIVE EDGE input (potential free contact N.C., dip 12 OFF) or 8,2
KΩ RESISTIVE SENSITIVE EDGE (dip 12 ON); During the opening phase,
it temporarily stops the gate and makes it close again for about 20
cm, thus allowing to free the potential obstacle.
During the closing phase, it stops the gate and makes it totally
reopen. In this case, if programmed, the automatic closing will
be inhibited. Jumper terminals if not used. (17 = COMMON - 14 =
SENSITIVE EDGE)
15 - 17 INTERNAL
PHOTOCELLS
PHOTOCELL OR SAFETY DEVICE input INSIDE the automation (Nor-
mally Closed contact); COMMON=17.
When these devices trigger during the opening phase, they tem-
porarily stop the automation until the obstacle has been removed;
during the closing phase they stop the automation and then totally
open it again. Bridge the connectors if not used.
16 - 17 EXTERNAL
PHOTOCELLS
PHOTOCELL OR SAFETY DEVICE input OUTSIDE the automation (Nor-
mally Closed contact); COMMON=17.
Then these devices trigger during the closing phase, they stop the auto-
mation and then totally open it again. Bridge the connectors if not used.
Notice: Because the control of the safety system (FOTOTEST) is per-
formed on the photocell’s transmitter, this must always be pow-
ered by terminals 24 – 26, therefore if this connection is broken the
control unit will not accept any opening command. To eliminate
the safety system control, position dip-switch 6 to OFF.
18 - 19 ELECTRIC LOCK ELECTRIC LOCK power output 12 Vac max. 15 W;
20 - 21 2nd RADIO CH
2nd RADIO CHANNEL - RELAY K2 output (contact normally open); In
case the operating mode can be selected through TauApp;
Warning: to connect other devices to the 2nd Radio Channel
(area lighting, pumps, etc.), use an additional auxiliary relay.
22 - 23 GATE OPEN
WARNING LIGHT
GATE OPEN WARNING LIGHT - RELAY K3 output; 24 V ac, max 3W;
the light lights with the same frequency as that of the ashing light
for the entire opening and closing manoeuvre and remains on if the
gate is open and o when the gate has closed; In case the operating
mode can be selected through TauApp;
24 - 26 PHOTOCELL TX 24 Vac external transmitting photocell power supply output for
safety device control (connect the external TX photocell only) max.
of 2 photocell transmitters;
25 - 26 AUX - PHOTOCELL RX 24Vac output, 10W for the power supply of photocells, external receivers, etc.
27 - 28 FLASHING
LIGHT
LEDS FLASHING LIGHT output 12V dc, 200mA max.
(NEGATIVE=27 - POSITIVE=28)
The signal is already modulated for direct use. Flashing frequency is
double during closing;
29 - 30 AERIAL AERIAL input (EARTH=29, SIGNAL=30); The antenna is normally inte-
grated in the VLED ashing light
ENGLISH

17
5. LOGIC ADJUSTMENTS
TRIMMER
TRA
Second motor delay adjustment: during closing cycle from approx. 0 to 30 sec. (on top
of the time that the card calculates automatically during the SETUP procedure); during
opening from approx. 0 to 6 sec (on top of the time that the card calculates automati-
cally during the SETUP procedure).
FR1 Motor 1 torque adjustment (swing 1). The trimmer is set to provide sucient thrust to work
the gate without exceeding the limits established by current standards (EN 12453). Turning
the trimmer clockwise (+) increases the motor torque, turning it anticlockwise (-) reduces it.
FR2
Motor 2 torque adjustment (swing 2). The trimmer is set to provide sucient thrust to work
the gate without exceeding the limits established by current standards (EN 12453). Turning
the trimmer clockwise (+) increases the motor torque, turning it anticlockwise (-) reduces it.
TCA Automatic closing time adjustment from 2 to 120 seconds.
Notice: turn the TRIMMER clockwise to increase adjustments; turn it anticlockwise to
decrease.
6. DIP SWITCH
1AUTOMATIC
CLOSING
On After opening, the gate automatically closes when the delay set on the
T.C.A. trimmer expires;
O Automatic closing disabled;
22 / 4 STROKE
On With automatic closing enabled, a sequence of open/close commands
causes the gate to OPENCLOSE-OPEN-CLOSE etc (see also dip switch 4);
O In the same conditions, the same command sequence causes the gate
to OPEN-STOP-CLOSE-STOP-OPEN-STOP (step-by-step);
3CLOSES AGAIN
AFTER THE
PHOTOCELL
On After the photocell is activated (input 7 - 9), the automation closes auto-
matically after 5 seconds.
O function o.
4NO REVERSE On The gate ignores the close command while it is opening (NO REVERSE);
O The gate behaves according to the position of dip-switch n° 2;
5PRE-FLASHING On The pre-ashing function enabled;
O The pre-ashing function disabled;
6FOTOTEST
On The “photocell test” function is enabled;
O The “photocell test” function is disabled. N.B.: to be used when the pho-
tocells are not used;
7OPENING
RAM BLOW
On The “opening ram blow” function is on. This permits the release of the
electric lock (to be used only in the presence of an electric lock);
O The “opening ram blow” function is o;
8* MOTORS
SELECTION
On Enables just one motor (M1).
O Enables 2 motors.
9* DECELERATION On The deceleration function is on (see “PROGRAMMING INSTRUCTIONS”);
O The deceleration function is o;
10** MAN MODE On Enables the MAN mode: the OPEN / CLOSE input switches OPEN,
the PEDESTRIAN input switches CLOSE;
O Normal function
WARNING: with dip 10 ON the input OPEN / CLOSE (terminals 10-11) switches OPEN, the
PEDESTRIAN input (terminals 10-12) switches CLOSE.
In MAN mode, it is not necessary to run the race setup, and the dip-switches 1, 2, 3, 4
and 9 are not used.
ENGLISH

18
11 ELECTRIC LOCK
OPERATION
On Operation of the electric lock for the entire opening and closing time
O Impulsive operation of the electric lock: at each opening, the electric lock
works for a short moment.
12 SENSITIVE EDGE
SELECTION
On RESISTIVE SENSITIVE EDGE (terminal no. 15)
O RESISTIVE EDGE - potential free contact N.C. (terminal no. 15)
Note: if not used, keep the DIP in the OFF position.
* It is necessary to run the SETUP stroke if you modify the DIP.
** It is necessary to run the SETUP stroke if you turn the DIP from ON to OFF
IMPORTANT:
Each pair of terminals attached to an NC contact that is not in use must be short-circuited in order to
ensure the proper operation of the board.
The door’s earthing system must comply with current standards. The manufacturer will accept no li-
ability for any damage deriving from failure to comply with this requirement.
7. PROGRAMMING INSTRUCTIONS (SETUP)
If a transmitter has been previously programmed, it can be used to perform the following procedure.
Otherwise, connect a Key Switch or a NO Pushbutton to the AP/CH wire terminals on the controller.
DOUBLE SWING GATE - DIP 8 OFF (2 motors operation) - DIP 9 in ON (Soft-Stop function enabled):
1 Press and hold down for at least 5 seconds P1 and P2 buttons to activate the programming mode;
2 Leds DL7 + DL8 begin to ash quickly and the 2 wings open;
f the automation closes instead of opening, stop the gate travel by temporarily disconnecting
the voltage. Invert the phases of the motor that closes (terminals 4-6 for M1, terminals 7-9
for M2) and resume the procedure from the beginning after having given voltage.
3 Once opening is complete, press AP/CH button or the remote control: both leaves will stop;
4 Press AP/CH button or the remote control: the leaf #2 will close at standard speed;
5 Press AP/CH button or the remote control when the leaf should start to decelerate;
6 When the leaf is completely closed press AP/CH button or the remote control (leaf #2 programming completed);
7 Press AP/CH button or the remote control: the leaf #1 will close at standard speed;
8 Press AP/CH button or the remote control when the leaf should start to decelerate;
9 When the leaf is completely closed press AP/CH button or the remote control (leaf #1 programming completed);
10 The green led DL7 will ash every 4 sec. (programming completed and saved).
SINGLE SWING GATE - DIP 8 ON (1 motor operation) - DIP 9 in ON ( Soft-Stop function enabled):
1 Press and hold down for at least 5 seconds P1 and P2 buttons to activate the programming mode;
2 Leds DL7 + DL8 begin to ash quickly and the 2 wings open;
f the automation closes instead of opening, stop the gate travel by temporarily disconnecting
the voltage. Invert the phases of the motor that closes (terminals 4-6 for M1, terminals 7-9
for M2) and resume the procedure from the beginning after having given voltage.
3 Once opening is complete, press AP/CH button or the remote control: the leaf will stop;
4 Press 4 times AP/CH button or the remote control: the leaf will close at standard speed;
5 Press AP/CH button or the remote control when the leaf should start to decelerate;
6 When the leaf is completely closed press AP/CH button or the remote control (leaf programming completed);
7 The green led DL7 will ash every 4 sec. (programming completed and saved).
GATE 2 WINGS - DIP 8 OFF (2 motors operation) - DIP 9 in OFF (Soft-Stop function disabled):
1 Press and hold down for at least 5 seconds P1 and P2 buttons to activate the programming mode;
2 Leds DL7 + DL8 begin to ash quickly and the 2 wings open;
f the automation closes instead of opening, stop the gate travel by temporarily disconnecting
the voltage. Invert the phases of the motor that closes (terminals 4-6 for M1, terminals 7-9
for M2) and resume the procedure from the beginning after having given voltage.
3 Once opening is complete, press AP/CH button or the remote control: both leaves will stop;
4 Press AP/CH button or the remote control: the leaf #2 will close at standard speed;
5 When the leaf is completely closed press AP/CH button or the remote control (leaf #2 programming completed);
ENGLISH

19
6 Press AP/CH button or the remote control: the leaf #1 will close at standard speed;
7 When the leaf is completely closed press AP/CH button or the remote control (leaf #1 programming completed);
8 The green led DL7 will ash every 4 sec. (programming completed and saved).
SINGLE SWING GATE - DIP 8 ON (1 motor operation) - DIP 9 in OFF (Soft-Stop function disabled):
1 Press and hold down for at least 5 seconds P1 and P2 buttons to activate the programming mode;
2 Leds DL7 + DL8 begin to ash quickly and the 2 wings open;
f the automation closes instead of opening, stop the gate travel by temporarily disconnecting
the voltage. Invert the phases of the motor that closes (terminals 4-6 for M1, terminals 7-9
for M2) and resume the procedure from the beginning after having given voltage.
3 Once opening is complete, press AP/CH button or the remote control: the leaf will stop;
4 Press 3 times AP/CH button or the remote control: the leaf will close at standard speed;
5 When the leaf is completely closed press AP/CH button or the remote control (leaf programming completed);
6 The green led DL7 will ash every 4 sec. (programming completed and saved).
Notice:
- during the SETUP procedure the safety devices are disabled.
- set a working time slightly longer than necessary (a couple of seconds) to allow complete
opening/closing of the leaves.
8. 433.92 MHz BUILT-IN RADIO RECEIVER
The radio receiver can learn up to a maximum of 30 codes of rolling code (S2RP, S4RP, K-SLIM-RP, T-4RP)
to be set freely on 2 channels.
The rst channel directly commands the control board for opening the automatic device; the second
channel commands a relay for a N.O. no-voltage output contact (terminals 19 - 20, max. 24V AC, 1 A)
and the third channel controls directly the pedestrian opening from the controller.
LEARNING SYSTEM FOR RADIO CONTROL DEVICES
P1 = 1st channel (OPEN/CLOSE) P2 = 2nd channel
1_ Press button CH1 briey to associate a radio control device with the OPEN/CLOSE function;
2_ The (green) DL7 LED is ON to indicate the code learning mode has been activated (if no code is
entered within 10 seconds the board exits the programming function);
3_ Press the button of the relative radio control device;
4_ The (green) DL7 LED turns o to indicate saving is complete and then on again immediately waiting
for other radio control devices (if this is not the case, try to re-transmit or wait 5 seconds and restart
from point 1);
5_ To memorise codes to other radio control devices, press the key to be stored on other devices
within 5 sec. After this time (green DL7 LED turns o) must repeat the procedure from point 1 (up
to a maximum of 30 transmitters);
6_ If you wish to save on the 2nd channel, repeat the procedure from point 1 using the P2 key instead
of P1 (in this case the red DL8 LED will turn on);
f the maximum number of radio controls is reached (30), the led DL7 (green) for CH1
and the led DL8 (red) for CH2 ash for about 3 seconds without storing however.
REMOTE PROGRAMMING BY MEANS OF T-4RP / K-SLIM-RP / S-2RP / S-4RP (V 4.X)
With the new version of software V 4.X it is possible to carry out the remote self-learning of the new
version of transmitters T-4RP / K-SLIM-RP / S-2RP / S-4RP (V 4.X), that is without pressing the receiver’s
programming buttons.
It will be sucient to have an already programmed transmitter in the receiver in order to start the
procedure of remote programming of the new transmitters. Follow the procedure written on the
instructions of the transmitter T-4RP / K-SLIM-RP / S-2RP / S-4RP (V 4.X).
CANCELLING CODES FROM RADIO CONTROL DEVICES
1_ Keep button P1 pressed for 3 seconds in order to cancel all the associated radio control devices;
2_ (Green) DL7 LED ashes slowly to indicate that the cancellation mode has been activated;
3_ press button P1 again for 3 seconds;
4_ (Green) DL7 LED turns o for approx. 3 seconds and then remains steady to indicate that the code
has been cancelled;
ENGLISH

20
5_ repeat the procedure from point 1 using button P2 to cancel all the associated radio control devices;
6_ to exit the learning mode without memorising a code, press button P1 or P2 briey.
MEMORY CAPACITY
The code memory capacity* of the D770M can be expanded from 30 to 126, 254 or 1022 codes (transmit-
ters) by replacing the memory cards as follows
(plug them onto J4 connector, see wiring diagram)
:
126 codes Art. 250SM126
254 codes Art. 250SM254
1022 codes Art. 250SM1022
* Control units are supplied with a standard built-in 30-code memory. The memory card for enhancing the
code memory capacity must be ordered separately.
To allow the previously stored codes (max. 30) to be moved to the control unit, it is required to install
a memory card, making sure that the control unit is at that time o and that the memory card is brand
new and therefore completely empty.
When the control unit is restarted, the codes will automatically move to the memory card.
Moving the codes from the control unit to the memory card does not work if on the memory card used,
radio control codes have already been stored and the memory card has been subsequently erased.
To insert new radio controls, the operation described above shall be repeated.
WARNING: Control unit must be turned OFF to insert / remove a memory card.
HARD RESET (factory setting):
- With the power o, press and hold down the P1 button.
Power the board (always keeping the P1 button pressed), the DL8 starts ashing red.
Release the P1 button after 5 sec. the DL7-DL8 switch o and on again by ashing green/red
In case of Hard Reset the memory of the radio receiver will not be erased: all existing
transmitters remain programmed.
9. SET-UP FOR OPERATION WITH TAU APPS
In order to use the TauApp and TauOpen apps, it will be necessary to connect to input J3 of the control
unit using the supplied cable, the respective T-WIFI and T-CONNECT devices. To activate the operation
of the apps see the respective instructions.
10. DIAGNOSTICS LED
DL1 - Red OPEN/CLOSE button red LED signal
DL2 - Red PEDESTRIAN button red LED signal
DL3 - Green STOP button green LED signal
DL4 - Green SENSITIVE EDGE green LED signal
DL5 - Green INTERNAL PHOTOCELL green LED signal
DL6 - Green EXTERNAL PHOTOCELL green LED signal
DL7 + DL8 Led indicating the programming of REMOTE CONTROLS, ERRORS and the status of
the control unit
LED: DL7 (green) + DL8 (red)
Leds DL7 and DL8 displays any mistakes with a series of pre-set ashes:
Key: led always on; led ashing; led o;
/ Alternate ashing (green/red): Saving to be performed;
/ Simultaneous fast ashing
(green/red) Saving in progress;
/ No. 8 ashes (green/red): Eeprom data error;
ENGLISH

21
Perform procedure RADIO MEMORY RESET;
LED: DL7 (green) + DL8 (red led always o)
1 ash every 4 seconds (green): Normal operation;
Apart from the logic mistakes, the DL7 LED indicates also the status of the control unit during the sav-
ing of the radio controls.
Always on (green): Channel CH1 waiting to be saved;
Fast ashing (green): CH1 channel memory full;
Flashing (green): CH1 channel waiting to be cancelled;
Led o: Cancelling of channel CH1 in progress;
LED: DL8 (red) + DL7 (green led always o)
Led o: Normal operation;
1 ash (red): Phototest error
Disable phototest (dip-switch 6 OFF), check the operation of the
photocells and their connection;
7 ashes (red): Sensitive edge safety intervention
A command pulse is required to carry out the closure;
8 ashes (red): Eeprom external memory fault;
Replace the external memory module;
Apart from the logic mistakes, the DL8 LED indicates also the status of the control unit during the sav-
ing of the radio controls.
Always on (red): Channel CH2 waiting to be saved;
Fast ashing (red): CH2 channel memory full;
Flashing (Rosso): CH2 channel waiting to be cancelled;
Led o: cancelling of channel CH2 in progress;
11. MALFUNCTIONS: POSSIBLE CAUSES AND SOLUTION
The automation does not start
a- Check there is 230Vac power supply with the multimeter;
b- Check that the NC contacts of the card are actually normally closed (4 green LEDs on: DL3, DL4, DL5, DL6);
c- Set dip 6 (phototest) to OFF;
d- Check that the fuses are intact with the multimeter.
The radio control has very little range
a- Check that the ground and the aerial signal connections have not been inverted;
b- Do not make joints to increase the length of the aerial wire;
c- Do not install the aerial in a low position or behind walls or pillars;
d- Check the state of the radio control batteries.
The gate opens the wrong way
Invert the motor connections on the terminal block (terminals 4 and 6 for motor 1; terminals 7 and
9 for motor 2);
12. GUARANTEE: GENERAL CONDITIONS
TAU guarantees this product for a period of 24 months from the date of purchase (as proved by the sales
ENGLISH

22
MANUFACTURER’S DECLARATION OF INCORPORATION
(in accordance with European Directive 2006/42/EC App. II.B)
Manufacturer: TAU S.r.l.
Address: Via E. Fermi, 43 - 36066 Sandrigo (Vi) -ITALY
Declares under its sole responsibility, that the product: Electronic control unit
designed for automatic movement of: Swing Gates
for use in a: Residential / Communities complete with: Radioreceiver
Model: D770M Type:D770M
Serial number: see silver label Commercial name: Control panel for two single-phase motors 230V AC
Has been produced for incorporation on an access point (swing gate) of for assembly with other devices used
to move such an access point, to constitute a machine in accordance with the Machinery Directive 2006/42/EC.
Also declares that this product complies with the essential safety requirements of the following EEC directives:
- 2014/35/EU Low Voltage Directive - 2014/30/EU Electromagnetic Compatibility Directive
and, where required, with the Directive: - 2014/53/EU Radio equipment and telecommunications terminal equipment
Also declares that it is not permitted to start up the machine until the machine in which it is incorporated or
of which it will be a component has been identied with the relative declaration of conformity with the provi-
sions of Directive 2006/42/EC.
The following standards and technical specications are applied:
EN 61000-6-2; EN 61000-6-3; EN 60335-1; ETSI EN 301 489-1 V1.9.2; ETSI EN 301 489-3 V1.6.1;
EN 300 220-2 V2.4.1; EN 12453:2000; EN 12445:2000; EN 60335-2-103.
The manufacturer undertakes to provide, on suciently motivated request by national authorities, all infor-
mation pertinent to the quasi-machinery.
Sandrigo, 18/02/2018 Legal Representative
_________________________________________
Loris Virgilio Danieli
Name and address of person authorised to draw up all pertinent technical documentation:
Loris Virgilio Danieli - via E. Fermi, 43 - 36066 Sandrigo (Vi) Italy
_________________________________________
Loris Virgilio Danieli
Name and address of person authorised to draw up all pertinent technical documentation:
document, receipt or invoice).
This guarantee covers the repair or replacement at TAU’s expense (ex-works TAU: packing and transport at
the customer’s expense) of parts that TAU recognises as being faulty as regards workmanship or materials.
For visits to the customer’s facilities, also during the guarantee period, a “Call-out fee” will be charged for
travelling expenses and labour costs.
The guarantee does not cover the following cases:
• If the fault was caused by an installation that was not performed according to the instructions
provided by the company inside the product pack.
• If original TAU spare parts were not used to install the product.
• If the damage was caused by an Act of God, tampering, overvoltage, incorrect power supply, im-
proper repairs, incorrect installation, or other reasons that do not depend on TAU.
• If a specialised maintenance man does not carry out routine maintenance operations according to
the instructions provided by the company inside the product pack.
• Wear of components.
The repair or replacement of pieces under guarantee does not extend the guarantee period.
In case of industrial, professional or similar use, this warranty is valid for 12 months.
ENGLISH
Other manuals for D770M
1
Table of contents
Other tau Control Unit manuals
Popular Control Unit manuals by other brands
Frequency Central
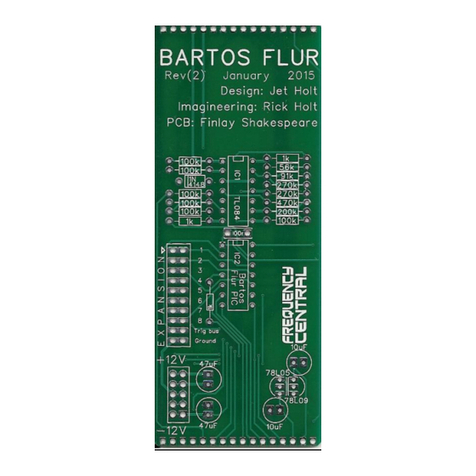
Frequency Central Bartos Flur Rev(2) Build documentation
Dart
Dart DP10 instruction manual
System Sensor
System Sensor i3 Series Installation and maintenance instructions
Toro
Toro 112-4881 installation instructions
ITRON
ITRON 60W Endpoint installation guide

Vega
Vega VEGADIF 65 operating instructions
Telit Wireless Solutions
Telit Wireless Solutions NE866B1 Hardware Design Guide
Puls
Puls DIMENSION YR40.245 manual
ICP DAS USA
ICP DAS USA ZT-2017 user manual
HomeMatic
HomeMatic HmIP-PCBS Installation instructions and operating manual

Racal Instruments
Racal Instruments 1260 VXI manual
Quectel
Quectel EM160R-GL Hardware design
