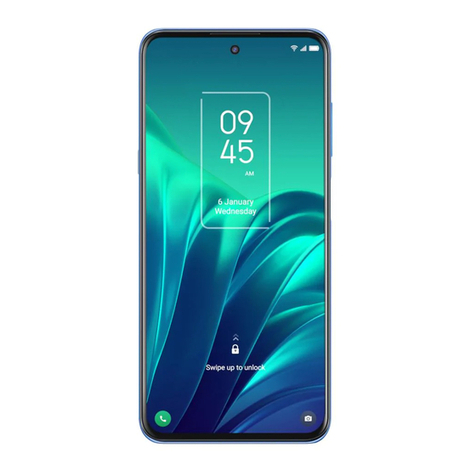
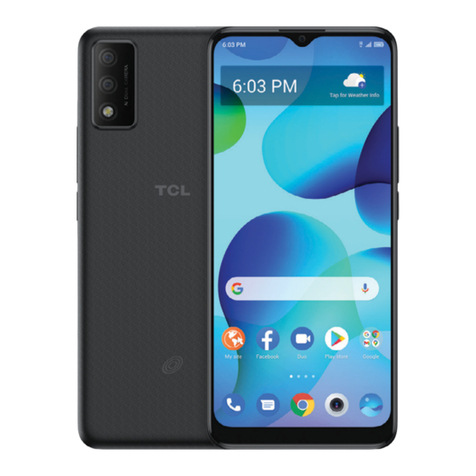
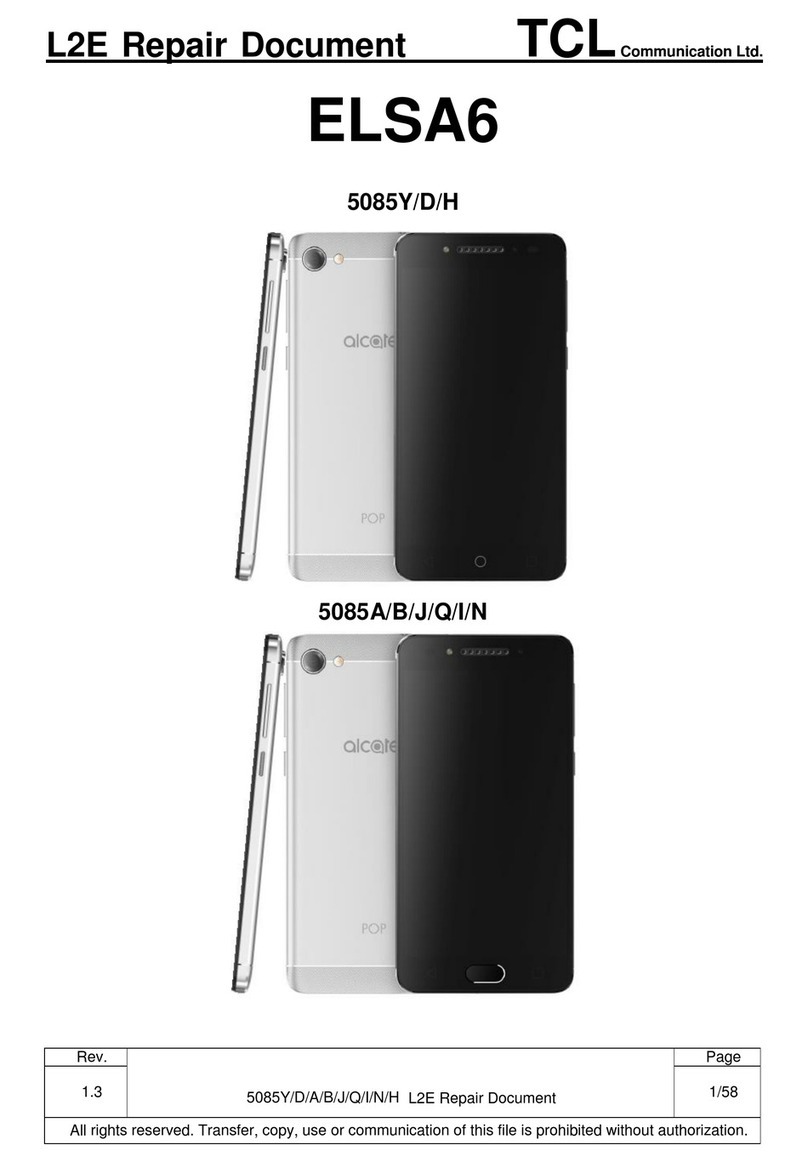
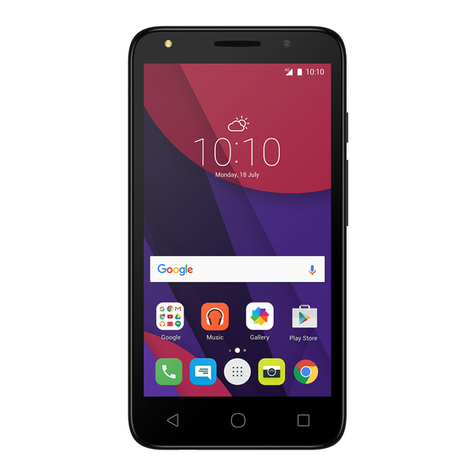
TCL A30 User manual


1 2
8.5 Connecting to virtual private networks .................................................. 44
9 Google applications ��������������������������������������������������������������������������������� 46
9.1 Play Store.............................................................................................. 46
9.2 Chrome.................................................................................................. 46
9.3 Maps...................................................................................................... 46
9.4 YouTube ................................................................................................ 47
9.5 Drive ...................................................................................................... 47
9.6 YT Music................................................................................................ 47
9.7 Play Movies & TV .................................................................................. 47
9.8 Duo ........................................................................................................ 47
9.9 Photos ................................................................................................... 48
10 Settings������������������������������������������������������������������������������������������������������� 49
10.1 Wi-Fi ...................................................................................................... 49
10.2 Bluetooth ............................................................................................... 49
10.3 SIM cards & mobile network ................................................................. 49
10.4 Connected devices................................................................................ 50
10.5 Home screen & lock screen .................................................................. 50
10.6 Display................................................................................................... 50
10.7 Sound & vibration .................................................................................. 51
10.8 Notifications ........................................................................................... 51
10.9 Button & Gestures ................................................................................. 51
10.10 Smart Manager...................................................................................... 51
10.11 Digital Wellbeing & parental controls .................................................... 51
10.12 Security & biometrics............................................................................. 52
10.13 Location ................................................................................................. 52
10.14 Privacy................................................................................................... 52
Table of contents
1 Your mobile �������������������������������������������������������������������������������������������������� 4
1.1 Keys and connectors...............................................................................4
1.2 Getting started......................................................................................... 6
1.3 Home screen ........................................................................................... 8
2 Text input���������������������������������������������������������������������������������������������������� 16
2.1 Using the Onscreen Keyboard .............................................................. 16
2.2 Text editing ............................................................................................ 17
3 Phone call, Call log and Contacts������������������������������������������������������������ 18
3.1 Phone .................................................................................................... 18
3.2 Contacts ................................................................................................ 23
4 Messages���������������������������������������������������������������������������������������������������� 27
4.1 Write message....................................................................................... 27
4.2 Manage messages ................................................................................ 28
4.3 Adjust message settings ....................................................................... 29
5 Camera�������������������������������������������������������������������������������������������������������� 30
6 Gmail����������������������������������������������������������������������������������������������������������� 33
7 Calendar & Alarm clock ���������������������������������������������������������������������������� 38
7.1 Calendar ................................................................................................ 38
7.2 Clock...................................................................................................... 39
8 Getting connected ������������������������������������������������������������������������������������� 40
8.1 Connecting to the Internet..................................................................... 40
8.2 Connecting to Bluetooth devices .......................................................... 41
8.3 Connecting to a computer .................................................................... 43
8.4 Sharing your phone's mobile data connection ...................................... 43
3 4
www.sar-tick.com
This product meets applicable national SAR limits of 1.6 W/kg.
The specific maximum SAR values can be found in the “SAR
Information” section.
When carrying the product or using it while worn on your
body, either use an approved accessory such as a holster
or otherwise maintain a distance of 15 mm from the body to
ensure compliance with RF exposure requirements. Note that
the product may be transmitting even if you are not making a
phone call.
1 Your mobile ��������������������������������������������
1�1 Keys and connectors
Headset connector
Home
Back Recent Apps
Micro-USB Connector
Front camera
Indicator light
Touch screen
10.15 Apps ...................................................................................................... 52
10.16 Storage .................................................................................................. 53
10.17 Users & accounts .................................................................................. 53
10.18 Google ................................................................................................... 53
10.19 Accessibility ........................................................................................... 53
10.20 System................................................................................................... 53
11 Making the most of your phone��������������������������������������������������������������� 54
11.1 FOTA Upgrade....................................................................................... 54
Safety and use��������������������������������������������������������������������������������������������������� 55
Radio waves������������������������������������������������������������������������������������������������������� 57
Licenses ������������������������������������������������������������������������������������������������������������� 61
General information ������������������������������������������������������������������������������������������ 63
Electronic Information �������������������������������������������������������������������������������������� 64

5 6
Power key
Volume key
The Google
Assistant Button
Back
camera Flash
Back
• Tap to go back to the previous screen, or to close a dialog box, options
menu, the notification panel, etc.
Home
• From any application or screen, tap to return to the Home screen.
• Touch and hold to activate Google Assistant.
Recent Apps
• Tap to open a thumbnail list of apps you've worked with recently. Tap
a thumbnail to open an app. Swipe up on the screen to remove a
specific thumbnail from the list, or tap to remove all thumbnails
from the list.
The Google Assistant Button (on the left side of the device)
• Press to access the Google Assistant
Power key
• Press: Lock the screen or light up the screen.
• Press and hold: Show the pop-up menu to select from Power off, Restart,
Airplane mode.
• Press and hold the Power key for more than 11 seconds to reboot.
• Press and hold the Power key and Volume down key to capture a
screenshot.
Volume Keys
• During a call, adjusts the earpiece or headset volume.
• While listening to music, video or streaming, adjusts the media volume.
• Adjusts the ringtone volume.
• Mutes the ringtone of an incoming call.
• While using the camera, press Volume up or down key to take a photo.
1�2 Getting started
1�2�1 Set up
Installing or removing the SIM card and microSDTM card
Your phone already has a SIM card installed. If you need to change or remove
your SIM card, follow the steps below.
With the phone face down, remove back cover by gently pulling up on the
indentation on the bottom left of the cover.
Insert the SIM card and microSDTM card with gold contacts facing down.
Ensure that SIM and microSDTM cards have been properly secured.
Note: microSDTM cards are sold separately. Only use Nano SIM cards with your
phone.

7 8
Charging the battery
It is advised that you fully charge your battery before first use ( ). Connect
the charger to your phone and an outlet. Charging status is indicated by the
percentage on screen while the phone is powered off. The percentage increases
as the phone is charged.
To reduce power consumption and energy waste when the battery is fully
charged, disconnect your charger from your phone; switch off Wi-Fi, GPS,
Bluetooth or background-running applications when not in use; reduce the
backlight time, etc.
1�2�2 Power on your phone
Hold down the Power key until the phone powers on, unlock your phone (screen
lock, face unlock, password, etc.) if necessary and confirm. The Home screen is
displayed.
If you do not know your PIN/password or pattern, or if you have forgotten it,
contact your service provider. Do not leave your PIN/password or pattern, with
your phone. Store this information in a safe place when not in use.
Set up your phone for the first time
The first time you power on the phone, you should set the following options:
language, mobile data, Google service, and date & time, etc.
1�2�3 Power off your phone
Hold down the Power key from any screen until the phone options appear, select
Power off.
1�3 Home screen
You can bring all of the items (applications, shortcuts, folders and widgets) you
use most frequently to your Home screen for quick access. Tap the Home key
to get instant access to the Home screen.
Status bar
• Status/notification indicators
• Drag down to open the Notification panel.
Tap an icon to open an application, folder, etc.
Favorite Applications tray
•Tap to open the application.
•Touchandholdtomoveorchangeapplications.
The Home screen is provided in an extended format to allow more space for
adding applications, shortcuts, etc. Slide the Home screen horizontally to get a
complete view.

9 10
1�3�1 Using the touchscreen
Tap
To open an application, tap it with your finger.
Touch and Hold
Touch and hold the item to view options for the item, such as Move, Remove, and
more.
Drag
Place your finger on the screen to drag an object to another location.
Slide/Swipe
Slide or swipe on the screen to scroll through the applications, images, web
pages, and more.
Pinch
Place two fingers on the screen surface and together to scale an element on the
screen.
Rotate
Automatically change the screen orientation from portrait to landscape by turning
the device sideways to have a better view. Auto-rotate can be changed at any time
in Settings .
1�3�2 Status bar
From the status bar, you can view both phone status and notification information.
Status icons
GSM only Vibrate mode
WCDMA only Alarm is set
LTE only Connected to a Wi-Fi network
Signal strength Speakerphone is on
No signal No SIM card inserted
Airplane mode Battery is charging
Bluetooth connected Battery is low
Headset connected Battery is partially drained
GPS is on Battery is full
Notification icons
New Gmail message Missed call
New text or multimedia
message Connect to open Wi-Fi network
Upcoming event Uploading data
Downloading data System update available
Drag down the Status bar to open the Quick Settings panel or Notification panel.
Drag up to close the panels.

11 12
Notification panel
When there are notifications, drag down the Status bar to open the Notification
panel to read the detailed information. Tap on the notification directly to open the
notification within the respective app.
Taptoclearallevent–basednotifications
(other ongoing notifications will remain).
With the Notification panel open,
drag down again to see the Quick
Settings menu.
Quick settings panel
Drag down the Notification panel to open the Quick Settings panel, where you can
enable or disable functions or change modes by tapping the icons.
Tap to open the full Settings menu.
1�3�3 Search bar
The phone provides a Search function which can be used to locate information
within applications, the phone or the web.
Search by text
• Touch the Search bar from the Home screen.
• Type the text/phrase you want to search for.
• Touch the icon on the keyboard if you want to search on the web.
Search by voice
• Touch from the Search bar to display a dialog screen.
• Speak the word/phrase you want to search for. A list of search results will
display for you to select from.

13 14
1�3�4 Lock/Unlock your screen
To protect your phone and privacy, you can lock the phone screen by creating a
variety of patterns, PINs or passwords etc.
To lock the phone screen
• If your phone remains inactive for a period of time, it will automatically lock the
screen and enter sleep mode to save power. Go to Settings > Display > Sleep
and select a screen timeout period.
• You can also manually lock the screen by pressing the Power key once.
To unlock the phone screen
Press the Power key once to light up the screen, swipe up and unlock the screen
with the method you have set.
• Enter a password to unlock the screen
Once the screen is turned on, swipe up from any position on the screen to display
the password input panel. Then enter your lock screen password.
• Use pattern unlock
Draw the same pattern you have set to unlock the screen.
• Use Face unlock
From the app list, touch Settings > Security & biometrics > Face unlock. Before
using the face unlock, you need to set a pattern/PIN/password�
Hold your phone 8-20 inches from your face. Position your face in the square
shown on the screen. For best results, we suggest that the face key is enrolled
indoors and away from direct sunlight.
1�3�5 Personalize your Home screen
Add
You can touch and hold a folder, an application or a widget to activate the Move
mode, and drag the item to any Home screen as you prefer.
Reposition
Touch and hold the item to be repositioned to activate the Move mode, drag the
item to the desired position and then release. You can move items both on the
Home screen and the favorite tray. Hold the icon on the left or right edge of the
screen to drag the item to another Home screen.
Remove
Touch and hold the item to be removed to activate the Move mode, drag the item
up to the top of the Remove icon, and release after the item turns red.
Create folders
To improve the organization of items (shortcuts or applications) on the Home
screen and the favorite tray, you can add them to a folder by stacking one item on
top of another. To rename a folder, open it and touch the folder’s title bar to input
the new name.
Wallpaper customization
Touch and hold the Home screen then touch Wallpapers to customize
wallpaper.
1�3�6 Widgets and recently used applications
Consult widgets
Touch and hold the Home screen to enter applications and widgets list.
Slide left and right to view all applications and widgets. Touch Widgets to
access the category directly.
To return to the Home screen, touch the Home button .

15 16
Consult recently used applications
To consult recently used applications, touch Recent APPs from the Home
screen. Touch a thumbnail in the window to open the related application.
Slide horizontally to view all thumbnails of recently used applications.
Touch one thumbnail and slide it up to remove it.
Touch to activate the system's one key boost which clears memory used by
recent applications.
1�3�7 Volume adjustment
Using the Volume key
Press the Volume key to adjust the volume. To activate the vibrate mode, press
the Volume down or up key and touch . While in vibrate mode, press the Volume
down or up key and touch to activate the silent mode.
Using the Settings Menu
Swipe up on the Home screen, then touch Settings > Sound & vibration to
set the volume for media, Alarm, Ring, Notification, etc. to your preference.
2 Text input������������������������������������������������
2�1 Using the Onscreen Keyboard
Onscreen keyboard settings
Swipe up on the Home screen, select Settings > System > Languages &
input > Virtual Keyboard and a series of settings will become available for your
selection.
2�1�1 Gboard
Touch to switch to "abc/Abc" mode;
Touch and hold to switch to "ABC" mode.
Touch to take a photo/video or
attach a photo/video.
Touch to give access to your location,
send a voice message or attach files. Touch to send
the SMS or
MMSmessage.

17 18
2�2 Text editing
You can edit the text you have entered�
• Touch and hold or double tap the text you would like to edit.
• Drag the tabs to change the highlighted selection.
• The following options will show: Cut, Copy, Paste, Share.
You can also insert new text�
• Touch where you want to type, or touch and hold the blank area, the cursor will
blink, and the tab will show. Drag the tab to move the cursor.
• If you have selected any text, touch the tab to show the Paste and Select all
options which allows you to paste immediately.
3 Phone call, Call log and Contacts �������
3�1 Phone ��������������������������������������������������������������
3�1�1 Placing a call
You can easily make a call using Phone . Touch Phone from the Home
screen.
Touch and hold to
access voicemail.
Displaythesuggested
number(s).
Enter the desired number from the keyboard directly or select a contact from
Contacts or Recents, then touch to place the call.
The number you entered can be saved to Contacts by touching Create new
contact .
If you make a mistake, you can delete the incorrect digits by touching .
To hang up a call, touch .
International call
To dial an international call, touch and hold to enter “+”, then enter the international
country prefix followed by the full phone number and finally touch .

19 20
Emergency call
If your phone has network coverage, dial emergency number and touch to
make an emergency call. This works even without a SIM card and without typing
the PIN code.
3�1�2 Answering or rejecting a call
When you receive a call:
• Swipe up to answer.
• Swipe down to reject.
• Swipe to reject the call by sending a preset message.
To mute the ringtone volume of an incoming call, press the Volume up/down key.
3�1�3 Calling your voicemail
Your voicemail is provided by your network to avoid missing calls. It works like an
answering machine that you can consult at any time.
To access your voicemail, touch and hold on the dial pad.
To set your voicemail number, touch the Menu icon from the Phone screen, then
touch Settings > Voicemail > Advanced Settings > Setup > Voicemail number.
3�1�4 During a call
To adjust the volume during a call, press the Volume up/down key.
End the current call.
Touch to mute the current call. Touch this icon again to unmute the call.
Display the dial pad.
Touch to activate the speaker during the current call. Touch this icon again
to deactivate the speaker.
Make another call.
Put a call on hold.
Merge calls to start a conference call.
Split a conference call into multiple calls.
Swap the calls.
To avoid accidental operation of the touchscreen during a call, the screen
will be locked automatically when you put the cellphone close to your ear;
and it will be unlocked when the cellphone is taken away from your ear.

21 22
3�1�5 Managing multiple calls
With this phone you can handle multiple calls at the same time.
Swap calls
When you accept two calls, touch the icon to switch between two lines. The
current call will be put on hold and you are able to join the other call.
Conference calls(1)
You can set up a conference call as follows.
• Place a call to the first participant of the conference call.
• Touch to add another call.
• Enter the phone number of the person you want to add to the conference and
touch . You can also add participants from Call logs or Contacts.
• Touch to start the conference.
• Touch to end the conference call and disconnect all callers.
3�1�6 Call settings
Touch the Menu icon from the Phone screen, then touch Settings, the following
options are available:
Display options
•Sort by
To set the contacts display by First name or Last name.
•Name format
To set the name format by First name first or Last name first.
Sounds and vibrate
Adjust volume or select ringtone for your call, notification, alarm, etc.
Quick responses
Touch to edit quick responses which will be used when you reject a call with
messages.
(1) Depending on your network operator.
Calls
Touch to forward your calls or access other voice call settings.
Blocked numbers
Block the numbers you don’t want to receive calls or texts from them.
Voicemail
Touch to access voicemail service and number settings.
•Service
Opens a dialog box where you can select your provider's voicemail service or
another service.
•Setup
If you are using your provider's voicemail service, this opens a dialog box where
you can enter the phone number to use for listening to and managing your
voicemail.
•Notifications
Touch to select the notification sound.
Accessibility
•TTY mode/Real Time Text
TTY/ Real Time Text (RTT) assists callers who are deaf, hard of hearing, have a
speech disability, or need more than voice alone. Incoming/outgoing speech can
be converted to real-time text messaging when TTY call has been established.
Assisted dialing
Assisted dialing predicts and adds a country code when you call while traveling
abroad.
Caller ID & spam
•See caller and spam ID
Identify business and spam numbers
•Verified Calls
See the caller ID and reason for incoming calls from business

23 24
Nearby places
When you search from the phone app, this feature will use your location to find
nearby pleces that match your query, even if they are not in your contacts.
3�1�7 Call log
You can access your call log by touching from the Phone screen to view
missed calls, outgoing calls and incoming calls.
Touch one call to view information or further operations. You can launch a new
call, send a message to the contact or number, or view detailed information of the
call.
To delete the call history of a selected contact or number, touch and hold the
contact and choose Delete.
3�2 Contacts�����������������������������������������������������������
Contacts enables quick and easy access to the people you want to reach. You
can view and create contacts on your phone.
3�2�1 Consult your Contacts
To access this feature, swipe up on the Home screen, then select Contacts .
Touch to view the contact’s
detailed information.
Touch to select accounts.
Touch to select Contacts
Touch to add a new contact.
Touch to open
menu options.
3�2�2 Adding a contact
Touch to create a new contact.
You are required to enter the contact's name and other contact information. By
scrolling up and down on the screen, you can move from one field to another
easily.
Touch to save
Touch to select a picture for the contact.
Touch to expand the label
Add to/remove from Favorites (1)
To add a contact to favorites, you can touch a contact to view details then touch
to add the contact to favorites (the star will turn black in color).
To remove a contact from favorites, touch on the contact details screen.
3�2�3 Editing your contacts
To edit contact information, touch . When finished, touch SAVE.
Change a contact’s default phone number
The default phone number (the number which has priority when making a call or
sending a message) will always be displayed under the contact name.
To change the default phone number, touch and hold the number you want to set
as the default number from the contact's details screen, then select Set default.
This choice is only available when the contact has more than one number.
(1) Only phone and account contacts can be added to Favorites.

25 26
Set ringtone for a contact (1)
On the contact's detail screen, touch to set ringtone.
Delete a contact
To delete a contact, touch and hold the contacts and then touch to delete select
contacts.
The contact you have deleted will also be removed from other applications
on the phone or web the next time you synchronize your phone.
3�2�4 Communicating with your contacts
From the contact list, you can communicate with your contacts by making a call
or exchanging messages.
Touch a contact to open Quick Contact for Android, then you can touch the number
to make a phone call or to send a message.
The icons available on the Quick Contact panel depend on the information you
have for the contact and the applications and accounts on your phone.
(1) You can only set a ringtone for established contacts.
3�2�5 Contacts importing, exporting, and sharing
From the Contacts screen, touch to open the options menu, touch Settings >
Import/Export, then select to import/export contacts from/to your SIM card,
phone, micro SD card, etc.
Share a single contact or multiple contacts with others by sending the contact's
vCard to them via Bluetooth, Gmail, etc.
Touch and hold the contact (s) you want to share, touch .

27 28
4 Messages �������������������������������������������
You can create, edit, and receive SMS and MMS with this phone.
To access this feature, touch Messages from the Home screen.
4�1 Write message
On the message list screen, touch the new message icon to write text/
multimedia messages.
Touch to create a new message
Touch for more options.
• Touch to view the whole message thread.
• Touch & hold to activate delete mode.
Touch to search in all messages.
Sending a text message
Enter the mobile phone number of the recipient in the To bar or select a contact,
then touch the Text message bar to type the text of the message. When finished,
touch to send the text message.
An SMS of more than 160 characters will be split and sent as multiple SMS.
A counter will be displayed on the right of the text box to remind you of how
many characters can be entered in one message. Specific letters (accent)
will also increase the size of the SMS, this may cause multiple SMS to be
sent to your recipient.
Sending a multimedia message
MMS enables you to send video clips, images, photos, animations, slides and
sounds to other compatible mobiles and e-mail addresses.
An SMS will be converted to MMS automatically when media files (image, video,
audio, slides, etc.) are attached or subject or email addresses are added.
• To send a multimedia message, enter the recipient's phone number in the To
bar.
• Write the text of the message in the Text message bar.
• Touch to give access to your location, send a voice message or attach files.
• Touch to take a photo/video or attach a photo/video you have taken.
• When finished, touch to send the multimedia message.
4�2 Manage messages
When receiving a message, an icon will appear on the status bar as notification.
Drag down the status bar to open the Notification panel, touch the new message
to open and read it. You can also access the Messaging application and touch the
message to open.
Messages are displayed in conversational order.
To reply to a message, touch the current message to enter message composing
screen, enter the text, then touch .
Long press an SMS in message details screen. The following message options
are available for selection:
This option displays when the message is an SMS. Copy the current
message content. You can paste it to the enter bar of the new message you
are going to compose.
Delete the current message.
To view message details or send message.

29 30
4�3 Adjust message settings
You can adjust a set of message settings. From the Messaging application screen,
touch and then Settings.
•Notifications
Mark the checkbox to display message notifications in the status bar.
•Hear outgoing message sounds
Touch to enable this function.
•Your current country
Touch to set the country.
•Automatic previews
Touch to select the settings of previews in messages.
•Spam protection
Touch to enable spam protection.
•Advanced
Touch to enable/disable more settings, such as Auto-download MMS, Use
simple characters, etc.
•About, terms & privacy
Touch to view the Version info, Privacy Policy and Terms of Service
5 Camera �����������������������������������������������
Your mobile phone is equipped with a camera and a camcorder for taking photos
and shooting videos.
Before using the camera or camcorder, please be sure to remove the protective
lens cover before use to avoid it affecting your picture quality.
To access this function, touch Camera from the Home screen.
View the photos or
videos you have taken Take a photo
Touch the
screen to focus
Switch between front/back
camera
To take a picture
The screen acts as the viewfinder. First position the object or landscape in the
viewfinder, touch to take the picture which will be automatically saved, touch
and hold to take burst shots, the maximum number is 20.
To take a video
Touch VIDEO to change the camera mode to video, then touch to start video
recording. You can also touch the left part of the icon to take a picture
during video recording.
Touch to pause video recording and touch to continue. Touch to stop
recording. The video will be automatically saved.

31 32
Further operations when viewing a picture/video you have taken
• Slide left or right to view the photos or videos you have taken.
• Touch , then select Gmail/Bluetooth/MMS/etc. to share the photo or video.
• Touch Back button to return to Camera.
Modes in framing mode
•MORE
Touch to access more modes. These modes can be moved to the main screen by
touching .
•AUTO
Auto is the default mode for Camera.
•VIDEO
Touch to access video mode.
•PORTRAIT
Touch to create a depth of field effect. You can compose an image that highlights
your subject while producing a gorgeously blurred background.
•PRO
Pro camera mode lets you fine-tune parameters and gives you full control over
ISO, WB exposure time, aperture, shutter speed and so on.
Settings
Touch to adjust several settings in framing mode.
•Video quality
Touch to select video progressive scan output and definition.
•Volume button function
Touch to set volume button function in camera mode.
•Grid
Switch the toggle to enable/disable grid view. It divides the screen into equal
parts and helps you take better photos by making it simple to align compositional
elements to the grid.
•Storage
Show the storage location for the photo.
•Save location information
Touch to turn on/off save location information when taking a picture.
•Shutter sound
Switch the toggle to enable/disable shutter sound when taking a photo.
•Reset settings
Touch to reset settings to default.
Other applications (1)
The previous applications in this section are preinstalled on your phone. You can
also download thousands of 3rd party applications by going to the Google Play
Store on your phone.
(1) Application availability depends on country and provider.

33 34
6 Gmail�������������������������������������������������
As Google's web-based email service, Gmail is configured when you first set up
your phone. Gmail on your phone can be automatically synchronized with your
Gmail account on the web. Unlike other types of email accounts, each message
and its replies in Gmail are grouped in your inbox as a single conversation; all
emails are organized by labels instead of folders.
To access Gmail
Swipe up on the Home screen, then touch Gmail.
To create and send emails
• Touch from the Inbox screen.
• Enter recipient(s)’s email address in the To field, and if necessary, touch and
then add a copy or a blind copy to the message in the Cc or Bcc field.
• Enter the subject and the content of the message.
• Touch to add an attachment.
• Finally, touch to send.
• If you do not want to send the mail out right away, you can touch and Save
draft or touch Back button to save a copy. To view the draft, touch display
all labels, then select Drafts.
• If you do not want to send or save the mail, you can touch to discard.
To add a signature to emails, touch the icon from the inbox screen and then
touch Settings, choose an account, then touch Mobile Signature.
To receive and read your emails
When a new email arrives, you will be notified by a ringtone or vibration, and
will appear on Status bar.
Touch and drag down the Status bar to display the Notification panel, touch the
new email to view it. Or you can also access the Gmail Inbox label and touch All
mail to read it.
You can search for an email by sender, subject, label, etc.
• Touch the Search mail bar from the Inbox screen.
• Touch to say something or enter the keyword you want to search for in the
searching box and touch .
To reply or forward emails
•Reply
When viewing an email, touch to reply to the sender of this mail.
•Reply all
Touch and select “Reply all” to send message to all people in a mail loop.
•Forward
Touch and select “Forward” to forward the received mail to other people.
•Add star
Touch to add star.
•Print
Touch and select "Print" to save the email as PDF and print it.
Managing Emails with Labels
To conveniently manage conversations and messages, you can organize them
using a Label.
To view conversations by labels when viewing your inbox or another conversation
list, touch to view a list of conversations with that label.
Touch and hold an email to activate batch mode, and produce the following options:
Touch to archive the email message.
Touch to delete the email message.
/ Touch to mark an email message as read or unread.

35 36
Touch to show additional options:
•Move to
Touch to move the email to other labels.
•Change labels
Touch to change the label of the email message or conversation.
•Mark important
To Mark the email as important or not important.
•Mute
Touch to mute the email.
•Snooze
Touch to set the notification of the email.
•Report spam
To report the email message/conversation as spam.
Gmail settings
To manage Gmail settings, touch from the inbox screen and then touch Settings.
General settings
•Default notification action
Touch to set the default notification action when touched as Archive or Delete.
•Conversation view
Mark the checkbox to enable group emails in the same conversation together for
IMAP, POP3, and Exchange accounts.
•Swipe actions
Touch to select the swipe actions to archive in conversation list.
•Default reply action
Touch to choose the default reply action.
•Open web links in Gmail
Touch to enable the function for faster browsing of the link in the email through
Gmail. Otherwise you can only open the link through Chrome.
•Auto-fit messages
Touch to mark the checkbox to shrink messages to fit the screen and allow
zooming.
•Auto-advance
Touch to select which screen to show after you delete or archive a conversation.
•Confirm before deleting
Mark the checkbox and you will need to confirm before deleting emails.
•Confirm before archiving
Mark the checkbox and you will need to confirm before archiving emails.
•Confirm before sending
Mark the checkbox and you will need to confirm before sending emails.
Touch an account and the following settings will display:
•Inbox type
To set messages in this inbox as the default important first, Unread first, standard
first or priority inbox.
•Inbox categories
Touch to category the emails to Primary, Social, Promotions, Update or Forums�
•Notifications
Select to activate notification when a new email arrives.
•Inbox notifications
Touch to set Play sound, Vibrate and Notify once when each new message arrives.
•Mobile Signature
To add a signature text to the end of each mail you send.
•Vacation responder
Touch to set the notification when on vacation.

37 38
•Sync Gmail
Mark the checkbox to turn on/off Gmail sync.
•Days of mail to sync
Touch to set the duration of days for mail sync.
•Manage labels
Touch to open the Label screen, where you can manage synchronization and
notifications.
•Download attachments
Mark the checkbox to auto download attachments for recent messages via Wi-Fi.
•Images
Touch to set always show image or ask before showing.
7 Calendar & Alarm clock ������������������������
7�1 Calendar���������������������������������������������������������
Use Calendar to keep track of important meetings, appointments, etc.
To access this function, swipe up on the Home screen, then touch Calendar.
7�1�1 Multimode view
You can display the Calendar in daily, weekly, monthly, or agenda view.
To change your Calendar view, touch to open a drop-down menu of Day, 3
days, Week and Month for your options. Touch to return to Today's view.
In Schedule, Day or Week view, touch an event to view its details. Touch a day
in Month view to open that day's events.
7�1�2 To create new events
You can add new events from any Calendar view.
• Touch to access new event edit screen.
• Fill in all required information for this new event. If it is a whole-day event, you
can turn on All day.
• When finished, touch Save from the top of the screen.
To quickly create an event from Day, Week view screen, touch an empty spot or
an event to open the event details screen of the time you have previously selected.
7�1�3 Event reminder
If a reminder is set for an event, the upcoming event icon will appear on the
Status bar as a notification when the reminder time arrives.
Touch and drag down the Status bar to open the notification panel, touch an event
name to view the Calendar notification list. Touch the Back button to keep the
reminders pending in the Status bar and the notification panel.
This manual suits for next models
1
Table of contents
Other TCL Cell Phone manuals