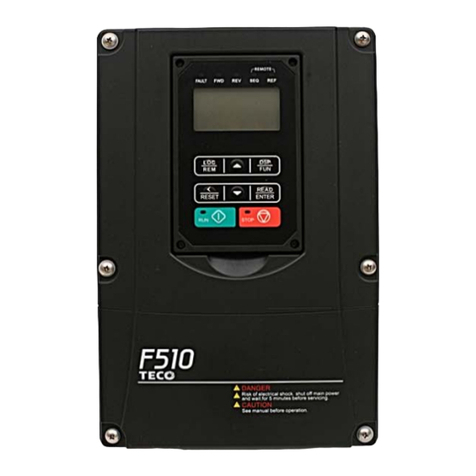
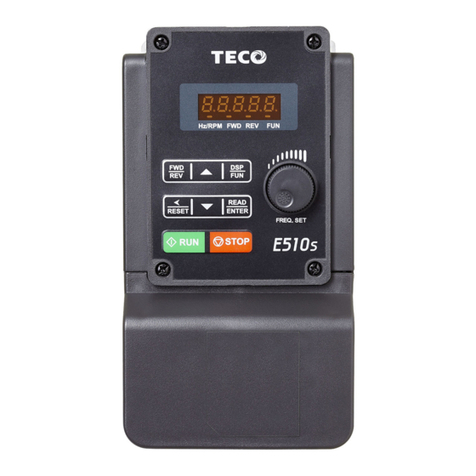
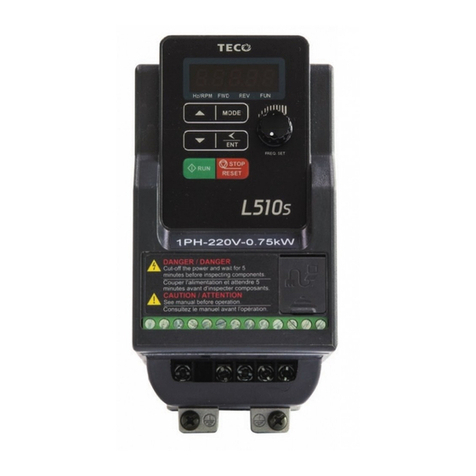
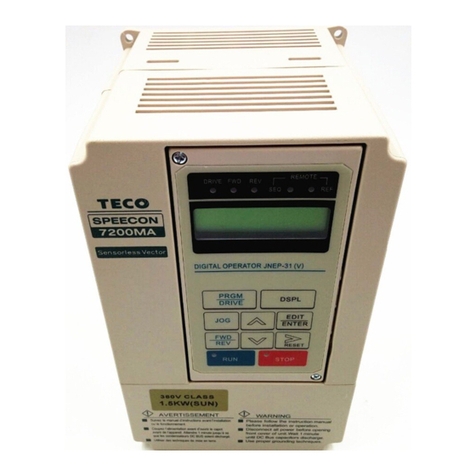
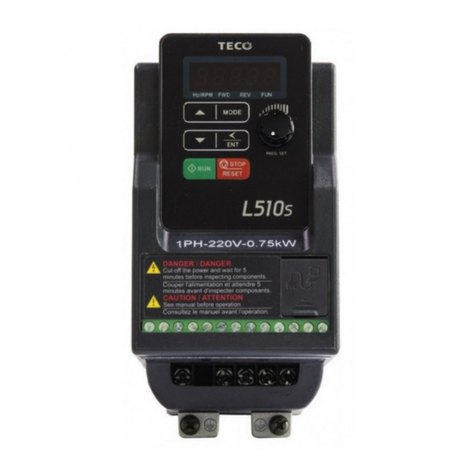
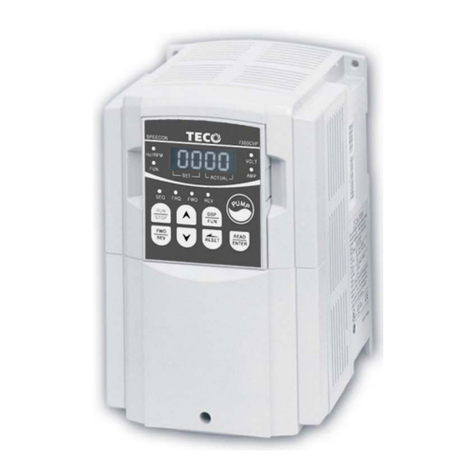
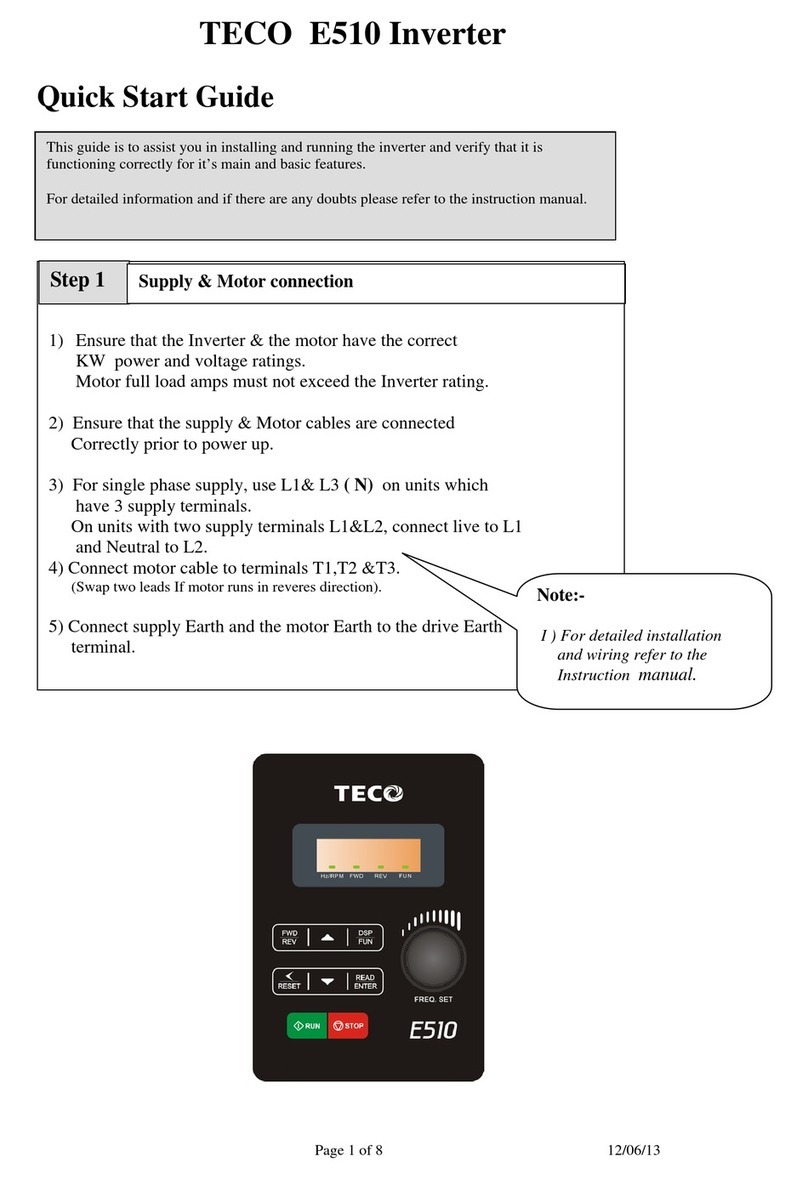
TECO L510S Series Installation guide


1
Chapter 1 Safety Precautions
1.1 Before Power Up
Danger
Make sure the main circuit connections are correct. Single phase L1(L),L3(N), and
Three phase L1(L),L2,L3(N); 400V : L1,L2,L3 are power-input terminals and must not
be mistaken for T1,T2 and T3. Otherwise, inverter damage can result.
Caution
The line voltage applied must comply with the inverter’s specified input voltage.(See
the nameplate)
To avoid the front cover from disengaging, or other damge do not carry the inverter by
its covers. Support the drive by the heat sink when transporting. Improper handling can
damage the inverter or injure personnel and should be avoided.
To avoid the risk of fire, do not install the inverter on a flammable object. Install on
nonflammable objects such as metal.
If several inverters are placed in the same control panel, provide heat removal means
to maintain the temperature below 50 degree C to avoid overheat or fire.
When disconnecting the remote keypad, turn the power off first to avoid any damage
to the keypad or the inverter.
Installation limitation, -10~50℃ (cooling fan inside model), -10~40℃ (without cooling fan
inside model)
Warning
This product is sold subject to EN 61800-3 and EN 61800-5-1.
In a domestic environment this product may cause radio interference in which
case the user may be required to apply corrective measures.
Caution
Work on the device/system by unqualified personnel or failure to comply with warnings
can result in severe personal injury or serious damage to material. Only suitably
qualified personnel trained in the setup, installation, commissioning and operation of
the product should carry out work on the device/system.
Only permanently-wired input power connections are allowed.
1.2 During Power Up
Danger
When the momentary power loss is longer than 2 seconds, the inverter will not have
sufficient stored power for its control circuit. Therefore, when the power is re-applied,
the run operation of the inverter will be based on the setup of following parameters:
Run parameters. 00-02 or 00-03.
Direct run on power up. Parameter. 07-04 and the status of external run switch,
Note-: the start operation will be regardless of the settings for parameters
07-00/07-01/07-02.
Danger. Direct run on power up.
If direct run on power up is enabled and inverter is set to external run
with the run FWD/REV switch closed then the inverter will restart.
Danger
Prior to use, ensure that all risks and safety implications are considered.
When the momentary power loss ride through is selected and the power loss is short,
the inverter will have sufficient stored power for its control circuits to function, therefore,
when the power is resumed the inverter will automatically
restart depending on the setup of parameters 07-00 & 07-01.
2
1.3Before Operation
Caution
Make sure the model and inverter capacity are the same as that set in parameter
13-00.
Note : On power up the supply voltage set in parameter 01-01 will flash on display
for 2 seconds.
1.4 During Operation
Danger
Do not connect or disconnect the motor during operation. Otherwise, It may cause the
inverter to trip or damage the unit.
Danger
To avoid electric shock, do not take the front cover off while power is on.
The motor will restart automatically after stop when auto-restart function is enabled. In
this case, care must be taken while working around the drive and associated
equipment .
The operation of the stop switch is different than that of the emergency stop switch. The
stop switch has to be activated to be effective. Emergency stop has to be de-activated
to become effective.
Caution
Do not touch heat radiating components such as heat sinks and brake resistors.
The inverter can drive the motor from low speed to high speed. Verify the allowable
speed ranges of the motor and the associated machinery.
Note the settings related to the braking unit.
Risk of electric shock. The DC link capacitors remain charged for five minutes after
power has been removed. It is not permissible to open the equipment until 5 minutes
after the power has been removed.
Caution
The Inverter should be used in environments with temperature range from (14-104℉)
or (-10 to 40℃) and relative humidity of 95%.
Note: models with fan : -10~50℃, models without fan : -10~40℃
Danger
Make sure that the power is switched off before disassembling or checking any
components.
1.5 Inverter Disposal
Caution
Please dispose of this unit with care as an industrial waste and according to your
required local regulations.
The capacitors of inverter main circuit and printed circuit board are considered as
hazardous waste and must not be burnt.
The Plastic enclosure and parts of the inverter such as the cover board will release
harmful gases if burnt.
Equipment containing electrical components may not be disposed of together with
domestic waste. It must be separately collected with electrical and electronic waste
according to local and currently valid legislation.

3
Chapter 2 Environment & Installation
2.1 System Diagram
~
~
~
Power Supply
Molded
Circuit
Breaker
Magnetic
Contactor
AC
Reactor
Fast
Acting
Fuse
Input Noise
Filter
Inverter
Ground
Induction
Motor
Ground
Output Noise
Filter
Power supply:
Make sure the correct voltage is applied to avoid damaging the
inverter.
Molded-case circuit breaker (MCCB) or fused disconnect:
A molded-case circuit breaker or fused disconnect must be installed
between the AC source and the inverter that conforms to the rated
voltage and current of the inverter to control the power and protect the
inverter.
Do not use the circuit breaker as the run/stop switch for the
inverter.
Ground fault detector / breaker:
Install a ground fault breaker to prevent problems caused by
current leakage and to protect personnel. Select current range up to
200mA, and action time up to 0.1 second to prevent high frequency
failure.
Magnetic contactor:
Normal operations do not need a magnetic contactor. When performing
functions such as external control and auto restart after power failure, or
when using a brake controller, install a magnetic contactor.
Do not use the magnetic contactor as the run/stop switch for
theinverter.
AC line reactor for power quality:
When inverters are supplied by a high capacity power source (>
600KVA), an AC reactor can be connected to improve the power factor.
Install Fast Acting Fuse:
To protect peripheral equipment, install fast acting fuses in accordance
with the specifications in the instruction manual for peripheral devices.
Input Noise filter:
A filter must be installed when there are inductive loads affecting the
inverter. The inverter meets EMC standard when the special filter is
used. See the instruction manual for peripheral devices.
Inverter:
Output terminals T1, T2, and T3 are connected to U, V, and W terminals
of the motor. If the motor runs in reverse while the inverter is set to run
forward, swap any two terminals connections for T1, T2, and T3.
To avoid damaging the inverter, do not connect the output
terminals T1, T2, and T3 to AC input power.
Connect the ground terminal properly. (200V class: Rg <100;
400V class: Rg <10.)
Output Noise filter:
An output noise filter may reduce system interference and induced
noise.
Motor:
If the inverter drives multiple motors the output rated current of the
inverter must be greater than the total current of all the motors.

4
2.2 Standard wiring
2.2.1 Single phase (NPN) input
Model:
100V : L510-1P2-SH1-N(P), L510-1P5-SH1-N(P), L510-101-SH1-N(P)
200V : L510-2P2-SH1(F)-N(P), L510-2P5-SH1(F)-N(P), L510-2P7-SH1(F)-N(P)
L510-201-SH1(F)-N(P), L510-202-SH1(F)-N(P), L510-203-SH1(F)-N(P)
1:Data+
2:Data-
3:Data+
4:Reserved
5:Reserved
6:Data-
7:5V
8:GND

5
2.2.2 Single phase (PNP) input
Model:
200V : L510-2P2-SH1(F)-P(P), L510-2P5-SH1(F)-P(P), L510-2P7-SH1(F)-P(P)
L510-201-SH1(F)-P(P), L510-202-SH1(F)-P(P), L510-203-SH1(F)-P(P)
1:Data+
2:Data-
3:Data+
4:Reserved
5:Reserved
6:Data-
7:5V
8:GND

6
2.2.3 Three phase (NPN) input
MCCB L1 L
AC
source
S2
S3
S4
AO
3+
250VAC/1A
(30VDC/1A)
T1
T2
T3
RB
RA
S5
L3 N
ON-OFF
Surge
Suppressor
10V
AVI
ACI GND
MC
Magnetic
Contactor
RS485
FWD (Run/Stop)
REV (Run/Stop)
Speed Control
External speed
potentiometer = 10 Kohm
or PID input
Induction
Motor
COM
MC
Thermal
relay
MC
S1
GND
0~10V
2AO
+
-
Frequency
Indicator
0~10VDC
CON2
Thermal
relay
M
0~20mA
PP'
2'
1-
Relay
Output
Pin 1 to Pin 8
Ground
Inverter
output
Power
input
Analog
Output
Multifunction
Input
Terminals
Analog
Input
L2
Note:
Earth wire of CON2
must be connected
Model:
200V : L510-2P2-SH3-N(P), L510-2P5-SH3-N(P), L510-201-SH3-N(P)
L510-202-SH3-N(P), L510-203-SH3-N(P), L510-205-SH3(P)
400V : L510-401-SH3-N(P), L510-402-SH3-N(P), L510-403-SH3-N(P)
1:Data+
2:Data-
3:Data+
4:Reserved
5:Reserved
6:Data-
7:5V
8:GND

7
2.2.4 Three phase (PNP) input
Model:
400V : L510-401-SH3(F)-P(P), L510-402-SH3(F)-P(P), L510-403-SH3(F)-P(P)
1:Data+
2:Data-
3:Data+
4:Reserved
5:Reserved
6:Data-
7:5V
8:GND

8
2.2.5 NPN/PNP selectable models
Model:
200V : 510-205-SH3(P), L510-208-SH3(P), L510-210-SH3(P)
400V : L510-405-SH3(F)(P), L510-408-SH3(F)(P), L510-410-SH3(F)(P)
L510-415-SH3(F)(P)
NPN/PNP input is selected by “SC” terminal.
If you need to use NPN input, please you shorted +24V and SC terminal.
If you need to use PNP input, please you shorted COM and SC terminal.
Notes : If the SC terminal does not be connected correctly, the functions of
group 3 will be malfunctioned.
1:Data+
2:Data-
3:Data+
4:Reserved
5:Reserved
6:Data-
7:5V
8:GND

9
2.3 Terminal Description
2.3.1 Description of main circuit terminals
Terminal symbols TM1 Function Description
L1(L) Main power input, single phase: L1(L) / L3(N)
three phase(200V): L1(L) / L2 / L3(N)
three phase(400V): L1 / L2 / L3
L2
L3(N)
P* externally connected braking resistor
BR*
T1
Inverter output, connect to U, V, W terminals of motor
T2
T3
Ground terminal
*P,BR for 205/208/210/401/402/403/405/408/410/415 series
Single phase
Note: the screw on L2 terminal is removed for the single phase input supply models.
Three phase(200V series)
Three phase (205 & 208 & 210 & 400V series)
L1(L) L2 L3(N) T1 T2 T3
L1 L2 L3 P BR T1 T2 T3

10
2.3.2 Description of control circuit terminals
Frame1&Frame2
Terminal
symbols TM2 Function Description Signal Level
RA Relay output terminal, Specification:
250VAC/1A(30VDC/1A) 250VAC/1A(30VDC/1A)
RB
COM S1~S5 (COMMON) 【NPN】±15%,Max output current
30mA
24V S1~S5 (COMMON) 【PNP】
S1
Multi-function input terminals(refer to group3)
24 VDC, 4.5 mA, Optical
coupling isolation
(Max,voltage30 Vdc,
Input impedance 6kΩ)
S2
S3
S4
S5
10V Built in Power for an external speed
potentiometer 10V,(Max current:20mA)
AVI Analog voltage input, Specification : 0/2~10VDC
(choose by parameter 04-00)
0~10V(Input impedance
200kΩ)
ACI Analog current input, Specification : 0/4~20mA
(choose by parameter 04-00)
0~20mA(Input impedance
249Ω)
AO Multi function analog output terminal.
Maximum output 10VDC/1mA 0~10V(Max current 2mA)
AGND Analog ground terminal
NPN:
PNP:

11
Frame3&Frame4
Terminal symbols TM1 Function Description
RA Relay output terminal, Specification: 250VAC/5A(30VDC/5A)
RA: Normally open RB: Normally close RC: common point
RB
RC
Terminal
symbols TM2 Function Description Signal Level
+24V Common point of PNP input
±15%,Max output current 30mA
SC
NPN/PNP selectable terminal.
NPN input: +24V&SC need to be shorted.
PNP input: COM&SC need to be shorted.
COM voltage reference point for S1~S5
S1~S5 Multi-function input terminals(refer to
group3)
24 VDC, 4.5 mA, Optical coupling
isolation (Max,voltage30 Vdc,
Input impedance 6kΩ)
10V Built in Power for an external speed
potentiometer (Max output : 20mA) 10V,(Max current:20mA)
AVI/PTC
Analog voltage input/motor over
temperature protection signal input,
Specification : 0~10VDC
0~10V(Input impedance 200kΩ)
ACI
Analog current input, Specification :
0~20mA / 4~20mA(choose by parameter
04-00)
0~20mA(Input impedance 249Ω)
AO Multi function analog output terminal.
Maximum output 10VDC/1mA 0~10V(Max current 2mA)
AGND Analog ground terminal
NPN/PNP:

12
Chapter 3 Software Index
3.1 Programmable Parameter Groups
Parameter Group No. Description
Group 00 Basic parameters
Group 01 V/F Pattern selections & setup
Group 02 Motor parameters
Group 03 Multi function digital Inputs/Outputs
Group 04 Analog signal inputs/ Analog output
Group 05 Preset Frequency Selections.
Group 06 Auto Run(Auto Sequencer) function
Group 07 Start/Stop command setup
Group 08 Drive and motor Protection
Group 09 Communication function setup
Group 10 PID function setup
Group 11 Performance control functions
Group 12 Digital Display & Monitor functions
Group 13 Inspection & Maintenance function
Group 14 PUMP Application Function
Parameter notes for Parameter Groups
*1 Parameter can be adjusted during running mode Notes: New added in version 05
*2 Cannot be modified in communication mode
*3 Does not change with factory reset
*4 Read only

13
Group 00- The basic parameters group
No. Description Range Factory
Setting Note
00-00
control
mode
0: V/F mode 0
1: SLV mode
00-01
Motor
rotation
0: Forward
1: Reverse 0 *1
00-02
Main Run
Source
Selection
0: Keypad
1
1: External
Run/Stop Control
2
: Communication
00-03
A
lternative
Run
Source
Selection
0: Keypad
0
1: External Run/Stop
Control
2
: Communication
00-04
Operation
modes for
external
t
erminals
0
: Forward/
Stop-Reverse/Stop
0
1: Run/
Stop-Reverse/Forward
2
: 3-Wire Control
Mode-Run/Stop
00-05
Main
Frequenc
y
Source
Selection
0: Keypad
2
1: Potentiometer
o
n Keypad
2
: External AVI
A
nalog Signal
Input
3: External ACI
A
nalog Signal
Input
4
: External
Up/Down
Frequency Control
5: Communication
s
etting Frequenc
y
6: PID output
f
requency
00-06
A
lternative
Frequenc
y
Source
Selection
0: Keypad
0
1: Potentiometer
o
n Keypad
2
: External AVI
A
nalog Signal
Input
3: External ACI
A
nalog Signal
Input
4
: External
Up/Down
Frequency Control
5: Communication
s
etting Frequenc
y
6: PID output
f
requency.
00-07
Main and
A
lternative
Frequency
Command
modes
0: Main Or
A
lternative
Frequency
1: Main
f
requency+Alterna
t
ive Frequency
0
00-08
Communica
t
ion
Frequency
0.00~599.00 *4
Group 00- The basic parameters group
No. Description Range Factory
Setting Note
Command
00-09
Frequency
command
Save mode
(Communica
t
ion mode)
0: Save the
f
requency before
power down
1: Save the
communication
f
requency
0
00-10
Initial
Frequenc
y
Selection
( keypad
mode)
0: by Current
Frequency
Command 0
1: by 0 Frequency
Command
2
: by 00-11
00-11
Initial
Frequenc
y
Keypad
mode
0.00~599.00 50.00/
60.00
00-12Frequency
Upper Limi
t
0.01~599.00 50.00/
60.00
00-13Frequency
Lower Limi
t
0.00~598.99 0.00
00-14
A
cceleration
T
ime 1 0.1~3600.0 10.0 *1
00-15Deceleration
T
ime 1 0.1~3600.0 10.0 *1
00-16
A
cceleration
T
ime 2 0.1~3600.0 10.0 *1
00-17Deceleration
T
ime 2 0.1~3600.0 10.0 *1
00-18
J
og
Frequenc
y
1.00~25.00 2.00 *1
00-19
J
og
A
cceleration
T
ime
0.1~25.5 0.5 *1
00-20
J
og
Deceleration
T
ime
0.1~25.5 0.5 *1
Group 01- V/F Pattern selection &
Setup
No. Description Range Factory
Setting Note
01-00
V
olts/Hz
Patterns 1~7 1/4
01-01
V
/F Max
v
oltage
2
00V:170.0~
2
64.0
4
00V:323.0~
528.0
Based on
13-08
01-02Max
Frequenc
y
0.2 ~ 599.00 50.00/
60.00
01-03
Max
Frequency
V
oltage
Ratio
0.0 ~ 100.0 100.0
01-04Mid
Frequency 20.1 ~ 599.00 2.50/3.00
01-05Mid 0.0 ~ 100.0 10.0/6.8

14
Group 01- V/F Pattern selection &
Setup
No. Description Range Factory
Setting Note
Frequency
V
oltage
Ratio 2
01-06
Mid
Frequency 1
0.1 ~ 599.00 2.50/3.00
01-07
Mid
Frequency
V
oltage
Ratio 1
0.0 ~ 100.0 10.0/6.8
01-08
Min
Frequenc
y
0.1 ~ 599.00 1.30/1.50
01-09
Min
Frequency
V
oltage
Ratio
0.0 ~ 100.0 8.0/3.4
01-10
V
olts/Hz
Curve
Modification
(Torque
Boost)
0 ~ 10.0 0.0 *1
01-11
V
/F start
Frequenc
y
0.00~10.00 0.00
01-12
No-load
o
scillation
s
uppression
g
ain
0.0~200.0 0
01-13
Motor
Hunting
Prevention
Coefficien
t
1~8192 800
01-14
Motor
Hunting
Prevention
Gain
0~100
Frame1/2
100V/200
V series: 7
others: 0
01-15
Motor
Hunting
Prevention
Limit
0~100.0 5.0
01-16
A
uto-Torque
C
ompensation
Filter Coefficient
0.1~1000.0 0.1
01-17
A
uto-torque
Compensatio
n Gain
0~100 0
01-18
A
uto-torque
Compensatio
n Frequency
1.30~5.00 2
Group 02- Motor parameters
No. Description Range Factory
Setting Note
02-00Motor No
Load
Current
-
--- by motor
nameplate
02-01Motor Rated
Current
(OL1)
-
--- by motor
nameplate
02-02
V
/F Slip
Compensation 0.0 ~ 100.0 0.0 *1
02-03Motor Rated
Speed
-
--- by motor
nameplate
02-04Motor Rated
V
oltage
-
--- by motor
nameplate
02-05Motor Rated
Power 0~22.0 by motor
nameplate
02-06Motor Rated
Frequenc
y
0~599.0 by motor
nameplate
02-07Motor Auto
T
uning
0: Disable
1: Static auto
t
uning
0
02-08Stator
Resistor
Gain
0~600 by series
02-09Rotor
Resistor
Gain
0~600 by series
02-10
~
02-12 Reserved
02-13SLV Slip
Compensatio
n Gain
0~200 by series
02-14SLV Torque
Compensatio
n Gain
0~200
100
02-15Low
Frequency
T
orque Gain
0~100
50
02-16
SLV Without
Load Slip
Compensation
Gain
0~200 by series
02-17
SLV With Load
Slip
Compensation
Gain
0~200 150
02-18
SLV With Load
T
orque
Compensation
Gain
0~200 100
02-19SLV Slip
Compensation
Select
0: Slip
Compensation 1
2
: Slip
Compensation 2
0

15
Group 03- Multi function Digital
Inputs/Outputs
No. Description Range Factory
Setting Note
03-00
Multifunction
Input Term.
S1
0: Forward/Stop
Command or Run
/
Stop
0
03-01
Multifunction
Input Term.
S2
1: Reverse/Stop
Command Or
REV/FWD
1
03-02
Multifunction
Input Term.
S3
2
: Preset Speed 1
(5-02) 2
03-03
Multifunction
Input Term.
S4
3: Preset Speed 2
(5-03) 3
03-04
Multifunction
Input Term.
S5
4
: Preset Speed 4
(5-05)
17
6: Jog Forward
Command
7: Jog Reverse
Command
8: Up Command
9: Down Command
10: Acc/Dec 2
11: Acc/Dec
Disabled
12:
Main/Alternative
Run Command
s
elec
t
13:
Main/Alternative
Frequency
Command selec
t
14: Rapid Stop
( Decel to stop)
15: Base Block
16: Disable PID
Function
17: Rese
t
18: Auto Run
Mode enable
03-05 Reserved
03-06
Up/Down
f
requency
band
0.00~5.00
0.00
03-07
Up/Down
Frequency
modes
0: Preset
f
requency is held
as the inverter
s
tops, and the
UP/Down function
is disabled.
0
1: Preset
f
requency is reset
t
o 0 Hz as the
inverter stops.
2
: Preset
f
requency is held
as the inverter
s
tops, and the
UP/Down is
available.
Group 03- Multi function Digital
Inputs/Outputs
No. Description Range Factory
Setting Note
03-08S1~S5 scan
confirmation
1~200. Number
o
f Scan cycles 10
03-09S1~ S5
s
witch type
s
elec
t
x
xxx0:S1 NO
x
xxx1:S1 NC
00000
x
xx0x:S2 NO
x
xx1x:S2 NC
x
x0xx:S3 NO
x
x1xx:S3 NC
x
0xxx:S4 NO
x
1xxx:S4 NC
0xxxx:S5 NO
1xxxx:S5 NC
03-10 Reserved
03-11Output
Relay(RY1)
0: Run
1
1: Fault
2
: Setting
Frequency
Reached
3: Frequency
Reached
(3-13±3-14)
4
: Output
Frequency
Detection1(> 3-13)
5: Output
Frequency
Detection2(< 3-13)
6: Auto-Restart
7: Momentary AC
Power Loss
8: Rapid Stop
9: Base Block
10: Motor Overload
Protection(OL1)
11: Drive Overload
Protection(OL2)
12: Reserved
13: Output Current
Reached
14: Brake Control
15: PID feedback
d
isconnection
d
etection
03-12 Reserved
03-13
Output
f
requency
d
etection
level (Hz)
0.00~599.00 0.00 *1
03-14Frequency
Detection
band
0.00~30.00 2.00 *1
03-15
Output
Current
Detection
Level
0.1~999.9 0.1
03-16Output
Current
Detection
0.1~10.0 0.1

16
Group 03- Multi function Digital
Inputs/Outputs
No. Description Range Factory
Setting Note
Period
03-17
External
Brake
Release
level
0.00~20.00 0.00
03-18
External
Brake
Engage
Level
0.00~20.00 0.00
03-19
Relay
Output
f
unction type
0: A (Normally
o
pen)
1: B (Normally
close)
0
03-20
Braking
T
ransistor
On Level
100/200V:
2
40.0~400.0V
4
00V:
5
00.0~800.0V
2
20/230V: 380
3
80/400V: 690
4
15/460V: 780
03-21
Brake
T
ransistor
Off Level
100/200V:
2
40.0~400.0V
4
00V:
5
00.0~800.0V
2
20/230V: 360
3
80/400V: 650
4
15/460V: 740
※“NO” indicates normally open, “NC” indicates
normally closed.
Group 04- Analog signal inputs/
Analogue output functions
No. Description Range Factory
Setting Note
04-00
A
VI/ACI
analog Input
s
ignal type
s
elect
ACI AVI
0
0 : 0~10V
0~20mA
1 : 0~10V
4~20mA
2 : 2~10V
0~20mA
3 : 2~10V
4~20mA
04-01
A
VI Signal
V
erification
Scan rate
1~200 50
04-02
A
VI Gain 0 ~ 1000 100 *1
04-03
A
VI Bias 0 ~ 100 0 *1
04-04
A
VI Bias
Selection
0: Positive
1: Negative 0 *1
04-05
A
VI Slope
0: Positive
1: Negative 0 *1
04-06
A
CI Signal
V
erification
Scan rate
1~200 50
04-07
A
CI Gain 0 ~ 1000 100 *1
04-08
A
CIBias 0 ~ 100 0 *1
04-09
A
CI Bias
Selection
0: Positive
1: Negative 0 *1
04-10
A
CI Slope
0: Positive
1: Negative 0 *1
04-11
A
nalog
Output
mode(AO)
0: Output
Frequency
1: Frequency
Command
2
: Output Voltage
3: DC Bus Voltage
4
: Motor Current
0 *1
Group 04- Analog signal inputs/
Analogue output functions
No. Description Range Factory
Setting Note
04-12
A
nalog
Output AO
Gain (%)
0 ~ 1000 100 *1
04-13
A
nalog
Output AO
Bias (%)
0 ~ 1000 0 *1
04-14
A
O Bias
Selection
0: Positive
1: Negative 0 *1
04-15
A
O Slope 0: Positive
1: Negative 0 *1
04-16Potentiome
t
er Gain on
Keypad
0~1000 100 *1
04-17Potentiome
t
er Bias on
Keypad
0~100 0 *1
04-18
Potentiome
t
er Bias
Selection on
Keypad
0: Positive
1: Negative 0 *1
04-19Potentiome
t
er Slop on
Keypad
0: Positive
1: Negative 0 *1
Group 05- Preset Frequency Selections.
No. Description Range Factory
Setting Note
05-00
Preset
Speed
Control
mode
Selection
0: Common
A
ccel/Decel
A
ccel/Decel 1 or 2
apply to all speeds
0
1: Individual
A
ccel/Decel Accel/
Decel 0-7 apply to
t
he selected preset
s
peeds
(Acc0/Dec0~
A
cc7/Dec7)
05-01Preset Speed
0 (Keypad
Freq)
0.00 ~ 599.00
5.00 *1
05-02Preset
Speed1
(Hz)
5.00 *1
05-03Preset
Speed2
(Hz)
10.00 *1
05-04Preset
Speed3
(Hz)
20.00 *1
05-05Preset
Speed4
(Hz)
30.00 *1
05-06Preset
Speed5
(Hz)
40.00 *1

17
Group 05- Preset Frequency Selections.
No. Description Range Factory
Setting Note
05-07
Preset
Speed6
(Hz)
50.00 *1
05-08
Preset
Speed7
(Hz)
50.00 *1
05-09
~
05-16 Reserved
05-17
Preset
Speed0-Acc
t
ime
0.1 ~ 3600.0
10.0 *1
05-18
Preset
Speed0-Dec
t
ime
10.0 *1
05-19
Preset
Speed1-Acc
t
ime
10.0 *1
05-20
Preset
Speed1-Dec
t
ime
10.0 *1
05-21
Preset
Speed2-Acc
t
ime
10.0 *1
05-22
Preset
Speed2-Dec
t
ime
10.0 *1
05-23
Preset
Speed3-Acc
t
ime
10.0 *1
05-24
Preset
Speed3-Dec
t
ime
10.0 *1
05-25
Preset
Speed4-Acc
t
ime
10.0 *1
05-26
Preset
Speed4-Dec
t
ime
10.0 *1
05-27
Preset
Speed5-Acc
t
ime
10.0 *1
05-28
Preset
Speed5-Dec
t
ime
10.0 *1
05-29
Preset
Speed6-Acc
t
ime
10.0 *1
05-30
Preset
Speed6-Dec
t
ime
10.0 *1
05-31
Preset
Speed7-Acc
t
ime
10.0 *1
05-32
Preset
Speed7-Dec
t
ime
10.0 *1
Group 06- Auto Run(Auto Sequencer)
function
No. Description Range Factory
Setting Note
06-00
A
uto Run
(sequencer)
mode
s
election
0: Disabled.
1: Single cycle.
(Continues to run
f
rom the
Unfinished step if
restarted).
2
: Periodic cycle.
(Continues to run
f
rom the unfinished
s
tep if restarted).
3: Single cycle,
t
hen holds the
speed Of
f
inal step to run.
(Continues to run
f
rom the unfinished
s
tep if restarted).
4
: Single cycle.
(Starts a new cycle
if restarted).
5: Periodic cycle.
(Starts a new cycle
if restarted).
6: Single cycle,
t
hen hold the
speed of
f
inal step to run
(Starts a new cycle
if restarted).
0
06-01
A
uto _ Run
Mode
f
requency
command 1
0.00~599.00
0.00 *1
06-02
A
uto _ Run
Mode
f
requency
command 2
0.00 *1
06-03
A
uto _ Run
Mode
f
requency
command 3
0.00 *1
06-04
A
uto _ Run
Mode
f
requency
command 4
0.00 *1
06-05
A
uto _ Run
Mode
f
requency
command 5
0.00 *1
06-06
A
uto _ Run
Mode
f
requency
command 6
0.00 *1
06-07
A
uto _ Run
Mode
f
requency
command 7
0.00 *1
06-08
~
06-15 Reserved

18
Group 06- Auto Run(Auto Sequencer)
function
No. Description Range Factory
Setting Note
06-16
A
uto_ Run
Mode
running time
s
etting 0
0.0 ~ 3600.0
0.0 *1
06-17
A
uto_ Run
Mode
running time
s
etting 1
0.0 *1
06-18
A
uto_ Run
Mode
running time
s
etting 2
0.0 *1
06-19
A
uto_ Run
Mode
running time
s
etting 3
0.0 *1
06-20
A
uto_ Run
Mode
running time
s
etting 4
0.0 *1
06-21
A
uto_ Run
Mode
running time
s
etting 5
0.0 *1
06-22
A
uto_ Run
Mode
running time
s
etting 6
0.0 *1
06-23
A
uto_ Run
Mode
running time
s
etting 7
0.0 *1
06-24
~
06-31 Reserved
06-32
A
uto_ Run
Mode
running
d
irection 0
0: Stop
1: Forward
2
: Reverse
0
06-33
A
uto_ Run
Mode
running
d
irection 1
0
06-34
A
uto_ Run
Mode
running
d
irection 2
0
06-35
A
uto_ Run
Mode
running
d
irection 3
0
06-36
A
uto_ Run
Mode
running
d
irection 4
0
06-37
A
uto_ Run
Mode
running
d
irection 5
0
Group 06- Auto Run(Auto Sequencer)
function
No. Description Range Factory
Setting Note
06-38
A
uto_ Run
Mode
running
d
irection 6
0
06-39
A
uto_ Run
Mode
running
d
irection 7
0
Group 07- Start/Stop command setup
No. Description Range Factory
Setting Note
07-00Momentary
Power Loss
and Restart
0: Momentary
Power Loss and
Restart disable
1: Momentary
power loss and
restart enable
0
07-01
A
uto Restart
Delay Time 0.0~800.0 0.0
07-02Number of
A
uto Restart
A
ttempts
0~10 0
07-03Reset Mode
Setting
0: Enable Reset
Only when Run
Command is Off
1: Enable Reset
w
hen Run
Command is On or
Off
0
07-04
Direct
Running
A
fter Power
Up
0: Enable Direct
run on power up
1: Disable Direct
run on power up
1
07-05Delay-ON
T
imer 1.0~300.0 1.0
07-06
DC Injection
Brake Start
Frequency
(Hz) In Stop
mode
0.10 ~ 10.00 1.5
07-07
DC Injection
Brake Level
(%) In stop
mode
0 ~ 20 (Frame1/2).
Based on the 20%
o
f maximum outpu
t
v
oltage 5
0 ~ 100 (Frame3/4)
based on the rated
current 50
07-08
DC Injection
Brake Time
(Seconds)
In stop
mode
0.0 ~ 25.5 0.5
07-09Stopping
Method
0: Deceleration to
s
top
1: Coast to stop
0
07-10DC Braking 0~100 0

19
Group 07- Start/Stop command setup
No. Description Range Factory
Setting Note
Level at
Start
07-11
DC Braking
T
ime at Star
t
0.0~25.5 0.0
Group 08- Drive & Motor Protection
functions
No. Description Range Factory
Setting Note
08-00
T
rip
Prevention
Selection
x
xxx0: Enable Trip
Prevention During
A
cceleration
x
xxx1: Disable Trip
Prevention During
A
cceleration
x
xx0x: Enable Trip
Prevention During
Deceleration
x
xx1x: Disable Trip
Prevention During
Deceleration
x
x0xx: Enable Trip
Prevention in Run
Mode
x
x1xx: Disable Trip
Prevention in Run
Mode
x
0xxx: Enable over
v
oltage Prevention
in Run Mode
x
1xxx: Disable
o
ver voltage
Prevention
in Run Mode
00000
08-01
T
rip
Prevention
Level
During
A
cceleration
(%)
50 ~ 200 by series
08-02
T
rip
Prevention
Level
During
Deceleration
(%)
50 ~ 200 by series
08-03
T
rip
Prevention
Level In
Run Mode
(%)
50 ~ 200 by series
08-04
o
ver voltage
Prevention
Level in Run
Mode
2
00V: 350.0~390.0
4
00V: 700.0~780.0
380.0/76
0.0 *1
08-05
Electronic
Motor
Overload
x
xxx0: Disable
Electronic Motor
Overload
00001
Group 08- Drive & Motor Protection
functions
No. Description Range Factory
Setting Note
Protection
Operation
Mode
Protection
x
xxx1: Enable
Electronic Motor
Overload
Protection
x
xx0x: Motor
Overload Cold
Start
x
xx1x: Motor
Overload Hot Start
x
x0xx: Standard
Motor
x
x1xx: Invertor
Duty Motor ( Force
V
ent)
08-06
Operation
A
fter
Overload
Protection is
A
ctivated
0: Coast-to-Stop
A
fter Overload
Protection is
A
ctivated
1: Drive Will Not
T
rip when
Overload
Protection is
A
ctivated (OL1)
0
08-07
Over heat
Protection
(cooling fan
control)
0: Auto (Depends
o
n temp.)
1: Operate while in
RUN mode
2
: Always Run
3: Disabled
1
08-08
A
VR
Function
(Auto
V
oltage
Regulation)
0: AVR function
enable
4
1: AVR function
Disable
2
: AVR function
d
isable for stop
3: AVR function
d
isable for
d
eceleration
4
: AVR function
d
isable for stop
and deceleration.
5: When
V
DC>(360V/740V)
, AVR function
d
isable for stop
and deceleration.
08-09Input phase
lost
protection
0: Disabled
1: Enabled 0
08-10PTC
Overheat
Function
0: Disable 0
1: Decelerate to
s
top
2
: Coast to stop
3: Continue
running, when
w
arning level is
reached.
Coast to stop,
Other manuals for L510S Series
3
Table of contents
Languages:
Other TECO Inverter manuals

TECO
TECO A510s Manual

TECO
TECO SPEECON 7200GS User manual

TECO
TECO e510 series User manual

TECO
TECO S510 Series User manual

TECO
TECO MV510 Series User manual

TECO
TECO L510-1P2-H1-N User manual

TECO
TECO 7300EV User manual

TECO
TECO A510s User instructions

TECO
TECO A510s User manual

TECO
TECO A510 Installation and operating manual
Popular Inverter manuals by other brands

ProMariner
ProMariner TruePower Inverter Series Owner's manual & installation guide

South-Tek Systems
South-Tek Systems N2Blast FPS-650 manual

Winco
Winco W6010DI Installation and operator's manual

InfiniSolar
InfiniSolar PE300-2524 user manual

Mitsubishi Electric
Mitsubishi Electric FR-A5NP instruction manual

SunSynk
SunSynk SUN-8K-SG04LP3 user manual